

Updated Web-Based Echo Eradication Mastering the Art of Noise Cancellation
Web-Based Echo Eradication: Mastering the Art of Noise Cancellation
The primary sound in the video has to be clear. The presence of background noise can affect the user experience multifold. Don’t you agree? Background noise is known as irrelevant noise from the environment. Most content creators record in open space for better light. However, it leads to ambient noise.
Therefore, it becomes crucial to deal with background noise. The article highlights the top three websites for this purpose. These online tools remove background noise online. We shall discuss their key features as well. It will help creative professionals make sane decisions. Right? Wondershare Filmora will also be previewed as audio and video editors.
So, what are we waiting for? Time to start!
In this article
01 3 Recommended Sites to Remove Background Noise Online Free
02 How to Remove Background Noise from Video on Windows and Mac
Part 1: 3 Recommended Sites to Remove Background Noise Online Free
Video recording through devices usually leaves you with background noises that must be removed from the video for perfect results. In other cases, before adding recorded audio across a video, you might have come across some background noise that needs to be treated effectively before finalizing the video for publishing. Under such circumstances, a background noise removal tool comes in handy.
To remove noise from video online free, we have sketched out three websites that offer the potential option of removing background noise. The platforms remove noise from video online in seconds. Let us have a look at what each of them brings to the table! Shall we?
Veed.io

The first source to remove background noise from video online is Veed.io. The tool got famous due to its extreme workability in audio and media. The content publishers and streamers use Veed.io to clean their audios and videos from annoying noises. The “Clean Audio” function works based on the length of the video.
If your file is larger, it might take a couple of minutes. Willing to know more? You can have a look at the features below:
- The interface is interactive enough for entry-level beginners.
- The media file can be uploaded from a device, Dropbox, or you can record it.
- Moreover, you can insert a YouTube link to clean the audio.
AudioToolSet

Next on the list, we have AudioToolSet. AudioToolSet is a great platform to remove noise from audio online free. You can drag and drop the targeted media file or browse your system. The supported file formats for AudioToolSet include MP3, WAV, FLAC, OGG. Also known as Noise Reducer, this online tool is famous as an MP3 noise removal online free.
Are you satisfied with Audio Tool Set? Let us know more!
- The maximum file size is 50MB for your media files.
- The dark mode can be used based on your workability.
- AudioToolSet is designed to clean audio recordings, and no tweaking is needed with the settings.
Audiodenoise.com

Audiodenoise.com removes background noise from audio online free. The online tool takes the concerns of podcasters, vloggers, and creators seriously. Additionally, the noise reduction feature can be tested through the demo files. Isn’t that a dream?
Audiodenoise.com has a noise model type to choose from. It includes Adapted distribution, Spectral subtraction, and Autoregressive model. The user is free to play with noise reduction and analysis block size. The values can be set according to preference.
Following are some key features of Audiodenoise.com:
- The user can set the temporal soothing of the input by adjusting the playhead.
- You can alter the noise modulation tracking based on how slow and fast you need.
- One is free to preview the output before downloading it.
Part 2: How to Remove Background Noise from Video on Windows and Mac
There is no shortage of video and audio editors in the market. Wouldn’t you agree? It is the very reason the users can get confused about their choice. It is essential to have a hands-on tool that promises advanced features with high-quality output.
Wondershare Filmora is recommended as it understands the user’s needs. Being compatible with Windows and Mac, Filmora can be relied upon for different functions. For instance, Filmora is great for audio denoise. It assists you in eliminating unwanted noise from the recorded content.
Essentially, the audio denoise function has a slider. It is based on Weak, Mid, and Strong that permits you to set the level for noise reduction. You can also trim audio clips, add a voice-over, and adjust the audio volume. The audio equalizer, audio mixer, and audio ducking are among the most exceptional tools of the lot.
Apart from audio editing, Filmora specializes in video editing . From video trimming to rotating and splitting video to cropping, Filmora offers a balanced editor for everyone. You are free to join video clips and create freeze frames. There is nothing Filmora ceases to excel in. Don’t you think? Do not hesitate to preview render and change the video playback speed.
Do you wish to remove background noise from the video? Are you looking for proper guidance to do so? Worry no more, as we are in the picture! The steps below are for Filmora to eliminate background noise from the video effortlessly.
For Win 7 or later (64-bit)
For macOS 10.12 or later
Step 1: Launching Wondershare Filmora
First, double-click on Wondershare Filmora’s icon to open it. Click on “New Project” as the interface pops up. Now, it is time to import the media. Click on “File” from the top panel. After that, select “Import Media” and then “Import Media Files.”

Step 2: Browsing the Media File
Browse the targeted video from your system. The video will be shown in the Media Library. Now, drag it to the timeline of the editor. The program displays a dialogue box regarding the frame rate of the media. You can either keep the project settings or match them to media settings.

Step 3: Using the “Audio Denoise” Function
Moving on, right-click on the video located in the timeline. Click on “Show Properties” from the menus that appear. The properties would appear for video, audio, color, and animation. Head to “Audio” and enable the “Audio Denoise” feature.

Step 4: Selecting the Range
Choose the range for noise reduction. Filmora presents Weak, Mid, and Strong. Choose as you desire and hit “OK.” The background noise will be eliminated effectively.

Step 5: Exporting the Video
Click on “Export” to save the final video. Input the file name and output location. You can also pick the quality you need. Hit “Export,” and you are done!

Wrapping Up
A raw video doesn’t have a visual or sensory impact. Don’t you agree? It is crucial to perform necessary edits to make it viable. The removal of background noise is important for a creative creator. Hence, the article featured three workable ways to remove background noise audio online. Wondershare Filmora was also introduced as the perfect audio and video editor in the business.
Versatile Video Editor - Wondershare Filmora
An easy yet powerful editor
Numerous effects to choose from
Detailed tutorials provided by the official channel
02 How to Remove Background Noise from Video on Windows and Mac
Part 1: 3 Recommended Sites to Remove Background Noise Online Free
Video recording through devices usually leaves you with background noises that must be removed from the video for perfect results. In other cases, before adding recorded audio across a video, you might have come across some background noise that needs to be treated effectively before finalizing the video for publishing. Under such circumstances, a background noise removal tool comes in handy.
To remove noise from video online free, we have sketched out three websites that offer the potential option of removing background noise. The platforms remove noise from video online in seconds. Let us have a look at what each of them brings to the table! Shall we?
Veed.io
The first source to remove background noise from video online is Veed.io. The tool got famous due to its extreme workability in audio and media. The content publishers and streamers use Veed.io to clean their audios and videos from annoying noises. The “Clean Audio” function works based on the length of the video.
If your file is larger, it might take a couple of minutes. Willing to know more? You can have a look at the features below:
- The interface is interactive enough for entry-level beginners.
- The media file can be uploaded from a device, Dropbox, or you can record it.
- Moreover, you can insert a YouTube link to clean the audio.
AudioToolSet
Next on the list, we have AudioToolSet. AudioToolSet is a great platform to remove noise from audio online free. You can drag and drop the targeted media file or browse your system. The supported file formats for AudioToolSet include MP3, WAV, FLAC, OGG. Also known as Noise Reducer, this online tool is famous as an MP3 noise removal online free.
Are you satisfied with Audio Tool Set? Let us know more!
- The maximum file size is 50MB for your media files.
- The dark mode can be used based on your workability.
- AudioToolSet is designed to clean audio recordings, and no tweaking is needed with the settings.
Audiodenoise.com
Audiodenoise.com removes background noise from audio online free. The online tool takes the concerns of podcasters, vloggers, and creators seriously. Additionally, the noise reduction feature can be tested through the demo files. Isn’t that a dream?
Audiodenoise.com has a noise model type to choose from. It includes Adapted distribution, Spectral subtraction, and Autoregressive model. The user is free to play with noise reduction and analysis block size. The values can be set according to preference.
Following are some key features of Audiodenoise.com:
- The user can set the temporal soothing of the input by adjusting the playhead.
- You can alter the noise modulation tracking based on how slow and fast you need.
- One is free to preview the output before downloading it.
Part 2: How to Remove Background Noise from Video on Windows and Mac
There is no shortage of video and audio editors in the market. Wouldn’t you agree? It is the very reason the users can get confused about their choice. It is essential to have a hands-on tool that promises advanced features with high-quality output.
Wondershare Filmora is recommended as it understands the user’s needs. Being compatible with Windows and Mac, Filmora can be relied upon for different functions. For instance, Filmora is great for audio denoise. It assists you in eliminating unwanted noise from the recorded content.
Essentially, the audio denoise function has a slider. It is based on Weak, Mid, and Strong that permits you to set the level for noise reduction. You can also trim audio clips, add a voice-over, and adjust the audio volume. The audio equalizer, audio mixer, and audio ducking are among the most exceptional tools of the lot.
Apart from audio editing, Filmora specializes in video editing . From video trimming to rotating and splitting video to cropping, Filmora offers a balanced editor for everyone. You are free to join video clips and create freeze frames. There is nothing Filmora ceases to excel in. Don’t you think? Do not hesitate to preview render and change the video playback speed.
Do you wish to remove background noise from the video? Are you looking for proper guidance to do so? Worry no more, as we are in the picture! The steps below are for Filmora to eliminate background noise from the video effortlessly.
For Win 7 or later (64-bit)
For macOS 10.12 or later
Step 1: Launching Wondershare Filmora
First, double-click on Wondershare Filmora’s icon to open it. Click on “New Project” as the interface pops up. Now, it is time to import the media. Click on “File” from the top panel. After that, select “Import Media” and then “Import Media Files.”
Step 2: Browsing the Media File
Browse the targeted video from your system. The video will be shown in the Media Library. Now, drag it to the timeline of the editor. The program displays a dialogue box regarding the frame rate of the media. You can either keep the project settings or match them to media settings.
Step 3: Using the “Audio Denoise” Function
Moving on, right-click on the video located in the timeline. Click on “Show Properties” from the menus that appear. The properties would appear for video, audio, color, and animation. Head to “Audio” and enable the “Audio Denoise” feature.
Step 4: Selecting the Range
Choose the range for noise reduction. Filmora presents Weak, Mid, and Strong. Choose as you desire and hit “OK.” The background noise will be eliminated effectively.
Step 5: Exporting the Video
Click on “Export” to save the final video. Input the file name and output location. You can also pick the quality you need. Hit “Export,” and you are done!
Wrapping Up
A raw video doesn’t have a visual or sensory impact. Don’t you agree? It is crucial to perform necessary edits to make it viable. The removal of background noise is important for a creative creator. Hence, the article featured three workable ways to remove background noise audio online. Wondershare Filmora was also introduced as the perfect audio and video editor in the business.
Versatile Video Editor - Wondershare Filmora
An easy yet powerful editor
Numerous effects to choose from
Detailed tutorials provided by the official channel
Rhythmic Editing Made Easy: Aligning Video and Sound in Adobe Premiere Pro
How to Edit Videos to the Beat in Premiere Pro?

Benjamin Arango
Mar 27, 2024• Proven solutions
A rapid succession of shots can make any music video or a feature film more entertaining to watch. The popularity of beat edits has gone through the roof in the era of social media videos, as so many YouTubers and video content creators produce videos that are perfectly synced to the music. This video editing technique can be used in a single scene or throughout an entire video, depending on the project and the effect you would like the video to make on the viewer. Read on if you would like to learn how to edit video clips to match the beat of a song in Adobe Premiere Pro.
How to Edit and Auto-Sync Video Clips to the Beat of a Song in Adobe Premiere Pro for Free?
Before you start editing clips to the beat, you must first ensure that all of the materials you want to include in that video are imported into the project you created in Adobe Premiere Pro. Once the footage you intend to use in your video is in the Media Bin, you should head over to the New submenu in the File menu.
Afterward, you can add an audio file to the timeline and ensure that the sequence settings are correct. The audio file is going to serve as the core around which you are going to build the entire video, which is why it is important to select a rhythmic song that has clearly distinguishable beats.
Click on the Wrench icon and choose the Show Audio Waveform option from the drop-down menu, so that you can see the beats in the audio file. Make sure that the sequence you created is selected and not the audio file you added to the timeline and then position the playhead at the beginning of the song. Listening to the music to which you would like to edit your video a few times is recommended because it will enable you to better understand where the beats are located.
When ready start adding markers to the sequence by using the M keyboard shortcut, so that every beat of the song contains a marker. This may take a few tries because hitting the beats can be difficult for video editors that don’t have any musical talents, but with practice, you should be able to position the markers precisely where they need to be. Also, you can make the adjustments to the video you’re creating after you sync your footage with the audio so even if the markers aren’t positioned perfectly you can make corrections later.
Head over to the Media Bin and proceed to add In and Out points, by either clicking on their icons or using the I and O buttons, to all video clips you want to edit to the beat. By doing so you will let Adobe Premiere know which parts of the video clips you want to keep and where it should create cuts. After setting the In and Out points for all the video clips you would like to use in your project you just have to select them. The order in which your footage is selected is important as it will determine where they are going to be placed on the timeline.
Choose the Automate to Sequence option from the Clip menu and once the Automate to Sequence window appears on the screen you should choose the Selection Order option from the Ordering menu. Afterward, you should select the At Unnumbered Markers setting from the Placement menu and change the Method to the Overwrite Edit.
Make sure that the Use In/Out Range option is enabled and click on the Ignore Audio checkbox if your video clips also contain audio. Click OK to confirm the changes and Adobe Premiere Pro will automatically match your footage to the markers you added to the sequence.
How to Edit Video Clips to the Beat of a Song with BeatEdit Extension for Adobe Premiere Pro?
Placing markers at each beat in the song can be both difficult and time-consuming, which defeats the purpose of using Adobe Premiere Pro to automate this process. In case you are looking to save some time on adding markers to a sequence, you should try the Mamoworld’s BeatEdit extension for Adobe Premiere Pro that analyses the music and adds markers automatically. Here’s how you can edit video clips to match the beat with BeatEdit.
How to Edit Footage to the Beat in Premiere Pro with the BeatEdit Extension?
In order to download and install the BeatEdit in Adobe Premiere Pro, you must pay a one-time $99,99 fee. After you go through the installation process, you can launch BeatEdit from the Extensions submenu that is located in the Window menu.
After the BeatEdit window pops up on the screen you should click on the Load Music button in order to start the beat detection process. After the audio file is analyzed blue lines are going to be displayed at each beat and you’ll be able to hear a click sound if you play the song. BeatEdit lets you adjust the volume of the audio file you analyzed and enables you to select the beats where you want to make the cuts in your footage.
You can choose if you want to select beats evenly or randomly, specify their frequency or select the portion of the song from which you want to select the beats. The extension also lets you add extra markers that are not located at beat and adjust their amount or minimum distance. BeatEdit generates clip and sequence markers, so make sure that the sequence markers option is selected before clicking on the Create Markers button.
Add the audio file you would like to use in your video to the Adobe Premiere Pro’s timeline and proceed to select the video clips in the Media Bin. Place the playhead at the beginning of the timeline and select the Automate to Sequence option from the Clip menu. You can then select the same settings you’d select if you added the markers to the sequence on your own.
Conclusion
Editing videos to the beat of a song in Premiere Pro is becoming increasingly popular among video content creators. Hopefully, our tutorial has helped you learn this simple but effective video editing technique so that you can use it to make the videos your friends and followers on social media are going to enjoy watching. It is important to remember that how effective your beat edits are going to be, depends on the quality of the footage and the song selection. Do you know how to edit video clips to match the beat of a song in Premiere Pro? If so, share your experiences with us in the comments.
Benjamin Arango
Benjamin Arango is a writer and a lover of all things video.
Follow @Benjamin Arango
Benjamin Arango
Mar 27, 2024• Proven solutions
A rapid succession of shots can make any music video or a feature film more entertaining to watch. The popularity of beat edits has gone through the roof in the era of social media videos, as so many YouTubers and video content creators produce videos that are perfectly synced to the music. This video editing technique can be used in a single scene or throughout an entire video, depending on the project and the effect you would like the video to make on the viewer. Read on if you would like to learn how to edit video clips to match the beat of a song in Adobe Premiere Pro.
How to Edit and Auto-Sync Video Clips to the Beat of a Song in Adobe Premiere Pro for Free?
Before you start editing clips to the beat, you must first ensure that all of the materials you want to include in that video are imported into the project you created in Adobe Premiere Pro. Once the footage you intend to use in your video is in the Media Bin, you should head over to the New submenu in the File menu.
Afterward, you can add an audio file to the timeline and ensure that the sequence settings are correct. The audio file is going to serve as the core around which you are going to build the entire video, which is why it is important to select a rhythmic song that has clearly distinguishable beats.
Click on the Wrench icon and choose the Show Audio Waveform option from the drop-down menu, so that you can see the beats in the audio file. Make sure that the sequence you created is selected and not the audio file you added to the timeline and then position the playhead at the beginning of the song. Listening to the music to which you would like to edit your video a few times is recommended because it will enable you to better understand where the beats are located.
When ready start adding markers to the sequence by using the M keyboard shortcut, so that every beat of the song contains a marker. This may take a few tries because hitting the beats can be difficult for video editors that don’t have any musical talents, but with practice, you should be able to position the markers precisely where they need to be. Also, you can make the adjustments to the video you’re creating after you sync your footage with the audio so even if the markers aren’t positioned perfectly you can make corrections later.
Head over to the Media Bin and proceed to add In and Out points, by either clicking on their icons or using the I and O buttons, to all video clips you want to edit to the beat. By doing so you will let Adobe Premiere know which parts of the video clips you want to keep and where it should create cuts. After setting the In and Out points for all the video clips you would like to use in your project you just have to select them. The order in which your footage is selected is important as it will determine where they are going to be placed on the timeline.
Choose the Automate to Sequence option from the Clip menu and once the Automate to Sequence window appears on the screen you should choose the Selection Order option from the Ordering menu. Afterward, you should select the At Unnumbered Markers setting from the Placement menu and change the Method to the Overwrite Edit.
Make sure that the Use In/Out Range option is enabled and click on the Ignore Audio checkbox if your video clips also contain audio. Click OK to confirm the changes and Adobe Premiere Pro will automatically match your footage to the markers you added to the sequence.
How to Edit Video Clips to the Beat of a Song with BeatEdit Extension for Adobe Premiere Pro?
Placing markers at each beat in the song can be both difficult and time-consuming, which defeats the purpose of using Adobe Premiere Pro to automate this process. In case you are looking to save some time on adding markers to a sequence, you should try the Mamoworld’s BeatEdit extension for Adobe Premiere Pro that analyses the music and adds markers automatically. Here’s how you can edit video clips to match the beat with BeatEdit.
How to Edit Footage to the Beat in Premiere Pro with the BeatEdit Extension?
In order to download and install the BeatEdit in Adobe Premiere Pro, you must pay a one-time $99,99 fee. After you go through the installation process, you can launch BeatEdit from the Extensions submenu that is located in the Window menu.
After the BeatEdit window pops up on the screen you should click on the Load Music button in order to start the beat detection process. After the audio file is analyzed blue lines are going to be displayed at each beat and you’ll be able to hear a click sound if you play the song. BeatEdit lets you adjust the volume of the audio file you analyzed and enables you to select the beats where you want to make the cuts in your footage.
You can choose if you want to select beats evenly or randomly, specify their frequency or select the portion of the song from which you want to select the beats. The extension also lets you add extra markers that are not located at beat and adjust their amount or minimum distance. BeatEdit generates clip and sequence markers, so make sure that the sequence markers option is selected before clicking on the Create Markers button.
Add the audio file you would like to use in your video to the Adobe Premiere Pro’s timeline and proceed to select the video clips in the Media Bin. Place the playhead at the beginning of the timeline and select the Automate to Sequence option from the Clip menu. You can then select the same settings you’d select if you added the markers to the sequence on your own.
Conclusion
Editing videos to the beat of a song in Premiere Pro is becoming increasingly popular among video content creators. Hopefully, our tutorial has helped you learn this simple but effective video editing technique so that you can use it to make the videos your friends and followers on social media are going to enjoy watching. It is important to remember that how effective your beat edits are going to be, depends on the quality of the footage and the song selection. Do you know how to edit video clips to match the beat of a song in Premiere Pro? If so, share your experiences with us in the comments.
Benjamin Arango
Benjamin Arango is a writer and a lover of all things video.
Follow @Benjamin Arango
Top 10 Websites to Download Free Sound Clips for Videos
FREE Top 10 Best Websites to Download Sound Clips for Videos

Liza Brown
Mar 27, 2024• Proven solutions


Are you working on animation , video, game, music, or maybe some other media file? Sound is a vital factor for all. It is the effect of the sound that can make or break a project.
But it can be difficult to find perfect and quality free sound clips. There are thousands of software for creating excellent videos, adding sounds , titles, overlays, tracks, and more. But what if you don’t wish to create a piece for just jazzing up your already existing video?
Free sound clips are great resources to download for videos if you don’t want to create sound effects.
Many people want to know the source of high-quality free audio for videos. These free sound samples are easy to find on the Internet.
In this article, you will get to know the 10 best websites to download free sound clips.
10 Best Free Sound Samples to Use
1. Freesound
Licensed under the Creative Commons License , the Freesound comprises of a large sound database. You can choose from the huge collection of sounds and decide which one is free and which sound needs attribution.
You can ensure if the sound can be used in commercial products or not. If you are not a professional and just need free sound samples for personal use, you may use free sound download from any site. The features of Freesound include-
- You can search for sounds or browse by tags or geotags
- The pack feature helps you to find a bunch of similar sounds very easily
- Preview the sound without logging in
- For downloading the sound, you need to log in
- Add your audio samples to contribute to the database
- You get 5 free sound clips download
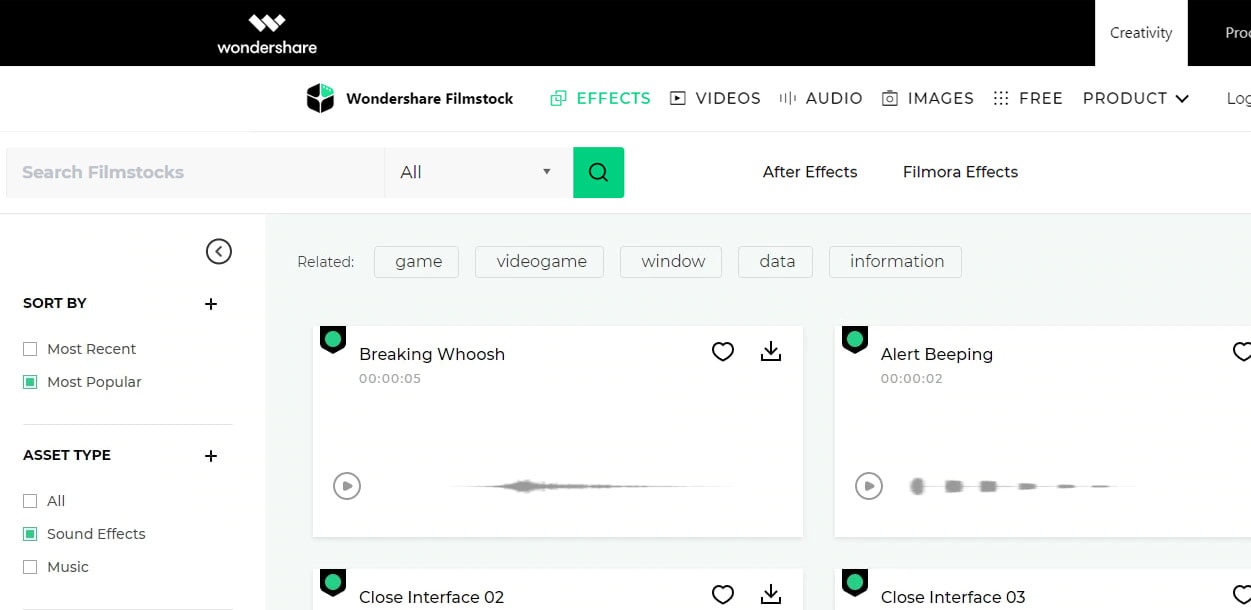
2. Filmstock
Filmstock from the house of Wondershare is one of the greatest libraries for free sound clips.
Any budget filmmaker would love to have this invaluable resource not just for free audio clips for videos but also for royalty-free sound clips.
You can bring your cinematic video to life from the Filmstock free-stuff one-stop-shop. The features of Filmstock include-
- Royalty-free video effects, audio, and stock media
- There are genres like science fiction, sci-fi, ufo, technology games
- Huge selection of curated quality stock images
- Filmstock library is continuously updated
- No attribution required for any project on Filmstock
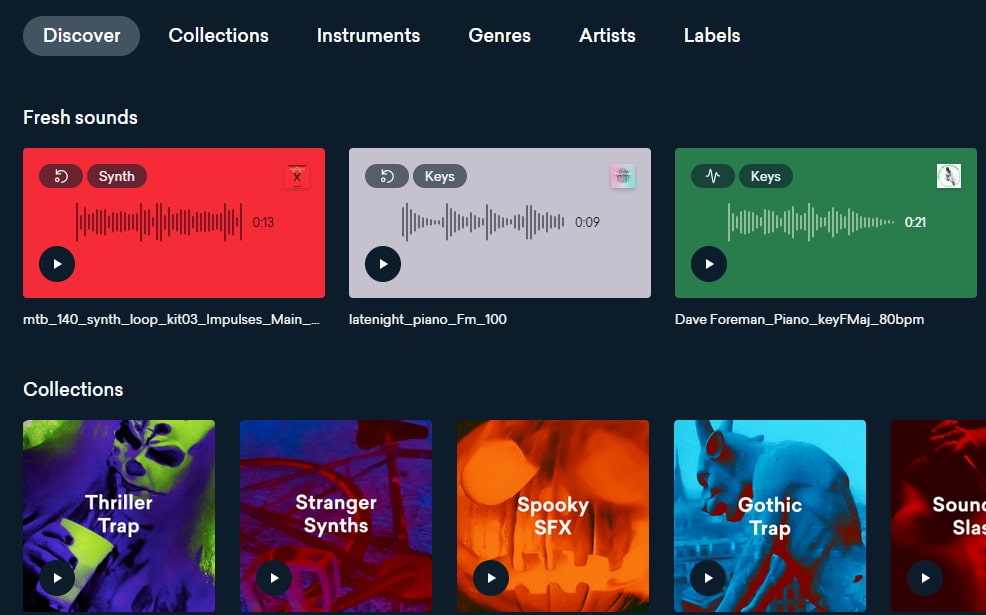
3. Landr
With a simple interface, Landr offers the best loops, packs, and samples to you. Make use of powerful Artificial Intelligence (AI) and you can spend lesser time searching and browsing. The features of Landr includes-
- You can browse free sound clips from the various collection of instruments
- Quickly find the right sound from the millions of free sound samples
- Get access to Selector tool powered by AI to make your browsing session faster
- Nourish your ideas with the curated collection and smart browsing
- The filter sounds by instrument, mood, BPM or key
- Go pro with your sampling
- Royalty-free sounds from today’s best artists, producers, and labels
4. Audio Micro
Audio Micro is one of the best tools for downloading horror-based free sound clips. Once you register with Audio Micro, you can easily download free audio clips for videos.
For downloading sound for commercial uses like TV or mass reproduction, you must be a paid subscriber. The features of Audio Micro are-
- Get access to the collection of royalty-free music and 2000 free good quality sound effects
- High-quality audio content for commercial use, available at competitive prices without any hidden cost
- Research, locate, purchase, and download stock audio
- Easy and fast search option with free sound collection visible from the navigation bar on the homepage
5. Audio Blocks
It is an intuitive platform to download loops, sound effects, and music. It has a low-cost subscription model and the content is constantly updated based on the search results. The features of Audio Blocks are-
- Unlimited royalty-free audio
- Loop, sound effects, and music download
- Low-cost subscription offers more content at a nominal price
- There are flexible plans for every budget
- Use content multiple times for commercial and personal projects
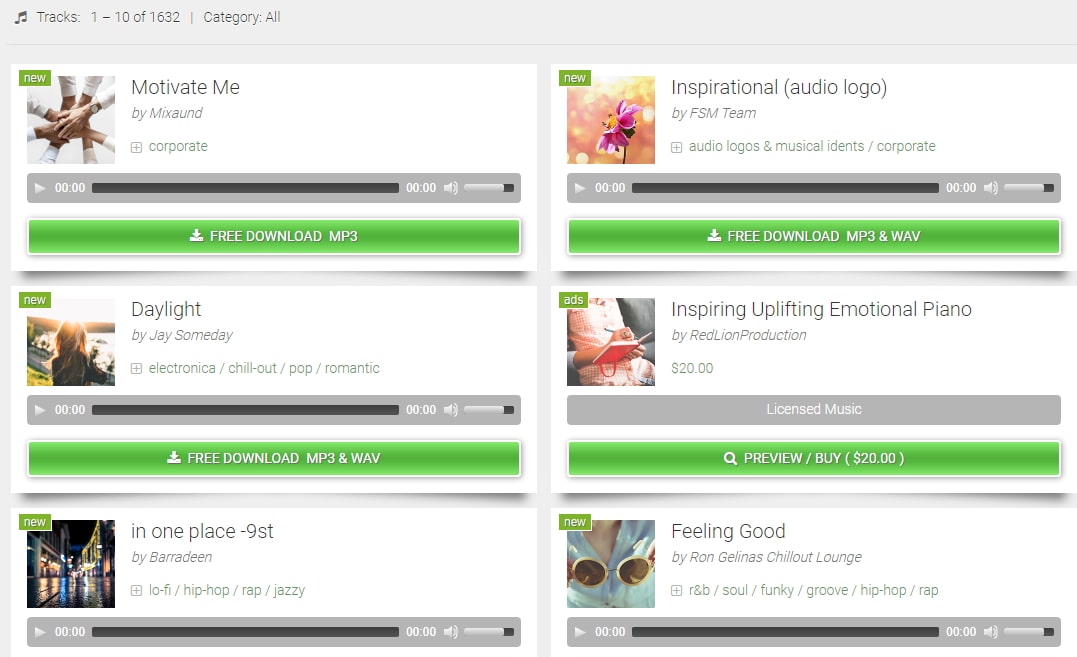
6. Free Stock Music
Whether YouTube project or your personal Vlog, Free Stock Music offers royalty-free music for a range of media platforms.
For any non-copyrighted sound clips free download, always feel free to reach Free Stock Music. The features are-
- Free access to non-copyrighted music
- Just put the attribution in credits to use the sound clips
- Unlimited royalty-free music in all moods, lengths, tempos, and categories
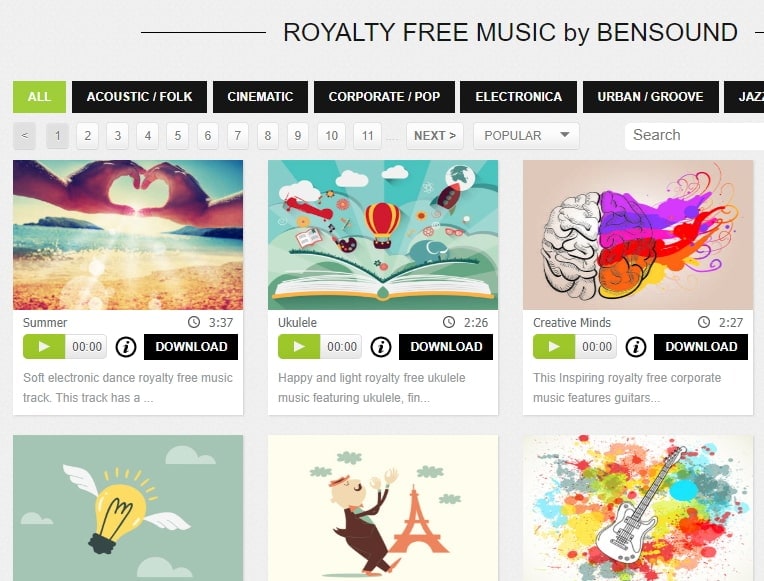
7. Bensound
Available under the Creative Common License, Bensound is used for multimedia projects like web applications or videos.
You can use the free tracks available with Bensound stock music in the various website background score, animations, web adverts, slideshows, etc. The features of Bensound include-
- Royalty-free stock music in various genres like electronica, urban, cinematic, jazz, rock, etc.
- Download free sound clips from the huge collection and add attributions in credits
- If you don’t wish to give credits and use the high-quality premium tracks, get the Bensound Pro License
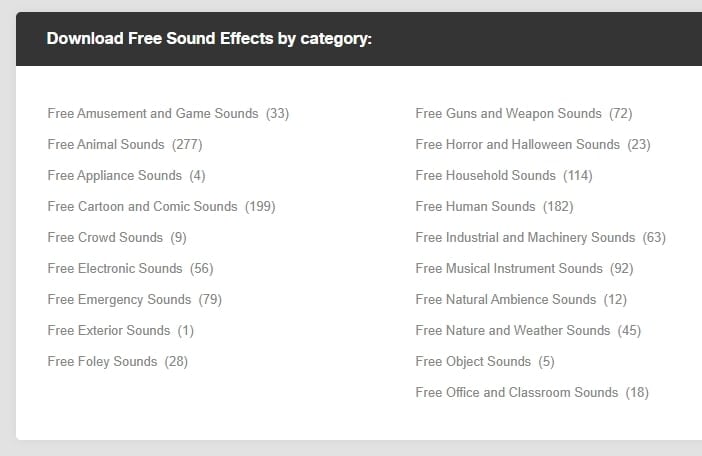
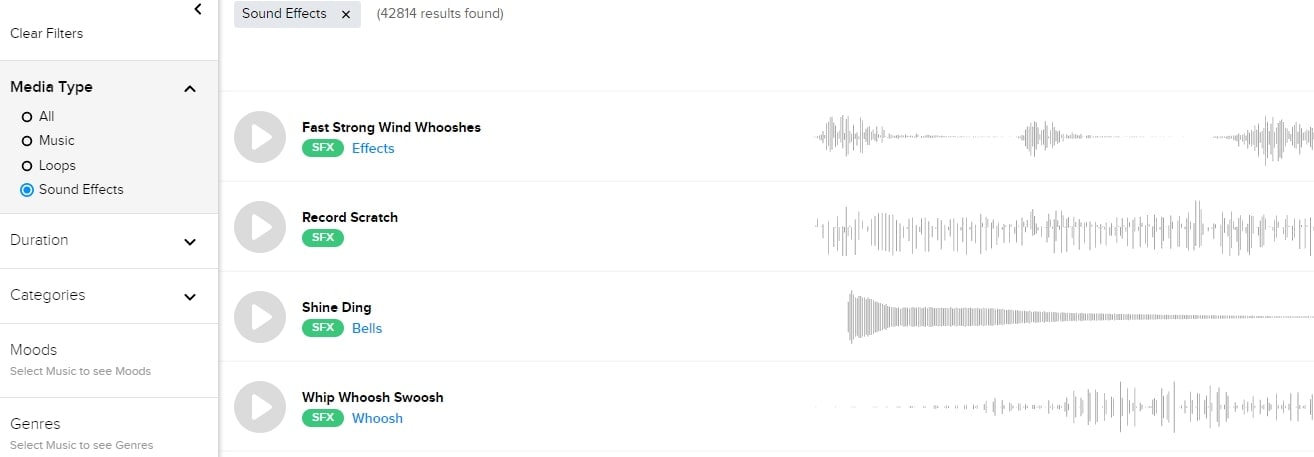
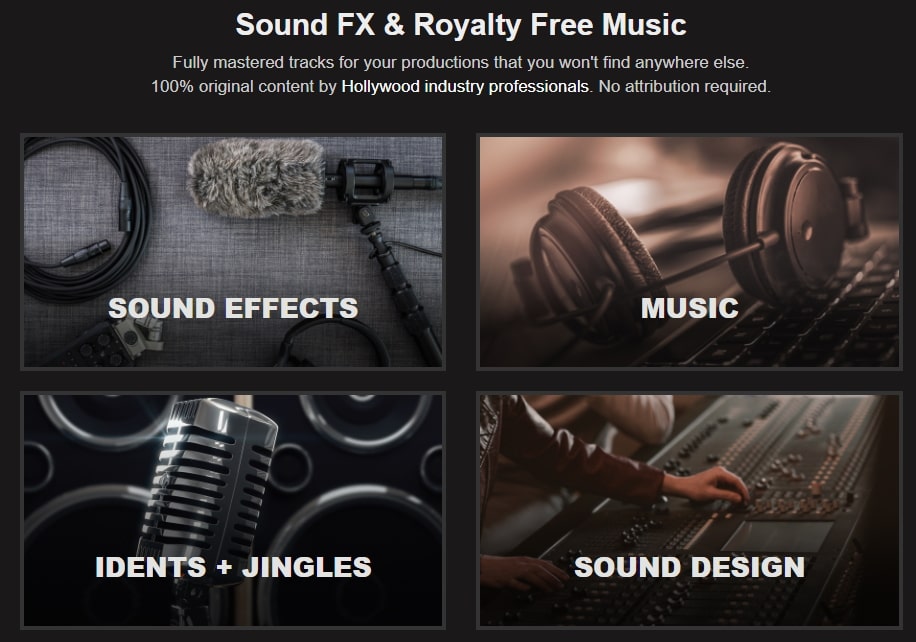
8. Sounds Crate
Are you looking for the best soundtrack for your video? Sounds Crate offers some of the best royalty-free music and sound FX.
With the tracks completely mastered for your production, Sound Crate offers 100% quality content created by industry professionals from Hollywood. The Sound Crate features include-
- Sound FX for electricity, gun, explosion, weapons, sci-fi, vehicles, movements, etc.
- Royalty-free music in diverse genres
- You can also use idents for corporate, news jingles, holiday idents, etc.
- Download and use the royalty-free sound clips easily
- Over 10000 plus HD assets
- No attribution required
- Browse from unlimited music, sound effects, etc.
9. ZapSlat
Do your audio and video editing projects need some cool soundtracks to jazz it up? Look no further. ZapSlat is one of the best free sound download sites to make your project successful. The features of ZapSlat are-
- Comprises over 54,000 professional free sound effects and royalty-free music files
- Variety of free sound effect packs
- Download royalty-free music from a variety of genres
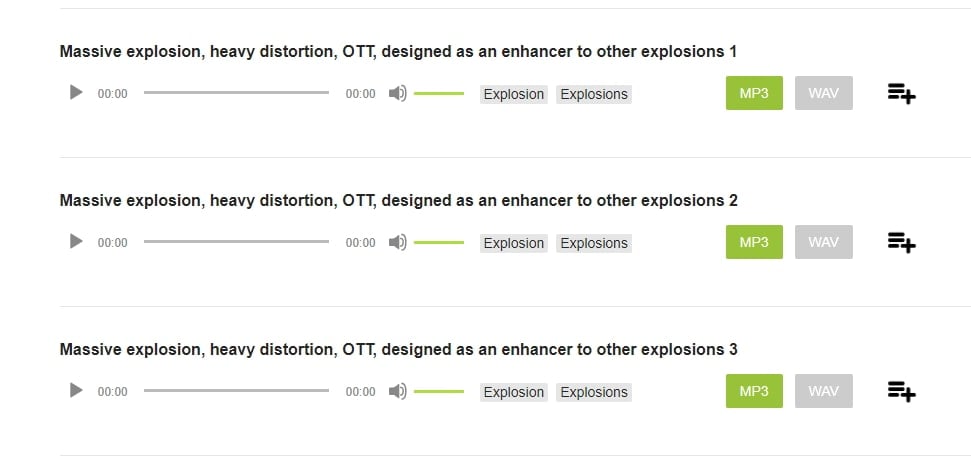
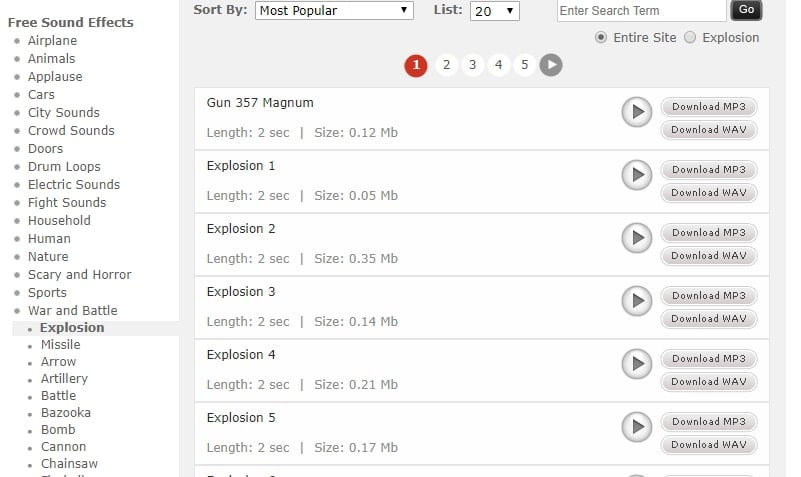
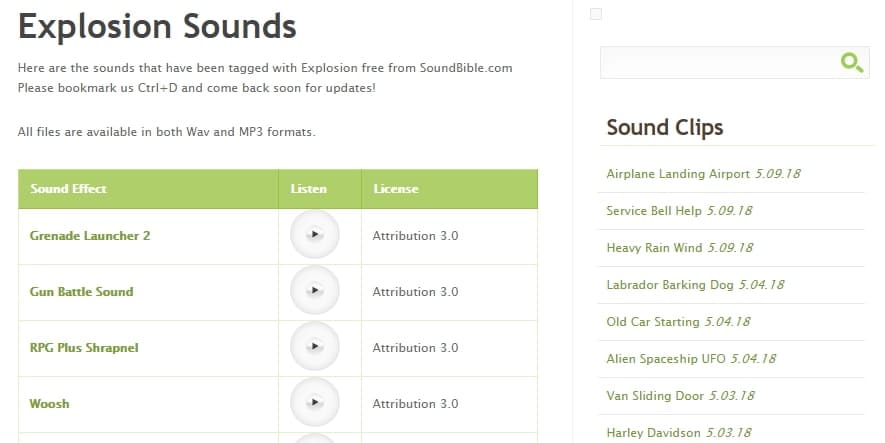
10. Sound Bible
Choose the best from 2000 free sound clips licensed under Creative Commons. To use the sound effect for commercial video, you can select from the royalty-free sounds. The features of SoundBible are-
- Download free sound clips without logging in or creating an account
- 2000 free sounds
- Copyright-free sound resources are weekly updated
Conclusion
Now that you know the best 10 free sound clip download sites, make use of it in your videos. Without worrying about the expense, you can use these sites to download free sound clips.
Liza Brown
Liza Brown is a writer and a lover of all things video.
Follow @Liza Brown
Liza Brown
Mar 27, 2024• Proven solutions
Are you working on animation , video, game, music, or maybe some other media file? Sound is a vital factor for all. It is the effect of the sound that can make or break a project.
But it can be difficult to find perfect and quality free sound clips. There are thousands of software for creating excellent videos, adding sounds , titles, overlays, tracks, and more. But what if you don’t wish to create a piece for just jazzing up your already existing video?
Free sound clips are great resources to download for videos if you don’t want to create sound effects.
Many people want to know the source of high-quality free audio for videos. These free sound samples are easy to find on the Internet.
In this article, you will get to know the 10 best websites to download free sound clips.
10 Best Free Sound Samples to Use
1. Freesound
Licensed under the Creative Commons License , the Freesound comprises of a large sound database. You can choose from the huge collection of sounds and decide which one is free and which sound needs attribution.
You can ensure if the sound can be used in commercial products or not. If you are not a professional and just need free sound samples for personal use, you may use free sound download from any site. The features of Freesound include-
- You can search for sounds or browse by tags or geotags
- The pack feature helps you to find a bunch of similar sounds very easily
- Preview the sound without logging in
- For downloading the sound, you need to log in
- Add your audio samples to contribute to the database
- You get 5 free sound clips download
2. Filmstock
Filmstock from the house of Wondershare is one of the greatest libraries for free sound clips.
Any budget filmmaker would love to have this invaluable resource not just for free audio clips for videos but also for royalty-free sound clips.
You can bring your cinematic video to life from the Filmstock free-stuff one-stop-shop. The features of Filmstock include-
- Royalty-free video effects, audio, and stock media
- There are genres like science fiction, sci-fi, ufo, technology games
- Huge selection of curated quality stock images
- Filmstock library is continuously updated
- No attribution required for any project on Filmstock
3. Landr
With a simple interface, Landr offers the best loops, packs, and samples to you. Make use of powerful Artificial Intelligence (AI) and you can spend lesser time searching and browsing. The features of Landr includes-
- You can browse free sound clips from the various collection of instruments
- Quickly find the right sound from the millions of free sound samples
- Get access to Selector tool powered by AI to make your browsing session faster
- Nourish your ideas with the curated collection and smart browsing
- The filter sounds by instrument, mood, BPM or key
- Go pro with your sampling
- Royalty-free sounds from today’s best artists, producers, and labels
4. Audio Micro
Audio Micro is one of the best tools for downloading horror-based free sound clips. Once you register with Audio Micro, you can easily download free audio clips for videos.
For downloading sound for commercial uses like TV or mass reproduction, you must be a paid subscriber. The features of Audio Micro are-
- Get access to the collection of royalty-free music and 2000 free good quality sound effects
- High-quality audio content for commercial use, available at competitive prices without any hidden cost
- Research, locate, purchase, and download stock audio
- Easy and fast search option with free sound collection visible from the navigation bar on the homepage
5. Audio Blocks
It is an intuitive platform to download loops, sound effects, and music. It has a low-cost subscription model and the content is constantly updated based on the search results. The features of Audio Blocks are-
- Unlimited royalty-free audio
- Loop, sound effects, and music download
- Low-cost subscription offers more content at a nominal price
- There are flexible plans for every budget
- Use content multiple times for commercial and personal projects
6. Free Stock Music
Whether YouTube project or your personal Vlog, Free Stock Music offers royalty-free music for a range of media platforms.
For any non-copyrighted sound clips free download, always feel free to reach Free Stock Music. The features are-
- Free access to non-copyrighted music
- Just put the attribution in credits to use the sound clips
- Unlimited royalty-free music in all moods, lengths, tempos, and categories
7. Bensound
Available under the Creative Common License, Bensound is used for multimedia projects like web applications or videos.
You can use the free tracks available with Bensound stock music in the various website background score, animations, web adverts, slideshows, etc. The features of Bensound include-
- Royalty-free stock music in various genres like electronica, urban, cinematic, jazz, rock, etc.
- Download free sound clips from the huge collection and add attributions in credits
- If you don’t wish to give credits and use the high-quality premium tracks, get the Bensound Pro License
8. Sounds Crate
Are you looking for the best soundtrack for your video? Sounds Crate offers some of the best royalty-free music and sound FX.
With the tracks completely mastered for your production, Sound Crate offers 100% quality content created by industry professionals from Hollywood. The Sound Crate features include-
- Sound FX for electricity, gun, explosion, weapons, sci-fi, vehicles, movements, etc.
- Royalty-free music in diverse genres
- You can also use idents for corporate, news jingles, holiday idents, etc.
- Download and use the royalty-free sound clips easily
- Over 10000 plus HD assets
- No attribution required
- Browse from unlimited music, sound effects, etc.
9. ZapSlat
Do your audio and video editing projects need some cool soundtracks to jazz it up? Look no further. ZapSlat is one of the best free sound download sites to make your project successful. The features of ZapSlat are-
- Comprises over 54,000 professional free sound effects and royalty-free music files
- Variety of free sound effect packs
- Download royalty-free music from a variety of genres
10. Sound Bible
Choose the best from 2000 free sound clips licensed under Creative Commons. To use the sound effect for commercial video, you can select from the royalty-free sounds. The features of SoundBible are-
- Download free sound clips without logging in or creating an account
- 2000 free sounds
- Copyright-free sound resources are weekly updated
Conclusion
Now that you know the best 10 free sound clip download sites, make use of it in your videos. Without worrying about the expense, you can use these sites to download free sound clips.
Liza Brown
Liza Brown is a writer and a lover of all things video.
Follow @Liza Brown
Also read:
- Updated Multimodal Media Mastery Integrating Audio Into Video Projects Today for 2024
- New 2024 Approved Exploring the Best No-Cost Voice Recorders on Your Computer – The 10 Essential Tools
- In 2024, Animation Enthusiasts Choice Top 8 Downloaded Sound Effects for Your Projects
- Finding Locations with the Hallmark of Enthusiastic Uproar for 2024
- Updated In 2024, The Ultimate Guide to MP3 Modification Software for Mac Uncovering the Best Tools and Comparisons .
- Understanding Pexels.com A Resource for High-Quality, Creative Commons Images
- Dispelling Digital Studio Misconceptions What DAWs Truly Are for 2024
- Updated Clap Echo Generator for 2024
- New The Ultimate Guide to Podcast-to-MP3 Conversions with 3 Proven Methods
- New Voice to Word Made Easy Discovering the Best Free Android and iOS Transcription Tools for 2024
- New Methods for Diminishing Delay Effects in Audio Production for 2024
- New Where Can I Find Button Sound Effect?
- Beatless Beats Innovative Strategies for Eliminating Drums From Audio Tracks for 2024
- New 2024 Approved Zoom Sound Off Disabling Video Chat Volume on All Devices
- New 2024 Approved Top 10 Windows/Mac/Linux-Friendly Audio Editors That Match Audacitys Capabilities
- Top 11 No-Cost Audio Production Tools for PCs & Macs for 2024
- Updated 2024 Approved Isolating Vocal Elements Disengaging Audio From Video Using Premiere Pro
- Updated Advanced Audio Editing How to Achieve Seamless Volume Automation Using Final Cut Pro X Ducking Tools
- Updated Bypassing Extras The No-Cost, No-Download Strategy for Quieting Video Audio on Windows 10
- Updated 2024 Approved Audiophiles Dream Upgrading Your Recording Space Sound
- Updated The Art of Strip-Singing A Complete Breakdown of Removing Vocals From Music Pieces
- Simplifying Sound Production A Step-by-Step Guide to Silencing Vocals with Adobe Audition for 2024
- New The Ultimate iMovie Strategy to Eliminate Unwanted Sounds in Your Projects
- Updated 2024 Approved Advanced Filmmaking Techniques Silencing the Distractions in Your Audio Recordings with Wondershare Filmora
- Updated Mastering the Art of Sound Integration Into Film Magix Edition
- New 2024 Approved Lose the Extra Bits Effortless MP3 Downscaling for Spotless Sing-Along Sessions.
- Updated Echo-Free Editing Five Approaches for Audio Cleansing in Video Content
- In 2024, Deciphering the Prowess of MAGIX Samplitude in Modern Music Production
- Updated Turn Off Dynamic Earphone Balance Control in iOS for 2024
- Updated In 2024, Top15 Apps & Websites to Use to Add Music to a Video
- New In 2024, Ultimate Guide to the 5 Premium Car Audio Mixer Programs for Mac
- New In 2024, Natures Chirp Collection in MP3 Format
- 2024 Approved Audacity on Your Chrome OS Complete Installation and Deletion Processes
- Updated Crafting an Impressive Visual Saga Your In-Depth Tutorial on Podcast Cover Artistry for 2024
- In 2024, Implementing Effective DeNoise Methods with Artificial Intelligence
- New In 2024, Converting Sounds to Words The Ultimate Free Guide with Top 3 Strategies
- In 2024, Unova Stone Pokémon Go Evolution List and How Catch Them For Nubia Red Magic 9 Pro+ | Dr.fone
- A Step-by-Step Guide on Using ADB and Fastboot to Remove FRP Lock on your Poco F5 5G
- Different Methods To Unlock Your iPhone 11 Pro Max
- In 2024, Tips and Tricks for Apple ID Locked Issue On Apple iPhone 6s Plus
- In 2024, Uncomplicate Your Workflow 5 Free Online Tone Tools
- New Free Video Trimming and Merging Tools for Beginners A Comprehensive Guide
- In 2024, How to Intercept Text Messages on Oppo A78 5G | Dr.fone
- In 2024, Design Your WhatsApp Status with These Top Apps
- How To Do Google Pixel 8 Screen Sharing | Dr.fone
- How To Transfer WhatsApp From Apple iPhone 11 Pro to other iPhone 12 Pro devices? | Dr.fone
- Updated 2024 Approved Top 10 Video Editing Apps for Android Devices
- In 2024, How to Sign Out of Apple ID From Apple iPhone 13 Pro Max without Password?
- 3 Ways to Erase iPhone 11 Pro Max When Its Locked Within Seconds
- In 2024, Does find my friends work on Vivo X Fold 2 | Dr.fone
- New 2024 Approved Speaking Volumes The Best Ways to Convert Text Into High-Quality MP3s
- New 2024 Approved Proxy Perfection The Top 8 Video Editing Apps for 4K
- New In 2024, Change Video Aspect Ratio in Final Cut Pro Easy Instructions for Beginners
- The way to get back lost messages from Y27 5G
- In 2024, How to Get and Use Pokemon Go Promo Codes On Poco X6 | Dr.fone
- Best Fixes For Vivo Y36 Hard Reset | Dr.fone
- Do You Want to Download Slow-Motion Apps that Can Edit Video Professionally? This Article Will Discuss some Slomo Makers for Both iOS and Android for 2024
- How to retrieve lost files from Magic 6?
- The Best of Both Worlds Free and Paid 3D Animation Software Options for 2024
- Title: Updated Web-Based Echo Eradication Mastering the Art of Noise Cancellation
- Author: David
- Created at : 2024-06-10 05:52:45
- Updated at : 2024-06-11 05:52:45
- Link: https://sound-tweaking.techidaily.com/updated-web-based-echo-eradication-mastering-the-art-of-noise-cancellation/
- License: This work is licensed under CC BY-NC-SA 4.0.
