
:max_bytes(150000):strip_icc():format(webp)/SDC18_Keynote_OneUI-5be8d33f46e0fb002d108acf.jpg)
Updated Locating High-Pitched Shattering Noises in Audio for 2024
Locating High-Pitched Shattering Noises in Audio
Versatile Video Editor - Wondershare Filmora
An easy yet powerful editor
Numerous effects to choose from
Detailed tutorials provided by the official channel
There are a few different places where you can find glass-breaking sound effects. One place is online, on websites like SoundCloud or YouTube. Many apps offer glass-breaking sound effects as part of their library of sounds. A quick internet search will reveal various sites to download these effects for free.
Keep in mind that not all of these sites are completely free. Some of them will only offer free glass-breaking sound effects for certain uses, while others may limit how many times you can use their sounds before charging a fee.

You can also find glass-breaking sounds in libraries of sound effects. These collections are available for purchase, or they may be available to download for free. If you are looking for a specific sound effect, it is often easiest to search for it by name. This will help you to find the right sound effect quickly and easily.
Finally, if you have access to a recording studio, you can record the sound yourself. In this article, we are going to help you with the whole matter with step by step guide. So read on to know more!
In this article
01 [Ways to Download All Kinds of Sound Effect](#Part 1)
02 [Use Filmora to Add Background Music in Your Video](#Part 2)
Part 1 Ways to Download All Kinds of Sound Effect
Among many ways to download or create all kinds of sound effect including glass breaking/shattering sound effect, here are some of the ways for you to follow –
1. Freesound
This site has thousands of sound effects available under the Creative Commons 0 license. This means that they can be used for any purpose, personal or commercial, without attribution or permission required. To download music from Freesound, follow these steps.
Step 1: Go to the Freesound website.
Step 2: Search for the sound you want to download.
Step 3: Click on the sound to listen to it.
Step 4: Click on the Download button.
Step 5: Save the sound to your computer.

2. Incompetech
This site offers royalty-free music and sound effects used in a commercial or non-commercial project. All of the sounds are available for download in MP3 format.
Step 1: First of all, go to Incompetech and open up any page on the site. You’ll see that there are links on the left side.
Step 2: Click on one of those links, and you’ll see a list of songs of that category. Once again, click on one of the songs to open up another page where you can listen to it.
Step 3: Once you’re done listening, scroll down, and you’ll see a link that says “Download this song”. Click on the link, and it will start downloading automatically.
Step 4: Once downloaded, go into your project and put in the music track where you want the song to go in. If you want a song to be longer, re-download the song and find that “Download this song” link again. Put it where you want the new end of the music to be.

3. Orange Free Sounds
This site offers various sound effects that are free to download and use in your projects. The sound effects are available in MP3 format and can be used for personal or commercial purposes. Here is how to download a video from orange free sounds step by step.
Step 1: Go to the URL of the video. The URL is the address of the video that you want to download. Copy it and paste it in a new tab or window if your browser doesn’t automatically do it for you.
Step 2: The next step is to go to a website called SaveFrom.net. When the page has loaded, look for the big blue button that says “Download Video”. A new tab or window will open with the download page. It would be best to paste the video URL in the “Enter a video URL” bar.
Step 3: After pasting it, click on “Download this video” (the blue button). When it appears, press on one of them. I usually go for mp3 format because it keeps good quality and it’s the most used format that you can play on many devices.

Step 4: The next step is to wait until it downloads. Depending on your connection speed, it may take a few minutes, but it usually doesn’t even take one minute to download 100Mb videos. When it has finished downloading, look for the green button that says “Download to your computer” (you may have to scroll down the page).
Step 5: Click on it, and it will start downloading. You can click on “Open folder” or let it open automatically when the download is finished. When the download finishes, you can play it with any audio player that supports mp3 files.
4. SoundBible
This website offers free sound effects that can be downloaded and used in your projects. The sound effects are available in MP3 format and can be used for personal or commercial purposes. There is a free option and a premium option. Here is how to use SoundBible for collecting sound effects.
Step 1: Open SoundBible website.
Step 2: Look for the download button, which is located in the upper right-hand corner of your screen.
Step 3: Click on it to open another drop-down menu with “Royalty” and “Free” options, click the “Free” option.
Step 4: Scroll down to the bottom of the page.
Step 5: Click “Download”.
Step 6: You will be able to download your sound effect onto your computer.
Please note: These glass-breaking sound effects are in .mp3 format and can be used freely in your video games and animated projects under the terms of the Attribution 3.0 license.

5. ZapSplat
This website offers a wide variety of sound effects that are free to download and use in your projects. The sound effects are available in WAV format and can be used for personal or commercial purposes.
Step 1: Go to Zapslat website, click on ZapSplat.
Step 2: Type the name of your project, then go to the search tab and find your project.
Step 3: When the video has finished importing, you can change the playback speed and add effects.
Step 4: To export your project, click on the share button and select “Download”. You can then save your video to your computer.

Part 2 Use Filmora to Add Background Music in Your Video
Filmora is an easy video editing software that is easy to use and has a wide range of features. It is available for both Windows and Mac users. Some of the features of Filmora include adding text, music, and filters to your videos. You can also create slideshows, animated titles, and green screen effects. Filmora has a glass-breaking effect. This can be added to your video to give it a dramatic ending or a thrilling start. It can signify the end of a relationship or other momentous occasion. You can choose from different types of glass-breaking sound effects, like champagne glasses clinking together, breaking glass, or the sound of a window shattering.
Features:
- The software features a manual mode for advanced control over the video editing process and express mode for quick and easy creation of videos. It also supports 4K video editing.
- One of the program’s most distinctive features is the glass-breaking sound effect. When a clip is edited and played back, this sound can be heard whenever the clip is paused or stopped. This effect was added to make the editing process more realistic.
- Another distinctive feature of Filmora is the glass shutter sound effect. This sound can be heard when a clip is edited and played back. It was added to make the editing process more realistic and enhance the user’s experience.
- If you are looking for video editing software that offers a realistic editing experience, Filmora is the right choice for you. It features two unique sound effects that add a touch of realism and make the editing process more exciting.
Some features include adding text, music, and audio effects and creating titles and intro/outros.
Step by Step Guide for How to Add Sound Effects to Video With Filmora:
Step 1: Go to the Filmora official website, install wonder share Filmora and lunch it. Once it’s launched, you will find a tab just below the menu bar, tap media, and click import. After this, there will be a drop-down where you can click on import media files and choose the video file. Repeat the process to pick the desired background music. You can also use build-in music tracks to add music to your video by selecting the Music tab.
For Win 7 or later (64-bit)
For macOS 10.12 or later

Step 2: Now you can navigate over the video you imported to Filmora, then tap on the sign ‘+’on it alternatively; you can drag down to the timeline the media file.
Step 3: Now edit your music by double-tapping the audio from the timeline. It will display the audio panel at the top of the screen. You can use it to set the desired equalizer, manage pitch volume and speed. You can also use the forum to fade in or fade out.

Step 4: Finally, you can now export the video that has made the desired changes by clicking ‘export’ on the toolbar to export the video. You can now save the exported in the desired format and remember to rename it directly.
Wondershare Filmora
Get started easily with Filmora’s powerful performance, intuitive interface, and countless effects!
Try It Free Try It Free Try It Free Learn More >

AI Portrait – The best feature of Wondershare Filmora for gameplay editing
The AI Portrait is a new add-on in Wondershare Filmora. It can easily remove video backgrounds without using a green screen or chroma key, allowing you to add borders, glitch effects, pixelated, noise, or segmentation video effects.

Conclusion
Glass-breaking sound effects are a great way to give your video or project some real, dramatic flair. These sounds for free online. Do an internet search, and you’ll come up with plenty of sites that offer them as downloads. Note that not all of those websites will be completely free; those that only provide their glass-breaking sounds for certain uses may charge a fee after using it more than a certain number of times.
Filmora is a video editing program that’s simple enough for beginners but powerful enough to satisfy even the most advanced editors. With features like manual mode and glass-breaking sound effects, you can easily create videos. Hope this article helps you with collecting glass breaking/shattering sound effects and adding them into videos using Filmora.
There are a few different places where you can find glass-breaking sound effects. One place is online, on websites like SoundCloud or YouTube. Many apps offer glass-breaking sound effects as part of their library of sounds. A quick internet search will reveal various sites to download these effects for free.
Keep in mind that not all of these sites are completely free. Some of them will only offer free glass-breaking sound effects for certain uses, while others may limit how many times you can use their sounds before charging a fee.
You can also find glass-breaking sounds in libraries of sound effects. These collections are available for purchase, or they may be available to download for free. If you are looking for a specific sound effect, it is often easiest to search for it by name. This will help you to find the right sound effect quickly and easily.
Finally, if you have access to a recording studio, you can record the sound yourself. In this article, we are going to help you with the whole matter with step by step guide. So read on to know more!
In this article
01 [Ways to Download All Kinds of Sound Effect](#Part 1)
02 [Use Filmora to Add Background Music in Your Video](#Part 2)
Part 1 Ways to Download All Kinds of Sound Effect
Among many ways to download or create all kinds of sound effect including glass breaking/shattering sound effect, here are some of the ways for you to follow –
1. Freesound
This site has thousands of sound effects available under the Creative Commons 0 license. This means that they can be used for any purpose, personal or commercial, without attribution or permission required. To download music from Freesound, follow these steps.
Step 1: Go to the Freesound website.
Step 2: Search for the sound you want to download.
Step 3: Click on the sound to listen to it.
Step 4: Click on the Download button.
Step 5: Save the sound to your computer.
2. Incompetech
This site offers royalty-free music and sound effects used in a commercial or non-commercial project. All of the sounds are available for download in MP3 format.
Step 1: First of all, go to Incompetech and open up any page on the site. You’ll see that there are links on the left side.
Step 2: Click on one of those links, and you’ll see a list of songs of that category. Once again, click on one of the songs to open up another page where you can listen to it.
Step 3: Once you’re done listening, scroll down, and you’ll see a link that says “Download this song”. Click on the link, and it will start downloading automatically.
Step 4: Once downloaded, go into your project and put in the music track where you want the song to go in. If you want a song to be longer, re-download the song and find that “Download this song” link again. Put it where you want the new end of the music to be.
3. Orange Free Sounds
This site offers various sound effects that are free to download and use in your projects. The sound effects are available in MP3 format and can be used for personal or commercial purposes. Here is how to download a video from orange free sounds step by step.
Step 1: Go to the URL of the video. The URL is the address of the video that you want to download. Copy it and paste it in a new tab or window if your browser doesn’t automatically do it for you.
Step 2: The next step is to go to a website called SaveFrom.net. When the page has loaded, look for the big blue button that says “Download Video”. A new tab or window will open with the download page. It would be best to paste the video URL in the “Enter a video URL” bar.
Step 3: After pasting it, click on “Download this video” (the blue button). When it appears, press on one of them. I usually go for mp3 format because it keeps good quality and it’s the most used format that you can play on many devices.
Step 4: The next step is to wait until it downloads. Depending on your connection speed, it may take a few minutes, but it usually doesn’t even take one minute to download 100Mb videos. When it has finished downloading, look for the green button that says “Download to your computer” (you may have to scroll down the page).
Step 5: Click on it, and it will start downloading. You can click on “Open folder” or let it open automatically when the download is finished. When the download finishes, you can play it with any audio player that supports mp3 files.
4. SoundBible
This website offers free sound effects that can be downloaded and used in your projects. The sound effects are available in MP3 format and can be used for personal or commercial purposes. There is a free option and a premium option. Here is how to use SoundBible for collecting sound effects.
Step 1: Open SoundBible website.
Step 2: Look for the download button, which is located in the upper right-hand corner of your screen.
Step 3: Click on it to open another drop-down menu with “Royalty” and “Free” options, click the “Free” option.
Step 4: Scroll down to the bottom of the page.
Step 5: Click “Download”.
Step 6: You will be able to download your sound effect onto your computer.
Please note: These glass-breaking sound effects are in .mp3 format and can be used freely in your video games and animated projects under the terms of the Attribution 3.0 license.
5. ZapSplat
This website offers a wide variety of sound effects that are free to download and use in your projects. The sound effects are available in WAV format and can be used for personal or commercial purposes.
Step 1: Go to Zapslat website, click on ZapSplat.
Step 2: Type the name of your project, then go to the search tab and find your project.
Step 3: When the video has finished importing, you can change the playback speed and add effects.
Step 4: To export your project, click on the share button and select “Download”. You can then save your video to your computer.
Part 2 Use Filmora to Add Background Music in Your Video
Filmora is an easy video editing software that is easy to use and has a wide range of features. It is available for both Windows and Mac users. Some of the features of Filmora include adding text, music, and filters to your videos. You can also create slideshows, animated titles, and green screen effects. Filmora has a glass-breaking effect. This can be added to your video to give it a dramatic ending or a thrilling start. It can signify the end of a relationship or other momentous occasion. You can choose from different types of glass-breaking sound effects, like champagne glasses clinking together, breaking glass, or the sound of a window shattering.
Features:
- The software features a manual mode for advanced control over the video editing process and express mode for quick and easy creation of videos. It also supports 4K video editing.
- One of the program’s most distinctive features is the glass-breaking sound effect. When a clip is edited and played back, this sound can be heard whenever the clip is paused or stopped. This effect was added to make the editing process more realistic.
- Another distinctive feature of Filmora is the glass shutter sound effect. This sound can be heard when a clip is edited and played back. It was added to make the editing process more realistic and enhance the user’s experience.
- If you are looking for video editing software that offers a realistic editing experience, Filmora is the right choice for you. It features two unique sound effects that add a touch of realism and make the editing process more exciting.
Some features include adding text, music, and audio effects and creating titles and intro/outros.
Step by Step Guide for How to Add Sound Effects to Video With Filmora:
Step 1: Go to the Filmora official website, install wonder share Filmora and lunch it. Once it’s launched, you will find a tab just below the menu bar, tap media, and click import. After this, there will be a drop-down where you can click on import media files and choose the video file. Repeat the process to pick the desired background music. You can also use build-in music tracks to add music to your video by selecting the Music tab.
For Win 7 or later (64-bit)
For macOS 10.12 or later
Step 2: Now you can navigate over the video you imported to Filmora, then tap on the sign ‘+’on it alternatively; you can drag down to the timeline the media file.
Step 3: Now edit your music by double-tapping the audio from the timeline. It will display the audio panel at the top of the screen. You can use it to set the desired equalizer, manage pitch volume and speed. You can also use the forum to fade in or fade out.
Step 4: Finally, you can now export the video that has made the desired changes by clicking ‘export’ on the toolbar to export the video. You can now save the exported in the desired format and remember to rename it directly.
Wondershare Filmora
Get started easily with Filmora’s powerful performance, intuitive interface, and countless effects!
Try It Free Try It Free Try It Free Learn More >
AI Portrait – The best feature of Wondershare Filmora for gameplay editing
The AI Portrait is a new add-on in Wondershare Filmora. It can easily remove video backgrounds without using a green screen or chroma key, allowing you to add borders, glitch effects, pixelated, noise, or segmentation video effects.
Conclusion
Glass-breaking sound effects are a great way to give your video or project some real, dramatic flair. These sounds for free online. Do an internet search, and you’ll come up with plenty of sites that offer them as downloads. Note that not all of those websites will be completely free; those that only provide their glass-breaking sounds for certain uses may charge a fee after using it more than a certain number of times.
Filmora is a video editing program that’s simple enough for beginners but powerful enough to satisfy even the most advanced editors. With features like manual mode and glass-breaking sound effects, you can easily create videos. Hope this article helps you with collecting glass breaking/shattering sound effects and adding them into videos using Filmora.
Surround Yourself with Silence and Symphony: The Ultimate Collection of Natural Sounds on Mobile
Best Nature Sounds Apps for iOS and Android

Benjamin Arango
Apr 26, 2024• Proven solutions
In today’s challenging times, when stress and anxiety has become inevitable for a majority of population, there is a constant search for solutions that will enable people to live a peaceful and pleasant life. Here, the technology comes to their rescue with nature sound effects app.
These applications provide multiple sounds related to the Nature. The users just need to download any of these programs, and select the desired tone according to their choice. Such mobile software also offer numerous relaxing audios that assist in achieving a deeper level of concentration during the meditation.
10 Best Nature Sounds Apps
1. YouTube
YouTube is also one of the important apps for nature sounds where one can get almost any kind of relaxing sounds related to the Nature.
Binaural beats videos, where two different frequencies of sounds are combined to create a new frequency tone are getting highly popular among people. These are believed to help in lowering stress, anxiety and depression and increase concentration, attention, and efficiency of an individual.
It can also be helpful in attaining mental peace and serenity. The app even contains peaceful meditation sounds that ease the ability to focus and remain relaxed during the whole process. It is highly a user-friendly app and is absolutely free to download on the Android Smartphones.
2. Atmosphere: Relaxing Sounds
Compatible with Android 5.0 or up , and iOS 10.0 or later

Atmosphere is one of the best apps for nature sounds. It is custom-made to help people relieve stress and relax their mind.
The key feature of this application is that it allows users to import their personalized audios and mix them with various default acoustics available within the app itself.
The soothing sounds available here are divided into 8 different environments such as Beach, City, Park, Countryside, Home, Underwater, Forest and Oriental. Users can also mix and match the sounds between environments to produce a tailored theme.
3. Rainy Mood
Compatible with both iOS and Android OS 5.0 and up

Rainy Mood provides the most genuine rain, thunderstorm, and lightening sounds available online.
It not only relieves tension and anxiety but also helps users suffering from insomnia.
This app even contains natural white noise facility that helps in getting rid of any unwanted sounds around us.
The various rain sounds are available here in different environments such as heavy rain, tropical rain, umbrella, rain on tent, rain on porch etc. The best thing about this app is that it can work in offline mode, i.e. without any Internet connection. This eventually results in less power consumption.
4. Animal Sounds
Compatible with Android 4.1 and up
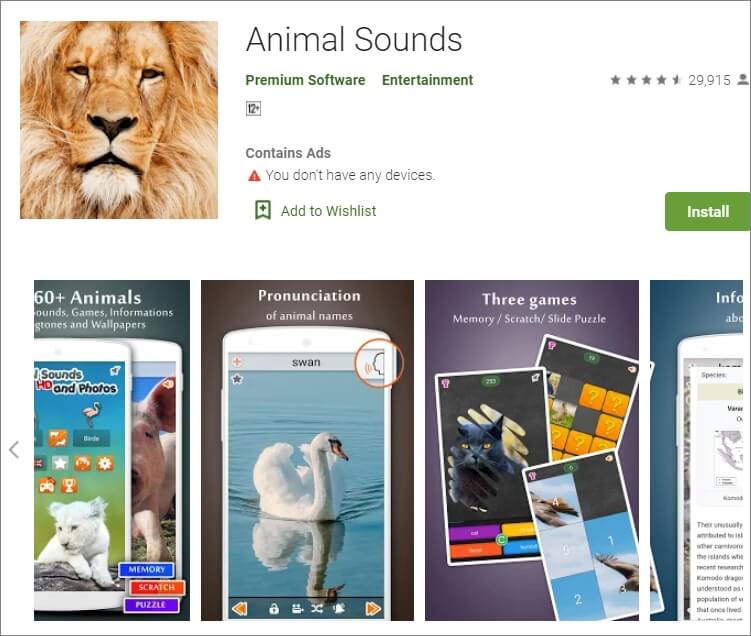
Animal Sounds is a one-stop destination for all animal lovers. The program provides the most detailed information about animals, and also contains hundreds of animal sounds and photographs from all over the globe.
The quality of audios and pictures is remarkably high and clear. The sounds here are categorized under pet animals, mammals, farm animals, bird sounds, wild animals, reptiles and amphibians.
The application also provides the facility of customized ringtones and wallpapers to its users.
5. Sleep Sounds
Compatible with Android 4.4 or later
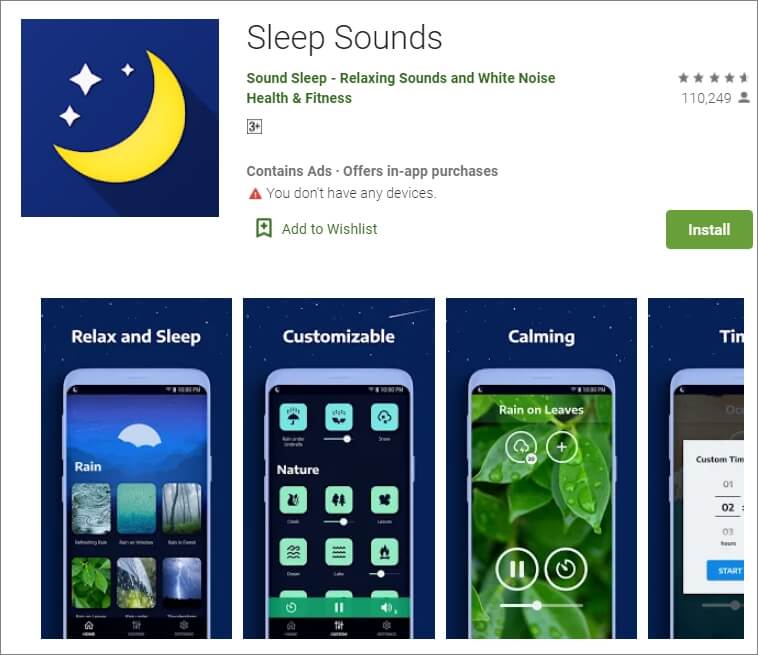
Sleep Sounds is one of the top trending apps nowadays owing to the increasing problems of insomnia and irregular sleep patterns among people. It is very helpful for an uninterrupted quality sleep.
The calm and soft music gradually tranquilizes the mind and the user eases into a good sleep. Its interface is user-friendly with beautiful images in the background.
The sounds here are categorized under rain, nature, relax, transport, noise, and white noise classes. This app also works without an Internet connection.
6.Calm
Compatible with Android and iOS 10.0 and watchOS 6.0 or later
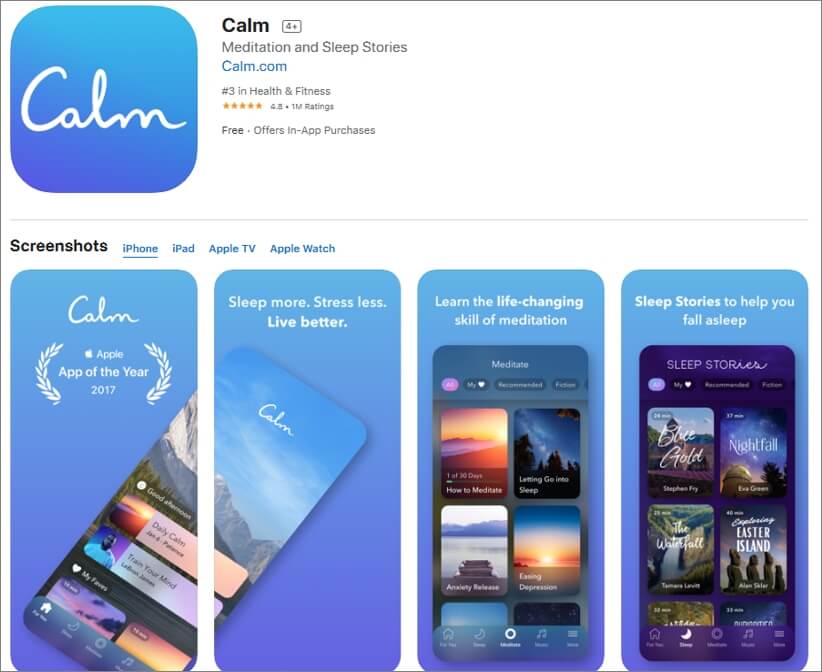
Calm is best suitable for the people who practice meditation on a daily basis. It is available for free and can be used by the beginners as well as experienced users.
The main features include guided meditation programs, breathing sessions, adult bed-time stories, masterclasses by the international coaches, etc.
Here, one can choose a personalized guide for meditation from several topics such as relationships, self-esteem, breaking habits, forgiveness, mindfulness, etc. Users can even track their daily progress on the basis of time spent by them on the app.
7. Ambience – Nature sounds: sleep and meditation
Compatible with Android 4.2 and up .
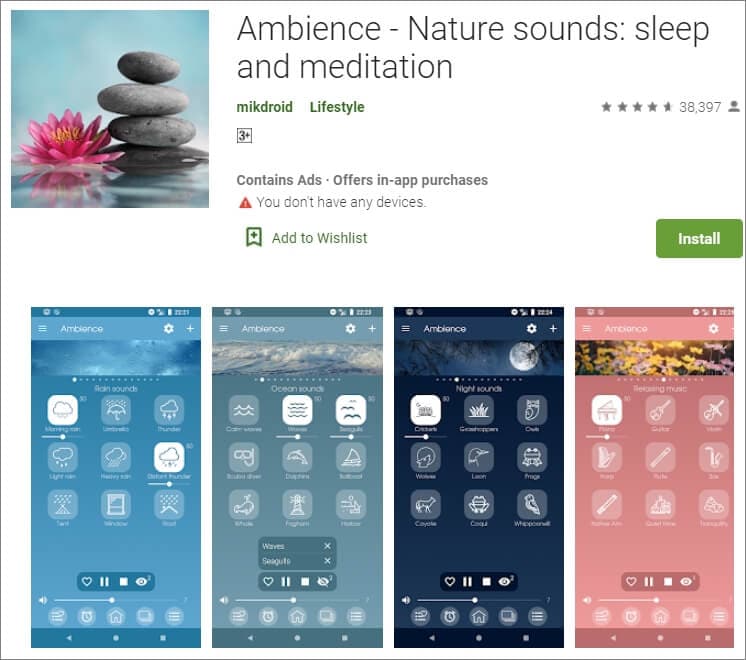
Ambience is another one of the most popular apps for nature sounds providing peace and serenity to its users through relaxing and soothing tones.
It has a very simple and clean user interface which makes it a highly demanding program. The main features include the facility of mixing maximum 10 sounds at the same time. Along with various preset mixtures of audios that are available here, users can also save their customized combinations for future use.
8. Naturespace: Sleep Relax Focus
Compatible with Android 4.0 or up and iOS 9.0 or later
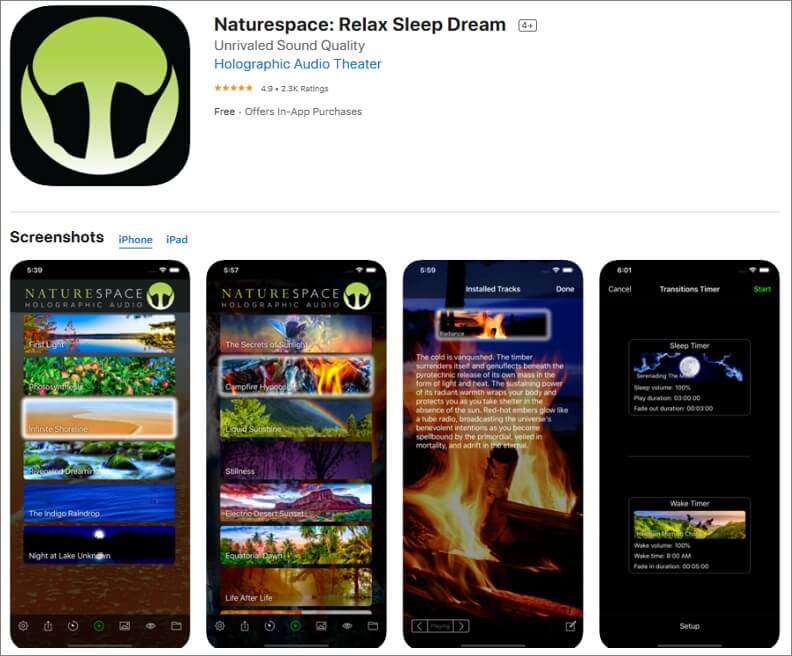
Naturespace is a unique app containing real time 3D recordings of natural places such as forests, deserts, mountains, etc. The equipment used in the program for recording the sounds are of extremely high quality, and as a result, the listening experience is out of this world.
The clarity of the sound surpasses almost every other application available in this genre of nature sound apps. It also provides the facility of sleep and wake timer to its users. The simple user interface along with earbud optimisation facility makes the software highly efficient and popular among people.
9. SimplyNoise – Free White Noise
Compatible with iOS 8.0 or later and Android
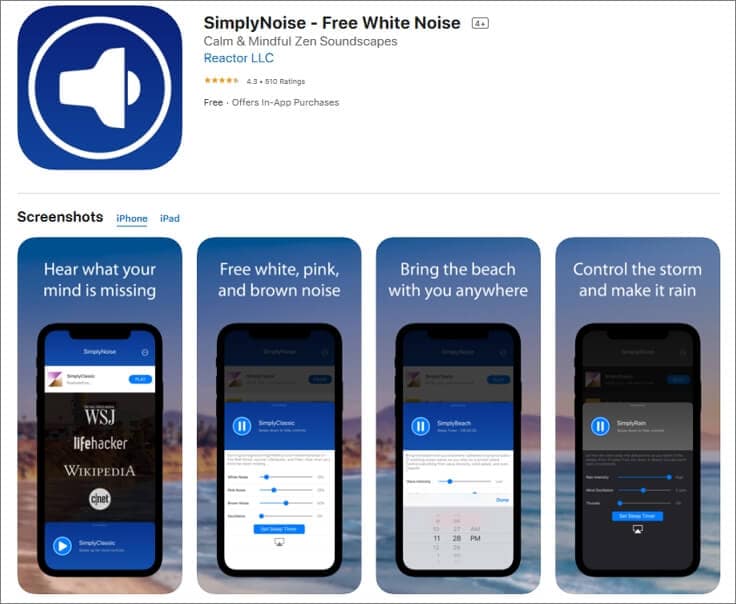
Simply Noise is one of the most basic apps for nature sounds as it provides only one acoustic without any background noises. As there are no such complexities involved, it can also be used by people who are not tech-savvy.
The categorization of sounds is done here as white noise, pink noise, and brown noise. Users can select any of these according to their requirement.
This app is best suitable for people who are unable to concentrate on a particular thing, or suffer from sleeping disorder. Sleep-timer option is also available here.
10. aSleep
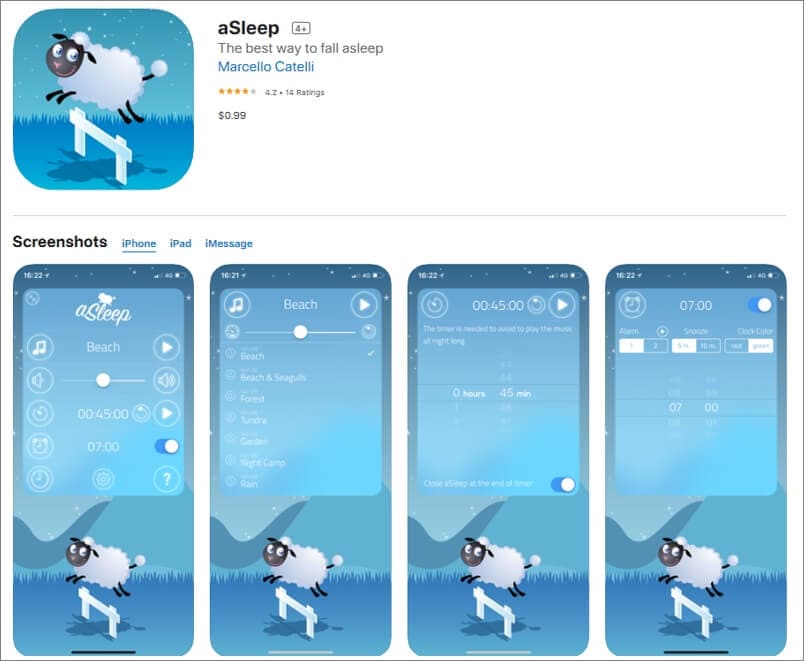
Available for iOS devices like iPhone and iPad, aSleep offers around 64 realistic stereo nature sounds to help you relax your mind and fall asleep almost instantaneously. With the built-in Timer feature, the music can be programmed to stop automatically after a certain amount of time to save your device’s battery.
Furthermore, the also works as an alarm clock that wakes you up with nature sounds at your predefined hour. The application is also good for kids as it can be used to play lullabies to help them get a tight sleep at night. And the program does all this without collecting any data from your iDevice.
What Is the Best Rain Sound App?
Among various rain sound applications available online, Rainy Mood is the most popular one that enjoys high star rating. When it comes to rain sounds, there is no match to it. It mainly includes 4 rain scenes namely Classic, Ocean, Countryside and Cafe. These genres can be customized according to different tastes and preferences.
What Are the Different Sounds of Nature?
The nature is made up of 5 basic elements which include Air, Water, Fire, Earth and Space. These components constitute various natural acoustics. Some examples are music of the rain, thunderstorm or a waterfall, wind blows, sounds of leaves and water streams, chirping of birds or grasshoppers, stridulation of insects like crickets, etc. All these sounds are beautifully incorporated in nature sound effects app.
In case that you want to add some nature sound to your video clip, you can try Wondershare Filmora, which features an audio library containing different nature sound effects as well. Download the free trial version of Filmora and have a try.


Besides adding sound to video, you can also add some elemental 2D visual effects to videos to make it cooler.
Benjamin Arango
Benjamin Arango is a writer and a lover of all things video.
Follow @Benjamin Arango
Benjamin Arango
Apr 26, 2024• Proven solutions
In today’s challenging times, when stress and anxiety has become inevitable for a majority of population, there is a constant search for solutions that will enable people to live a peaceful and pleasant life. Here, the technology comes to their rescue with nature sound effects app.
These applications provide multiple sounds related to the Nature. The users just need to download any of these programs, and select the desired tone according to their choice. Such mobile software also offer numerous relaxing audios that assist in achieving a deeper level of concentration during the meditation.
10 Best Nature Sounds Apps
1. YouTube
YouTube is also one of the important apps for nature sounds where one can get almost any kind of relaxing sounds related to the Nature.
Binaural beats videos, where two different frequencies of sounds are combined to create a new frequency tone are getting highly popular among people. These are believed to help in lowering stress, anxiety and depression and increase concentration, attention, and efficiency of an individual.
It can also be helpful in attaining mental peace and serenity. The app even contains peaceful meditation sounds that ease the ability to focus and remain relaxed during the whole process. It is highly a user-friendly app and is absolutely free to download on the Android Smartphones.
2. Atmosphere: Relaxing Sounds
Compatible with Android 5.0 or up , and iOS 10.0 or later
Atmosphere is one of the best apps for nature sounds. It is custom-made to help people relieve stress and relax their mind.
The key feature of this application is that it allows users to import their personalized audios and mix them with various default acoustics available within the app itself.
The soothing sounds available here are divided into 8 different environments such as Beach, City, Park, Countryside, Home, Underwater, Forest and Oriental. Users can also mix and match the sounds between environments to produce a tailored theme.
3. Rainy Mood
Compatible with both iOS and Android OS 5.0 and up
Rainy Mood provides the most genuine rain, thunderstorm, and lightening sounds available online.
It not only relieves tension and anxiety but also helps users suffering from insomnia.
This app even contains natural white noise facility that helps in getting rid of any unwanted sounds around us.
The various rain sounds are available here in different environments such as heavy rain, tropical rain, umbrella, rain on tent, rain on porch etc. The best thing about this app is that it can work in offline mode, i.e. without any Internet connection. This eventually results in less power consumption.
4. Animal Sounds
Compatible with Android 4.1 and up
Animal Sounds is a one-stop destination for all animal lovers. The program provides the most detailed information about animals, and also contains hundreds of animal sounds and photographs from all over the globe.
The quality of audios and pictures is remarkably high and clear. The sounds here are categorized under pet animals, mammals, farm animals, bird sounds, wild animals, reptiles and amphibians.
The application also provides the facility of customized ringtones and wallpapers to its users.
5. Sleep Sounds
Compatible with Android 4.4 or later
Sleep Sounds is one of the top trending apps nowadays owing to the increasing problems of insomnia and irregular sleep patterns among people. It is very helpful for an uninterrupted quality sleep.
The calm and soft music gradually tranquilizes the mind and the user eases into a good sleep. Its interface is user-friendly with beautiful images in the background.
The sounds here are categorized under rain, nature, relax, transport, noise, and white noise classes. This app also works without an Internet connection.
6.Calm
Compatible with Android and iOS 10.0 and watchOS 6.0 or later
Calm is best suitable for the people who practice meditation on a daily basis. It is available for free and can be used by the beginners as well as experienced users.
The main features include guided meditation programs, breathing sessions, adult bed-time stories, masterclasses by the international coaches, etc.
Here, one can choose a personalized guide for meditation from several topics such as relationships, self-esteem, breaking habits, forgiveness, mindfulness, etc. Users can even track their daily progress on the basis of time spent by them on the app.
7. Ambience – Nature sounds: sleep and meditation
Compatible with Android 4.2 and up .
Ambience is another one of the most popular apps for nature sounds providing peace and serenity to its users through relaxing and soothing tones.
It has a very simple and clean user interface which makes it a highly demanding program. The main features include the facility of mixing maximum 10 sounds at the same time. Along with various preset mixtures of audios that are available here, users can also save their customized combinations for future use.
8. Naturespace: Sleep Relax Focus
Compatible with Android 4.0 or up and iOS 9.0 or later
Naturespace is a unique app containing real time 3D recordings of natural places such as forests, deserts, mountains, etc. The equipment used in the program for recording the sounds are of extremely high quality, and as a result, the listening experience is out of this world.
The clarity of the sound surpasses almost every other application available in this genre of nature sound apps. It also provides the facility of sleep and wake timer to its users. The simple user interface along with earbud optimisation facility makes the software highly efficient and popular among people.
9. SimplyNoise – Free White Noise
Compatible with iOS 8.0 or later and Android
Simply Noise is one of the most basic apps for nature sounds as it provides only one acoustic without any background noises. As there are no such complexities involved, it can also be used by people who are not tech-savvy.
The categorization of sounds is done here as white noise, pink noise, and brown noise. Users can select any of these according to their requirement.
This app is best suitable for people who are unable to concentrate on a particular thing, or suffer from sleeping disorder. Sleep-timer option is also available here.
10. aSleep
Available for iOS devices like iPhone and iPad, aSleep offers around 64 realistic stereo nature sounds to help you relax your mind and fall asleep almost instantaneously. With the built-in Timer feature, the music can be programmed to stop automatically after a certain amount of time to save your device’s battery.
Furthermore, the also works as an alarm clock that wakes you up with nature sounds at your predefined hour. The application is also good for kids as it can be used to play lullabies to help them get a tight sleep at night. And the program does all this without collecting any data from your iDevice.
What Is the Best Rain Sound App?
Among various rain sound applications available online, Rainy Mood is the most popular one that enjoys high star rating. When it comes to rain sounds, there is no match to it. It mainly includes 4 rain scenes namely Classic, Ocean, Countryside and Cafe. These genres can be customized according to different tastes and preferences.
What Are the Different Sounds of Nature?
The nature is made up of 5 basic elements which include Air, Water, Fire, Earth and Space. These components constitute various natural acoustics. Some examples are music of the rain, thunderstorm or a waterfall, wind blows, sounds of leaves and water streams, chirping of birds or grasshoppers, stridulation of insects like crickets, etc. All these sounds are beautifully incorporated in nature sound effects app.
In case that you want to add some nature sound to your video clip, you can try Wondershare Filmora, which features an audio library containing different nature sound effects as well. Download the free trial version of Filmora and have a try.
Besides adding sound to video, you can also add some elemental 2D visual effects to videos to make it cooler.
Benjamin Arango
Benjamin Arango is a writer and a lover of all things video.
Follow @Benjamin Arango
“Unlocking the Full Potential of Sound with Adobe Audition Features, Tips & Techniques”
What can be more useful than audio editing on a single platform? There is software that will solve this problem under the name of ‘Adobe Audition.’ This Adobe audio editor has got all the facilities that you might need while editing audio. The audio might be edited for professional purposes or random fun sessions.
Do you want to know more about this particular Adobe voice editor? Continue reading this article to enhance your knowledge of this specific editor.
In this article
01 What Is Adobe Audio Editor?
02 Key Features of Adobe Auditionos
03 Pros and Cons of Adobe Audio Editor-Adobe Audition
04 How Do You Edit Audio in Adobe Audition?
Part 1. What Is Adobe Audio Editor?
Adobe developed ‘Audition ,’ an Adobe audio editor that is a powerful platform that you can use for making significant changes in audio files. Audition is an editor for mastering audio editing for different purposes. You can use this Adobe voice editor to control the audio you want to edit, and it can remove the background noises.
This Adobe audio editor has an intuitive interface that attracts users. It has a straightforward way of editing that helps beginner-level users a lot. You can edit single track and also multi-tracks and use tons of plug-ins as they are supported by this Adobe voice editor.

Part 2. Key Features of Adobe Audition
This Adobe audio editor is a very famous editor among both beginners and professionals. It is loaded with amazing features and editing options. You can completely transform your audio files with Adobe Audition. Let’s share some of the key features of this Adobe voice editor.
· Audio Restoration
The biggest factor that attracts users is the AI Audio Restoration feature of Adobe Audition. This is not just an editor; it can automatically restore your damaged files. Moreover, the sound sampling tool also helps remove sounds like crack, rumble, etc.
· Spectral Analysis
Do you know that this Adobe voice editor offers spectral analysis? With this feature, you can look at the audio but in frequency. In addition to this, you can also select the unwanted part of the audio and easily remove it.
· Essential Sounds
For adding effects on Adobe Audition, this is the best option. Users can easily access this feature and assign a category like SFX, Music, Ambience, and Dialogue. After selecting a category, you get different effects like; In a large Room, From Outside, Podcast Voice, Make Distant, etc.
· Envelopes
What are envelopes in this Adobe audio editor? Each track has lines running through them in Adobe Audition. With these, you can control the volume the ability of the pan. Moreover, you can also have control over the EQ envelope.
Part 3. Pros and Cons of Adobe Audio Editor-Adobe Audition
There are a lot of audio editors available in the world that you can use. There is always some downside to any product you use, as nothing is perfect. In this section, we are discussing the pros and cons of Adobe Audition, Adobe Audio Editor.
Pros
- Have you used any software that allows the user to have AI recovery? Adobe Audition has given AI recovery access to users with ease.
- You must have used noise reduction in other software. The quality of the noise reduction services provided by this editor is among the top-notch service providers available.
- Have you used 100+ effects for audios? Audition provides 100+ audio effects. They can be edited on individual clips or over the whole track.
- Moreover, background noises like hum crackle can be reduced using AI tools, while sounds like barking dogs or cars passing by can be removed by Spectral Frequency Display.
Con
- Adobe voice editor has inconvenient subscription options. For example, you can buy Adobe Audition for 20.99$ per month; on the other hand; you can have all the Adobe applications for 52.99$ per month.
Part 4. How Do You Edit Audio in Adobe Audition?
This Adobe audio editor is an impressive audio editing software. You get different and unique editing options that are very useful for creating great audio files. If you are looking for steps to edit in Adobe Audition, this section is for you.
1. Adobe Audition Workflow for Beginner
Are you a beginner? Let’s share some basic details about Adobe Audition. You can start by recording the audio, and once done; you can pause it. The waveform view of the recording will appear on the screen. Furthermore, you have a Files option in the top left corner where all the files appear. Just below this, you get the Media Browser tab, where you can browse the media files from your device.
Do you know something about the Effects Rack? This part of the interface allows you to add and save effects for editing. If you record things and make notes, the Markers tab is great for noting things along the timeline. For adding audio effects, the Essential Sound section will be visible on the right side of the screen.
2. Getting Started with Audition Audio Mixing
Mixing files is always fun, but what about mixing files with Adobe voice editor? Let’s share the steps for this mixing purpose.
Step 1: Start by importing all the media files you plan to mix. Next, head to the Multitrack option from the top left corner to mix multiple tracks. Then, you have to drag and drop the audio files on the timeline.

Step 2: Now, listen to the audio files and analyze the volumes. If you need to adjust the volume, select the tracks, and from the sub-menu, hit on ‘Match Clip Loudness.’

Step 3: If you wish to add effects to the tracks, head to the ‘Effects Rack’ section. There you can get options like Amplify, Compression, etc.

Step 4: While mixing files with Adobe, you can also edit and add volume envelope points. Select the audio file, right-click on it, and look for the Remix option for smart mixing.

3. How Can You Apply Effects in Adobe Audition ?
If you have successfully mixed the files, we should discuss audio effects. So, let’s get started.
Step 1: For adding effects, start by heading to the Windows tab. From the submenu, select the Effects Rack option. Or else, you can also access Effect racks from the left screen pane. Remember, you can add effects in both forms, either its Waveform timeline or Multitrack.

Step 2: After this, it’s time to add your favorite effect; for that, hit the side arrow in front of every effect number. A list of offered effects will appear; you can select an effect of your choice.

Step 3: After adding an effect, the effect will be added to the list in the effect rack. Secondly, a window appears on the screen, it’s the Effect Control Box, to customize and adjust the settings of the added effect.

Step 4: This exceptional Adobe audio editor offers different presets that could be used instead of using the default effect. Moreover, you can also add the effect to the preset section after adjusting the Effect Control Box. You can also turn off or turn on individual effects by pressing the button along every option in Effect Rack.

4. How to Do Noise Reduction & Restoration in Adobe Audition
You might have recorded a great podcast or voiceover, but when you check it, you are devastated. This is because there is a lot of background noise, disturbing the file quality. Try Noise Reduction in Adobe voice editor by following these steps.
Step 1: Start by importing the audio file to Adobe Audition. Then, carefully listen and analyze the file. This is because you have to identify the part where you get the extra noise to work on it.

Step 2: After the part has been identified, let’s move further and head to the Effects tab. From the submenu, hover on the Noise Reduction/ Restoration option. Now, select the Capture Noise Print option; this feature finds all the highlighted part information.

Step 3: Next step demands you to open the Effects tab. Once that is done, go to the Noise Reduction / Restoration option. Further, select the Noise Reduction Process.

Step 4: This will open a pop-up window for Noise Reduction Control where you can adjust things. This Adobe voice editor allows you to adjust Noise reduction by using the slider. For detailed editing, open Advanced options like Smoothing, etc.

Final Thoughts
Adobe Audition is a known and stunning Adobe audio editor. For you to learn everything, we discussed Adobe Audition in detail. The article talked about its features, pros, cons, and various ways to edit files with this Adobe voice editor. An equally amazing audio editor is Filmora Audio Editor. An amazing, all-in-one audio editor.
Filmora offers a list of basic as well as advanced editing options. Wondershare Filmora is easy to download and quite simple to use. Users who have multiple uses of the software across the video along the audio should consider using this tool.
Wondershare Filmora
Get started easily with Filmora’s powerful performance, intuitive interface, and countless effects!
Try It Free Try It Free Try It Free Learn More >
02 Key Features of Adobe Auditionos
03 Pros and Cons of Adobe Audio Editor-Adobe Audition
04 How Do You Edit Audio in Adobe Audition?
Part 1. What Is Adobe Audio Editor?
Adobe developed ‘Audition ,’ an Adobe audio editor that is a powerful platform that you can use for making significant changes in audio files. Audition is an editor for mastering audio editing for different purposes. You can use this Adobe voice editor to control the audio you want to edit, and it can remove the background noises.
This Adobe audio editor has an intuitive interface that attracts users. It has a straightforward way of editing that helps beginner-level users a lot. You can edit single track and also multi-tracks and use tons of plug-ins as they are supported by this Adobe voice editor.
Part 2. Key Features of Adobe Audition
This Adobe audio editor is a very famous editor among both beginners and professionals. It is loaded with amazing features and editing options. You can completely transform your audio files with Adobe Audition. Let’s share some of the key features of this Adobe voice editor.
· Audio Restoration
The biggest factor that attracts users is the AI Audio Restoration feature of Adobe Audition. This is not just an editor; it can automatically restore your damaged files. Moreover, the sound sampling tool also helps remove sounds like crack, rumble, etc.
· Spectral Analysis
Do you know that this Adobe voice editor offers spectral analysis? With this feature, you can look at the audio but in frequency. In addition to this, you can also select the unwanted part of the audio and easily remove it.
· Essential Sounds
For adding effects on Adobe Audition, this is the best option. Users can easily access this feature and assign a category like SFX, Music, Ambience, and Dialogue. After selecting a category, you get different effects like; In a large Room, From Outside, Podcast Voice, Make Distant, etc.
· Envelopes
What are envelopes in this Adobe audio editor? Each track has lines running through them in Adobe Audition. With these, you can control the volume the ability of the pan. Moreover, you can also have control over the EQ envelope.
Part 3. Pros and Cons of Adobe Audio Editor-Adobe Audition
There are a lot of audio editors available in the world that you can use. There is always some downside to any product you use, as nothing is perfect. In this section, we are discussing the pros and cons of Adobe Audition, Adobe Audio Editor.
Pros
- Have you used any software that allows the user to have AI recovery? Adobe Audition has given AI recovery access to users with ease.
- You must have used noise reduction in other software. The quality of the noise reduction services provided by this editor is among the top-notch service providers available.
- Have you used 100+ effects for audios? Audition provides 100+ audio effects. They can be edited on individual clips or over the whole track.
- Moreover, background noises like hum crackle can be reduced using AI tools, while sounds like barking dogs or cars passing by can be removed by Spectral Frequency Display.
Con
- Adobe voice editor has inconvenient subscription options. For example, you can buy Adobe Audition for 20.99$ per month; on the other hand; you can have all the Adobe applications for 52.99$ per month.
Part 4. How Do You Edit Audio in Adobe Audition?
This Adobe audio editor is an impressive audio editing software. You get different and unique editing options that are very useful for creating great audio files. If you are looking for steps to edit in Adobe Audition, this section is for you.
1. Adobe Audition Workflow for Beginner
Are you a beginner? Let’s share some basic details about Adobe Audition. You can start by recording the audio, and once done; you can pause it. The waveform view of the recording will appear on the screen. Furthermore, you have a Files option in the top left corner where all the files appear. Just below this, you get the Media Browser tab, where you can browse the media files from your device.
Do you know something about the Effects Rack? This part of the interface allows you to add and save effects for editing. If you record things and make notes, the Markers tab is great for noting things along the timeline. For adding audio effects, the Essential Sound section will be visible on the right side of the screen.
2. Getting Started with Audition Audio Mixing
Mixing files is always fun, but what about mixing files with Adobe voice editor? Let’s share the steps for this mixing purpose.
Step 1: Start by importing all the media files you plan to mix. Next, head to the Multitrack option from the top left corner to mix multiple tracks. Then, you have to drag and drop the audio files on the timeline.
Step 2: Now, listen to the audio files and analyze the volumes. If you need to adjust the volume, select the tracks, and from the sub-menu, hit on ‘Match Clip Loudness.’
Step 3: If you wish to add effects to the tracks, head to the ‘Effects Rack’ section. There you can get options like Amplify, Compression, etc.
Step 4: While mixing files with Adobe, you can also edit and add volume envelope points. Select the audio file, right-click on it, and look for the Remix option for smart mixing.
3. How Can You Apply Effects in Adobe Audition ?
If you have successfully mixed the files, we should discuss audio effects. So, let’s get started.
Step 1: For adding effects, start by heading to the Windows tab. From the submenu, select the Effects Rack option. Or else, you can also access Effect racks from the left screen pane. Remember, you can add effects in both forms, either its Waveform timeline or Multitrack.
Step 2: After this, it’s time to add your favorite effect; for that, hit the side arrow in front of every effect number. A list of offered effects will appear; you can select an effect of your choice.
Step 3: After adding an effect, the effect will be added to the list in the effect rack. Secondly, a window appears on the screen, it’s the Effect Control Box, to customize and adjust the settings of the added effect.
Step 4: This exceptional Adobe audio editor offers different presets that could be used instead of using the default effect. Moreover, you can also add the effect to the preset section after adjusting the Effect Control Box. You can also turn off or turn on individual effects by pressing the button along every option in Effect Rack.
4. How to Do Noise Reduction & Restoration in Adobe Audition
You might have recorded a great podcast or voiceover, but when you check it, you are devastated. This is because there is a lot of background noise, disturbing the file quality. Try Noise Reduction in Adobe voice editor by following these steps.
Step 1: Start by importing the audio file to Adobe Audition. Then, carefully listen and analyze the file. This is because you have to identify the part where you get the extra noise to work on it.
Step 2: After the part has been identified, let’s move further and head to the Effects tab. From the submenu, hover on the Noise Reduction/ Restoration option. Now, select the Capture Noise Print option; this feature finds all the highlighted part information.
Step 3: Next step demands you to open the Effects tab. Once that is done, go to the Noise Reduction / Restoration option. Further, select the Noise Reduction Process.
Step 4: This will open a pop-up window for Noise Reduction Control where you can adjust things. This Adobe voice editor allows you to adjust Noise reduction by using the slider. For detailed editing, open Advanced options like Smoothing, etc.
Final Thoughts
Adobe Audition is a known and stunning Adobe audio editor. For you to learn everything, we discussed Adobe Audition in detail. The article talked about its features, pros, cons, and various ways to edit files with this Adobe voice editor. An equally amazing audio editor is Filmora Audio Editor. An amazing, all-in-one audio editor.
Filmora offers a list of basic as well as advanced editing options. Wondershare Filmora is easy to download and quite simple to use. Users who have multiple uses of the software across the video along the audio should consider using this tool.
Wondershare Filmora
Get started easily with Filmora’s powerful performance, intuitive interface, and countless effects!
Try It Free Try It Free Try It Free Learn More >
Also read:
- New MP3 Conversion Made Simple 3 Effective Techniques for Podcast Files
- Unveiling Omegle Understanding Online Chat Rooms and Their Security Implications for 2024
- New In 2024, Mastering Mix A Comprehensive Look at Top Audio Editing Tools
- New Omegle Uncovered Delving Into Internet-Based Social Sessions Security Landscape
- Precision Timing in Post-Production Matching Video Cuts with Audio Beats Using Premiere Pro
- New Elevate Your Music Creation A Comprehensive Review of the Best 8 Digital Audio Workstations for Professionals for 2024
- New Muting Zoom A Step-by-Step Guide for Quiet Calls on Laptops & Phones
- New In 2024, Captivating Sound Design Essentials Review of Premier Audio Editors, Pros & Cons
- Updated In 2024, The Ultimate Guide to Automatic Volume Reduction Audio Ducking Tips in Adobe Premiere Pro on macOS
- New The Ultimate List of Easy-to-Find Websites Offering Free Ding Noise Sounds
- New In 2024, Charting the Best Affordable Virtual Studio Technology Enhancers for Todays Producers
- Updated Rhythm Ranch A Curated Collection of DJ Sounds
- Refinement Through Removal Advanced Techniques for Enhancing Music Clarity in Adobe Audition
- New Speak in Style, Play to Win Transforming Your Virtual Identity with Morphvox for Streaming Games for 2024
- New 2024 Approved Symphony in Reverse A Guide to State-of-the-Art Audio Reversal Applications
- 2024 Approved Step by Step Tips Remove Background Noise and Mute Clip in Premiere Pro
- Voice Capture Essentials - A Complete Review and Selection Process for Free Software for 2024
- Premium Free Online Auditory Trimmer Tools
- New 2024 Approved Master the Art of Audio Recording Top 8 Software Platforms to Achieve Professional Mixing and Mastering Results
- New 2024 Approved Redefining Star Sounds A Comprehensively Detailed Exploration of Vocal Alteration Technology and Alternative Solutions
- Updated Best Online MP3 Cutter And Joiner
- Updated Siri Voice Changer How to Change Siri Voice on iPhone, iPad or Mac for 2024
- Voice Memos Made Simple Your Comprehensive Guide to High-Quality Audio Recordings on Windows 10 for 2024
- Navigating Through Googles Audio Platform The Podcast Interface Explained
- Exploring Online Resources for Listening to Birds Melodies as MP3s for 2024
- Updated 5 Best Cellphone Tunes of the Year for 2024
- Updated 2024 Approved Innovative Platforms to Connect Visually Videochat Alternatives to Omegle
- Updated 2024 Approved From Chatter to Silence Utilizing iMovie for Superior Sound Filtration
- New Master Background Banishment Tool Content Creators Sharpen Your Visual Narratives for 2024
- Updated In 2024, Sculpt Your Media Techniques for Excising Audio in iPhones & Mac Videos
- Top 10 Animation Video Creators for Mobile Devices
- Remove the Lock Screen Fingerprint Of Your Vivo Y77t
- New 2024 Approved The Cartoon Conversion Blueprint Tips and Tricks
- Recover your photos after Realme C55 has been deleted.
- In 2024, 5 Ways to Transfer Music from Nokia C300 to Other Android Devices Easily | Dr.fone
- In 2024, 4 solution to get rid of pokemon fail to detect location On Oppo Reno 11F 5G | Dr.fone
- Full Guide to Catch 100 IV Pokémon Using a Map On Honor X9b | Dr.fone
- In 2024, How To Open Your Apple iPhone 6 Plus Without a Home Button
- Updated 2024 Approved Download/Install/Register/Uninstall
- Play Store Not Working On Realme 12+ 5G? 8 Solutions Inside | Dr.fone
- In 2024, 3 Effective Methods to Fake GPS location on Android For your Infinix GT 10 Pro | Dr.fone
- How PGSharp Save You from Ban While Spoofing Pokemon Go On Oppo A79 5G? | Dr.fone
- In 2024, How To Transfer Messages From Apple iPhone 6s Plus to other iPhone All iOS Versions | Dr.fone
- How to Change GPS Location on Motorola Moto G24 Easily & Safely | Dr.fone
- Updated 2024 Approved Unleash Your Creativity 10 Top-Notch iMovie Alternatives for Android
- In 2024, Easy Guide to Vivo Y78 5G FRP Bypass With Best Methods
- In 2024, How I Transferred Messages from Lava Yuva 2 Pro to iPhone 12/XS (Max) in Seconds | Dr.fone
- New Techniques You Never Heard of for Learning YouTube AI Marketing
- How to Check Distance and Radius on Google Maps For your Vivo Y100t | Dr.fone
- 9 Solutions to Fix Process System Isnt Responding Error on Motorola Moto G73 5G | Dr.fone
- In 2024, How to Remove a Previously Synced Google Account from Your Xiaomi Redmi Note 12R
- New 2024 Approved Best Software or Website to Convert Video Format
- A Step-by-Step Guide on Using ADB and Fastboot to Remove FRP Lock from your Oppo Find N3 Flip
- updated In 2024, Google Translate Video A Complete Guide To Translate Video With Google
- Updated In 2024, VSDC Video Editor Not on Mac? No Problem! Here Are the Alternatives
- In 2024, How to Reset a Samsung Galaxy Z Fold 5 Phone that is Locked?
- 3uTools Virtual Location Not Working On Samsung Galaxy F15 5G? Fix Now | Dr.fone
- Wondering the Best Alternative to Hola On Oppo Reno 8T? Here Is the Answer | Dr.fone
- Title: Updated Locating High-Pitched Shattering Noises in Audio for 2024
- Author: David
- Created at : 2024-05-05 10:05:27
- Updated at : 2024-05-06 10:05:27
- Link: https://sound-tweaking.techidaily.com/updated-locating-high-pitched-shattering-noises-in-audio-for-2024/
- License: This work is licensed under CC BY-NC-SA 4.0.
