
:max_bytes(150000):strip_icc():format(webp)/how-to-fix-a-critical-process-dies-windows-11-error-952a1ad6325f455aaef36516fb3f7120.jpg)
Updated 2024 Approved The Pathway From Podcast to MP3 Three Effective Steps for Successful Transfer
The Pathway From Podcast to MP3: Three Effective Steps for Successful Transfer
Converting podcasts to MP3 is simpler than many of you think. Whether you’re looking to convert a podcast to MP3 to make it available for playing on your mobile device or share it with a friend, there are various ways to get the job done within a few clicks.
To help you out, we’ve explored different reliable methods that can come in handy to convert podcasts to MP3 without requiring technical knowledge. Keep reading to find out more!
Part 1. Can You Convert Podcast to mp3?
Yes, of course. Podcasts can be converted to MP3 by using either your podcast player, an online audio conversion tool, audio converter software, or iTunes.
Part 2. Why Should You Convert Podcast to mp3?
The main reason why you might need to convert podcasts to MP3 is that MP3 is a widely accepted format. Although some podcast player supports WAV formats, it’s advisable to keep your podcast file in MP3 so you won’t be castigated over your podcast’s audio format by listeners.
Part 3. How To Convert Podcast to mp3?
As mentioned earlier, you can convert podcasts to MP3 directly from a podcast player, using an online converter, or with iTunes.
Regardless of what method you choose to use, we’ve explained the simple steps to help you operate smoothly. Keep reading!
Way 1: Convert podcast to mp3 directly by podcast payers - Spotify
Some podcast apps like Spotify, Google Podcast, Apple Podcast, and many others allow users to directly download their favorite podcast episodes in MP3 format for offline listening. So, if you’re looking to convert podcast to MP3 without using an online or third-party tool, you can easily download it from the podcast app you’re using.
We’ve outlined the steps to convert a podcast to MP3 directly from a podcast player like Spotify podcast player below;
For Android & iOS
Step1 Open the Spotify app on your smartphone and locate the Podcast you want to convert to MP3. Then, tap on See All Episodes.
Step2 Tap the Download icon next to the podcast to save it as MP3 to your device.

Step3 To find the downloaded podcast, go to Your Library > Podcasts. Then, select Downloads to see the podcast files.
For Computer
The process of converting podcasts to MP3 on Spotify via computer is similar to using a mobile device. You just need to do the following;
Step1 Open the Spotify app and login into your account.
Step2 Locate the Podcast that you wish to convert to MP3.
Step3 Move your cursor over the podcast episode you want to convert. Then, click the Download icon next to it to convert it to MP3.

![]()
Note: You must have a premium Spotify account to be able to download podcasts.
Way 2: Convert podcasts to mp3 by online converters or converting software
If the Podcast you’re looking to convert to MP3 is not on a podcast manager, don’t panic. Tech experts have innovated various online tools that can also be used to convert podcasts to MP3s. So, if the Podcast you want to convert to MP3 is saved as a file on your device, you can employ a reliable online converter to execute the operation without compromising the quality of the Podcast.
We’ve curated a list of some online converters you can use below;
1. Convert Podcasts to MP3 with Uniconverter
Wondershare Uniconverter is a video/audio conversion tool that allows the conversion of files in various formats to another format without compromising the file’s quality. The tool is used by professionals to convert podcasts to MP3, as it boasts fast conversion speed and has a clean interface that makes it very easy to use.
Here is how to use Uniconverter to convert podcasts to MP3;
Step1 Install the Uniconverter software on your PC or macOS.
Step2 Click the Convert function from the top-left side. Then, use the Add Fies button at the top left corner of the screen to upload the podcast file that you’re looking to convert.

Step3 Click the drop-down icon next to Output Format. Then, select Audio > MP3 and choose the quality you want the output file to be.

Step4 Click File Location from the bottom left corner and select the path where you want the output file to be saved. Then, click Convert to start converting the podcast to MP3. This will take only a few minutes to complete.

Pros
- Convert unlimited podcasts to MP3 for free.
- Fast conversion speed.
- Supports batch conversion.
- It’s safe.
Cons
- It requires installation.
- You need to upgrade to premium to access all its features.
2. Convert Podcasts to MP3 Online with Media.io
The above method requires you to install a third-party app. But if you prefer using an online podcast converter, then Media.io is one of the best choices that’s worth trying. The tool allows you to quickly convert audio files into various formats safely and securely online.
Follow the following steps to use Media.io to convert your podcast;
Step1 Open theMedia.io Online Audio Converter tool on your browser and click Choose Files to upload the podcast file(s) you’re looking to convert. You can also upload the file from Google Drive, Dropbox, or via YouTube URL.

Step2 Click the drop-down icon next to To and select Audio. Then, choose MP3 as the preferred output format and click Convert to begin the conversion process.

Step3 Once the file has been successfully converted to MP3, click the Download button to save it to your device’s local storage.

Pros
- It’s easy to operate.
- It’s safe and secure.
- No watermark.
- Fast conversion speed.
Cons
- It uploads files slowly.
3. Convert Podcast to MP3 With Online-Convert
If Media.io does not have what it takes to suit your requirements, Online-Convert is another excellent tool that can help you convert audio files from one format to another. Though it’s not 100% free like Media.io.
Here is how to use Online-Convert to convert podcast to MP3 online;
Step1 Open Online Convert online Audio to MP3 converter in your browser and click Choose File to upload the podcast file that you want to convert.

Step2 Click Start to begin the conversion.

Step3 Finally, click Download to save the converted file to your storage.

Pros
- Convert podcasts to MP3 without installing a third-party app.
- It’s easy to use.
- Supports simultaneous conversion of multiple podcast files.
Cons
- You must upgrade your account to be able to convert unlimited podcast files to MP3.
Way 3: Convert podcast to mp3 via iTunes
Besides music streaming, Apple iTunes also allows the conversion of audio files from one format to another. So, if you’ve got iTunes installed on your PC or Mac, you can easily employ it to convert the podcast to MP3. But this might not be a reliable option if you looking to convert many podcast episodes to MP3.
See the steps to convert podcast to MP3 with iTunes;
Step1 Open the iTunes app on your computer and click File from the top-left. Then, select Add File to Library to upload the podcast that you’re looking to convert.

Step2 Once you upload the podcast, click Edit from the top bar. Then, select Preferences.

Step3 Click the General tab and select Import Settings.

- Click the drop-down icon next to Import Using and select MP3 Encoder. Then, click OK.

Step4 Click File from the top-left side once again. Then, select Convert > Create MP3 version.

You’ve successfully converted the podcast to MP3!
Pros & Cons of using iTunes to Convert Podcasts to MP3
Pros
- It’s free.
- It’s easy to use.
- It does not reduce podcast quality.
Cons
- It’s not efficient for converting many podcast files.
Part 4. Tips & Tricks for Podcast to MP3 Conversion
- Convert Multiple Podcast Files Simultaneously: If you have a bunch of podcasts to convert to MP3, it’s advisable to use online tools or software like the ones mentioned in the article above to convert all of them at once. It saves you from unwanted stress and wasting your time.
- Add Podcasts to “My Favorites” or “Save to My Library: Add all podcasts you wish to convert to “My Favorites” or save them to your library so you can easily locate them.
- Ensure to have a stable internet connection when using an online tool: Make sure you have a stable internet connection when using online audio converters to convert podcasts to MP3. It makes the process smooth and straightforward.
Final Words
The above techniques are efficient for converting podcasts to MP3. As you can see, it does not matter whether you’re looking to use a podcast manager app like Spotify, online converter, software, or iTunes, the steps are very easy to employ.
Overall, make sure you read the pros and cons attached to using each method so you can choose the one that suits your requirements.
Way 2: Convert podcasts to mp3 by online converters or converting software
If the Podcast you’re looking to convert to MP3 is not on a podcast manager, don’t panic. Tech experts have innovated various online tools that can also be used to convert podcasts to MP3s. So, if the Podcast you want to convert to MP3 is saved as a file on your device, you can employ a reliable online converter to execute the operation without compromising the quality of the Podcast.
We’ve curated a list of some online converters you can use below;
1. Convert Podcasts to MP3 with Uniconverter
Wondershare Uniconverter is a video/audio conversion tool that allows the conversion of files in various formats to another format without compromising the file’s quality. The tool is used by professionals to convert podcasts to MP3, as it boasts fast conversion speed and has a clean interface that makes it very easy to use.
Here is how to use Uniconverter to convert podcasts to MP3;
Step1 Install the Uniconverter software on your PC or macOS.
Step2 Click the Convert function from the top-left side. Then, use the Add Fies button at the top left corner of the screen to upload the podcast file that you’re looking to convert.
Step3 Click the drop-down icon next to Output Format. Then, select Audio > MP3 and choose the quality you want the output file to be.
Step4 Click File Location from the bottom left corner and select the path where you want the output file to be saved. Then, click Convert to start converting the podcast to MP3. This will take only a few minutes to complete.
Pros
- Convert unlimited podcasts to MP3 for free.
- Fast conversion speed.
- Supports batch conversion.
- It’s safe.
Cons
- It requires installation.
- You need to upgrade to premium to access all its features.
2. Convert Podcasts to MP3 Online with Media.io
The above method requires you to install a third-party app. But if you prefer using an online podcast converter, then Media.io is one of the best choices that’s worth trying. The tool allows you to quickly convert audio files into various formats safely and securely online.
Follow the following steps to use Media.io to convert your podcast;
Step1 Open theMedia.io Online Audio Converter tool on your browser and click Choose Files to upload the podcast file(s) you’re looking to convert. You can also upload the file from Google Drive, Dropbox, or via YouTube URL.
Step2 Click the drop-down icon next to To and select Audio. Then, choose MP3 as the preferred output format and click Convert to begin the conversion process.
Step3 Once the file has been successfully converted to MP3, click the Download button to save it to your device’s local storage.
Pros
- It’s easy to operate.
- It’s safe and secure.
- No watermark.
- Fast conversion speed.
Cons
- It uploads files slowly.
3. Convert Podcast to MP3 With Online-Convert
If Media.io does not have what it takes to suit your requirements, Online-Convert is another excellent tool that can help you convert audio files from one format to another. Though it’s not 100% free like Media.io.
Here is how to use Online-Convert to convert podcast to MP3 online;
Step1 Open Online Convert online Audio to MP3 converter in your browser and click Choose File to upload the podcast file that you want to convert.
Step2 Click Start to begin the conversion.
Step3 Finally, click Download to save the converted file to your storage.
Pros
- Convert podcasts to MP3 without installing a third-party app.
- It’s easy to use.
- Supports simultaneous conversion of multiple podcast files.
Cons
- You must upgrade your account to be able to convert unlimited podcast files to MP3.
Way 3: Convert podcast to mp3 via iTunes
Besides music streaming, Apple iTunes also allows the conversion of audio files from one format to another. So, if you’ve got iTunes installed on your PC or Mac, you can easily employ it to convert the podcast to MP3. But this might not be a reliable option if you looking to convert many podcast episodes to MP3.
See the steps to convert podcast to MP3 with iTunes;
Step1 Open the iTunes app on your computer and click File from the top-left. Then, select Add File to Library to upload the podcast that you’re looking to convert.
Step2 Once you upload the podcast, click Edit from the top bar. Then, select Preferences.
Step3 Click the General tab and select Import Settings.
- Click the drop-down icon next to Import Using and select MP3 Encoder. Then, click OK.
Step4 Click File from the top-left side once again. Then, select Convert > Create MP3 version.
You’ve successfully converted the podcast to MP3!
Pros & Cons of using iTunes to Convert Podcasts to MP3
Pros
- It’s free.
- It’s easy to use.
- It does not reduce podcast quality.
Cons
- It’s not efficient for converting many podcast files.
Part 4. Tips & Tricks for Podcast to MP3 Conversion
- Convert Multiple Podcast Files Simultaneously: If you have a bunch of podcasts to convert to MP3, it’s advisable to use online tools or software like the ones mentioned in the article above to convert all of them at once. It saves you from unwanted stress and wasting your time.
- Add Podcasts to “My Favorites” or “Save to My Library: Add all podcasts you wish to convert to “My Favorites” or save them to your library so you can easily locate them.
- Ensure to have a stable internet connection when using an online tool: Make sure you have a stable internet connection when using online audio converters to convert podcasts to MP3. It makes the process smooth and straightforward.
Final Words
The above techniques are efficient for converting podcasts to MP3. As you can see, it does not matter whether you’re looking to use a podcast manager app like Spotify, online converter, software, or iTunes, the steps are very easy to employ.
Overall, make sure you read the pros and cons attached to using each method so you can choose the one that suits your requirements.
Enhancing Sound Quality: Implementing Audio Ducking Techniques in Adobe Premiere Pro for Mac Users
Tutorial on Audio Ducking in Adobe Premiere Pro on Mac

Benjamin Arango
Oct 26, 2023• Proven solutions
Too many times, while mixing voiceover with the background music in a video, the dialogues don’t seem to be audible. That’s when we follow the process of audio ducking in Premiere Pro that would automatically lower the volume of the background music whenever there is a dialogue.
The best thing about Premiere Pro audio ducking is that it is an automatic process and we don’t need to put a lot of effort. To make your job easier, I’m going to let you know how to use the Adobe Premiere Pro audio ducking feature in a step by step manner in this guide.
Part 1: How to Use Audio Ducking to Balance Music and Voiceover in Adobe Premiere Pro on Mac?
If you have been using Adobe Premiere Pro on Mac, then you would already be familiar with the wide range of editing features that it has. One of them is the Premiere Pro audio ducking option that comes inbuilt in the application. Using it, you can automatically lower the volume of the background music and amplify your dialogues.
To perform auto-ducking in Premiere Pro, we first need to define each audio track and then use the ducking feature. Here’s how you can also perform audio ducking in Premiere Pro like a pro.
Step 1: Define the Audio Types
Since Adobe Premiere Pro can’t automatically detect the type of sounds, you need to do it manually. To do audio ducking in Premiere Pro, you can first import your video clip and the voiceover to the application, and drag them to the working timeline.
Now, you can first select the voiceover file that you want to amplify, and from the sidebar on the right, click on “Dialogue” as the type of the audio file.
Once you mark the audio type, you will get different options. Here, go to the “Loudness” option and click on the “Auto Match” button.
Afterward, you can do the same for your background audio file. Select the file and choose its audio type as “Music”. You can also set its loudness to “Auto Match” if you want to.
Step 2: Perform Auto Ducking in Premiere Pro
Now when you have set the audio types, you can just find the Ducking option on the sidebar and turn it on. Here, you can first click on the dialogue icon from the top and get the needed options. You can adjust its sensitivity and set a level or improve or reduce its quality.
Apart from the dialogue icon, you can also click on the Music icon and do the same. For instance, you can reduce the quality of the background music and increase the level of the dialogue track.
Step 3: Make the Final Changes
Great! You can now preview the changes you have made and check the audio ducking results in Premiere Pro. If you want to finalize things, then you can perform keyframing and manually adjust the volume.
Furthermore, you can also perform an instant hard ducking in Premiere Pro. For this, just choose the track, go to the side panel, and select Preset > Music > Hard Vocal Ducking. While it would get instant results in Adobe Premiere audio ducking, the results might not be so effective.
Part 2: Wondershare Filmora : An Easier Way to Auto Duck Your Audios on Mac
As you can see, the Premiere Pro audio ducking feature can get a bit complicated if you are a beginner. Therefore, if you are looking for a simpler and more effective automatic ducking solution, then use Wondershare Filmora. This intuitive and diverse video/audio editing tool has an automatic audio ducking option that would make your job a whole lot easier.


To learn how to perform automatic audio ducking in your videos on Mac via Wondershare Filmora, one can follow these steps:
Step 1: Load the Video or Audio Files on Filmora
Firstly, you can just launch Wondershare Filmora on your Mac and import your videos/audios. You can drag and drop the files or just go to its Import Menu option to browse the files. Afterward, you can drag the files to the timeline at the bottom to work on them.
On the native interface of Filmora, you can also directly record voiceovers. Just click on the voiceover icon (below the preview window) and start recording any dialogue.
Not just that, you can also find a wide range of royalty-free music on Filmora that you can readily use in your projects without any copyright issues.
Step 2: Perform Automatic Audio Ducking on Filmora
Great! Now you can see your video and the audio track on the timeline of Filmora. At first, you need to select the voiceover (or any other track) that you want to amplify.
Once the desired audio track is selected, right-click it, and choose the “Adjust Audio” option.
As the dedicated Audio Editor will open, just go to the “Ducking” option at the bottom and turn on the “Lower the volume of other clips” feature. You can further select the level to lower the volume of other background clips in the video here.
Step 3: Save and Export Your Video
That’s it! After making the changes, just click on the “OK” button and Filmora would automatically adjust the volume of other clips. You can further make the needed changes in the video and click on the “Export” icon. This will let you save the project in the desired format and resolution on your computer.
Who knew it would be so easy to do auto-ducking in Premiere Pro, right? Though, if you are looking for even a simpler alternative to Adobe Premiere audio ducking, then consider using Wondershare Filmora. A user-friendly and resourceful video editor, it offers a wide range of features and other inbuilt tools that would meet every post-production requirement of yours in one place.
Benjamin Arango
Benjamin Arango is a writer and a lover of all things video.
Follow @Benjamin Arango
Benjamin Arango
Oct 26, 2023• Proven solutions
Too many times, while mixing voiceover with the background music in a video, the dialogues don’t seem to be audible. That’s when we follow the process of audio ducking in Premiere Pro that would automatically lower the volume of the background music whenever there is a dialogue.
The best thing about Premiere Pro audio ducking is that it is an automatic process and we don’t need to put a lot of effort. To make your job easier, I’m going to let you know how to use the Adobe Premiere Pro audio ducking feature in a step by step manner in this guide.
Part 1: How to Use Audio Ducking to Balance Music and Voiceover in Adobe Premiere Pro on Mac?
If you have been using Adobe Premiere Pro on Mac, then you would already be familiar with the wide range of editing features that it has. One of them is the Premiere Pro audio ducking option that comes inbuilt in the application. Using it, you can automatically lower the volume of the background music and amplify your dialogues.
To perform auto-ducking in Premiere Pro, we first need to define each audio track and then use the ducking feature. Here’s how you can also perform audio ducking in Premiere Pro like a pro.
Step 1: Define the Audio Types
Since Adobe Premiere Pro can’t automatically detect the type of sounds, you need to do it manually. To do audio ducking in Premiere Pro, you can first import your video clip and the voiceover to the application, and drag them to the working timeline.
Now, you can first select the voiceover file that you want to amplify, and from the sidebar on the right, click on “Dialogue” as the type of the audio file.
Once you mark the audio type, you will get different options. Here, go to the “Loudness” option and click on the “Auto Match” button.
Afterward, you can do the same for your background audio file. Select the file and choose its audio type as “Music”. You can also set its loudness to “Auto Match” if you want to.
Step 2: Perform Auto Ducking in Premiere Pro
Now when you have set the audio types, you can just find the Ducking option on the sidebar and turn it on. Here, you can first click on the dialogue icon from the top and get the needed options. You can adjust its sensitivity and set a level or improve or reduce its quality.
Apart from the dialogue icon, you can also click on the Music icon and do the same. For instance, you can reduce the quality of the background music and increase the level of the dialogue track.
Step 3: Make the Final Changes
Great! You can now preview the changes you have made and check the audio ducking results in Premiere Pro. If you want to finalize things, then you can perform keyframing and manually adjust the volume.
Furthermore, you can also perform an instant hard ducking in Premiere Pro. For this, just choose the track, go to the side panel, and select Preset > Music > Hard Vocal Ducking. While it would get instant results in Adobe Premiere audio ducking, the results might not be so effective.
Part 2: Wondershare Filmora : An Easier Way to Auto Duck Your Audios on Mac
As you can see, the Premiere Pro audio ducking feature can get a bit complicated if you are a beginner. Therefore, if you are looking for a simpler and more effective automatic ducking solution, then use Wondershare Filmora. This intuitive and diverse video/audio editing tool has an automatic audio ducking option that would make your job a whole lot easier.
To learn how to perform automatic audio ducking in your videos on Mac via Wondershare Filmora, one can follow these steps:
Step 1: Load the Video or Audio Files on Filmora
Firstly, you can just launch Wondershare Filmora on your Mac and import your videos/audios. You can drag and drop the files or just go to its Import Menu option to browse the files. Afterward, you can drag the files to the timeline at the bottom to work on them.
On the native interface of Filmora, you can also directly record voiceovers. Just click on the voiceover icon (below the preview window) and start recording any dialogue.
Not just that, you can also find a wide range of royalty-free music on Filmora that you can readily use in your projects without any copyright issues.
Step 2: Perform Automatic Audio Ducking on Filmora
Great! Now you can see your video and the audio track on the timeline of Filmora. At first, you need to select the voiceover (or any other track) that you want to amplify.
Once the desired audio track is selected, right-click it, and choose the “Adjust Audio” option.
As the dedicated Audio Editor will open, just go to the “Ducking” option at the bottom and turn on the “Lower the volume of other clips” feature. You can further select the level to lower the volume of other background clips in the video here.
Step 3: Save and Export Your Video
That’s it! After making the changes, just click on the “OK” button and Filmora would automatically adjust the volume of other clips. You can further make the needed changes in the video and click on the “Export” icon. This will let you save the project in the desired format and resolution on your computer.
Who knew it would be so easy to do auto-ducking in Premiere Pro, right? Though, if you are looking for even a simpler alternative to Adobe Premiere audio ducking, then consider using Wondershare Filmora. A user-friendly and resourceful video editor, it offers a wide range of features and other inbuilt tools that would meet every post-production requirement of yours in one place.
Benjamin Arango
Benjamin Arango is a writer and a lover of all things video.
Follow @Benjamin Arango
Animation Enthusiasts’ Choice: Top 8 Downloaded Sound Effects for Your Projects
8 Best Cartoon Sound Effects You Can Download
Benjamin Arango
Mar 27, 2024• Proven solutions
The sound plays a significant role in the videos. Without the right sound effects, your videos become dull. It doesn’t create an impact to grab the attention of the viewers. Especially when it comes to attracting the attention of kids while they watch cartoons.
Are you working on a cartoon video for kids or some animated action cartoons? Use the cartoon sound effects to add more intensity and emotions to the videos. Every time creating a new sound effect for your cartoon video becomes difficult.
If you are on a strict budget, producing new content becomes almost impossible. In such situations, free cartoon sound effects are the best way to enhance your cartoon videos.
In this article, you will learn eight best cartoon sound effects that you can download and make your videos perfect.
8 Best Cartoon Sound Effects Resources
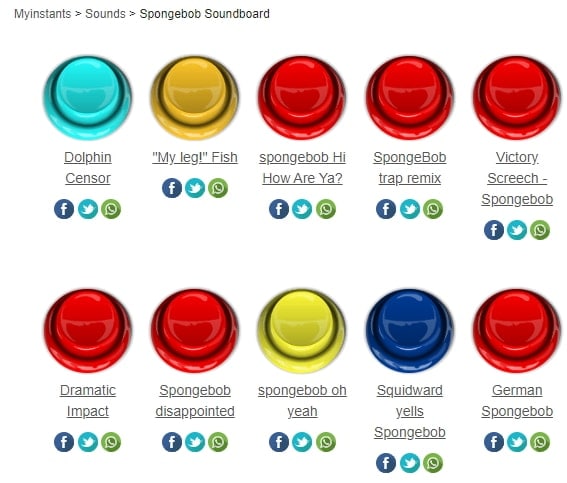
1. Spongebob Sound Effects
MyInstant’s Spongebob soundboard offers a range of cartoon sound effects that can be easily downloaded just by clicking on the Download mp3 sound effect button. You can listen to over 120 classic cartoon sound effects and download it for free. You can also copy the embed link and paste it to your website.
2. Hanna Barbera Sound Effects
From Sounddogs, Hanna Barbera sound effects library, you can find over 2200 cartoon sound effects that are divided into 4 CDs. It has almost all the legendary classic cartoon sound effects from the cartoon shows like Yogi Bear, Huckleberry Hound, the Flintstones, The Jetsons, Quick Draw McGraw, and all the rest of the gang.
You can download the mp3 cartoon sound effects completely free by clicking on the Download ID number mentioned at the right end of each link.
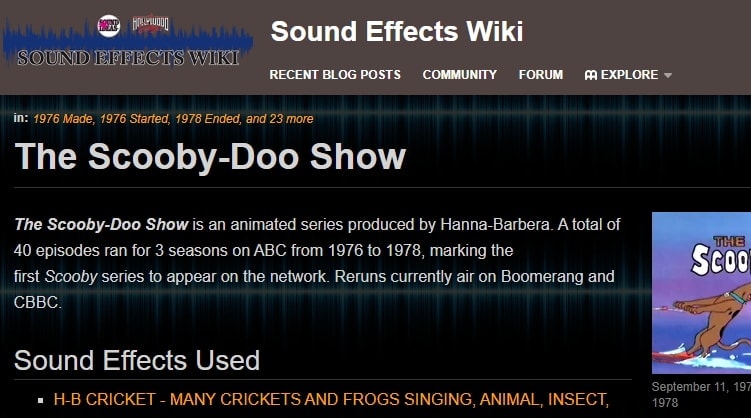
3. Scooby Doo Running Sound
Fandom’s Scooby Doo running sound effects offers all the ideas used in 40 episodes of Scooby Doo throughout the three seasons on ABC. It is over 37000 pages wiki that you can click and browse through the pages to find the right sound effect and download it for free.
4. Tom and Jerry Sound Effects
Pond5 offers 13 Tom and Jerry sound effects that you can listen by scrolling the cursor over the boxes and download the free preview of cartoon sound effects by clicking on Download Preview.
If you want to download the entire cartoon sound effect, you need to register, log in, and pay for it. There are filters like price, collections, duration, etc. to make your selection more precise.
5. Free SFX
In FreeSFX website, you can find a range of comical cartoon sound effects that includes classic effects like descend, boink, impact, pop, musical, running, rip and snap, bounce spring, slide whistle, squelch and splat, horn and loads more.
You need to log in to the website to download free cartoon sound effects.

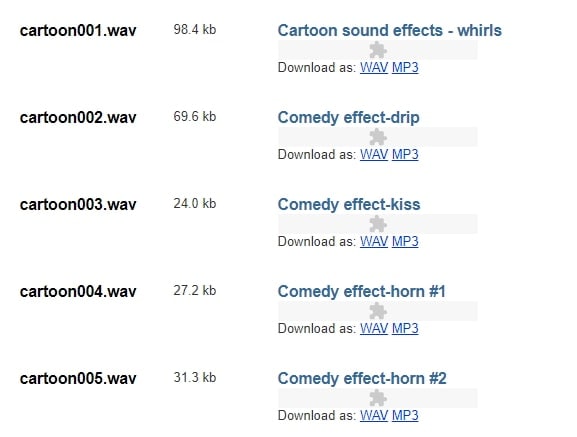
6.GRSites
With over 1980 cartoon sound effects, the GRSites is one of the best free sites for downloading both mp3 and WAV files. You can browse from a range of categories to find the best cartoon sound effects for your videos.
7. Cartoon Running Sound Effect
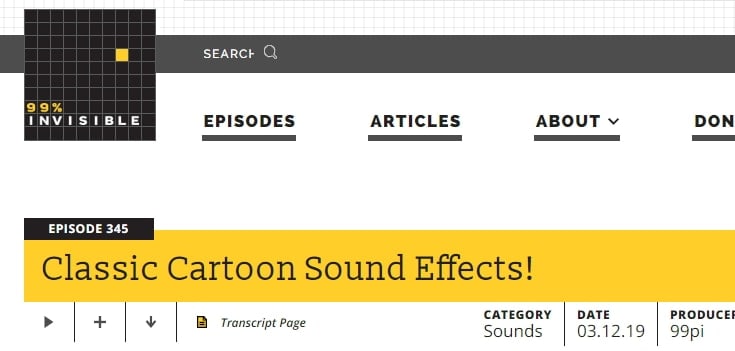
If you are looking for cartoon running sound effect, turn to Episode 345 in 99PercentInvisible. You can download the complete transcript page of around 30 minutes to use it in your video. Use the cartoon running sound effect produced by 99pi to enhance your video.
8. Big Fish Audio
The Big Fish Audio’s cartoon sound FX includes 23 free classic cartoon sound effects. The filters include a range of sound FX types, styles, format, brand, etc.
You can click on the cartoon sound effect and listen to it or add it to your playlist. But, if you wish to download the free cartoon sound effects, you need to register and pay to use the sound effect.

You may also like: How to Extract Audio from Videos on Win/Mac/Phone >>
Conclusion
Make your cartoon videos perfect with the fantastic free cartoon sound effects available for download completely free. With the range of free cartoon sound effects, you don’t need to worry about creating new sounds or expenses. You need to download the free sounds and beautifully enhance it with your creativity. There are several other sites for downloading free cartoon sound effects, but here you can check out some of the trusted ones to use.
Benjamin Arango
Benjamin Arango is a writer and a lover of all things video.
Follow @Benjamin Arango
Benjamin Arango
Mar 27, 2024• Proven solutions
The sound plays a significant role in the videos. Without the right sound effects, your videos become dull. It doesn’t create an impact to grab the attention of the viewers. Especially when it comes to attracting the attention of kids while they watch cartoons.
Are you working on a cartoon video for kids or some animated action cartoons? Use the cartoon sound effects to add more intensity and emotions to the videos. Every time creating a new sound effect for your cartoon video becomes difficult.
If you are on a strict budget, producing new content becomes almost impossible. In such situations, free cartoon sound effects are the best way to enhance your cartoon videos.
In this article, you will learn eight best cartoon sound effects that you can download and make your videos perfect.
8 Best Cartoon Sound Effects Resources
1. Spongebob Sound Effects
MyInstant’s Spongebob soundboard offers a range of cartoon sound effects that can be easily downloaded just by clicking on the Download mp3 sound effect button. You can listen to over 120 classic cartoon sound effects and download it for free. You can also copy the embed link and paste it to your website.
2. Hanna Barbera Sound Effects
From Sounddogs, Hanna Barbera sound effects library, you can find over 2200 cartoon sound effects that are divided into 4 CDs. It has almost all the legendary classic cartoon sound effects from the cartoon shows like Yogi Bear, Huckleberry Hound, the Flintstones, The Jetsons, Quick Draw McGraw, and all the rest of the gang.
You can download the mp3 cartoon sound effects completely free by clicking on the Download ID number mentioned at the right end of each link.
3. Scooby Doo Running Sound
Fandom’s Scooby Doo running sound effects offers all the ideas used in 40 episodes of Scooby Doo throughout the three seasons on ABC. It is over 37000 pages wiki that you can click and browse through the pages to find the right sound effect and download it for free.
4. Tom and Jerry Sound Effects
Pond5 offers 13 Tom and Jerry sound effects that you can listen by scrolling the cursor over the boxes and download the free preview of cartoon sound effects by clicking on Download Preview.
If you want to download the entire cartoon sound effect, you need to register, log in, and pay for it. There are filters like price, collections, duration, etc. to make your selection more precise.
5. Free SFX
In FreeSFX website, you can find a range of comical cartoon sound effects that includes classic effects like descend, boink, impact, pop, musical, running, rip and snap, bounce spring, slide whistle, squelch and splat, horn and loads more.
You need to log in to the website to download free cartoon sound effects.
6.GRSites
With over 1980 cartoon sound effects, the GRSites is one of the best free sites for downloading both mp3 and WAV files. You can browse from a range of categories to find the best cartoon sound effects for your videos.
7. Cartoon Running Sound Effect
If you are looking for cartoon running sound effect, turn to Episode 345 in 99PercentInvisible. You can download the complete transcript page of around 30 minutes to use it in your video. Use the cartoon running sound effect produced by 99pi to enhance your video.
8. Big Fish Audio
The Big Fish Audio’s cartoon sound FX includes 23 free classic cartoon sound effects. The filters include a range of sound FX types, styles, format, brand, etc.
You can click on the cartoon sound effect and listen to it or add it to your playlist. But, if you wish to download the free cartoon sound effects, you need to register and pay to use the sound effect.
You may also like: How to Extract Audio from Videos on Win/Mac/Phone >>
Conclusion
Make your cartoon videos perfect with the fantastic free cartoon sound effects available for download completely free. With the range of free cartoon sound effects, you don’t need to worry about creating new sounds or expenses. You need to download the free sounds and beautifully enhance it with your creativity. There are several other sites for downloading free cartoon sound effects, but here you can check out some of the trusted ones to use.
Benjamin Arango
Benjamin Arango is a writer and a lover of all things video.
Follow @Benjamin Arango
Also read:
- New 2024 Approved The Filmorians Guide to Eloquent Volume Dynamics Using Keyframe Editing on macOS
- New 2024 Approved Sonic Palette An Intensive Look at AVS Editors Features, User Reviews, and Alternate Choices in Audio Editing
- Updated In 2024, How to Add Audio Fade Out Effect
- New In 2024, The Art of Decibel Decline Uncovering Sound Management with Audacity
- Updated The Digital DJ Harnessing Software to Separate Song Beats for 2024
- New From Sight to Sound Modern Methods for Pulling Audio From Visual Media
- Updated How to Make Beats for Your Music Videos?
- Updated Cutting-Edge Siri Speech Replicator Cross-Platform Solution for 2024
- In 2024, Elevate Your Videos Inception with These Top 8 Sound Effects (Updated )
- New In 2024, Audiophiles Manual for Profound Tones Filmora 2023 Edition
- Updated 2024 Approved Perfecting Your Audio Recordings on Samsungs Latest Smartphones (S10/S9)
- New In 2024, 5 Best Backwards Music Videos
- New 2024 Approved Strategies for Eliminating Reverb From Studio-Recorded Sounds
- New In 2024, Mastering the Art of Guitar Production A Compilation of the Best 7 Digital Audio Workstations
- New In 2024, Ultimate Guide to the 5 Premium Car Audio Mixer Programs for Mac
- 2024 Approved Unlocking the Secrets to Finding Your Ideal Mac MP3 Information Editor
- New 2024 Approved Innovative Editing in Final Cut Pro Combining Clear Waveform Visuals with Animated Sound Sequences
- New Magix Movie Editor Secrets Perfecting Audio Fusion in Your Clips
- New Auditory Feast Bird Calls and Songs for 2024
- New The Art of Musical Integration in Video Editing An In-Depth Look at Using Filmora
- The Art of Pristine Audio Techniques for Perfecting Sound Quality in Visual Media
- New The Ultimate Guide to Audacitys Free Audio Post-Production Capabilities, Including Automated Tuning for 2024
- Elevating Your Music Video Game Advanced Editing Techniques
- Updated In 2024, Discovering the 6 Best Call Voice Boosters on Both Android and iPhone Devices
- 2024 Approved Bypassing iPhones In-App Audio Limitation Feature
- In 2024, Critical Picks The 5 Most Accessible Harmonics Adjuster Tools
- New In 2024, Mastering Mix A Comprehensive Look at Top Audio Editing Tools
- Updated 2024 Approved The Art of Soundless Storytelling Removing Audio From Videos with iMovie
- Updated In 2024, Top 8 Dictation Software for Windows, Mac and Online-2023 List
- Updated In 2024, From Silence to Symphony Adding Music to Your Online Videos Effortlessly
- New In 2024, Probe for Silly Sonic Impressions
- New In 2024, Pinnacle Audio Blending Tools for Distinct Online Media Presentations
- New From Views to Leads The Ideal Aspect Ratios for LinkedIn Video Ads for 2024
- Remove Google FRP Lock on Vivo Y28 5G
- How To Reset the Security Questions of Your Apple ID From Your Apple iPhone 7 Plus
- In 2024, Elevate Your Edit 5 Advanced Final Cut Pro Techniques to Try Now
- New 2024 Approved In This Article, We Are Going to Take You Through some of the Best 8K Video Editing Software Products on the Market and Help You Select the App that Can Cater to All of Your Video Editing Needs
- In 2024, 5 Ways To Teach You To Transfer Files from Oppo Reno 10 Pro+ 5G to Other Android Devices Easily | Dr.fone
- Full Guide on Mirroring Your Oppo Reno 8T to Your PC/Mac | Dr.fone
- Updated 2024 Approved The Fastest Way to Resize Your Videos Tips and Tricks
- How to Create Educational Teaching Videos in An Outstanding Way for 2024
- Updated 2024 Approved Premiere on Linux? No Way! Try These 10 Alternatives Instead
- How to Unlock Apple iPhone 7 Passcode without iTunes without Knowing Passcode? | Dr.fone
- In 2024, Simple and Effective Ways to Change Your Country on YouTube App Of your Apple iPhone 12 mini | Dr.fone
- 3 Best Tools to Hard Reset Vivo G2 | Dr.fone
- Title: Updated 2024 Approved The Pathway From Podcast to MP3 Three Effective Steps for Successful Transfer
- Author: David
- Created at : 2024-05-05 10:16:20
- Updated at : 2024-05-06 10:16:20
- Link: https://sound-tweaking.techidaily.com/updated-2024-approved-the-pathway-from-podcast-to-mp3-three-effective-steps-for-successful-transfer/
- License: This work is licensed under CC BY-NC-SA 4.0.
