
:max_bytes(150000):strip_icc():format(webp)/GettyImages-1088144728-3a9f1bd54e994bfaa4cabea82414202e.jpg)
Updated 2024 Approved Perfect Harmony Unveiling the Best 5 Mixers for Mac Enthusiasts
Perfect Harmony: Unveiling the Best 5 Mixers for Mac Enthusiasts
If you’ve ever considered singing, you might look for the ideal audio mixer that allows you to record, edit, and seamlessly mix audio. The suitable audio mixer for Mac enables you to create the best tracks for your audience. Even for professionals, a suitable audio mixer is essential for music producers because it helps them create good music and deliver crisp audio.
Even with quality sounds, you might find that your audio file comes with many traffic noises and unnecessary chatter. The ideal audio mixer will ensure your audio piece stands out. However, we know that finding the ideal audio mixer that’s compatible with the Mac operating system can be challenging. That’s why we’ve done the essential research for you and compiled this impressive list. So, let’s jump straight into the comprehensive list to determine the best audio mixer for you.
Audacity

We’re going to start with a veteran in the audio mixing world. Audacity has been around since 2000 and has continually updated its features to become a quality audio mixer. This explains why it is the best audio editing software out there. Audacity is free, open-source, and works across different platforms. It is also relatively simple to use by professionals and beginners; you don’t need to have any previous audio mixing experience to use this tool.
There are varying activities you can carry out on Audacity. For example, it allows you to record, edit, and add effects to your audio like distortion, reverb, echoes, and auto-tune. With Audacity, you can also digitize recordings from various media files. In addition, many keyboard shortcuts work with Audacity; using these shortcuts allows for a faster and more seamless workflow.
Using this tool, you can visualize the audio in frequencies using the spectrogram mode. It also offers professional-grade plugins to improve the mixing process. If you’d like to improve the sound quality of your file, you can choose to export in 24-bits or 32-bits. Beyond the Mac OS, Audacity also supports Linux and Windows. You should consider Audacity if you want a free editor with many audio mixing functions.
Pros
- It is intuitive and easy to use
- Offers varying plugins for easy mixing
- Keyboard shortcuts improve workflow
- Rich features to enhance overall sound quality
Cons
- Audacity tends to crash on Mac
Adobe Audition

We all know that Adobe only offers excellent software, and you can expect nothing different from Adobe Audition. This is a great audio mixer for editing and polishing your audio, making it into an impeccable sound. It allows you clean, mixes, and fine-tune your sound file by offering a smooth workflow. In addition, Adobe Audition offers a spectral display and a crucial sound panel that helps you restore audio. This tool also helps users achieve a professional-level quality even if you’re a beginner with little to no audio-mixing experience. You can also make audio remixes on this audio mixing software; you can achieve this by rearranging the different tacks to fit various durations.
The many features available on this Mac audio mixer allow you to record and convert audio files into lossless WAV files. If you’re looking to run a radio station, you can do that with Adobe Audition by downloading your audio files to the server after mixing. In addition, you can convert your audio files into MP3 format to use on varying devices if necessary. One of its excellent features is processing and analyzing various audio files.
Adobe Audition also offers users diagnostic tools like DeHummer, DeClipper, diagnostic panel, and audio reduction to determine and fix issues on audio files. It is made for different purposes, as you can always count on this tool to provide you with crisp, quality sounds. In addition, you can visualize the edits on your audio file on this software in real-time.
Pros
- Offers varying mixing and editing features
- Users can import and export audio files in various formats
- It comes with a spectral display for restoring audio files
- Features diagnostic tools for fixing audio file issues
- Interactive and easy-to-use interface
Cons
- Limited free version
WavePad

Another impressive audio mixer with basic and advanced features that you should explore is WavePad. This software is excellent for audio editing, recordings, and music productions. The best part is that it supports the major audio formats and allows users to trim, cut, split, copy, equalize, and amplify audio tracks within a few seconds. WavePad also offers you several options to minimize noise and access advanced tools like TFFT, FFT, and spectral analysis that help you understand video frequencies better.
This audio mixer is excellent for streaming and offers voice-over features. The developers continually update WavePad, and if you have issues, the customer support options on the website allow you to get help immediately. If you like to edit lots of soundtracks and would like to save them as you edit, then you would enjoy the batch processing feature. This feature is ideal for busy producers who want to mix their audio quickly. This versatile tool isn’t just compatible with Mac and works on Chromebook, Windows, Android, and iOS devices.
Pros
- Allows batch processing
- Allows you to amplify and equalize sounds
- It comes with an intuitive user interface
- Excellent customer support options
Cons
- The free version is limited
TwistedWave

Another audio mixer for Mac that allows you to record, mix, master, convert and batch-process your audio is TwistedWave. This tool is an all-in-one solution for everything audio-related. The best part is that it comes with an intuitive interface that’s easy for anyone to use. TwistedWave works with Mac OS alone and is available at a premium price. If you want to master audio with inbuilt effects and make quick, effective edits to audio files, this is the tool for you. In addition, a responsive interface can process large audio files in the background.
Its vast features allow for the seamless mixing and editing of audio files. It features a smart silence detector that detects silences, removes them, and exports the remaining audio as individual files. The batch processor also comes with effects like AU and VST plugins. If you’re uncomfortable with the effects, you can create your effect stacks and then utilize them with just a click. TwistedWave isn’t a basic editor as it has advanced features like pitch shifting, professional time stretching, and multichannel editing. This audio mixing tool also supports up to 32-bit audio and is great if you want a professional and crisp audio output.
Pros
- It easily detects silence points for easy splitting
- Corrects pitch and speeds it up seamlessly
- You can work on present audio tracks while loading large files in the background
- You can create your custom audio stack
- Offers professional-grade plugins
Cons
- No free version
- It can be difficult for beginners to use
Logic Pro

Apple’s Logic Pro is an excellent audio mixer that you can utilize to carry out some professional editing and audio-producing activities. This audio mixer has impressive features like Sampler, Step Sequencer, Quick Sampler, and many more. These features help you build melodic patterns and drum beats. You can also use them to transform various sounds into instruments within a few seconds. So if your goal is to improve your music, Logic Pro makes it relatively easy.
You can also create new music using this tool and, in the process, play different music arrangements on a cell grid and identify the best sounds for you. You can also add the sounds to your timeline before you get started. With Logic Pro, you can add DJ-style effects to your audio file. You can also play any instrument and record clean and high-quality audio to add to your existing file. Logic Pro also allows you to add new music to your track without disturbing its tempo; you can also correct pitch with this tool.
Another tool from Logic Pro is the mountable sound card which allows up to 24-track recording. It also features unique digital effects. Some features it comes with include delay, chorus, ping-pong delay, reverb, and many more. Logic Pro supports several popular audio formats and also allows multi-tracking editing. There’s also a library of royalty-free songs you can explore with this tool.
Pros
- It helps you identify the best sounds
- Users can implement DJ-style effects on audio files
- It offers many impressive features
- Impressive recording features
Cons
- Too complex for beginners
Alternative Option: Wondershare Filmora
Wondershare Filmora is the best software to carry out different audio mixing activating. You can easily edit your audio to ensure a clean and crisp audio output. In addition, this tool offers excellent features like silence detection and auto-beat sync. Beyond this, it offers features like an auto montage maker, which evaluates your audio file and informs you of its best points. It is also useful for adding soundtracks to video files when necessary.
Free Download For Win 7 or later(64-bit)
Free Download For macOS 10.14 or later
Wondershare Filmora allows you efficiently adjust pitch and speed. You can also minimize or increase the volume of your sound file or add sound fading in and out features to your audio file. The best part about this tool is that you can share the mix on social media after mixing and editing audio files. The steps to mix audio files using Wondershare Filmora are easy; check them out below.
Step1Download Wondershare Filmora from the official website and install it on your device following the installation guide.
Step2Launch the audio mixing software and choose ‘create new project’ on the homepage.

Step3Import media files by clicking on ‘import media files’ on the media menu.

Step4Choose the audio file you want to mix and click the ‘import media’ option. Alternatively, you can choose to drag and drop the audio file to the software’s timeline.
Step5Start editing your media file by clicking the ‘audio mixer’ option. It will provide various tools to mix and edit your audio file.

Step6click the master icon to decrease or increase audio volume. Once you’re done, hit the ‘OK’ button.

Step7After mixing, hit the ‘export’ button and choose the location you want to save your edited file. You can also choose to share directly on social media platforms.

Final Thoughts
Audio mixing and editing are sometimes essential to creating an excellent music track. However, finding an audio mixer for Mac can be difficult; we reviewed the 5 best audio mixers for Mac to provide you with options. With this list of best Mac audio mixers, you can transform your audio files into professional quality.
Adobe Audition
We all know that Adobe only offers excellent software, and you can expect nothing different from Adobe Audition. This is a great audio mixer for editing and polishing your audio, making it into an impeccable sound. It allows you clean, mixes, and fine-tune your sound file by offering a smooth workflow. In addition, Adobe Audition offers a spectral display and a crucial sound panel that helps you restore audio. This tool also helps users achieve a professional-level quality even if you’re a beginner with little to no audio-mixing experience. You can also make audio remixes on this audio mixing software; you can achieve this by rearranging the different tacks to fit various durations.
The many features available on this Mac audio mixer allow you to record and convert audio files into lossless WAV files. If you’re looking to run a radio station, you can do that with Adobe Audition by downloading your audio files to the server after mixing. In addition, you can convert your audio files into MP3 format to use on varying devices if necessary. One of its excellent features is processing and analyzing various audio files.
Adobe Audition also offers users diagnostic tools like DeHummer, DeClipper, diagnostic panel, and audio reduction to determine and fix issues on audio files. It is made for different purposes, as you can always count on this tool to provide you with crisp, quality sounds. In addition, you can visualize the edits on your audio file on this software in real-time.
Pros
- Offers varying mixing and editing features
- Users can import and export audio files in various formats
- It comes with a spectral display for restoring audio files
- Features diagnostic tools for fixing audio file issues
- Interactive and easy-to-use interface
Cons
- Limited free version
WavePad
Another impressive audio mixer with basic and advanced features that you should explore is WavePad. This software is excellent for audio editing, recordings, and music productions. The best part is that it supports the major audio formats and allows users to trim, cut, split, copy, equalize, and amplify audio tracks within a few seconds. WavePad also offers you several options to minimize noise and access advanced tools like TFFT, FFT, and spectral analysis that help you understand video frequencies better.
This audio mixer is excellent for streaming and offers voice-over features. The developers continually update WavePad, and if you have issues, the customer support options on the website allow you to get help immediately. If you like to edit lots of soundtracks and would like to save them as you edit, then you would enjoy the batch processing feature. This feature is ideal for busy producers who want to mix their audio quickly. This versatile tool isn’t just compatible with Mac and works on Chromebook, Windows, Android, and iOS devices.
Pros
- Allows batch processing
- Allows you to amplify and equalize sounds
- It comes with an intuitive user interface
- Excellent customer support options
Cons
- The free version is limited
TwistedWave
Another audio mixer for Mac that allows you to record, mix, master, convert and batch-process your audio is TwistedWave. This tool is an all-in-one solution for everything audio-related. The best part is that it comes with an intuitive interface that’s easy for anyone to use. TwistedWave works with Mac OS alone and is available at a premium price. If you want to master audio with inbuilt effects and make quick, effective edits to audio files, this is the tool for you. In addition, a responsive interface can process large audio files in the background.
Its vast features allow for the seamless mixing and editing of audio files. It features a smart silence detector that detects silences, removes them, and exports the remaining audio as individual files. The batch processor also comes with effects like AU and VST plugins. If you’re uncomfortable with the effects, you can create your effect stacks and then utilize them with just a click. TwistedWave isn’t a basic editor as it has advanced features like pitch shifting, professional time stretching, and multichannel editing. This audio mixing tool also supports up to 32-bit audio and is great if you want a professional and crisp audio output.
Pros
- It easily detects silence points for easy splitting
- Corrects pitch and speeds it up seamlessly
- You can work on present audio tracks while loading large files in the background
- You can create your custom audio stack
- Offers professional-grade plugins
Cons
- No free version
- It can be difficult for beginners to use
Logic Pro
Apple’s Logic Pro is an excellent audio mixer that you can utilize to carry out some professional editing and audio-producing activities. This audio mixer has impressive features like Sampler, Step Sequencer, Quick Sampler, and many more. These features help you build melodic patterns and drum beats. You can also use them to transform various sounds into instruments within a few seconds. So if your goal is to improve your music, Logic Pro makes it relatively easy.
You can also create new music using this tool and, in the process, play different music arrangements on a cell grid and identify the best sounds for you. You can also add the sounds to your timeline before you get started. With Logic Pro, you can add DJ-style effects to your audio file. You can also play any instrument and record clean and high-quality audio to add to your existing file. Logic Pro also allows you to add new music to your track without disturbing its tempo; you can also correct pitch with this tool.
Another tool from Logic Pro is the mountable sound card which allows up to 24-track recording. It also features unique digital effects. Some features it comes with include delay, chorus, ping-pong delay, reverb, and many more. Logic Pro supports several popular audio formats and also allows multi-tracking editing. There’s also a library of royalty-free songs you can explore with this tool.
Pros
- It helps you identify the best sounds
- Users can implement DJ-style effects on audio files
- It offers many impressive features
- Impressive recording features
Cons
- Too complex for beginners
Alternative Option: Wondershare Filmora
Wondershare Filmora is the best software to carry out different audio mixing activating. You can easily edit your audio to ensure a clean and crisp audio output. In addition, this tool offers excellent features like silence detection and auto-beat sync. Beyond this, it offers features like an auto montage maker, which evaluates your audio file and informs you of its best points. It is also useful for adding soundtracks to video files when necessary.
Free Download For Win 7 or later(64-bit)
Free Download For macOS 10.14 or later
Wondershare Filmora allows you efficiently adjust pitch and speed. You can also minimize or increase the volume of your sound file or add sound fading in and out features to your audio file. The best part about this tool is that you can share the mix on social media after mixing and editing audio files. The steps to mix audio files using Wondershare Filmora are easy; check them out below.
Step1Download Wondershare Filmora from the official website and install it on your device following the installation guide.
Step2Launch the audio mixing software and choose ‘create new project’ on the homepage.
Step3Import media files by clicking on ‘import media files’ on the media menu.
Step4Choose the audio file you want to mix and click the ‘import media’ option. Alternatively, you can choose to drag and drop the audio file to the software’s timeline.
Step5Start editing your media file by clicking the ‘audio mixer’ option. It will provide various tools to mix and edit your audio file.
Step6click the master icon to decrease or increase audio volume. Once you’re done, hit the ‘OK’ button.
Step7After mixing, hit the ‘export’ button and choose the location you want to save your edited file. You can also choose to share directly on social media platforms.
Final Thoughts
Audio mixing and editing are sometimes essential to creating an excellent music track. However, finding an audio mixer for Mac can be difficult; we reviewed the 5 best audio mixers for Mac to provide you with options. With this list of best Mac audio mixers, you can transform your audio files into professional quality.
Crafting a Complete Visual Experience: Adding Audio Layers to Videos in Premiere Pro
Versatile Video Editor - Wondershare Filmora
An easy yet powerful editor
Numerous effects to choose from
Detailed tutorials provided by the official channel
Look at any of the spot commercials, wedding videos, or even some family candid videos. Adding audio makes them appealing and likable. To catch a potential customer or create an emotional connection with the viewer combination of audio and video is a must. This makes the footage attractive and exceptional.
Read on to know more about the step-by-step approach how to add audio to video in Adobe Premiere Pro.
In this article
01 [How to add audio to video in Premiere Pro](#Part 1)
02 [How to adjust audio in Premiere Pro](#Part 2)
03 [Adding Audio to Video files](#Part 3)
Part 1 How to add audio to video in Premiere Pro
Some essential pointers for all would-be videographers are:
● Before you add audio to video in Premiere Pro, be ready to see your file size increase to a large extent. If you add a background score of 15MB, your total video file size will increase by the same amount of 15MB. The best way to take care of such a problem is to use additional compression techniques to get a suitable file size.
● Most videographers use lots of software tools to add audio to video professionally. One such trending software tool is the Adobe Premiere Pro. Its simple to add audio to video in Premiere Pro, edit your audio and video, and fine-tune the audio volume of each video project.
Let’s learn how.

Step1 Find out the Audio option
Navigate to the Audio workspace, select Audio at the top on the tools bar
Step2 Choose the Workspace
Click Window select Workspace click on Audio
Step3 Check toolbar
Within Audio, click on Choose Window Media Browser to show the Media Browser toolbar.
Step4 Select audio files
Go to your audio file; for Windows OS, right-click or control-click the selected audio file for macOS.
Step5 Import and add
Please select the desired audio file, then click import to add it to your Project.
An important tip is to keep the Ingest box selected if you want to copy your audio file concurrently to your project folder.
Adding audio to your series

Step1 Go to the Project panel
Select Window, click on Project to open the Project panel.
Step2 Select audio file
Click on the audio file you imported to select it.
Step3 Check the waveform
Double click the file to open it in the Source panel to check the sound and waveform.
Step4 Check sounds
Play the audio file if you want to check the audio quality, volume, and overall sound.
Step5 Add audio to the video track
Hold the left click on your mouse to drag the audio file to the series in the Timeline panel. You can add any audio file to the video track listed in the panel window in this step.
Step6 Trim audio file
Select the Trim option to trim your audio file the same way you will edit the video file in the final step.
Part 2 How to adjust audio in Premiere Pro
Now that you have understood how to add audio to video in Adobe Premier Pro. Let’s know how to adjust audio in Premier Pro.

Step1 Activate the series
Press on the spacebar to activate your series in the Program panel (appears in the top right of the panel)
Step2 Stop playback
To stop the playback, press the space bar again.
Step3 Choose starting point of playback
Press down the left mouse button to hold and drag the Blue colored play head to wherever you desire the playback to start.
If you feel the audio track is mild or too harsh compared to the rest of the audio series, change each audio track’s volume separately.
Step1 Select Audio Track Mixer
Click Window selects Audio Track Mixer from the menu.
Step2 Click the series name to see the audio mixer
Click the series name of your audio file to show the audio mixer for your series.
Step3 Choose playback to play the audio
At the bottom of the panel is the Audio Track Mixer. Click on playback to star, pause or play your audio in-ring sequence.
Step4 Click on the slider
When your audio file plays or loops, click on the slider to move up or down. It will increase or reduce the volume of each separate audio track in your audio series.
Step5 Adjust the volume
Use the slider to adjust the overall audio volume
Tips
Always keep the audio projects within the -6 to 3 dB volume range to get the best quality of the audio effect. Any lower you won’t be able to hear the sound, or if it’s higher, the sound will hurt the listeners’ ears.
Professional advice to all beginner-level videographers is that as Premiere Pro is complex so you need more straightforward tools like Filmora for all your video editing work. Filmora is easy to use and much cheaper than Premiere Pro.
You may think now why or how Filmora can be the best as an alternative on how to add audio to video using Premiere Pro. Well! It will help you to transform your video into a piece of art incredibly by offering simple drag and drop options, including an easy-to-use interface and powerful editing tools. You can:
● Edit and create your videos with minimal effort
● Get a Music Library to add comedy, fear, tension, and love to every scene
● Get several royalty-free songs and sound effects
● Create videos with up to 800 stunning effects
● Unleash your creativity with its offered Hollywood effects
● Import and export in almost any type of video format
How to use Filmora to add audio to video
Adding sound to any video file enhances its viewability and the whole experience of watching any video. To do this, you need to add audio to video. The same can be done quickly in Filmora, a 3rd-party video editing software tool now the hot favorite of amateur and professional video editors. Below we describe how to add audio to video in Filmora.
Import Media
To start the process of adding audio to video follow these steps.
Step1 Select the audio, add using the Import option or drag and select
Import selected audio using the Filmora Media Panel and add it to your timeline. You can also choose and drag the audio file from the source folder to the Media Panel. Filmora supports multiple audio file formats to ease adding audio to video. The supported audio files are MP3, M4V, MPA, WAV, WMA.

Step2 Add and make the audio file
Adding the audio file to Filmora Media Panel makes it a media asset and can now be used multiple times in future projects. The original file remains as Filmora doesn’t change the original audio file.
Step3 Copying or deleting an audio file
In Filmora, using the feature of copying or deleting an audio file, you can work on the audio and video from any computer or remote PC.
Part 3 Adding Audio to Video files
Using Filmora, it is easy to sync or add audio to the video, which is separately recorded and stored on your device.
Using Filmora, it is easy to sync or add audio to the video, which is separately recorded and stored on your device.
Step1 Click on Import in the Media Panel
Select the audio and video files to import them into Filmora.
Step2 Click on the video file to add audio
Press the Ctrl key (Windows) or Cmd key (Mac OS) and click on the audio file.
Step3 Add audio to video
Right-click on the files selected and choose the Merge audio & video option to add audio to the video.
Filmora analyzes audio and video files and replaces the existing audio with the newly selected audio file. Once the synchronization process is over, the new merged file will be available in the Media Panel for future processing.
The synchronized file will have the same terminology as the original video file with a difference. It will get an extension Merged to its name.
The original file will not get affected in Filmora. This software tool only references the files to generate a new file. The new file created when you add audio to the video can now be added to the timeline and exported.
Wondershare Filmora
Get started easily with Filmora’s powerful performance, intuitive interface, and countless effects!
Try It Free Try It Free Try It Free Learn More about Filmora>

Conclusion
So, this article listed how to add audio to video in Premiere Pro via a step-by-step guide. The guide lets you know the easy method of adding audio to video in Adobe Premiere Pro to all potential videographers. Thus, you can now start your journey of video edition by putting your best click forward!
Look at any of the spot commercials, wedding videos, or even some family candid videos. Adding audio makes them appealing and likable. To catch a potential customer or create an emotional connection with the viewer combination of audio and video is a must. This makes the footage attractive and exceptional.
Read on to know more about the step-by-step approach how to add audio to video in Adobe Premiere Pro.
In this article
01 [How to add audio to video in Premiere Pro](#Part 1)
02 [How to adjust audio in Premiere Pro](#Part 2)
03 [Adding Audio to Video files](#Part 3)
Part 1 How to add audio to video in Premiere Pro
Some essential pointers for all would-be videographers are:
● Before you add audio to video in Premiere Pro, be ready to see your file size increase to a large extent. If you add a background score of 15MB, your total video file size will increase by the same amount of 15MB. The best way to take care of such a problem is to use additional compression techniques to get a suitable file size.
● Most videographers use lots of software tools to add audio to video professionally. One such trending software tool is the Adobe Premiere Pro. Its simple to add audio to video in Premiere Pro, edit your audio and video, and fine-tune the audio volume of each video project.
Let’s learn how.
Step1 Find out the Audio option
Navigate to the Audio workspace, select Audio at the top on the tools bar
Step2 Choose the Workspace
Click Window select Workspace click on Audio
Step3 Check toolbar
Within Audio, click on Choose Window Media Browser to show the Media Browser toolbar.
Step4 Select audio files
Go to your audio file; for Windows OS, right-click or control-click the selected audio file for macOS.
Step5 Import and add
Please select the desired audio file, then click import to add it to your Project.
An important tip is to keep the Ingest box selected if you want to copy your audio file concurrently to your project folder.
Adding audio to your series
Step1 Go to the Project panel
Select Window, click on Project to open the Project panel.
Step2 Select audio file
Click on the audio file you imported to select it.
Step3 Check the waveform
Double click the file to open it in the Source panel to check the sound and waveform.
Step4 Check sounds
Play the audio file if you want to check the audio quality, volume, and overall sound.
Step5 Add audio to the video track
Hold the left click on your mouse to drag the audio file to the series in the Timeline panel. You can add any audio file to the video track listed in the panel window in this step.
Step6 Trim audio file
Select the Trim option to trim your audio file the same way you will edit the video file in the final step.
Part 2 How to adjust audio in Premiere Pro
Now that you have understood how to add audio to video in Adobe Premier Pro. Let’s know how to adjust audio in Premier Pro.
Step1 Activate the series
Press on the spacebar to activate your series in the Program panel (appears in the top right of the panel)
Step2 Stop playback
To stop the playback, press the space bar again.
Step3 Choose starting point of playback
Press down the left mouse button to hold and drag the Blue colored play head to wherever you desire the playback to start.
If you feel the audio track is mild or too harsh compared to the rest of the audio series, change each audio track’s volume separately.
Step1 Select Audio Track Mixer
Click Window selects Audio Track Mixer from the menu.
Step2 Click the series name to see the audio mixer
Click the series name of your audio file to show the audio mixer for your series.
Step3 Choose playback to play the audio
At the bottom of the panel is the Audio Track Mixer. Click on playback to star, pause or play your audio in-ring sequence.
Step4 Click on the slider
When your audio file plays or loops, click on the slider to move up or down. It will increase or reduce the volume of each separate audio track in your audio series.
Step5 Adjust the volume
Use the slider to adjust the overall audio volume
Tips
Always keep the audio projects within the -6 to 3 dB volume range to get the best quality of the audio effect. Any lower you won’t be able to hear the sound, or if it’s higher, the sound will hurt the listeners’ ears.
Professional advice to all beginner-level videographers is that as Premiere Pro is complex so you need more straightforward tools like Filmora for all your video editing work. Filmora is easy to use and much cheaper than Premiere Pro.
You may think now why or how Filmora can be the best as an alternative on how to add audio to video using Premiere Pro. Well! It will help you to transform your video into a piece of art incredibly by offering simple drag and drop options, including an easy-to-use interface and powerful editing tools. You can:
● Edit and create your videos with minimal effort
● Get a Music Library to add comedy, fear, tension, and love to every scene
● Get several royalty-free songs and sound effects
● Create videos with up to 800 stunning effects
● Unleash your creativity with its offered Hollywood effects
● Import and export in almost any type of video format
How to use Filmora to add audio to video
Adding sound to any video file enhances its viewability and the whole experience of watching any video. To do this, you need to add audio to video. The same can be done quickly in Filmora, a 3rd-party video editing software tool now the hot favorite of amateur and professional video editors. Below we describe how to add audio to video in Filmora.
Import Media
To start the process of adding audio to video follow these steps.
Step1 Select the audio, add using the Import option or drag and select
Import selected audio using the Filmora Media Panel and add it to your timeline. You can also choose and drag the audio file from the source folder to the Media Panel. Filmora supports multiple audio file formats to ease adding audio to video. The supported audio files are MP3, M4V, MPA, WAV, WMA.
Step2 Add and make the audio file
Adding the audio file to Filmora Media Panel makes it a media asset and can now be used multiple times in future projects. The original file remains as Filmora doesn’t change the original audio file.
Step3 Copying or deleting an audio file
In Filmora, using the feature of copying or deleting an audio file, you can work on the audio and video from any computer or remote PC.
Part 3 Adding Audio to Video files
Using Filmora, it is easy to sync or add audio to the video, which is separately recorded and stored on your device.
Using Filmora, it is easy to sync or add audio to the video, which is separately recorded and stored on your device.
Step1 Click on Import in the Media Panel
Select the audio and video files to import them into Filmora.
Step2 Click on the video file to add audio
Press the Ctrl key (Windows) or Cmd key (Mac OS) and click on the audio file.
Step3 Add audio to video
Right-click on the files selected and choose the Merge audio & video option to add audio to the video.
Filmora analyzes audio and video files and replaces the existing audio with the newly selected audio file. Once the synchronization process is over, the new merged file will be available in the Media Panel for future processing.
The synchronized file will have the same terminology as the original video file with a difference. It will get an extension Merged to its name.
The original file will not get affected in Filmora. This software tool only references the files to generate a new file. The new file created when you add audio to the video can now be added to the timeline and exported.
Wondershare Filmora
Get started easily with Filmora’s powerful performance, intuitive interface, and countless effects!
Try It Free Try It Free Try It Free Learn More about Filmora>
Conclusion
So, this article listed how to add audio to video in Premiere Pro via a step-by-step guide. The guide lets you know the easy method of adding audio to video in Adobe Premiere Pro to all potential videographers. Thus, you can now start your journey of video edition by putting your best click forward!
8 Best Cartoon Sound Effects You Can Download
8 Best Cartoon Sound Effects You Can Download

Benjamin Arango
Mar 27, 2024• Proven solutions
The sound plays a significant role in the videos. Without the right sound effects, your videos become dull. It doesn’t create an impact to grab the attention of the viewers. Especially when it comes to attracting the attention of kids while they watch cartoons.
Are you working on a cartoon video for kids or some animated action cartoons? Use the cartoon sound effects to add more intensity and emotions to the videos. Every time creating a new sound effect for your cartoon video becomes difficult.
If you are on a strict budget, producing new content becomes almost impossible. In such situations, free cartoon sound effects are the best way to enhance your cartoon videos.
In this article, you will learn eight best cartoon sound effects that you can download and make your videos perfect.
8 Best Cartoon Sound Effects Resources
1. Spongebob Sound Effects
MyInstant’s Spongebob soundboard offers a range of cartoon sound effects that can be easily downloaded just by clicking on the Download mp3 sound effect button. You can listen to over 120 classic cartoon sound effects and download it for free. You can also copy the embed link and paste it to your website.
2. Hanna Barbera Sound Effects
From Sounddogs, Hanna Barbera sound effects library, you can find over 2200 cartoon sound effects that are divided into 4 CDs. It has almost all the legendary classic cartoon sound effects from the cartoon shows like Yogi Bear, Huckleberry Hound, the Flintstones, The Jetsons, Quick Draw McGraw, and all the rest of the gang.
You can download the mp3 cartoon sound effects completely free by clicking on the Download ID number mentioned at the right end of each link.
3. Scooby Doo Running Sound
Fandom’s Scooby Doo running sound effects offers all the ideas used in 40 episodes of Scooby Doo throughout the three seasons on ABC. It is over 37000 pages wiki that you can click and browse through the pages to find the right sound effect and download it for free.
4. Tom and Jerry Sound Effects
Pond5 offers 13 Tom and Jerry sound effects that you can listen by scrolling the cursor over the boxes and download the free preview of cartoon sound effects by clicking on Download Preview.
If you want to download the entire cartoon sound effect, you need to register, log in, and pay for it. There are filters like price, collections, duration, etc. to make your selection more precise.
5. Free SFX
In FreeSFX website, you can find a range of comical cartoon sound effects that includes classic effects like descend, boink, impact, pop, musical, running, rip and snap, bounce spring, slide whistle, squelch and splat, horn and loads more.
You need to log in to the website to download free cartoon sound effects.

6.GRSites
With over 1980 cartoon sound effects, the GRSites is one of the best free sites for downloading both mp3 and WAV files. You can browse from a range of categories to find the best cartoon sound effects for your videos.
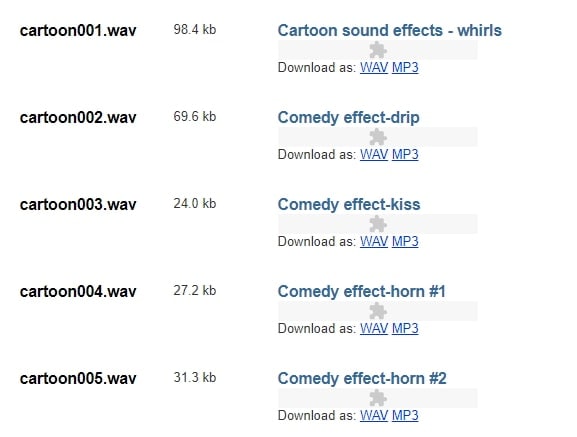
7. Cartoon Running Sound Effect
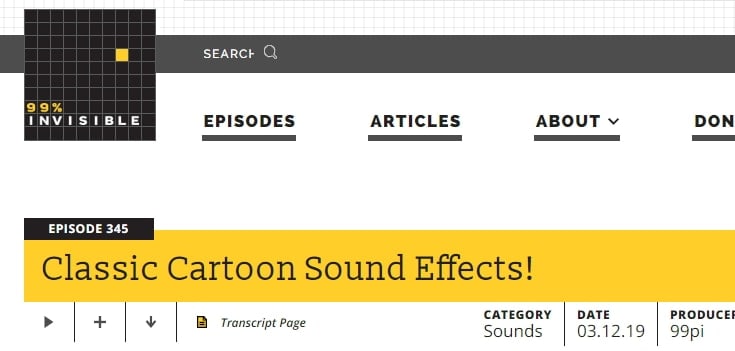
If you are looking for cartoon running sound effect, turn to Episode 345 in 99PercentInvisible. You can download the complete transcript page of around 30 minutes to use it in your video. Use the cartoon running sound effect produced by 99pi to enhance your video.
8. Big Fish Audio
The Big Fish Audio’s cartoon sound FX includes 23 free classic cartoon sound effects. The filters include a range of sound FX types, styles, format, brand, etc.
You can click on the cartoon sound effect and listen to it or add it to your playlist. But, if you wish to download the free cartoon sound effects, you need to register and pay to use the sound effect.

You may also like: How to Extract Audio from Videos on Win/Mac/Phone >>
Conclusion
Make your cartoon videos perfect with the fantastic free cartoon sound effects available for download completely free. With the range of free cartoon sound effects, you don’t need to worry about creating new sounds or expenses. You need to download the free sounds and beautifully enhance it with your creativity. There are several other sites for downloading free cartoon sound effects, but here you can check out some of the trusted ones to use.
Benjamin Arango
Benjamin Arango is a writer and a lover of all things video.
Follow @Benjamin Arango
Benjamin Arango
Mar 27, 2024• Proven solutions
The sound plays a significant role in the videos. Without the right sound effects, your videos become dull. It doesn’t create an impact to grab the attention of the viewers. Especially when it comes to attracting the attention of kids while they watch cartoons.
Are you working on a cartoon video for kids or some animated action cartoons? Use the cartoon sound effects to add more intensity and emotions to the videos. Every time creating a new sound effect for your cartoon video becomes difficult.
If you are on a strict budget, producing new content becomes almost impossible. In such situations, free cartoon sound effects are the best way to enhance your cartoon videos.
In this article, you will learn eight best cartoon sound effects that you can download and make your videos perfect.
8 Best Cartoon Sound Effects Resources
1. Spongebob Sound Effects
MyInstant’s Spongebob soundboard offers a range of cartoon sound effects that can be easily downloaded just by clicking on the Download mp3 sound effect button. You can listen to over 120 classic cartoon sound effects and download it for free. You can also copy the embed link and paste it to your website.
2. Hanna Barbera Sound Effects
From Sounddogs, Hanna Barbera sound effects library, you can find over 2200 cartoon sound effects that are divided into 4 CDs. It has almost all the legendary classic cartoon sound effects from the cartoon shows like Yogi Bear, Huckleberry Hound, the Flintstones, The Jetsons, Quick Draw McGraw, and all the rest of the gang.
You can download the mp3 cartoon sound effects completely free by clicking on the Download ID number mentioned at the right end of each link.
3. Scooby Doo Running Sound
Fandom’s Scooby Doo running sound effects offers all the ideas used in 40 episodes of Scooby Doo throughout the three seasons on ABC. It is over 37000 pages wiki that you can click and browse through the pages to find the right sound effect and download it for free.
4. Tom and Jerry Sound Effects
Pond5 offers 13 Tom and Jerry sound effects that you can listen by scrolling the cursor over the boxes and download the free preview of cartoon sound effects by clicking on Download Preview.
If you want to download the entire cartoon sound effect, you need to register, log in, and pay for it. There are filters like price, collections, duration, etc. to make your selection more precise.
5. Free SFX
In FreeSFX website, you can find a range of comical cartoon sound effects that includes classic effects like descend, boink, impact, pop, musical, running, rip and snap, bounce spring, slide whistle, squelch and splat, horn and loads more.
You need to log in to the website to download free cartoon sound effects.
6.GRSites
With over 1980 cartoon sound effects, the GRSites is one of the best free sites for downloading both mp3 and WAV files. You can browse from a range of categories to find the best cartoon sound effects for your videos.
7. Cartoon Running Sound Effect
If you are looking for cartoon running sound effect, turn to Episode 345 in 99PercentInvisible. You can download the complete transcript page of around 30 minutes to use it in your video. Use the cartoon running sound effect produced by 99pi to enhance your video.
8. Big Fish Audio
The Big Fish Audio’s cartoon sound FX includes 23 free classic cartoon sound effects. The filters include a range of sound FX types, styles, format, brand, etc.
You can click on the cartoon sound effect and listen to it or add it to your playlist. But, if you wish to download the free cartoon sound effects, you need to register and pay to use the sound effect.
You may also like: How to Extract Audio from Videos on Win/Mac/Phone >>
Conclusion
Make your cartoon videos perfect with the fantastic free cartoon sound effects available for download completely free. With the range of free cartoon sound effects, you don’t need to worry about creating new sounds or expenses. You need to download the free sounds and beautifully enhance it with your creativity. There are several other sites for downloading free cartoon sound effects, but here you can check out some of the trusted ones to use.
Benjamin Arango
Benjamin Arango is a writer and a lover of all things video.
Follow @Benjamin Arango
Also read:
- New Discovering the Finest Voice Recorders on Windows – A Comprehensive List for 2024
- New MP3 Speech-to-Text Conversion Explained 3 Streamlined Online Approaches for 2024
- In 2024, Crafting Masterpieces on Your Mac An In-Depth Look at the Leading DAWs of 2 Written in Markdown Format, with Each Title as a Separate Subheading. Heres How It Would Look Like
- New In 2024, The Complete Lexis Audio Editor Experience Critiques, Advanced Features, and Tutorials
- New In 2024, Detailed Overview of the Wave Editor Key Functions, Ratings, and Step-by-Step Guides
- New 2024 Approved Mastering Audio Level Management Discover the Top 5 Dynamic Ducking Software
- New Ultimate Guide to Dynamic Ducking The Five Must-Have Audio Processors for Clearer Stereo Separation for 2024
- New 2024 Approved Prime Audio Cleansing App Elevate the Quality of Your Videos
- Starting Off with Strains The Beginners Handbook to Selecting the Ideal Hip-Hop Accompaniment.
- New 2024 Approved Top 10 Budget-Friendly Options Premium-Free Podcast Players for Modern Smartphones
- New 2024 Approved Practices for Detaching Soundtracks in Film Clips
- Updated In 2024, Harmonizing Acoustics and Imagery Find Out the Top 5 Integrated Sound/Visual Devices
- New Harmonizing Sight and Sound Effective Methods for Audio Pairing in Android Video Production
- Vital Virtual Audio Anthology on YouTube for 2024
- New Navigating Post-Omegle Ban A Pathway Back Into Conversation for 2024
- New 2024 Approved Free and Top The Ultimate List of Online Audio Editing Software
- Audio Revelation Ten No-Fee Strategies for Extracting Sounds From Videos for 2024
- Updated In 2024, Advanced Strategies to Convert Your Spotify Playlist Into a Local Library
- Updated Best Audio Editing Apps for iPhone and iPad for 2024
- Updated 2024 Approved Advanced Methods for Reducing Storage Space Needed for Media Files
- Updated In 2024, Transforming Your Tech Experience How to Modify Siris Voice Across iDevices
- New Harmony of the Wild Selecting the Very Best iOS & Android Nature Audio Apps for 2024
- 2024 Approved Top 10 Song Recorder That You Wont Want to Miss
- New Chromebook Voice Memos Made Simple 8 Easy Techniques
- New In 2024, The Ultimate Music Selection Guide Harmonizing Sounds for Diverse Filmmaking Styles
- New Best MPA to MP3 Converter Convert MPA Audio Files to MP3 for Free for 2024
- Updated How to Cut Audio in iMovie on Mac & iPhone for 2024
- New Silencing Soundscape Guiding You to Audio Deletion in MOV Files for Both Operating Systems for 2024
- Unveiling Key Features A Deep Dive Into TwistedWave Audio Processor
- Updated In 2024, Elite Auditory Stealth Applications & Services Reviewed
- Updated In 2024, 10+ FREE Online MP3 to Text Converters
- In 2024, MP3 to MP4 Converter Guide - Mastering Audio File Conversions
- Updated 2024 Approved Best 7 Vocal Remover to Get Rid of Vocals with Ease Online & Offline
- Breaking Down Jazz Key Terminology and Principles for Newbies for 2024
- Peer-to-Peer Dialogue Hubs A Review of Reliable, User-Friendly & Amusing Applications for 2024
- Step-by-Step Tutorial Integrating Songs Into Your iMovie Masterpiece for 2024
- How to Unlock a Network Locked Oppo A59 5G Phone?
- In 2024, Forgot Apple iPhone 11 Backup Password? Heres What to Do
- In 2024, Top-Notch Solutions for Disabled Apple ID On Apple iPhone SE (2022) Making It Possible
- 3 Solutions to Hard Reset Tecno Camon 20 Phone Using PC | Dr.fone
- What Is a SIM Network Unlock PIN? Get Your Vivo G2 Phone Network-Ready
- In 2024, Unlock the Power of Animation Converting Videos Into Cartoons
- How To Install the Latest iOS Beta Version on iPhone 7 Plus? | Dr.fone
- How to Get and Use Pokemon Go Promo Codes On Vivo Y27s | Dr.fone
- New The Best Watermark-Free Video Joining Software for You
- Top 9 Vivo Y100 Monitoring Apps for Parental Controls | Dr.fone
- All About Factory Reset, What Is It and What It Does to Your Honor 100? | Dr.fone
- Top 10 Samsung Galaxy A05 Android SIM Unlock APK
- How to Unlock Apple ID Activation Lock On Apple iPhone 14?
- The way to get back lost music from Vivo Y100i Power 5G
- New In 2024, WhatsApp Video Maker Software Top Picks
- Will iSpoofer update On Nokia C12 Plus | Dr.fone
- In 2024, Mastering Lock Screen Settings How to Enable and Disable on Samsung Galaxy A05s
- How to Unlock iPhone X without Passcode or Face ID
- New Converting Conversations Speech to Text Made Easy for 2024
- Why Your Xiaomi Redmi K70 Screen Might be Unresponsive and How to Fix It | Dr.fone
- Why Does My Oppo Reno 11 5G Keep Turning Off By Itself? 6 Fixes Are Here | Dr.fone
- In 2024, How to Bypass Apple iPhone 6s Plus Passcode Easily Video Inside
- How to Upgrade iPhone XS Max without iTunes? | Dr.fone
- In 2024, 2 Ways to Transfer Text Messages from Honor X50 to iPhone 15/14/13/12/11/X/8/ | Dr.fone
- How To Change Xiaomi Civi 3 Lock Screen Clock in Seconds
- Why is iPogo not working On Tecno Camon 20 Premier 5G? Fixed | Dr.fone
- Best Infinix FRP Bypass Guide
- 3 Solutions to Hard Reset Oppo Reno 9A Phone Using PC | Dr.fone
- How to Stop Life360 from Tracking You On Huawei Nova Y91? | Dr.fone
- Easy steps to recover deleted photos from Oppo .
- Title: Updated 2024 Approved Perfect Harmony Unveiling the Best 5 Mixers for Mac Enthusiasts
- Author: David
- Created at : 2024-05-05 10:08:49
- Updated at : 2024-05-06 10:08:49
- Link: https://sound-tweaking.techidaily.com/updated-2024-approved-perfect-harmony-unveiling-the-best-5-mixers-for-mac-enthusiasts/
- License: This work is licensed under CC BY-NC-SA 4.0.
