
:max_bytes(150000):strip_icc():format(webp)/GettyImages-541365354-5c8ad42246e0fb00014a9687.jpg)
Updated 2024 Approved Integrating Audible Elements Into Your Slides A Comprehensive Guide for Recording Sound in PowerPoint on PC/Mac Systems
“Integrating Audible Elements Into Your Slides: A Comprehensive Guide for Recording Sound in PowerPoint on PC/Mac Systems”
Pandemic times have bought us very close to technology and the computerized world. We used various tools and software, we also learned about much new software in this time. We even came across some amazing features of tools that we have been using since our childhood. One best example of this scenario is PowerPoint.
We have been working on PowerPoint, making slides for a long time, but we recently came across the PowerPoint record audio feature. This is the most helpful feature one could imagine. When you cannot express yourself and your point in words, then the use of this PowerPoint voice recording feature jumps in. Stay with us to learn more about audio recording on PowerPoint.
In this article
01 How to Record Audio on PowerPoint in Windows?
02 How to Record Audio on PowerPoint in Mac?
03 7 PowerPoint Presentation Tips to Make Creative Slideshows
Part 1: How to Record Audio on PowerPoint in Windows?
Powerpoint is a presentation-based program. The Microsoft Office product is available for both Windows and macOS. PowerPoint is mostly used in offices for demonstration purposes. It is widely used by teachers to deliver their lectures. With record voice-over PowerPoint, its users can make better presentations.
A question arises here that how to record audio in PowerPoint presentations? If this same question is riding on your mind, then the wait is over. Let us share the steps that should be followed to record audio on PowerPoint in Windows.
Step 1: Firstly, you should open PowerPoint and add a blank slide to record voice-over PowerPoint. You can also record any old presentation by opening the slide where you plan to record audio.

Step 2: then, from the top menu bar, you are requested to head over to the ‘Insert’ section. From the Insert section, select the ‘Media’ option visible at the extreme right side.

Step 3: The Media offers 3 further options. Among those options, you have to hit the ‘Audio’ option. This will open a drop-down from where you have to click on ‘Record Audio.’

Step 4: Now, a small window for Record Sound will show up. Here, set a name for your recording and hit the Record button to start the recording.

Step 5: Once you have completed the recording, click on the Stop button to end the recording and then hit the ‘Ok’ button to exit the recording window.

Step 6: At the end, a speaker icon will appear on the screen. When you hover on that icon, it will show the option to play the recording. You can adjust the speaker icon on the slide, and lastly, save your changes to PowerPoint.

Part 2: How to Record Audio on PowerPoint in Mac?
As mentioned earlier, PowerPoint is available for both Windows and macOS, so how can we forget about Mac users? This section of the article will be talking about how to record audio on a PowerPoint Mac. If you are a Mac user and you plan to learn about this, then the following section is for you. By following the steps below, you can record audio on Powerpoint in Mac.
Step 1: Firstly, open PowerPoint and create a new presentation to record voice-over PowerPoint in Mac. You can also import any file from your Mac to PowerPoint for audio recording.

Step 2: After that, you have to open the slide where you want to record the audio. Then from the menu bar at the top, navigate to the ‘Insert’ section. In the Insert section, there will be an ‘Audio’ tab. Tap on it and then select the ‘Record Audio’ option.

Step 3: At this point, a Record Audio panel will show up on the right side of the screen. From that panel, click on the ‘Record’ button to start the recording.

Step 4: After you have completed the recording, hit the ‘Stop’ button. Now, PowerPoint will ask you to either Insert or Discard the audio. Upon clicking on ‘Insert,’ a speaker icon will pop up on the screen. You can listen to your recording from that speaker icon.

Part 3: 7 PowerPoint Presentation Tips to Make Creative Slideshows
Now that all the Windows and Mac users are satisfied after learning about PowerPoint voice recording, it’s the perfect time to share some very useful tips. In the coming part, we are going to share 7 tips that will aid in making creative slideshows.
1. Minimalism
The most crucial tip when it comes to making creative slides is the amount of information. It is said that ‘Less is More.’ While making your slides, you should always add less information to the slides, and you should speak more.
The slides must contain minimal data. Too many wordy slides look boring, and they can never sustain your audiences’ interest. So, it is best suggested to add less and make your slides neat and spacious.
2. Use Design Elements
Adding stock images and background images is a very common trend for making slides. A tip that will make your slides unique and equally attractive is design elements. Choosing a bold color for the background and then adding elements to it makes them shine. The elements dominate on a strong colored background. Images can never be this dominating or expressive.
Also, changing the common trends will make your presentation different and classic as compared to regularly designed slides.
3. One Story at a Time
A very common mistake that people generally make because they are unaware of it is the content. The best practice for quality presentation slides is to add and discuss one story per slide. You should never confuse your audience by sharing multiple things from the same slide.
If you plan to discuss various things, then make separate slides for each story. This way, the audience gets sufficient time to digest and understand one story before moving on to another.
4. Alignment and Symmetry
While making your slides, one key factor that can either make or break your presentation is consistency and alignment. You should never present a rough slide. Always align the text, images, and headings of your slides. Symmetry and consistency are also very important. Follow the same consistent pattern in all slides.
5. Formatting and Settings
Making your slides creative doesn’t mean making them like a rainbow. Simplicity has its own magic and grace. The more your slide is simple and clean, the more readable it is. You should always keep simple colors for text and headings.
Playing with different fonts and styles for headings might also disturb your presentation visually. Selecting the correct font size, style with appropriate colors is essential.
6. Add and Adjust
Always follow the ‘Add and Adjust’ policy. You should never throw data and elements on the slides and present them. The best practice is to add the content, the images and then adjust everything. You should always arrange the text in bullets with proper headings.
For the case of an image, you should add it, inspect it and if needed, crop it. Adding things with perfection makes your presentation stand out and shine differently.
7. Animation
Static slides are too mainstream for today’s fast world. The last tip to make creative slides that can retain your audiences’ attention is animation. By adding a few animated elements to your presentation makes it look classy and quirky. With animation, you can also maintain the interest of your audience.
Last Words
The article has discussed in detail that how someone could record a voice-over PowerPoint. A complete step-by-step guideline has been shared for both Mac and Windows users on audio recording with PowerPoint. We also talked about 7 tips that will surely improve the quality of your slides.
By using the right and effective tool, you can still make creative slides without bothering to follow any tips. Such a tool is Filmora by Wondershare. This is an all-in-one video editing software. With Filmora, you can make the perfect video slideshow by adding multiple images.
You can collectively import images from your device to Filmora, or else you can also take things from its stock library. Filmora also has a wide range of editing effects, filters, and transitions that can make your content aesthetic and perfect.
Versatile Video Editor - Wondershare Filmora
An easy yet powerful editor
Numerous effects to choose from
Detailed tutorials provided by the official channel
02 How to Record Audio on PowerPoint in Mac?
03 7 PowerPoint Presentation Tips to Make Creative Slideshows
Part 1: How to Record Audio on PowerPoint in Windows?
Powerpoint is a presentation-based program. The Microsoft Office product is available for both Windows and macOS. PowerPoint is mostly used in offices for demonstration purposes. It is widely used by teachers to deliver their lectures. With record voice-over PowerPoint, its users can make better presentations.
A question arises here that how to record audio in PowerPoint presentations? If this same question is riding on your mind, then the wait is over. Let us share the steps that should be followed to record audio on PowerPoint in Windows.
Step 1: Firstly, you should open PowerPoint and add a blank slide to record voice-over PowerPoint. You can also record any old presentation by opening the slide where you plan to record audio.
Step 2: then, from the top menu bar, you are requested to head over to the ‘Insert’ section. From the Insert section, select the ‘Media’ option visible at the extreme right side.
Step 3: The Media offers 3 further options. Among those options, you have to hit the ‘Audio’ option. This will open a drop-down from where you have to click on ‘Record Audio.’
Step 4: Now, a small window for Record Sound will show up. Here, set a name for your recording and hit the Record button to start the recording.
Step 5: Once you have completed the recording, click on the Stop button to end the recording and then hit the ‘Ok’ button to exit the recording window.
Step 6: At the end, a speaker icon will appear on the screen. When you hover on that icon, it will show the option to play the recording. You can adjust the speaker icon on the slide, and lastly, save your changes to PowerPoint.
Part 2: How to Record Audio on PowerPoint in Mac?
As mentioned earlier, PowerPoint is available for both Windows and macOS, so how can we forget about Mac users? This section of the article will be talking about how to record audio on a PowerPoint Mac. If you are a Mac user and you plan to learn about this, then the following section is for you. By following the steps below, you can record audio on Powerpoint in Mac.
Step 1: Firstly, open PowerPoint and create a new presentation to record voice-over PowerPoint in Mac. You can also import any file from your Mac to PowerPoint for audio recording.
Step 2: After that, you have to open the slide where you want to record the audio. Then from the menu bar at the top, navigate to the ‘Insert’ section. In the Insert section, there will be an ‘Audio’ tab. Tap on it and then select the ‘Record Audio’ option.
Step 3: At this point, a Record Audio panel will show up on the right side of the screen. From that panel, click on the ‘Record’ button to start the recording.
Step 4: After you have completed the recording, hit the ‘Stop’ button. Now, PowerPoint will ask you to either Insert or Discard the audio. Upon clicking on ‘Insert,’ a speaker icon will pop up on the screen. You can listen to your recording from that speaker icon.
Part 3: 7 PowerPoint Presentation Tips to Make Creative Slideshows
Now that all the Windows and Mac users are satisfied after learning about PowerPoint voice recording, it’s the perfect time to share some very useful tips. In the coming part, we are going to share 7 tips that will aid in making creative slideshows.
1. Minimalism
The most crucial tip when it comes to making creative slides is the amount of information. It is said that ‘Less is More.’ While making your slides, you should always add less information to the slides, and you should speak more.
The slides must contain minimal data. Too many wordy slides look boring, and they can never sustain your audiences’ interest. So, it is best suggested to add less and make your slides neat and spacious.
2. Use Design Elements
Adding stock images and background images is a very common trend for making slides. A tip that will make your slides unique and equally attractive is design elements. Choosing a bold color for the background and then adding elements to it makes them shine. The elements dominate on a strong colored background. Images can never be this dominating or expressive.
Also, changing the common trends will make your presentation different and classic as compared to regularly designed slides.
3. One Story at a Time
A very common mistake that people generally make because they are unaware of it is the content. The best practice for quality presentation slides is to add and discuss one story per slide. You should never confuse your audience by sharing multiple things from the same slide.
If you plan to discuss various things, then make separate slides for each story. This way, the audience gets sufficient time to digest and understand one story before moving on to another.
4. Alignment and Symmetry
While making your slides, one key factor that can either make or break your presentation is consistency and alignment. You should never present a rough slide. Always align the text, images, and headings of your slides. Symmetry and consistency are also very important. Follow the same consistent pattern in all slides.
5. Formatting and Settings
Making your slides creative doesn’t mean making them like a rainbow. Simplicity has its own magic and grace. The more your slide is simple and clean, the more readable it is. You should always keep simple colors for text and headings.
Playing with different fonts and styles for headings might also disturb your presentation visually. Selecting the correct font size, style with appropriate colors is essential.
6. Add and Adjust
Always follow the ‘Add and Adjust’ policy. You should never throw data and elements on the slides and present them. The best practice is to add the content, the images and then adjust everything. You should always arrange the text in bullets with proper headings.
For the case of an image, you should add it, inspect it and if needed, crop it. Adding things with perfection makes your presentation stand out and shine differently.
7. Animation
Static slides are too mainstream for today’s fast world. The last tip to make creative slides that can retain your audiences’ attention is animation. By adding a few animated elements to your presentation makes it look classy and quirky. With animation, you can also maintain the interest of your audience.
Last Words
The article has discussed in detail that how someone could record a voice-over PowerPoint. A complete step-by-step guideline has been shared for both Mac and Windows users on audio recording with PowerPoint. We also talked about 7 tips that will surely improve the quality of your slides.
By using the right and effective tool, you can still make creative slides without bothering to follow any tips. Such a tool is Filmora by Wondershare. This is an all-in-one video editing software. With Filmora, you can make the perfect video slideshow by adding multiple images.
You can collectively import images from your device to Filmora, or else you can also take things from its stock library. Filmora also has a wide range of editing effects, filters, and transitions that can make your content aesthetic and perfect.
Versatile Video Editor - Wondershare Filmora
An easy yet powerful editor
Numerous effects to choose from
Detailed tutorials provided by the official channel
“Sonic Resource Hub: A Curated List of Premium Websites with a Stockpile of Free Sound Scores
FREE Top 10 Best Websites to Download Sound Clips for Videos

Liza Brown
Mar 27, 2024• Proven solutions


Are you working on animation , video, game, music, or maybe some other media file? Sound is a vital factor for all. It is the effect of the sound that can make or break a project.
But it can be difficult to find perfect and quality free sound clips. There are thousands of software for creating excellent videos, adding sounds , titles, overlays, tracks, and more. But what if you don’t wish to create a piece for just jazzing up your already existing video?
Free sound clips are great resources to download for videos if you don’t want to create sound effects.
Many people want to know the source of high-quality free audio for videos. These free sound samples are easy to find on the Internet.
In this article, you will get to know the 10 best websites to download free sound clips.
10 Best Free Sound Samples to Use
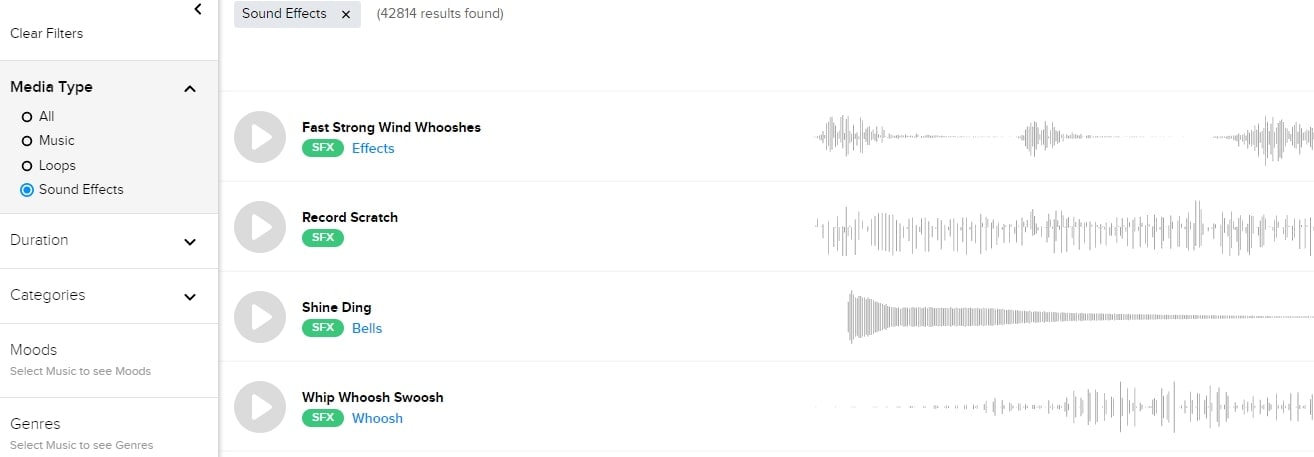
1. Freesound
Licensed under the Creative Commons License , the Freesound comprises of a large sound database. You can choose from the huge collection of sounds and decide which one is free and which sound needs attribution.
You can ensure if the sound can be used in commercial products or not. If you are not a professional and just need free sound samples for personal use, you may use free sound download from any site. The features of Freesound include-
- You can search for sounds or browse by tags or geotags
- The pack feature helps you to find a bunch of similar sounds very easily
- Preview the sound without logging in
- For downloading the sound, you need to log in
- Add your audio samples to contribute to the database
- You get 5 free sound clips download
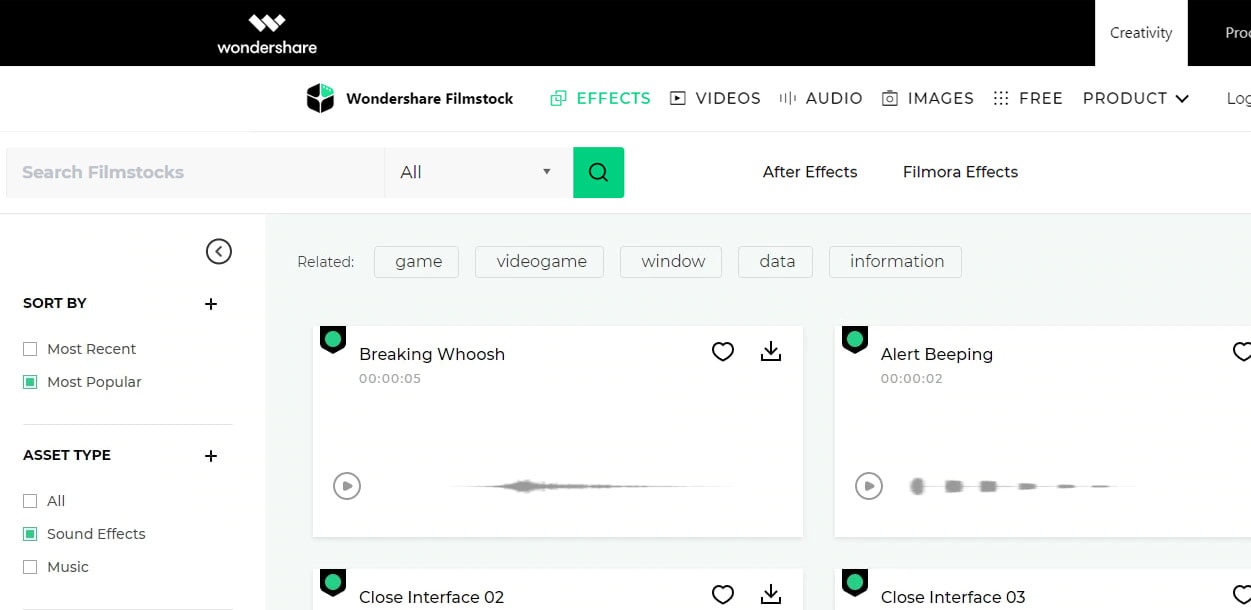
2. Filmstock
Filmstock from the house of Wondershare is one of the greatest libraries for free sound clips.
Any budget filmmaker would love to have this invaluable resource not just for free audio clips for videos but also for royalty-free sound clips.
You can bring your cinematic video to life from the Filmstock free-stuff one-stop-shop. The features of Filmstock include-
- Royalty-free video effects, audio, and stock media
- There are genres like science fiction, sci-fi, ufo, technology games
- Huge selection of curated quality stock images
- Filmstock library is continuously updated
- No attribution required for any project on Filmstock
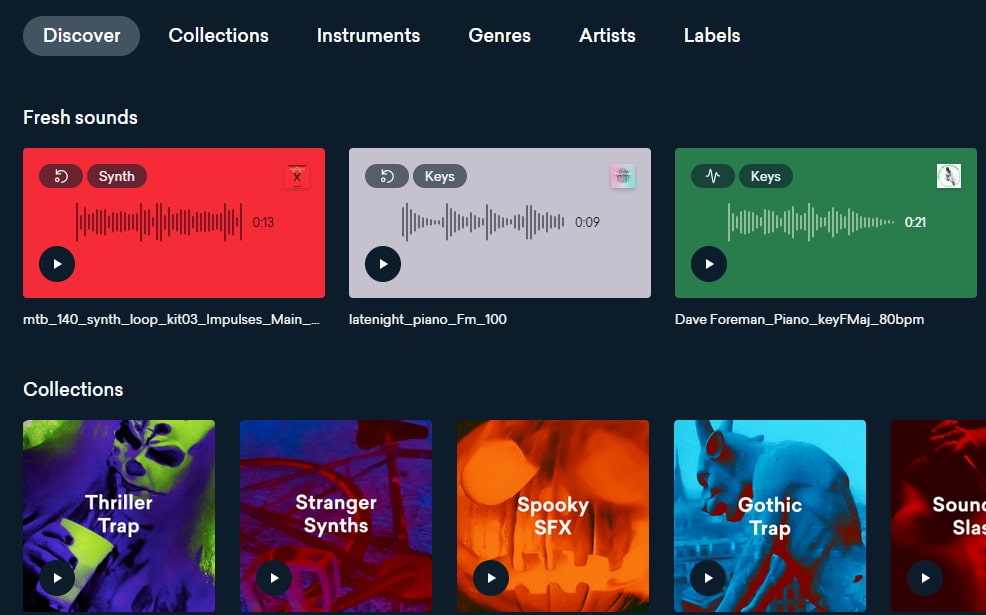
3. Landr
With a simple interface, Landr offers the best loops, packs, and samples to you. Make use of powerful Artificial Intelligence (AI) and you can spend lesser time searching and browsing. The features of Landr includes-
- You can browse free sound clips from the various collection of instruments
- Quickly find the right sound from the millions of free sound samples
- Get access to Selector tool powered by AI to make your browsing session faster
- Nourish your ideas with the curated collection and smart browsing
- The filter sounds by instrument, mood, BPM or key
- Go pro with your sampling
- Royalty-free sounds from today’s best artists, producers, and labels
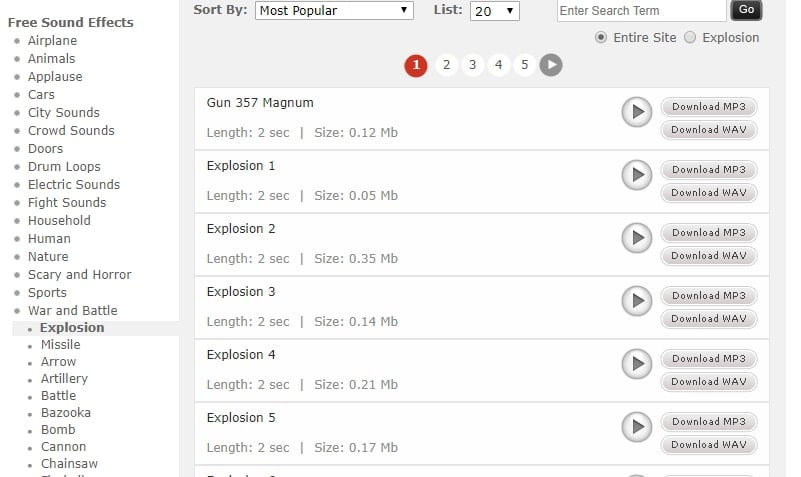
4. Audio Micro
Audio Micro is one of the best tools for downloading horror-based free sound clips. Once you register with Audio Micro, you can easily download free audio clips for videos.
For downloading sound for commercial uses like TV or mass reproduction, you must be a paid subscriber. The features of Audio Micro are-
- Get access to the collection of royalty-free music and 2000 free good quality sound effects
- High-quality audio content for commercial use, available at competitive prices without any hidden cost
- Research, locate, purchase, and download stock audio
- Easy and fast search option with free sound collection visible from the navigation bar on the homepage
5. Audio Blocks
It is an intuitive platform to download loops, sound effects, and music. It has a low-cost subscription model and the content is constantly updated based on the search results. The features of Audio Blocks are-
- Unlimited royalty-free audio
- Loop, sound effects, and music download
- Low-cost subscription offers more content at a nominal price
- There are flexible plans for every budget
- Use content multiple times for commercial and personal projects
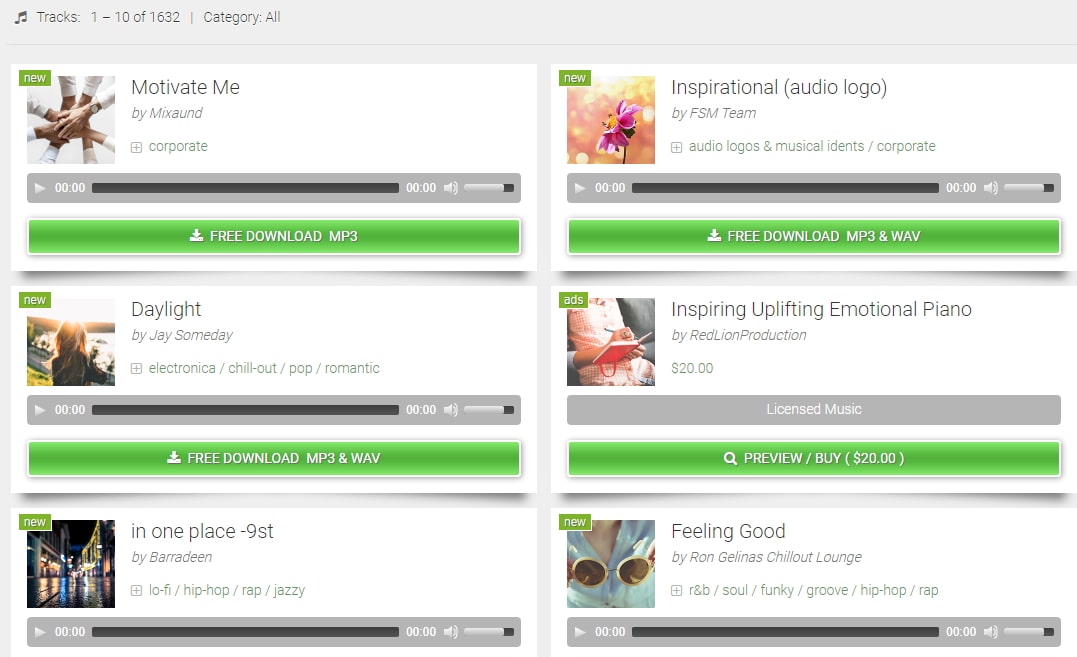
6. Free Stock Music
Whether YouTube project or your personal Vlog, Free Stock Music offers royalty-free music for a range of media platforms.
For any non-copyrighted sound clips free download, always feel free to reach Free Stock Music. The features are-
- Free access to non-copyrighted music
- Just put the attribution in credits to use the sound clips
- Unlimited royalty-free music in all moods, lengths, tempos, and categories
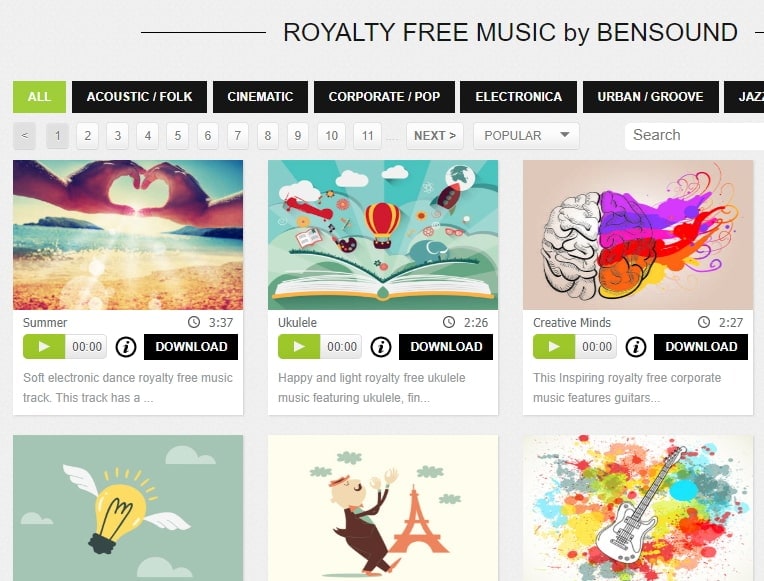
7. Bensound
Available under the Creative Common License, Bensound is used for multimedia projects like web applications or videos.
You can use the free tracks available with Bensound stock music in the various website background score, animations, web adverts, slideshows, etc. The features of Bensound include-
- Royalty-free stock music in various genres like electronica, urban, cinematic, jazz, rock, etc.
- Download free sound clips from the huge collection and add attributions in credits
- If you don’t wish to give credits and use the high-quality premium tracks, get the Bensound Pro License
8. Sounds Crate
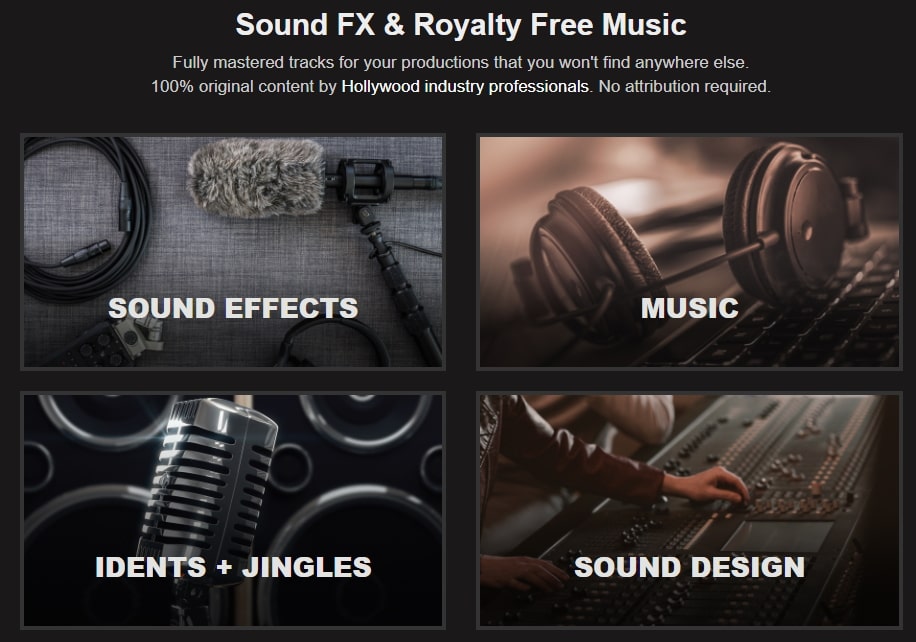
Are you looking for the best soundtrack for your video? Sounds Crate offers some of the best royalty-free music and sound FX.
With the tracks completely mastered for your production, Sound Crate offers 100% quality content created by industry professionals from Hollywood. The Sound Crate features include-
- Sound FX for electricity, gun, explosion, weapons, sci-fi, vehicles, movements, etc.
- Royalty-free music in diverse genres
- You can also use idents for corporate, news jingles, holiday idents, etc.
- Download and use the royalty-free sound clips easily
- Over 10000 plus HD assets
- No attribution required
- Browse from unlimited music, sound effects, etc.
9. ZapSlat
Do your audio and video editing projects need some cool soundtracks to jazz it up? Look no further. ZapSlat is one of the best free sound download sites to make your project successful. The features of ZapSlat are-
- Comprises over 54,000 professional free sound effects and royalty-free music files
- Variety of free sound effect packs
- Download royalty-free music from a variety of genres
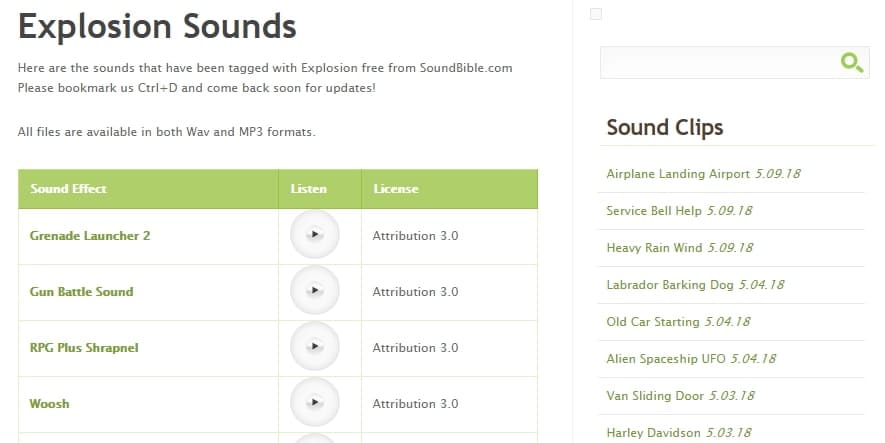
10. Sound Bible
Choose the best from 2000 free sound clips licensed under Creative Commons. To use the sound effect for commercial video, you can select from the royalty-free sounds. The features of SoundBible are-
- Download free sound clips without logging in or creating an account
- 2000 free sounds
- Copyright-free sound resources are weekly updated
Conclusion
Now that you know the best 10 free sound clip download sites, make use of it in your videos. Without worrying about the expense, you can use these sites to download free sound clips.
Liza Brown
Liza Brown is a writer and a lover of all things video.
Follow @Liza Brown
Liza Brown
Mar 27, 2024• Proven solutions
Are you working on animation , video, game, music, or maybe some other media file? Sound is a vital factor for all. It is the effect of the sound that can make or break a project.
But it can be difficult to find perfect and quality free sound clips. There are thousands of software for creating excellent videos, adding sounds , titles, overlays, tracks, and more. But what if you don’t wish to create a piece for just jazzing up your already existing video?
Free sound clips are great resources to download for videos if you don’t want to create sound effects.
Many people want to know the source of high-quality free audio for videos. These free sound samples are easy to find on the Internet.
In this article, you will get to know the 10 best websites to download free sound clips.
10 Best Free Sound Samples to Use
1. Freesound
Licensed under the Creative Commons License , the Freesound comprises of a large sound database. You can choose from the huge collection of sounds and decide which one is free and which sound needs attribution.
You can ensure if the sound can be used in commercial products or not. If you are not a professional and just need free sound samples for personal use, you may use free sound download from any site. The features of Freesound include-
- You can search for sounds or browse by tags or geotags
- The pack feature helps you to find a bunch of similar sounds very easily
- Preview the sound without logging in
- For downloading the sound, you need to log in
- Add your audio samples to contribute to the database
- You get 5 free sound clips download
2. Filmstock
Filmstock from the house of Wondershare is one of the greatest libraries for free sound clips.
Any budget filmmaker would love to have this invaluable resource not just for free audio clips for videos but also for royalty-free sound clips.
You can bring your cinematic video to life from the Filmstock free-stuff one-stop-shop. The features of Filmstock include-
- Royalty-free video effects, audio, and stock media
- There are genres like science fiction, sci-fi, ufo, technology games
- Huge selection of curated quality stock images
- Filmstock library is continuously updated
- No attribution required for any project on Filmstock
3. Landr
With a simple interface, Landr offers the best loops, packs, and samples to you. Make use of powerful Artificial Intelligence (AI) and you can spend lesser time searching and browsing. The features of Landr includes-
- You can browse free sound clips from the various collection of instruments
- Quickly find the right sound from the millions of free sound samples
- Get access to Selector tool powered by AI to make your browsing session faster
- Nourish your ideas with the curated collection and smart browsing
- The filter sounds by instrument, mood, BPM or key
- Go pro with your sampling
- Royalty-free sounds from today’s best artists, producers, and labels
4. Audio Micro
Audio Micro is one of the best tools for downloading horror-based free sound clips. Once you register with Audio Micro, you can easily download free audio clips for videos.
For downloading sound for commercial uses like TV or mass reproduction, you must be a paid subscriber. The features of Audio Micro are-
- Get access to the collection of royalty-free music and 2000 free good quality sound effects
- High-quality audio content for commercial use, available at competitive prices without any hidden cost
- Research, locate, purchase, and download stock audio
- Easy and fast search option with free sound collection visible from the navigation bar on the homepage
5. Audio Blocks
It is an intuitive platform to download loops, sound effects, and music. It has a low-cost subscription model and the content is constantly updated based on the search results. The features of Audio Blocks are-
- Unlimited royalty-free audio
- Loop, sound effects, and music download
- Low-cost subscription offers more content at a nominal price
- There are flexible plans for every budget
- Use content multiple times for commercial and personal projects
6. Free Stock Music
Whether YouTube project or your personal Vlog, Free Stock Music offers royalty-free music for a range of media platforms.
For any non-copyrighted sound clips free download, always feel free to reach Free Stock Music. The features are-
- Free access to non-copyrighted music
- Just put the attribution in credits to use the sound clips
- Unlimited royalty-free music in all moods, lengths, tempos, and categories
7. Bensound
Available under the Creative Common License, Bensound is used for multimedia projects like web applications or videos.
You can use the free tracks available with Bensound stock music in the various website background score, animations, web adverts, slideshows, etc. The features of Bensound include-
- Royalty-free stock music in various genres like electronica, urban, cinematic, jazz, rock, etc.
- Download free sound clips from the huge collection and add attributions in credits
- If you don’t wish to give credits and use the high-quality premium tracks, get the Bensound Pro License
8. Sounds Crate
Are you looking for the best soundtrack for your video? Sounds Crate offers some of the best royalty-free music and sound FX.
With the tracks completely mastered for your production, Sound Crate offers 100% quality content created by industry professionals from Hollywood. The Sound Crate features include-
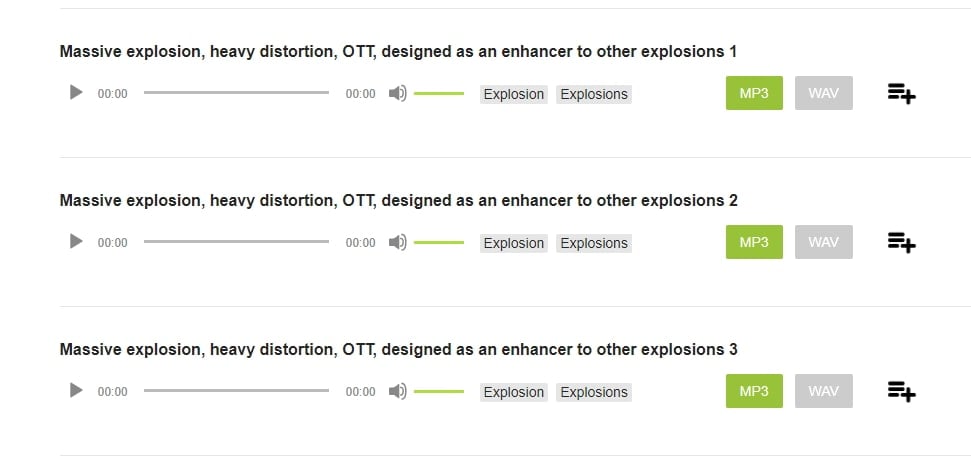
- Sound FX for electricity, gun, explosion, weapons, sci-fi, vehicles, movements, etc.
- Royalty-free music in diverse genres
- You can also use idents for corporate, news jingles, holiday idents, etc.
- Download and use the royalty-free sound clips easily
- Over 10000 plus HD assets
- No attribution required
- Browse from unlimited music, sound effects, etc.
9. ZapSlat
Do your audio and video editing projects need some cool soundtracks to jazz it up? Look no further. ZapSlat is one of the best free sound download sites to make your project successful. The features of ZapSlat are-
- Comprises over 54,000 professional free sound effects and royalty-free music files
- Variety of free sound effect packs
- Download royalty-free music from a variety of genres
10. Sound Bible
Choose the best from 2000 free sound clips licensed under Creative Commons. To use the sound effect for commercial video, you can select from the royalty-free sounds. The features of SoundBible are-
- Download free sound clips without logging in or creating an account
- 2000 free sounds
- Copyright-free sound resources are weekly updated
Conclusion
Now that you know the best 10 free sound clip download sites, make use of it in your videos. Without worrying about the expense, you can use these sites to download free sound clips.
Liza Brown
Liza Brown is a writer and a lover of all things video.
Follow @Liza Brown
Liza Brown
Mar 27, 2024• Proven solutions
Are you working on animation , video, game, music, or maybe some other media file? Sound is a vital factor for all. It is the effect of the sound that can make or break a project.
But it can be difficult to find perfect and quality free sound clips. There are thousands of software for creating excellent videos, adding sounds , titles, overlays, tracks, and more. But what if you don’t wish to create a piece for just jazzing up your already existing video?
Free sound clips are great resources to download for videos if you don’t want to create sound effects.
Many people want to know the source of high-quality free audio for videos. These free sound samples are easy to find on the Internet.
In this article, you will get to know the 10 best websites to download free sound clips.
10 Best Free Sound Samples to Use
1. Freesound
Licensed under the Creative Commons License , the Freesound comprises of a large sound database. You can choose from the huge collection of sounds and decide which one is free and which sound needs attribution.
You can ensure if the sound can be used in commercial products or not. If you are not a professional and just need free sound samples for personal use, you may use free sound download from any site. The features of Freesound include-
- You can search for sounds or browse by tags or geotags
- The pack feature helps you to find a bunch of similar sounds very easily
- Preview the sound without logging in
- For downloading the sound, you need to log in
- Add your audio samples to contribute to the database
- You get 5 free sound clips download
2. Filmstock
Filmstock from the house of Wondershare is one of the greatest libraries for free sound clips.
Any budget filmmaker would love to have this invaluable resource not just for free audio clips for videos but also for royalty-free sound clips.
You can bring your cinematic video to life from the Filmstock free-stuff one-stop-shop. The features of Filmstock include-
- Royalty-free video effects, audio, and stock media
- There are genres like science fiction, sci-fi, ufo, technology games
- Huge selection of curated quality stock images
- Filmstock library is continuously updated
- No attribution required for any project on Filmstock
3. Landr
With a simple interface, Landr offers the best loops, packs, and samples to you. Make use of powerful Artificial Intelligence (AI) and you can spend lesser time searching and browsing. The features of Landr includes-
- You can browse free sound clips from the various collection of instruments
- Quickly find the right sound from the millions of free sound samples
- Get access to Selector tool powered by AI to make your browsing session faster
- Nourish your ideas with the curated collection and smart browsing
- The filter sounds by instrument, mood, BPM or key
- Go pro with your sampling
- Royalty-free sounds from today’s best artists, producers, and labels
4. Audio Micro
Audio Micro is one of the best tools for downloading horror-based free sound clips. Once you register with Audio Micro, you can easily download free audio clips for videos.
For downloading sound for commercial uses like TV or mass reproduction, you must be a paid subscriber. The features of Audio Micro are-
- Get access to the collection of royalty-free music and 2000 free good quality sound effects
- High-quality audio content for commercial use, available at competitive prices without any hidden cost
- Research, locate, purchase, and download stock audio
- Easy and fast search option with free sound collection visible from the navigation bar on the homepage
5. Audio Blocks
It is an intuitive platform to download loops, sound effects, and music. It has a low-cost subscription model and the content is constantly updated based on the search results. The features of Audio Blocks are-
- Unlimited royalty-free audio
- Loop, sound effects, and music download
- Low-cost subscription offers more content at a nominal price
- There are flexible plans for every budget
- Use content multiple times for commercial and personal projects
6. Free Stock Music
Whether YouTube project or your personal Vlog, Free Stock Music offers royalty-free music for a range of media platforms.
For any non-copyrighted sound clips free download, always feel free to reach Free Stock Music. The features are-
- Free access to non-copyrighted music
- Just put the attribution in credits to use the sound clips
- Unlimited royalty-free music in all moods, lengths, tempos, and categories
7. Bensound
Available under the Creative Common License, Bensound is used for multimedia projects like web applications or videos.
You can use the free tracks available with Bensound stock music in the various website background score, animations, web adverts, slideshows, etc. The features of Bensound include-
- Royalty-free stock music in various genres like electronica, urban, cinematic, jazz, rock, etc.
- Download free sound clips from the huge collection and add attributions in credits
- If you don’t wish to give credits and use the high-quality premium tracks, get the Bensound Pro License
8. Sounds Crate
Are you looking for the best soundtrack for your video? Sounds Crate offers some of the best royalty-free music and sound FX.
With the tracks completely mastered for your production, Sound Crate offers 100% quality content created by industry professionals from Hollywood. The Sound Crate features include-
- Sound FX for electricity, gun, explosion, weapons, sci-fi, vehicles, movements, etc.
- Royalty-free music in diverse genres
- You can also use idents for corporate, news jingles, holiday idents, etc.
- Download and use the royalty-free sound clips easily
- Over 10000 plus HD assets
- No attribution required
- Browse from unlimited music, sound effects, etc.
9. ZapSlat
Do your audio and video editing projects need some cool soundtracks to jazz it up? Look no further. ZapSlat is one of the best free sound download sites to make your project successful. The features of ZapSlat are-
- Comprises over 54,000 professional free sound effects and royalty-free music files
- Variety of free sound effect packs
- Download royalty-free music from a variety of genres
10. Sound Bible
Choose the best from 2000 free sound clips licensed under Creative Commons. To use the sound effect for commercial video, you can select from the royalty-free sounds. The features of SoundBible are-
- Download free sound clips without logging in or creating an account
- 2000 free sounds
- Copyright-free sound resources are weekly updated
Conclusion
Now that you know the best 10 free sound clip download sites, make use of it in your videos. Without worrying about the expense, you can use these sites to download free sound clips.
Liza Brown
Liza Brown is a writer and a lover of all things video.
Follow @Liza Brown
Crafting the Perfect Sound: Changing Your Voice in Audacity
What does free open source audio software mean? Audacity voice changer is the answer. Along with being free, it is a cross-platform software, which means that it can be used with different software packages. Audacity is easy to use multi-track audio editing and recording software.
It has a simple and clean-looking interface for better user understandability. Audacity has plug-in support for multiple audio formats like LV2, AU, and VST. We will further discuss Audacity as an audio voice changer, and how to use the software under various conditions will also be discussed in the article.
In this article
01 How Can You Use Voice Changer in Audacity?
02 How to Change Pitch in Audacity?
03 How to Change Male Voice to Female Voice with Audacity?
04 How to Create Robot Voice in Audacity?
Part 1. How Can You Use Voice Changer in Audacity?
Voice changers are also commonly referred to as voice enhancers, which can completely change and transform your voice. You can pull pranks on friends with voice changers if you are bored. If you want to hide your identity, you can modify your voice and do that. With voice changers, you can change the tone and the pitch of your voice and add various voice effects.
Voice changer comes with a wide range of sound effects ranging from baby sound, kid, male, female, monster, demon, animal sounds, and a lot more than this. Some great voice changers include AV Voice Changer , MorphVOX Voice Changer , Voicemod , Clownfish Voice Changer , and others. Do you know that these voice changers can be used with Audacity? Let’s tell you how.
Step 1: If you are interested in using a voice changer in Audacity, start by downloading your favorite voice changer to your PC. Once done, install it and after successful installation, launch it.

Step 2: As we have mentioned earlier that you are offered various voice effects in voice changers, so after launching it, select your preferred voice effect, whether it be a baby voice, animal voice, or celebrity voice.

Step 3: On the other side, launch Audacity on your PC. Once it opens, you will see the top menu; just below that, a microphone icon will be seen. Tap on that icon so that the drop-down menu appears, there select the name of your voice changer.

Part 2. How to Change Pitch in Audacity?
Audacity, the audio voice changer, offers a ‘Change Pitch’ feature with which you can change the pitch of the audio without damaging its tempo. You can separately change the speed. With this feature, you can also adjust and play with the frequency and semitones.
The audio editor also features to estimate the starting pitch; for instance, if A3 is a quiet note, followed by a large and loud note like C4, Audacity will detect C4. In case both notes have the same volume, Audacity will detect A3. With Audacity, you also get the ‘To’ and ‘From’ controls if you plan to change the pitch manually. To learn more about changing pitch, follow the steps below:
Step 1: For changing pitch in Audacity, start by launching the software. After launching, you can either record the audio or else, from the ‘File’ section, you can also ‘Open’ any file from your device.

Step 2: Audacity lets you change the pitch of a whole file or else for a small portion as well. Now, to change the pitch of a small portion, click and drag the mouse along the recording. Or else, click on the name of the track to select it completely.

Step 3: After this, head over to the top menu and click on the ‘Effect’ section. A drop-down menu list will appear, locate and select the ‘Change Pitch’ option. You can either use the sliders to adjust the pitch or else write the percentage to change.

Step 4: You can preview the file and check how it sounds once done. When you are satisfied, hit the ‘OK’ button to save the changes. You can also adjust the Speed and Tempo of the track.

Part 3. How to Change Male Voice to Female Voice with Audacity?
The most fun voice transformation is from low pitch to higher pitch. In general, modifying the male voice to a female voice, as the male pitch has a negative value and changing it to a positive pitch, modifies your voice to a female voice. What else could be better to use than the amazing Audacity voice changer? Let’s share the steps that will help you change your male voice to female.
Step 1: First, start by opening the Audacity audio editor. Once it has launched successfully, you should import the audio file. You can record audio with Audacity. Along with this, you can also import files from your device from the ‘File’ section, followed by the ‘Open’ option.

Step 2: After your audio track is visible on the timeline, you have to select the part of the file that you want to edit. You can easily select it by clicking and dragging the mouse. If not this, you can also work with the whole track; for this, simply click on the track name to select it.

Step 3: After you are satisfied with the selection, head to the top menu and select the ‘Effects’ options. A drop-down list appears after this, and you have to look for the ‘Change Pitch’ option and select it.

Step 4: Normally, you can adjust the pitch by taking help from the sliders, but you can also change the pitch manually by adding a percentage. The male pitch originally will have a negative value; change it and set a positive value. You can keep changing until you are satisfied.

Step 5: Lastly, don’t forget to save the changes by hitting the ‘OK’ button at the button and saving the file to your respective device.

Part 4. How to Create Robot Voice in Audacity?
As we have mentioned, Audacity is an audio voice changer, so you must know that Audacity also can change your voice into a robotic voice. Among the different voices, the robot voice sounds interesting, and it’s fun to create. If you are excited to learn to create robot voice in Audacity, follow the guiding steps shared below:
Step 1: For creating an extraordinary robotic voice, start by launching Audacity on your device. After it opens, it’s time to record your voice to create a robot voice. Or else, head to the ‘File’ tab and import your audio file from your device to Audacity from the ‘Open’ option.

Step 2: After this, to start the editing, you need a stereo track on the timeline. For doing this, navigate ‘Tracks’ from the top menu and click on it. Next, hover on the ‘Add New’ option to open its sub-menu. You will see the ‘Stereo Track’ option, select it, and copy-paste the audio file in the new section.

Step 3: Let’s start with the fun part, the editing and adjusting different features. Start by opening the ‘Effects’ tab, and from the long list of options, select ‘Echo.’ There, you can enter the ‘Delay Time’ and change other fields as well.

Step 4: Preview the audio and move on to the next setting. Open the ‘Effects’ section and look for the ‘Change Pitch’ option. You can change and adjust the pitch according to your desire and preview the file again.

Step 5: For creating a robot voice, you can also set the tempo. For that, head to the ‘Change Tempo’ option under the ‘Effects’ section and set the value to minus. Keep adjusting the different effects until you get your perfect robot voice.

Bottom Line
Audacity is not only a great audio editor; it is also a stunning audio voice changer. The software comes with a lot of effects that can completely transform your voice to an unrecognizable level. You can sound like a robot, male, female, and whatever you want with Audacity voice changer. Do you know any video editor that offers sound effects?
If you don’t know, let us introduce Wondershare Filmora Video Editor . This wonderous software is loaded with many editing features to create the best videos. Not only trim, cut, crop, but the software also offers you features like split-screen, chroma key background, keyframing, color match, motion tracking, and whatnot.
Apart from this, this video editor is a hub for cool sound effects and editing elements from its media library, Filmstock. You get a wide range of sound effects, titles, transitions, and many more elements.
For Win 7 or later (64-bit)
For macOS 10.12 or later
02 How to Change Pitch in Audacity?
03 How to Change Male Voice to Female Voice with Audacity?
04 How to Create Robot Voice in Audacity?
Part 1. How Can You Use Voice Changer in Audacity?
Voice changers are also commonly referred to as voice enhancers, which can completely change and transform your voice. You can pull pranks on friends with voice changers if you are bored. If you want to hide your identity, you can modify your voice and do that. With voice changers, you can change the tone and the pitch of your voice and add various voice effects.
Voice changer comes with a wide range of sound effects ranging from baby sound, kid, male, female, monster, demon, animal sounds, and a lot more than this. Some great voice changers include AV Voice Changer , MorphVOX Voice Changer , Voicemod , Clownfish Voice Changer , and others. Do you know that these voice changers can be used with Audacity? Let’s tell you how.
Step 1: If you are interested in using a voice changer in Audacity, start by downloading your favorite voice changer to your PC. Once done, install it and after successful installation, launch it.
Step 2: As we have mentioned earlier that you are offered various voice effects in voice changers, so after launching it, select your preferred voice effect, whether it be a baby voice, animal voice, or celebrity voice.
Step 3: On the other side, launch Audacity on your PC. Once it opens, you will see the top menu; just below that, a microphone icon will be seen. Tap on that icon so that the drop-down menu appears, there select the name of your voice changer.
Part 2. How to Change Pitch in Audacity?
Audacity, the audio voice changer, offers a ‘Change Pitch’ feature with which you can change the pitch of the audio without damaging its tempo. You can separately change the speed. With this feature, you can also adjust and play with the frequency and semitones.
The audio editor also features to estimate the starting pitch; for instance, if A3 is a quiet note, followed by a large and loud note like C4, Audacity will detect C4. In case both notes have the same volume, Audacity will detect A3. With Audacity, you also get the ‘To’ and ‘From’ controls if you plan to change the pitch manually. To learn more about changing pitch, follow the steps below:
Step 1: For changing pitch in Audacity, start by launching the software. After launching, you can either record the audio or else, from the ‘File’ section, you can also ‘Open’ any file from your device.
Step 2: Audacity lets you change the pitch of a whole file or else for a small portion as well. Now, to change the pitch of a small portion, click and drag the mouse along the recording. Or else, click on the name of the track to select it completely.
Step 3: After this, head over to the top menu and click on the ‘Effect’ section. A drop-down menu list will appear, locate and select the ‘Change Pitch’ option. You can either use the sliders to adjust the pitch or else write the percentage to change.
Step 4: You can preview the file and check how it sounds once done. When you are satisfied, hit the ‘OK’ button to save the changes. You can also adjust the Speed and Tempo of the track.
Part 3. How to Change Male Voice to Female Voice with Audacity?
The most fun voice transformation is from low pitch to higher pitch. In general, modifying the male voice to a female voice, as the male pitch has a negative value and changing it to a positive pitch, modifies your voice to a female voice. What else could be better to use than the amazing Audacity voice changer? Let’s share the steps that will help you change your male voice to female.
Step 1: First, start by opening the Audacity audio editor. Once it has launched successfully, you should import the audio file. You can record audio with Audacity. Along with this, you can also import files from your device from the ‘File’ section, followed by the ‘Open’ option.
Step 2: After your audio track is visible on the timeline, you have to select the part of the file that you want to edit. You can easily select it by clicking and dragging the mouse. If not this, you can also work with the whole track; for this, simply click on the track name to select it.
Step 3: After you are satisfied with the selection, head to the top menu and select the ‘Effects’ options. A drop-down list appears after this, and you have to look for the ‘Change Pitch’ option and select it.
Step 4: Normally, you can adjust the pitch by taking help from the sliders, but you can also change the pitch manually by adding a percentage. The male pitch originally will have a negative value; change it and set a positive value. You can keep changing until you are satisfied.
Step 5: Lastly, don’t forget to save the changes by hitting the ‘OK’ button at the button and saving the file to your respective device.
Part 4. How to Create Robot Voice in Audacity?
As we have mentioned, Audacity is an audio voice changer, so you must know that Audacity also can change your voice into a robotic voice. Among the different voices, the robot voice sounds interesting, and it’s fun to create. If you are excited to learn to create robot voice in Audacity, follow the guiding steps shared below:
Step 1: For creating an extraordinary robotic voice, start by launching Audacity on your device. After it opens, it’s time to record your voice to create a robot voice. Or else, head to the ‘File’ tab and import your audio file from your device to Audacity from the ‘Open’ option.
Step 2: After this, to start the editing, you need a stereo track on the timeline. For doing this, navigate ‘Tracks’ from the top menu and click on it. Next, hover on the ‘Add New’ option to open its sub-menu. You will see the ‘Stereo Track’ option, select it, and copy-paste the audio file in the new section.
Step 3: Let’s start with the fun part, the editing and adjusting different features. Start by opening the ‘Effects’ tab, and from the long list of options, select ‘Echo.’ There, you can enter the ‘Delay Time’ and change other fields as well.
Step 4: Preview the audio and move on to the next setting. Open the ‘Effects’ section and look for the ‘Change Pitch’ option. You can change and adjust the pitch according to your desire and preview the file again.
Step 5: For creating a robot voice, you can also set the tempo. For that, head to the ‘Change Tempo’ option under the ‘Effects’ section and set the value to minus. Keep adjusting the different effects until you get your perfect robot voice.
Bottom Line
Audacity is not only a great audio editor; it is also a stunning audio voice changer. The software comes with a lot of effects that can completely transform your voice to an unrecognizable level. You can sound like a robot, male, female, and whatever you want with Audacity voice changer. Do you know any video editor that offers sound effects?
If you don’t know, let us introduce Wondershare Filmora Video Editor . This wonderous software is loaded with many editing features to create the best videos. Not only trim, cut, crop, but the software also offers you features like split-screen, chroma key background, keyframing, color match, motion tracking, and whatnot.
Apart from this, this video editor is a hub for cool sound effects and editing elements from its media library, Filmstock. You get a wide range of sound effects, titles, transitions, and many more elements.
For Win 7 or later (64-bit)
For macOS 10.12 or later
Also read:
- Tailoring Sound Techniques for Altering Audio Speed & Pitch in Adobe Rush for 2024
- Updated Mastering Audio Recording 7 Efficient Methods for Chromebook Users for 2024
- Streaming Audio Preservation Methods and Equipment
- In 2024, Turn Your Keyboard Typing Into Real Speech Top Ten No-Cost Services Available Now
- 2024 Approved Innovative Sound Solutions for Videographers Streamlining Effect Implementation
- New 2024 Approved Blending Melodies Into Motion Pictures
- New In 2024, Streamlining Silence Simplified Guide to Extracting Background Noise From Music Tracks Using Audacity
- Scout Audible Assets in Gaming Worlds for 2024
- New The Ultimate Technique for Harmonizing Volume in DaVinci Resolve
- Updated Boosting Windows Volume Without Spending a Dime - Free Techniques Revealed
- Exploring the Best Audio Recorders for Chrome OS S Latest Tech Lineup for 2024
- New 2024 Approved Deactivate Echo Cancellation Technology in Apple Devices
- New 2024 Approved Procuring Immersive Dragon Roar Soundscape
- Updated Music-Infused Videos Made Easy A Guide to the Leading Apps and Websites for Audio Integration
- Updated 2024 Approved Where to Find Custom Game Audio Packages
- Exploring the Leading Podcast Editing Programs Comprehensive Guide to Free & Premium Options
- Updated Steps for Creating MP3 From Audacity Recordings for 2024
- Updated 2024 Approved Enhancing Your Recordings Additional Layers of Voice Processing in Audacity Using Plugins
- New Step-By-Step Guide for Aspiring Filmmakers Incorporating Audio with iMovie for 2024
- New In 2024, The Ultimate Guide to In-the-Wild Chromebook Recording Tips
- Updated 2024 Approved Techniques for Excising Drum Sections in Online Music Editing
- Free Voice Modification Tools The Ultimate Guide to the Top 7
- Updated The Ultimate Guide to Syncing Your Playlist with Final Cut Pro for 2024
- New The Complete Audio Enhancement Manual From Raw Footage to Final Cut 2023S Methodology
- 2024 Approved Understanding the Significance of Team Collaboration in Cinematic Projects
- Updated 2024 Approved Elevate Sound Fidelity with Advanced Latency Reduction Methods
- New In 2024, Detailed Overview of the Wave Editor Key Functions, Ratings, and Step-by-Step Guides
- Updated Expert Strategies for Clearer Dialogue and Ambiance in iMovie Projects for 2024
- Updated 2024 Approved Free Audio Integration in Digital Photography Across Multiple Operating Systems
- In 2024, Christmas Is Coming! How to Find & Make Animated Christmas GIFs?
- How to Repair a Damaged video file of Reno 10 Pro 5G using Video Repair Utility on Windows?
- How to Fix Error 495 While Download/Updating Android Apps On Vivo Y17s | Dr.fone
- Updated The Ultimate Guide to Twitter Video Aspect Ratio and Size for 2024
- Top 5 Tracking Apps to Track Realme C67 4G without Them Knowing | Dr.fone
- New Video to Audio Conversion Made Easy My Selection Criteria for 2024
- In 2024, Life After Windows Movie Maker Top Alternative Video Editors
- New Android App Chart-Toppers The Most Popular Downloads
- How to Resolve Realme C33 2023 Screen Not Working | Dr.fone
- How to use Snapchat Location Spoofer to Protect Your Privacy On Samsung Galaxy A54 5G? | Dr.fone
- In 2024, About Lava Blaze Pro 5G FRP Bypass
- New Learning Some Perfect Ways to Convert a Slow-Motion Video to Normal for 2024
- How To Unlock Any Samsung Galaxy Z Fold 5 Phone Password Using Emergency Call
- Top 5 Asus ROG Phone 7 Ultimate Bypass FRP Tools for PC That Actually Work
- Updated Reduce File Size, Not Quality 9 Best Free Video Compressors for Windows 10
- Android Unlock Code Sim Unlock Your Infinix Smart 7 HD Phone and Remove Locked Screen
- 3 Methods to Mirror Honor Magic 5 to Roku | Dr.fone
- How to Intercept Text Messages on Vivo V27e | Dr.fone
- 2024 Approved VHS to Digital Best Apps for iPhone and Android
- In 2024, How to Fake Snapchat Location on Oppo Reno 11 5G | Dr.fone
- How to Change Netflix Location to Get More Country Version On Vivo Y100A | Dr.fone
- How To Bypass Google FRP on Honor 100
- New Ditch iMovie Top Free Online Video Editing Software
- In 2024, How Do You Get Sun Stone Evolutions in Pokémon For OnePlus Open? | Dr.fone
- Best Apple iPhone 6 & iPad Screen Mirroring App | Dr.fone
- New In 2024, 10 2D/3D Animation Tips & Tricks to Bring New Ideas to You
- Wondering the Best Alternative to Hola On Honor Play 7T? Here Is the Answer | Dr.fone
- How to use iSpoofer on Oppo A2? | Dr.fone
- Title: Updated 2024 Approved Integrating Audible Elements Into Your Slides A Comprehensive Guide for Recording Sound in PowerPoint on PC/Mac Systems
- Author: David
- Created at : 2024-05-05 10:04:33
- Updated at : 2024-05-06 10:04:33
- Link: https://sound-tweaking.techidaily.com/updated-2024-approved-integrating-audible-elements-into-your-slides-a-comprehensive-guide-for-recording-sound-in-powerpoint-on-pcmac-systems/
- License: This work is licensed under CC BY-NC-SA 4.0.
