

Updated 2024 Approved Complete List of Podcast Directories
Complete List of Podcast Directories
Submitting your podcast show on different platforms is essential to get the right audiences. As we all know, the more podcast directories you publish your show, the more listeners you get.
Yet, finding the ideal choices can take time and effort with many podcast directories available online. Worry less. We’ve compiled a list of the best podcast directories you can always count on to publish your podcast show anytime.
- YouTube
- Spotify
- Apple Podcasts
- Google Podcasts
- Pandora
- Audible
- NPR One
- Tune In
- Podcast Addict
- RadioPublic
- Overcast
- Pocket Casts
- CastBox
- Stitcher
- More choices to submit your podcast shows
- How to submit a show to podcast directories?
- Hot FAQs on Podcast Directories
Part 1. What are podcast directories?
A podcast directory is a listening app. It’s the place where podcasts and their listeners meet. Podcast listeners search for, subscribe to, and listen to your Podcast using their podcast directory of choice. Popular podcast directories include Apple Podcasts, Spotify, and Google Podcasts.
Part 2. 15 Top podcast directories to focus on in 2024
Thankfully, research conducted by EdisonResearch shows the weekly audience reach of top podcast directories. So this list will help us locate the best podcasting directories. And it can multiply your audience size and quickly reach a more extensive user base.
According to Edison Research, the top 15 Podcast Networks are:

You must retain that Edison’s research only analyzes the US podcast services. Yet, our guide has compiled the best podcasting directories to connect with users worldwide.
Below you will find the list of top podcast directories and their reviews. But keep in mind that when it comes to podcast directories, there is no such thing as best or worse. Instead, it’s all about the user base and audience reach. So, it is best to submit your podcasts to multiple podcasting directories.
1. YouTube
With a monthly active user base of 2.5 billion, YouTube should be the top choice of any podcast creator. According to a recent survey by Statista, YouTube took over Spotify to become the largest platform for podcast consumption worldwide. Additionally, 47.7% of the US audience prefers YouTube over other platforms for listening to podcasts.
Not to forget, YouTube comes pre-installed on all smartphones and is also accessible via the Web to users worldwide. Another benefit of YouTube is that it is free for creators and users. Plus, once you grow your user base, it also allows you to get surplus revenue.

Of course, YouTube is a video-only platform. Still, you can use tools like Wondershare Filmora to create video-based podcasts seamlessly. You can simply convert the video podcasts into an audio format using Filmora itself and then reupload the same Podcast to even audio-based podcast directories.
Free Download For Win 7 or later(64-bit)
Free Download For macOS 10.14 or later
Tools like Fimora also allow you to directly publish the created Podcast on YouTube (so you do not have to worry about video requirements mandatory for YouTube).
- User Review of YouTube on G2: “YouTube is one of those sites that you can’t live without for a business. Everyone knows what YouTube is, and users (globally) use the platform daily.”
- Monthly User Base: Over 2.5 billion active users.
- Supported OS: All major OS and web browsers.
2. Spotify
Spotify has over 389 million listeners across 187 markets worldwide. Available on all major OS and its web presence makes it one of the best directories of podcasts on the internet.
Aside from its audience base, Spotify also provides real-time insights, like who your audience is, what they like, which episodes they prefer, and even what songs they want. All these insights will also help you plan your future content according to the audience.

Spotify’s personalized recommendations and algorithms are another pluses, given you can get discovered easily/ Like YouTube, Spotify allows you to upload even video podcasts. While you can also create and upload podcasts in audio format only.
- User Review of Spotify on G2: “I can find any song, artist, album, and even podcasts at any time and no commercials.”
- Monthly User Base: Over 360 million active users.
- Supported OS: All major OS and web browsers.
3. Apple Podcasts
Apple Podcast is another top directory for a podcast that creators cannot ignore. Given it is an exclusive-podcast platform, its 28.5 million active user base in more than 170 countries and regions is enough to tell its greatness.
It is essential to understand that YouTube and Spotify are not exclusive podcast platforms like Apple Podcasts. And while Spotify and YouTube are best for connecting novice podcast listeners, Apple Podcast is the way to go if you want to connect with a dedicated podcast community.
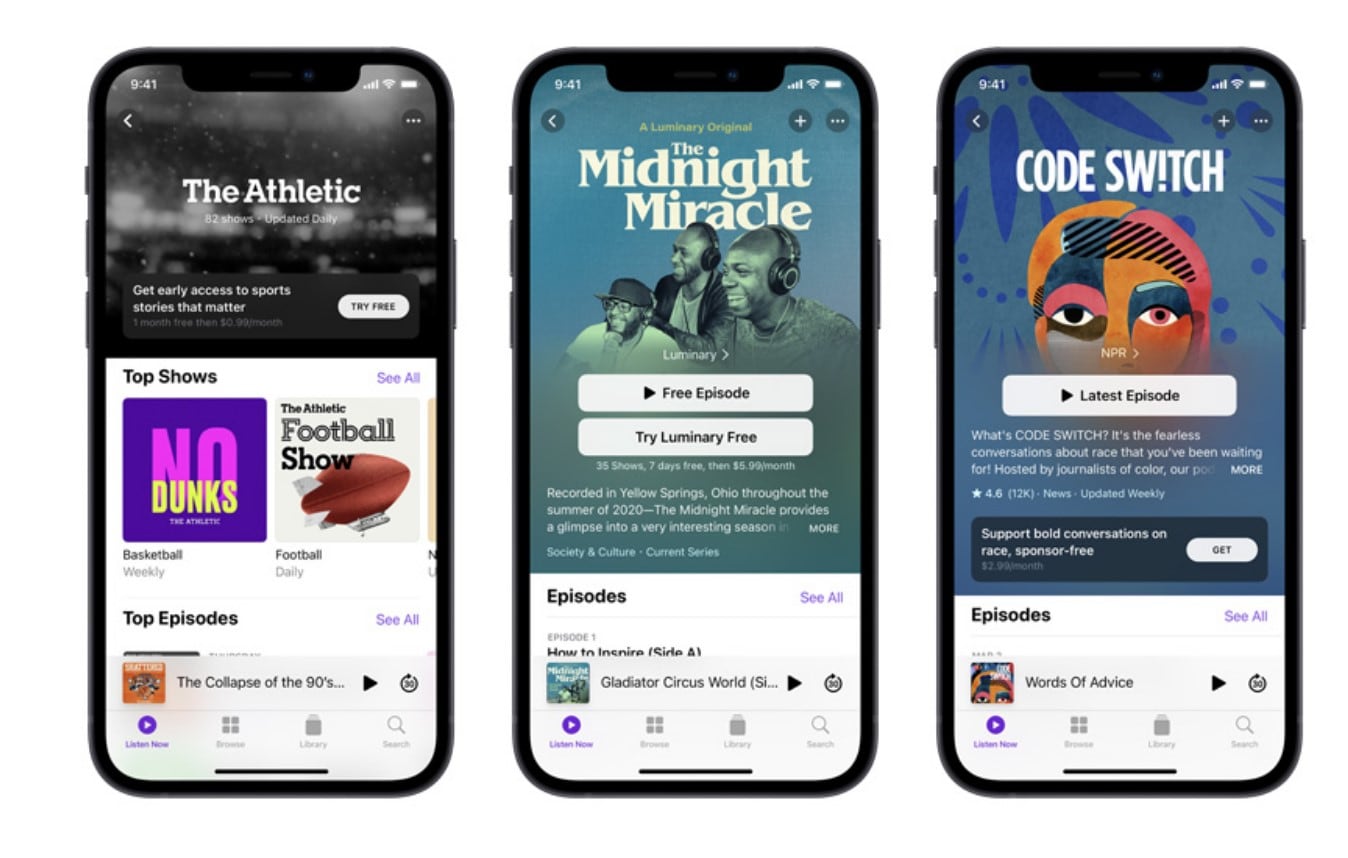
The best thing about the Apple Podcast directory is it allows you to create a podcast (via Apple Podcast Connect), but you must be an Apple user. However, you can submit your podcasts to Apple Podcast via RSS feed even if you are not an Apple user.
In all, given Apple Podcast is available for Apple users and is known by default on all Apple devices (the most prominent smartphone company in the world), Apple Podcast is a must-use podcast directory.
- User Review of Apple Podcast: “Apple once again nails with simplicity, millions of shows of my interest, and freemium service.”
- Monthly User Base: Over 28.5 million active users.
- Supported OS: All Apple devices.
4. Google Podcasts
Google Podcasts has over 100 million downloads on Play Store alone and is also available on the web, App Store, Blackberry, and ChromeOS users. A completely subscription-free and ad-free platform, Google Podcasts is one of the top podcasting directories among users.
However, unlike the Apple Podcast directory, it does not have a studio, so you can only submit your podcasts via RSS feeds. Still, its user base and the advanced algorithms are an opportunity to connect with users who like the subjects you discuss.
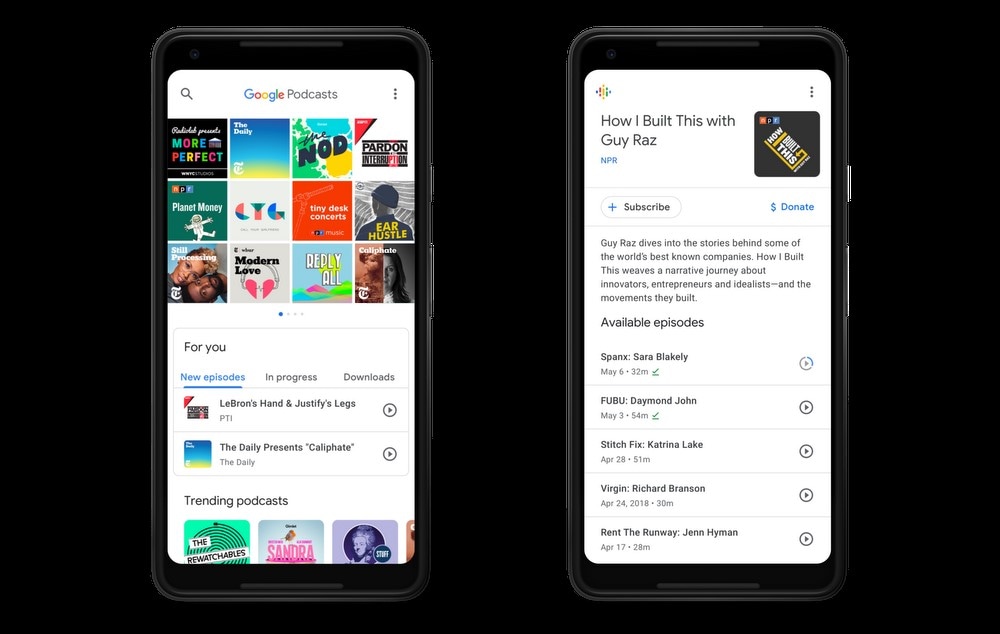
Like Spotify and Apple Podcast directories, Google Podcasts also show you real-time analytics and guide you about users so that you can plan your content accordingly. Given that it only requires a Google account to start, it is another top podcast directory you cannot ignore.
- User Review of Google Podcast
“Google Podcast includes everything that a podcast listener wants. It’s simple, free, and includes valuable options like Sleep Timer, Playback speed, and more.”
- Monthly User Base: Over 30 million active users.
- Supported OS: Dedicated apps for all major OS and web presence.
5. Pandora
Pandora has over 64 million monthly active users, with a listener spending up to 24 hours/monthly on the platform. It explains that users spend up to 45 minutes on the Pandora platform tuning in to their favorite podcasts. Again, its search-based algorithms allow you to get discovered by users that like subjects and topics on which you’re creating podcasts, meaning it is simple to connect with a large user base conveniently.
Pandora only accepts podcasts via RSS feed, which should be in MP3 format. But recent notifications have shown more audio formats will be added.
However, it is vital to retain that Pandora Podcast’s team critically analyzes all submissions manually. So, it might take up to 4-6 weeks for your first Podcast to appear on the platform.
- User Review of Pandora Podcast
“Pandora Podcasts recommendations are a blessing for me, who always finds it confusing to locate the right episode to spend my time on.”
- Monthly User Base: Over 64 million active users.
- Supported OS: Dedicated apps for all major OS and web presence.
6. Audible
Although popular among audiobook lovers, Audible has a considerable podcast following too. Its monthly active user base is around 41 million. The biggest benefit of registering your Podcast on the Audible directory of podcasts is that it connects with users who use Alexa to discover new podcasts.
Besides Audible, the Podcast will also be available for users of the Amazon Music app. That means you can connect with even more users via one submission only. Not to forget, Amazon Prime Video (a massive following) users get a free subscription to Amazon Music, so there’s a perfect chance that you will connect with users conveniently.
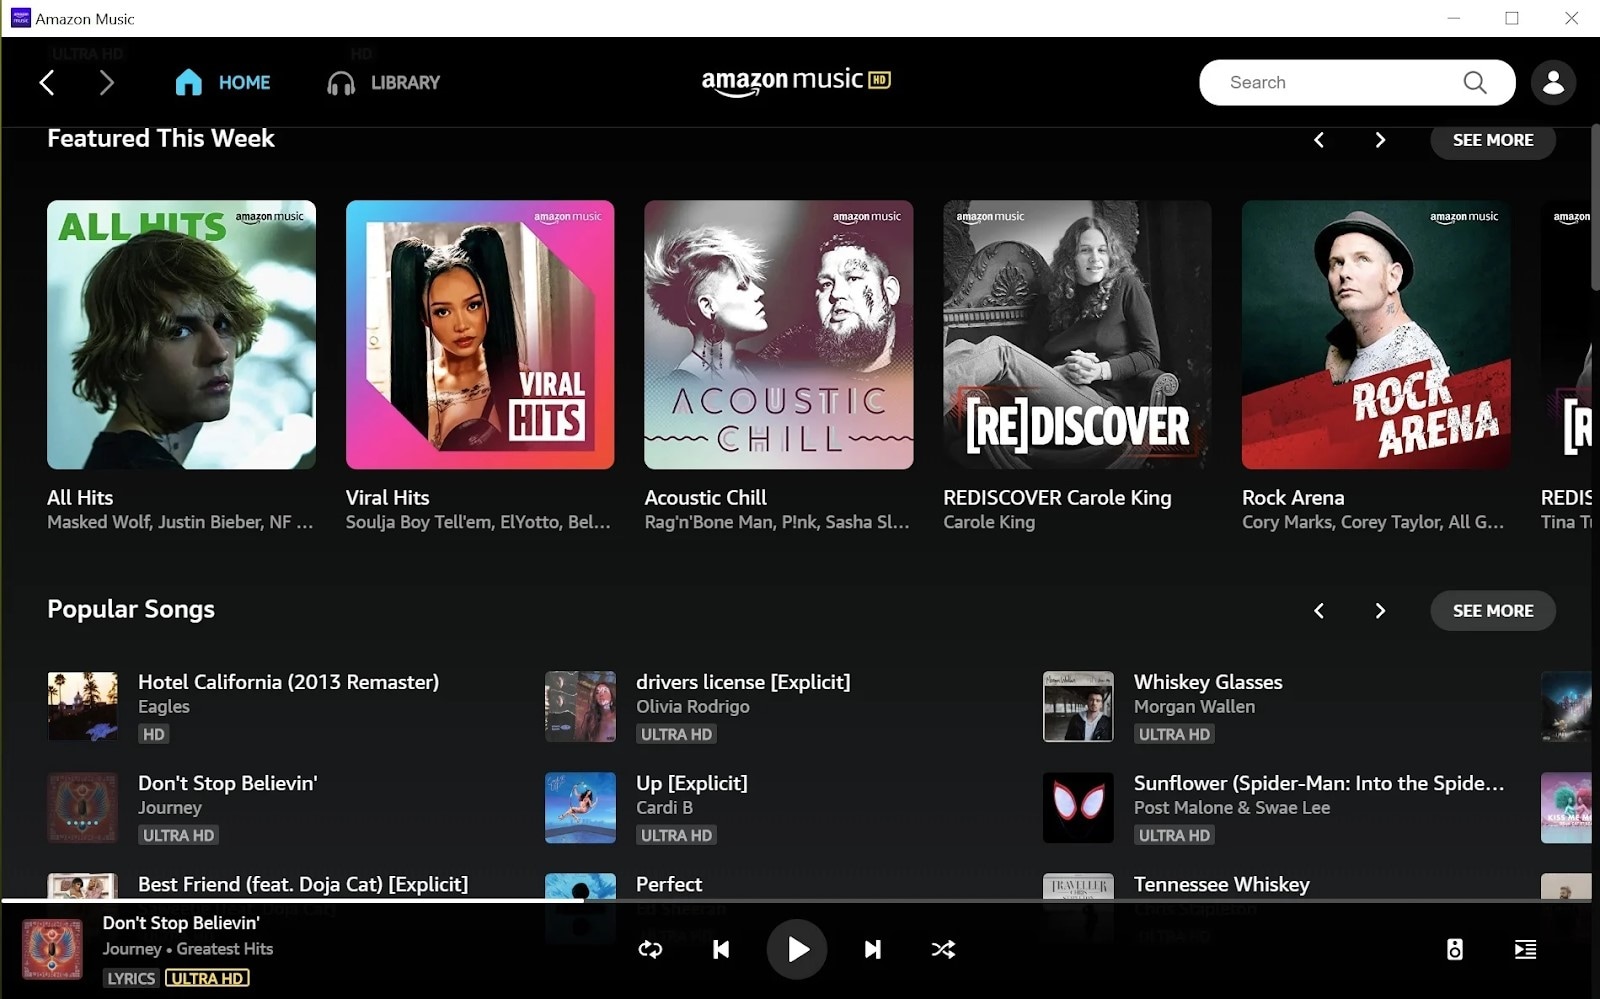
It is important to note that both Amazon Music and Audible offer podcasts for entirely free to users, so a more extensive user base prefers these platforms over paid platforms.
- User Review of Pandora Podcast
“You get to listen to any audiobook in the “included” library no matter which subscription you purchase..”
- Monthly User Base: Over 64 million active users.
- Supported OS: Android, iOS,
7. NPR One
With an average listener spending up to 145 minutes weekly, the NPR One podcast directory is one of the best podcast directories you can trust to submit your show online. The podcast directory has a userbase of over 500 thousand users globally, and
- User Review of NPR One Podcast
“I’ve been using this app for years now. It’s been my trusty companion to give me the news. I primarily use it with the sleep timer. I’m not a super picky consumer, especially when I don’t pay for the app!
But for many months now, the sleep timer will frequently think the time is up and shut off the player well before it should. The player will often shut off within 5 minutes of using the 30 min sleep timer. It’s annoying to open the player hit resume, and reset the sleep timer.”
- Monthly User Base: 500 thousand
- Supported OS: Android, iOS
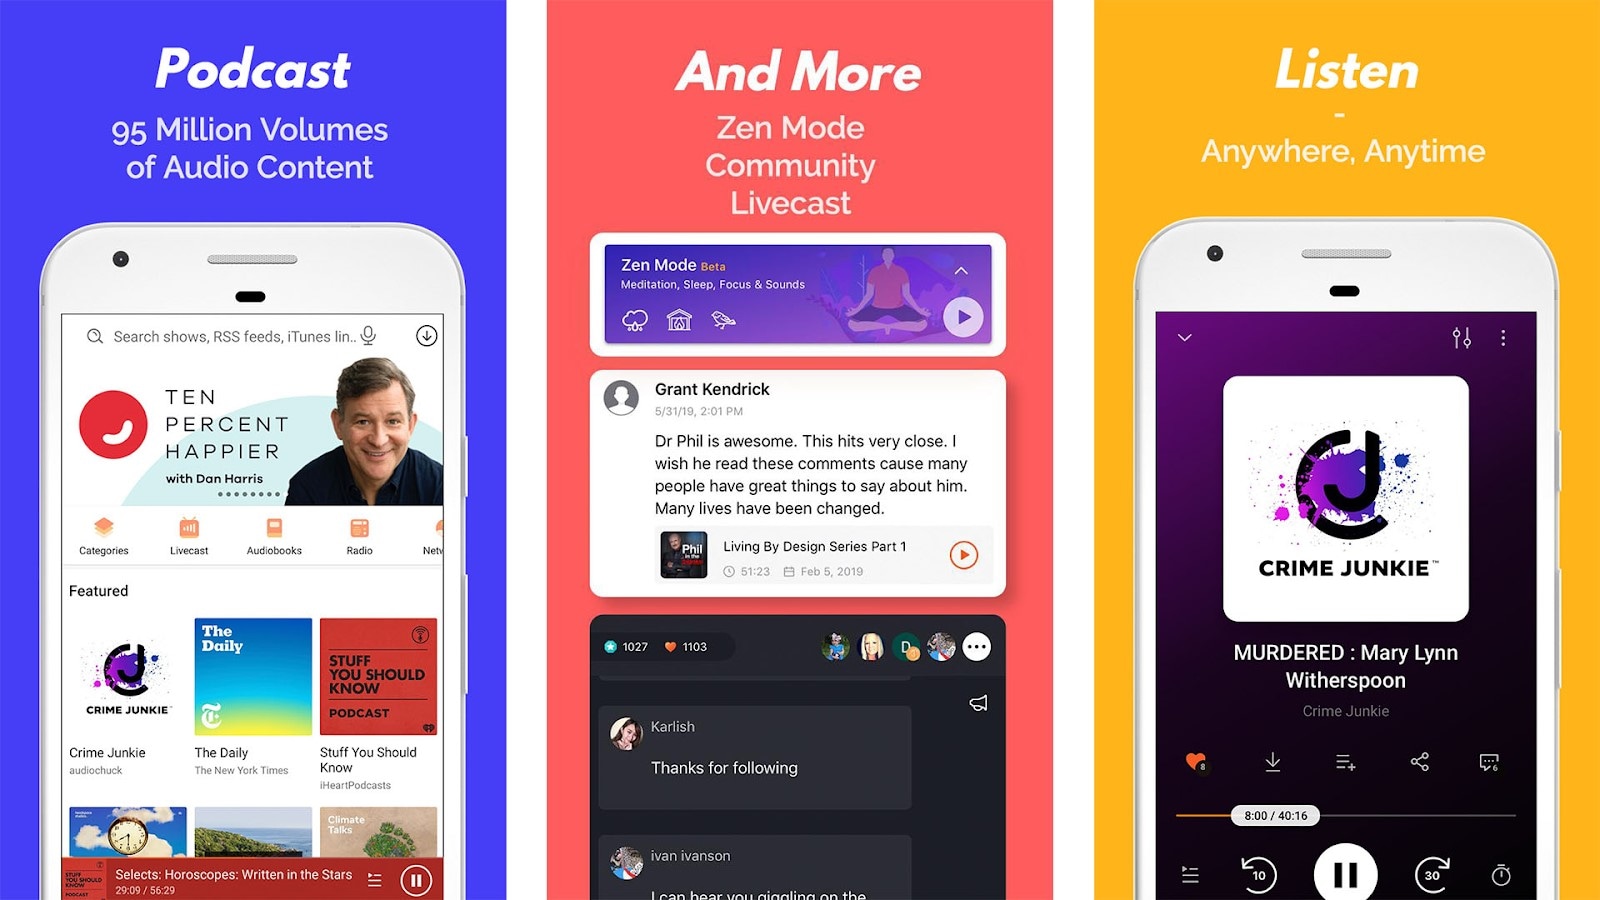
8. Tune In

Technically, TuneIn is a radio. But lately, it has become prevalent amongst podcast listeners to find their favorite shows and also listen to music. The podcast directory has a global user base of over 75 million and a monthly visit of 7million+, which makes it a great spot for any podcaster to publish their show.
- User Review of Tune In Podcast
“I’ve been using the app for 4 years. I like it, but there are some annoying “features.”
the screen won’t time out when the app is active.
the developers must have recently made a change. I used to search through my list of “recent” (there were about 20) to look for new episodes of my favorite podcasts.
Now, the app only allows me to see the last four podcasts or stations I have listened to. So it is not helpful.’
- Monthly User Base: Over 7 million active users
- Supported OS: Dedicated apps for all major OS and web presence.
9. Podcast Addict
With over 10 million downloads on Google Playstore, Podcast Addict is one of Android’s most popular podcast apps. You can publish your podcast show, as it allows you to connect with the ideal audience quickly and easily.
Also, Podcast Addict is one of the few podcast directories available in various languages, including French and German. So it’s a perfect choice non-English podcasters.
- User Review of PodcastAddit
**”**Been using this for years. It does everything I could ever want when listening/ referencing/ re-listening to my favorite podcasts and a lot more.
I’ve suffered through having to use other podcast players (e.g., listening to something “exclusive”), but I couldn’t stand the inane simplicity of other players long enough to finish their content.
Also, it takes a bit to get used to (especially if you’re coming from other stripped-down players), but very worth the small effort for a powerful app.”
- Monthly User Base: Over 750 thousand active users.
- Supported OS: Dedicated Android App and web presence.
10. RadioPublic

Having been in the game for over 15 years, RadioPublic is another excellent podcast directory you can count on to submit your show. Although the platform does not have a massive user base compared to its competitors, it will help you grow your listeners and business by getting your podcast show to the right audience.
On RadioPublic, an average listener spends up to 72 minutes every day finding new podcast shows and listening to new episodes from their favorite podcasts. And given that the platform offers many robust features, listeners can enjoy a seamless listening experience on any device.
Overall, the RadioPublic podcast directory offers you a smart way to publish your show and grow your audience without going through stress.
- User Review of RadioPublic
“Glad I waited a while to find a podcast website provider. Starting from scratch in WordPress seemed too much hassle. Luckily the site came along while I was dithering about what to do.
The RadioPublic team onboarded the other 5 billion podcasts as one of the first examples, and I’m delighted to have chosen this option. Already, my pod site feels “complete” to look at, and more features are coming soon that will help with marketing, understanding listeners, and building a podcast brand.”
- Monthly User Base: Over 300 Thousand active users
- Supported OS: Dedicated apps for all major OS and web presence.
11. Overcast
Overcast is a dedicated podcast app for Apple devices, and what makes it a great podcast directory is that it offers unique features that attract many listeners.
On this platform, you’ll be allowed to display advertising slots, enabling listeners to subscribe to your podcast show within a few clicks. Plus, unlike many of its competitors, listeners have control over what podcast show is displayed in the featured podcast section. It is helpful as it lets listeners quickly discover every new episode you publish.
Overall, many incredible features make Overcast a good choice, and chances are your Podcast will get to real listeners when you publish them here.
- User Review of Overcast
**”**Nice alternative to Apple’s. I’ve been well pleased so far. It isn’t always the most intuitive, but I’ve eventually figured out how to achieve almost everything I’ve wanted to. The benefits of adding a show via RSS have become immediately clear.
Being a subscriber to a show and getting early access episodes and bonus material right in my podcast manager makes it easy to stay up with all my shows.”
- Monthly User Base: Over 70 Thousand active users.
- Supported OS: Dedicated app for iOS and web presence.
12. Pocket Casts
If you’re looking for a free podcast directory to publish your Podcast show, Pocket Casts is the ideal one for you. This podcast directory is packed with many rich features that podcasters will find very helpful. In addition, thanks to its beautifully designed website interface, you won’t find the platform difficult to use.
Besides, many listeners love Pocket Podcasts as it offers them incredible features—for example, improved discovery options, playback speed options, and lots more. In addition, they’ve enhanced how they find and listen to podcasts on the platform. You can’t go wrong publishing your show on a platform like this one.
- User Review of Pocket Casts
“Wonderful app, the most reliable one I’ve found. Even with accounts, most others lose all your progress data which hasn’t happened once with this, and I’ve switched phones 3 times. The progress tracker is so accurate you can pause on one device, open the same account and continue listening. Most apps can’t even keep things downloaded. Search does take a minute but finds stuff no other app does.”
- Monthly User Base: Over 1 Million active users.
- Supported OS: Dedicated apps for all major OS and web presence.
13. CastBox
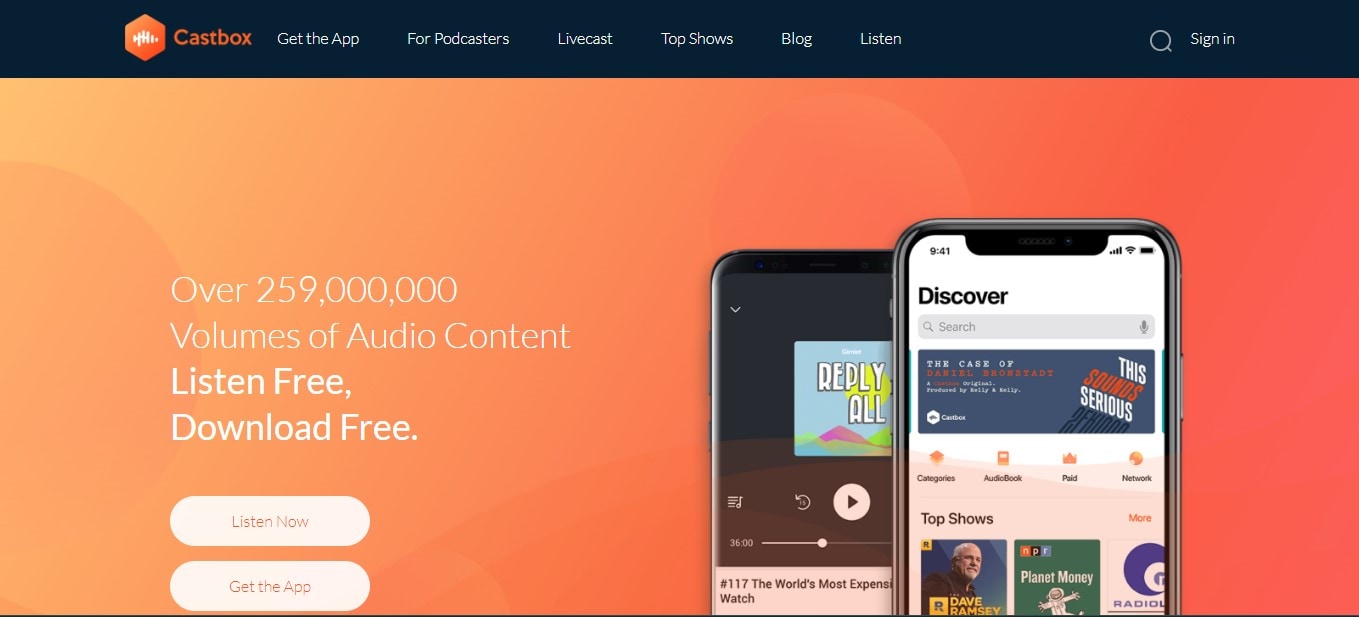
CastBox is another unique podcast directory that podcasters trust to publish their show online. The platform boasts an optimized SEO and artificial intelligence that lets listeners find new podcast shows. Thanks to its massive user base of up to 20 Million users, your Podcast could reach a wide range of audiences quickly and easily.
Also, CastBox offers social media features that allow listeners to comment and share your podcast show on their social media page, thus helping you get your show to more listeners and potentially increase your fanbase.
- User Review of CastBox
“I’ve been a podcaster for years and an avid podcast listener for a while. So I searched high and low for the best podcast app and distribution service, Castbox. They have a great app and website, a huge content library, and a superb feature set. Also, their app allows offline listening, as I can download my favorite podcast show.”
- Monthly User Base: Over 1 million active users
- Supported OS: Dedicated apps for all major OS and web presence.
14. Stitcher
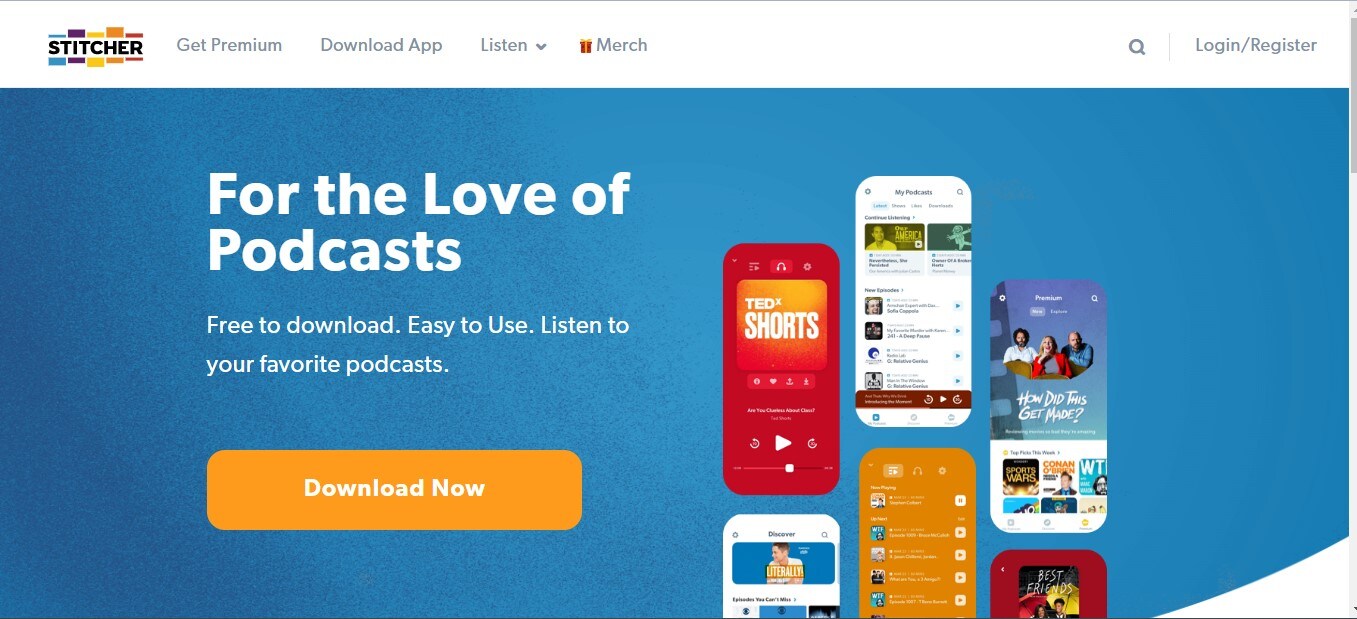
Last but not least podcast directory on our list is Stitcher. The platform boasts more than 14.5 Million active listeners, with an average listener having up to 25 hours of listening duration per month.
Stitcher helps you alleviate the stress of getting your show to the right audience, and thanks to the platform’s easy podcast submission requirements, you only need to have at least one podcast episode on your RSS Feed to get approved.
Also, Stitcher offers a unique analytic tool that allows you to track the performance of your show on the platform, and what more impressive is that it’s integrated into more than fifty car models. In addition, it works with any vehicle that supports Apple’s CarPlay and Android Auto, which makes it a great choice for podcasters who believe their audience loves to listen to their show while driving.
- User Review of Stitcher
“So glad I switched! I have my podcasts but didn’t listen to them much - partially because Apple Podcasts is so hard to use. I switched to Stitcher to listen to The Magnus Archives, and I love it!”
- Monthly User Base: Over 1.5 million active users.
- Supported OS: Dedicated apps for all major OS and web presence.
Part 3. More choices to submit your podcast shows
The above Podcast directories are great choices you can always count on any day. However, if you’re looking for more options, the following are reliable podcasting directories to choose from;
Part 4. How to submit a show to podcast directories?
Submitting a podcast show to podcast directories is pretty simple. Here, we used Spotify as an example to show you how you can easily submit your podcast show within a few clicks. The steps are as follows;
Step1 Create a Spotify account using the email attached to your podcast host.
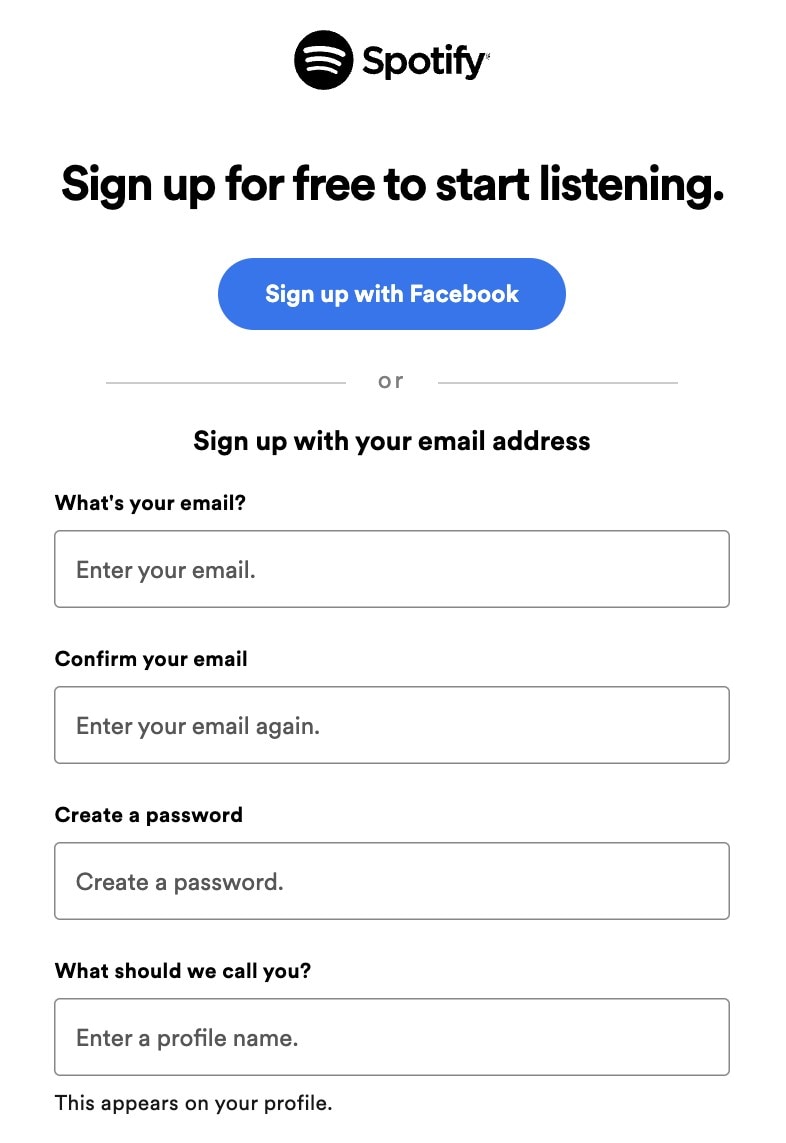
Step2 Open Spotify for Podcasters in your browser and login into your account. Then, click Get Started on the new screen.
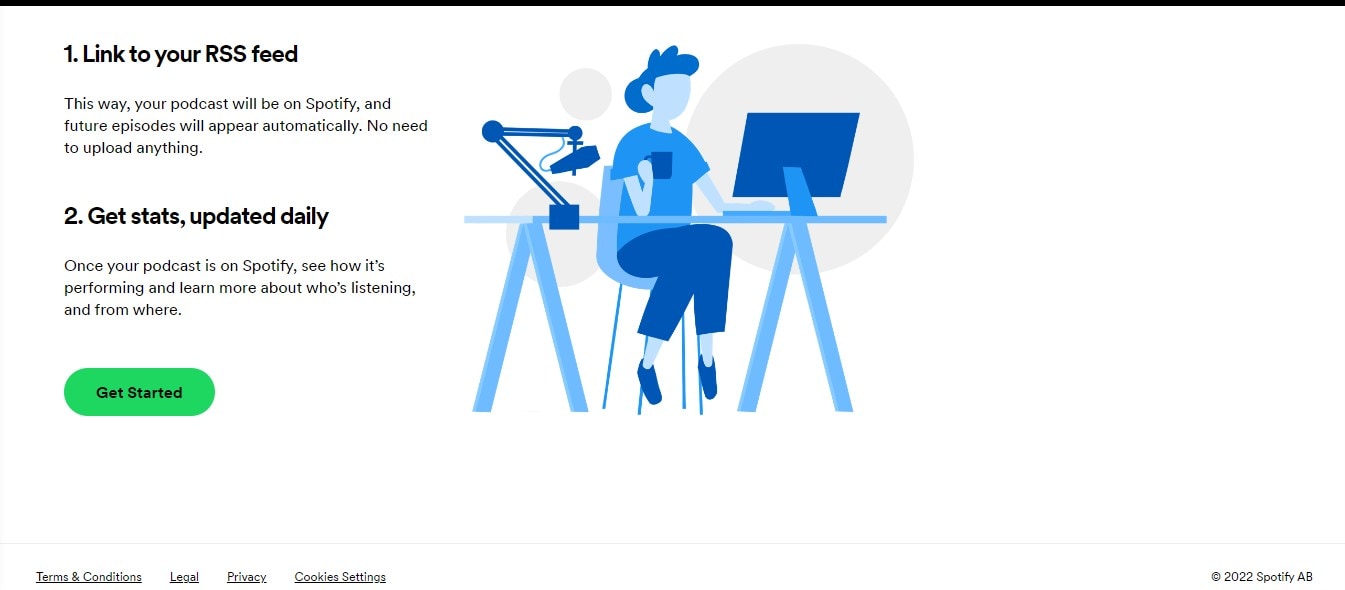
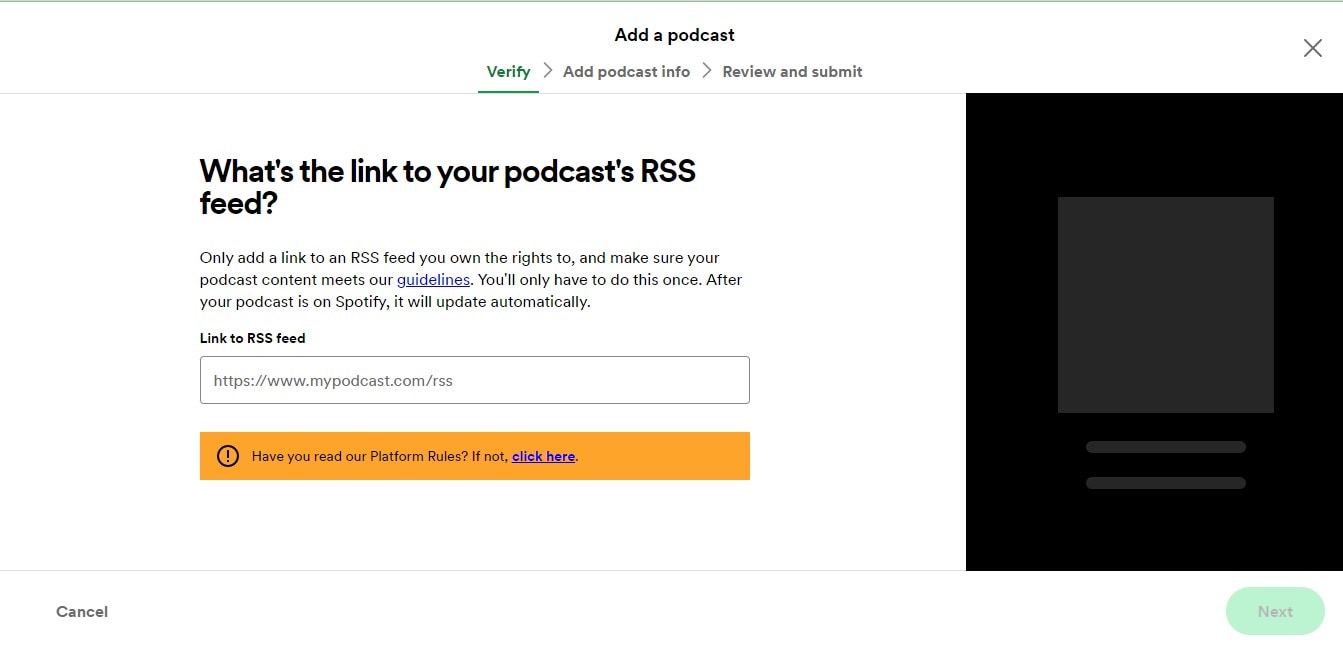
Step3 Provide your Podcast’s RSS Feed and click Next to proceed.
Step4 You’ll be asked to add information about your Podcast, from its description to the title, artwork, etc.
Step5 Verify the Podcast by submitting the code sent to your email.
Step6 Review the information you’ve provided so far and submit it to Spotify for review.
Once you complete the steps, keep an eye on the submitted Podcast, as Spotify won’t message you even if your Podcast has been published.
Hot FAQs on Podcast Directories
1. Are podcast directories free?
Almost all top podcast directories are entirely free for creators. All you have to do is sign up on the platforms. Then, check the platform’s requirements to submit your podcast episodes, like the format, cover photos, and description. Of course, the requirements vary depending on the platform.
2. Can any podcast be on a directory of podcasts?
Yes, you can choose from any podcast directory to publish your Podcast. There’s no limitation. When submitting, you must select the ideal category for your podcast show so it can be displayed to the right audience.
3. Does it cost to join a podcast directory?
Yes, and the cost of joining a podcast directory varies depending on your platform.
Conclusion
The podcast directories introduced above are reliable for submitting podcast shows. So, chances are there, no matter what your podcast show is about. It’ll help you connect with the right audience. However, one thing is vital you need to make sure you choose the podcast directory that suits you.
Part 1. What are podcast directories?
A podcast directory is a listening app. It’s the place where podcasts and their listeners meet. Podcast listeners search for, subscribe to, and listen to your Podcast using their podcast directory of choice. Popular podcast directories include Apple Podcasts, Spotify, and Google Podcasts.
Part 2. 15 Top podcast directories to focus on in 2024
Thankfully, research conducted by EdisonResearch shows the weekly audience reach of top podcast directories. So this list will help us locate the best podcasting directories. And it can multiply your audience size and quickly reach a more extensive user base.
According to Edison Research, the top 15 Podcast Networks are:
You must retain that Edison’s research only analyzes the US podcast services. Yet, our guide has compiled the best podcasting directories to connect with users worldwide.
Below you will find the list of top podcast directories and their reviews. But keep in mind that when it comes to podcast directories, there is no such thing as best or worse. Instead, it’s all about the user base and audience reach. So, it is best to submit your podcasts to multiple podcasting directories.
1. YouTube
With a monthly active user base of 2.5 billion, YouTube should be the top choice of any podcast creator. According to a recent survey by Statista, YouTube took over Spotify to become the largest platform for podcast consumption worldwide. Additionally, 47.7% of the US audience prefers YouTube over other platforms for listening to podcasts.
Not to forget, YouTube comes pre-installed on all smartphones and is also accessible via the Web to users worldwide. Another benefit of YouTube is that it is free for creators and users. Plus, once you grow your user base, it also allows you to get surplus revenue.
Of course, YouTube is a video-only platform. Still, you can use tools like Wondershare Filmora to create video-based podcasts seamlessly. You can simply convert the video podcasts into an audio format using Filmora itself and then reupload the same Podcast to even audio-based podcast directories.
Free Download For Win 7 or later(64-bit)
Free Download For macOS 10.14 or later
Tools like Fimora also allow you to directly publish the created Podcast on YouTube (so you do not have to worry about video requirements mandatory for YouTube).
- User Review of YouTube on G2: “YouTube is one of those sites that you can’t live without for a business. Everyone knows what YouTube is, and users (globally) use the platform daily.”
- Monthly User Base: Over 2.5 billion active users.
- Supported OS: All major OS and web browsers.
2. Spotify
Spotify has over 389 million listeners across 187 markets worldwide. Available on all major OS and its web presence makes it one of the best directories of podcasts on the internet.
Aside from its audience base, Spotify also provides real-time insights, like who your audience is, what they like, which episodes they prefer, and even what songs they want. All these insights will also help you plan your future content according to the audience.
Spotify’s personalized recommendations and algorithms are another pluses, given you can get discovered easily/ Like YouTube, Spotify allows you to upload even video podcasts. While you can also create and upload podcasts in audio format only.
- User Review of Spotify on G2: “I can find any song, artist, album, and even podcasts at any time and no commercials.”
- Monthly User Base: Over 360 million active users.
- Supported OS: All major OS and web browsers.
3. Apple Podcasts
Apple Podcast is another top directory for a podcast that creators cannot ignore. Given it is an exclusive-podcast platform, its 28.5 million active user base in more than 170 countries and regions is enough to tell its greatness.
It is essential to understand that YouTube and Spotify are not exclusive podcast platforms like Apple Podcasts. And while Spotify and YouTube are best for connecting novice podcast listeners, Apple Podcast is the way to go if you want to connect with a dedicated podcast community.
The best thing about the Apple Podcast directory is it allows you to create a podcast (via Apple Podcast Connect), but you must be an Apple user. However, you can submit your podcasts to Apple Podcast via RSS feed even if you are not an Apple user.
In all, given Apple Podcast is available for Apple users and is known by default on all Apple devices (the most prominent smartphone company in the world), Apple Podcast is a must-use podcast directory.
- User Review of Apple Podcast: “Apple once again nails with simplicity, millions of shows of my interest, and freemium service.”
- Monthly User Base: Over 28.5 million active users.
- Supported OS: All Apple devices.
4. Google Podcasts
Google Podcasts has over 100 million downloads on Play Store alone and is also available on the web, App Store, Blackberry, and ChromeOS users. A completely subscription-free and ad-free platform, Google Podcasts is one of the top podcasting directories among users.
However, unlike the Apple Podcast directory, it does not have a studio, so you can only submit your podcasts via RSS feeds. Still, its user base and the advanced algorithms are an opportunity to connect with users who like the subjects you discuss.
Like Spotify and Apple Podcast directories, Google Podcasts also show you real-time analytics and guide you about users so that you can plan your content accordingly. Given that it only requires a Google account to start, it is another top podcast directory you cannot ignore.
- User Review of Google Podcast
“Google Podcast includes everything that a podcast listener wants. It’s simple, free, and includes valuable options like Sleep Timer, Playback speed, and more.”
- Monthly User Base: Over 30 million active users.
- Supported OS: Dedicated apps for all major OS and web presence.
5. Pandora
Pandora has over 64 million monthly active users, with a listener spending up to 24 hours/monthly on the platform. It explains that users spend up to 45 minutes on the Pandora platform tuning in to their favorite podcasts. Again, its search-based algorithms allow you to get discovered by users that like subjects and topics on which you’re creating podcasts, meaning it is simple to connect with a large user base conveniently.
Pandora only accepts podcasts via RSS feed, which should be in MP3 format. But recent notifications have shown more audio formats will be added.
However, it is vital to retain that Pandora Podcast’s team critically analyzes all submissions manually. So, it might take up to 4-6 weeks for your first Podcast to appear on the platform.
- User Review of Pandora Podcast
“Pandora Podcasts recommendations are a blessing for me, who always finds it confusing to locate the right episode to spend my time on.”
- Monthly User Base: Over 64 million active users.
- Supported OS: Dedicated apps for all major OS and web presence.
6. Audible
Although popular among audiobook lovers, Audible has a considerable podcast following too. Its monthly active user base is around 41 million. The biggest benefit of registering your Podcast on the Audible directory of podcasts is that it connects with users who use Alexa to discover new podcasts.
Besides Audible, the Podcast will also be available for users of the Amazon Music app. That means you can connect with even more users via one submission only. Not to forget, Amazon Prime Video (a massive following) users get a free subscription to Amazon Music, so there’s a perfect chance that you will connect with users conveniently.
It is important to note that both Amazon Music and Audible offer podcasts for entirely free to users, so a more extensive user base prefers these platforms over paid platforms.
- User Review of Pandora Podcast
“You get to listen to any audiobook in the “included” library no matter which subscription you purchase..”
- Monthly User Base: Over 64 million active users.
- Supported OS: Android, iOS,
7. NPR One
With an average listener spending up to 145 minutes weekly, the NPR One podcast directory is one of the best podcast directories you can trust to submit your show online. The podcast directory has a userbase of over 500 thousand users globally, and
- User Review of NPR One Podcast
“I’ve been using this app for years now. It’s been my trusty companion to give me the news. I primarily use it with the sleep timer. I’m not a super picky consumer, especially when I don’t pay for the app!
But for many months now, the sleep timer will frequently think the time is up and shut off the player well before it should. The player will often shut off within 5 minutes of using the 30 min sleep timer. It’s annoying to open the player hit resume, and reset the sleep timer.”
- Monthly User Base: 500 thousand
- Supported OS: Android, iOS
8. Tune In
Technically, TuneIn is a radio. But lately, it has become prevalent amongst podcast listeners to find their favorite shows and also listen to music. The podcast directory has a global user base of over 75 million and a monthly visit of 7million+, which makes it a great spot for any podcaster to publish their show.
- User Review of Tune In Podcast
“I’ve been using the app for 4 years. I like it, but there are some annoying “features.”
the screen won’t time out when the app is active.
the developers must have recently made a change. I used to search through my list of “recent” (there were about 20) to look for new episodes of my favorite podcasts.
Now, the app only allows me to see the last four podcasts or stations I have listened to. So it is not helpful.’
- Monthly User Base: Over 7 million active users
- Supported OS: Dedicated apps for all major OS and web presence.
9. Podcast Addict
With over 10 million downloads on Google Playstore, Podcast Addict is one of Android’s most popular podcast apps. You can publish your podcast show, as it allows you to connect with the ideal audience quickly and easily.
Also, Podcast Addict is one of the few podcast directories available in various languages, including French and German. So it’s a perfect choice non-English podcasters.
- User Review of PodcastAddit
**”**Been using this for years. It does everything I could ever want when listening/ referencing/ re-listening to my favorite podcasts and a lot more.
I’ve suffered through having to use other podcast players (e.g., listening to something “exclusive”), but I couldn’t stand the inane simplicity of other players long enough to finish their content.
Also, it takes a bit to get used to (especially if you’re coming from other stripped-down players), but very worth the small effort for a powerful app.”
- Monthly User Base: Over 750 thousand active users.
- Supported OS: Dedicated Android App and web presence.
10. RadioPublic
Having been in the game for over 15 years, RadioPublic is another excellent podcast directory you can count on to submit your show. Although the platform does not have a massive user base compared to its competitors, it will help you grow your listeners and business by getting your podcast show to the right audience.
On RadioPublic, an average listener spends up to 72 minutes every day finding new podcast shows and listening to new episodes from their favorite podcasts. And given that the platform offers many robust features, listeners can enjoy a seamless listening experience on any device.
Overall, the RadioPublic podcast directory offers you a smart way to publish your show and grow your audience without going through stress.
- User Review of RadioPublic
“Glad I waited a while to find a podcast website provider. Starting from scratch in WordPress seemed too much hassle. Luckily the site came along while I was dithering about what to do.
The RadioPublic team onboarded the other 5 billion podcasts as one of the first examples, and I’m delighted to have chosen this option. Already, my pod site feels “complete” to look at, and more features are coming soon that will help with marketing, understanding listeners, and building a podcast brand.”
- Monthly User Base: Over 300 Thousand active users
- Supported OS: Dedicated apps for all major OS and web presence.
11. Overcast
Overcast is a dedicated podcast app for Apple devices, and what makes it a great podcast directory is that it offers unique features that attract many listeners.
On this platform, you’ll be allowed to display advertising slots, enabling listeners to subscribe to your podcast show within a few clicks. Plus, unlike many of its competitors, listeners have control over what podcast show is displayed in the featured podcast section. It is helpful as it lets listeners quickly discover every new episode you publish.
Overall, many incredible features make Overcast a good choice, and chances are your Podcast will get to real listeners when you publish them here.
- User Review of Overcast
**”**Nice alternative to Apple’s. I’ve been well pleased so far. It isn’t always the most intuitive, but I’ve eventually figured out how to achieve almost everything I’ve wanted to. The benefits of adding a show via RSS have become immediately clear.
Being a subscriber to a show and getting early access episodes and bonus material right in my podcast manager makes it easy to stay up with all my shows.”
- Monthly User Base: Over 70 Thousand active users.
- Supported OS: Dedicated app for iOS and web presence.
12. Pocket Casts
If you’re looking for a free podcast directory to publish your Podcast show, Pocket Casts is the ideal one for you. This podcast directory is packed with many rich features that podcasters will find very helpful. In addition, thanks to its beautifully designed website interface, you won’t find the platform difficult to use.
Besides, many listeners love Pocket Podcasts as it offers them incredible features—for example, improved discovery options, playback speed options, and lots more. In addition, they’ve enhanced how they find and listen to podcasts on the platform. You can’t go wrong publishing your show on a platform like this one.
- User Review of Pocket Casts
“Wonderful app, the most reliable one I’ve found. Even with accounts, most others lose all your progress data which hasn’t happened once with this, and I’ve switched phones 3 times. The progress tracker is so accurate you can pause on one device, open the same account and continue listening. Most apps can’t even keep things downloaded. Search does take a minute but finds stuff no other app does.”
- Monthly User Base: Over 1 Million active users.
- Supported OS: Dedicated apps for all major OS and web presence.
13. CastBox
CastBox is another unique podcast directory that podcasters trust to publish their show online. The platform boasts an optimized SEO and artificial intelligence that lets listeners find new podcast shows. Thanks to its massive user base of up to 20 Million users, your Podcast could reach a wide range of audiences quickly and easily.
Also, CastBox offers social media features that allow listeners to comment and share your podcast show on their social media page, thus helping you get your show to more listeners and potentially increase your fanbase.
- User Review of CastBox
“I’ve been a podcaster for years and an avid podcast listener for a while. So I searched high and low for the best podcast app and distribution service, Castbox. They have a great app and website, a huge content library, and a superb feature set. Also, their app allows offline listening, as I can download my favorite podcast show.”
- Monthly User Base: Over 1 million active users
- Supported OS: Dedicated apps for all major OS and web presence.
14. Stitcher
Last but not least podcast directory on our list is Stitcher. The platform boasts more than 14.5 Million active listeners, with an average listener having up to 25 hours of listening duration per month.
Stitcher helps you alleviate the stress of getting your show to the right audience, and thanks to the platform’s easy podcast submission requirements, you only need to have at least one podcast episode on your RSS Feed to get approved.
Also, Stitcher offers a unique analytic tool that allows you to track the performance of your show on the platform, and what more impressive is that it’s integrated into more than fifty car models. In addition, it works with any vehicle that supports Apple’s CarPlay and Android Auto, which makes it a great choice for podcasters who believe their audience loves to listen to their show while driving.
- User Review of Stitcher
“So glad I switched! I have my podcasts but didn’t listen to them much - partially because Apple Podcasts is so hard to use. I switched to Stitcher to listen to The Magnus Archives, and I love it!”
- Monthly User Base: Over 1.5 million active users.
- Supported OS: Dedicated apps for all major OS and web presence.
Part 3. More choices to submit your podcast shows
The above Podcast directories are great choices you can always count on any day. However, if you’re looking for more options, the following are reliable podcasting directories to choose from;
Part 4. How to submit a show to podcast directories?
Submitting a podcast show to podcast directories is pretty simple. Here, we used Spotify as an example to show you how you can easily submit your podcast show within a few clicks. The steps are as follows;
Step1 Create a Spotify account using the email attached to your podcast host.
Step2 Open Spotify for Podcasters in your browser and login into your account. Then, click Get Started on the new screen.
Step3 Provide your Podcast’s RSS Feed and click Next to proceed.
Step4 You’ll be asked to add information about your Podcast, from its description to the title, artwork, etc.
Step5 Verify the Podcast by submitting the code sent to your email.
Step6 Review the information you’ve provided so far and submit it to Spotify for review.
Once you complete the steps, keep an eye on the submitted Podcast, as Spotify won’t message you even if your Podcast has been published.
Hot FAQs on Podcast Directories
1. Are podcast directories free?
Almost all top podcast directories are entirely free for creators. All you have to do is sign up on the platforms. Then, check the platform’s requirements to submit your podcast episodes, like the format, cover photos, and description. Of course, the requirements vary depending on the platform.
2. Can any podcast be on a directory of podcasts?
Yes, you can choose from any podcast directory to publish your Podcast. There’s no limitation. When submitting, you must select the ideal category for your podcast show so it can be displayed to the right audience.
3. Does it cost to join a podcast directory?
Yes, and the cost of joining a podcast directory varies depending on your platform.
Conclusion
The podcast directories introduced above are reliable for submitting podcast shows. So, chances are there, no matter what your podcast show is about. It’ll help you connect with the right audience. However, one thing is vital you need to make sure you choose the podcast directory that suits you.
“From Novice to Pro: Exploring the Depths of REAPER’s Recording Software”
DAW stands for Digital Audio Workstation. It is where you can record, edit, mix or even master your music. You always need good DAW software to help you with the job to produce music or live recording musicians.
A good DAW software must have a multi-track audio recording , virtual instruments, MIDI sequencer, excellent mixing capabilities, and plug-in processor hosting. The software is found for all major operating systems such as Linux , Windows, and Mac. If you want to learn more about DAW, then stay with us. The article will discuss in detail REAPER Recording Software.
In this article
01 What Is REAPER Recording Software?
02 How to Download and Install REAPER Software?
03 Tutorial for Using REAPER Recording Software
Part 1. What Is REAPER Recording Software?
Recording software like REAPER records computer audio is used to produce music, edit it, transform, and customize your music. With REAPER Recording Software , you can record multi-layer audio and MIDI in various formats. REAPER has the easiest interface that allows you to drag and drop to import, split, move and do many other tasks.

This is just one feature of REAPER that sounds very interesting. In this section, we will talk about more of its features.
1. Record and Edit
You can easily record the audio and (MIDI) Musical Instrumental Digital Interface with REAPER recording software. It lets you edit and customize everything. You can record and edit things limitlessly. When it comes to recording, it’s not at all difficult for REAPER software to record various instruments or vocals.
2. Mixing
Initially, the mixer might seem inflexible, but in reality, REAPER has a lot to offer you. It has great automated capabilities for instrument and effect parameters. It doesn’t matter if you are working because you can still bounce or freeze tracks while working.
The mixer is very flexible. With REAPERs mixer, you just have to drag and drop your recordings so that you can create tracks, and also, you can customize the arrangements by moving the portions.
3. Interface
While looking at the interface, you might question yourself about how to use its interface. Some people love to learn about new things, such as the REAPER Recording Software. Whereas, some people seem least interested because the half-empty interface is not intuitive to them.
Whereas, the best thing about its interface is that you can customize it. REAPER allows you to add different wallpapers and layouts to your software interface.
4. Strong Stability
REAPER Recording Software has very strong stability. This is one of its strongest features as compared to other competitors. The RAM is rarely affected by the load time and the used resources. Moreover, the software offers a wide range of languages. You can select your desired language to run the software.
Part 2. How to Download and Install REAPER Software?
REAPER is a Digital Audio Workstation. The perfect platform where you can manipulate and transform your audio. With REAPER Record Computer audio, you can work efficiently in a resource-friendly studio with saving your time. Stay tuned if you plan to learn more about its pricing and requirements.

Pricing of REAPER Software
A reaper is a brilliant software. It has a 60-day trial period. REAPER costs $60 in total to register. It has complete MIDI sequencing. You can also get a discounted license if REAPER is the best private option for you or has commercial usage. You can set the equal license key on every computer for someone with multiple computers.
System Requirements
The recording software has uncountable features. REAPER software facilitates its users at every level by giving the best audio manipulating platform. The best thing about REAPER Recording Software is its compatibility with different operating systems. Let us add more to your knowledge on this.
Windows
REAPER software is available for Windows 7, 8, 10, XP, and Vista. The version of REAPER for Windows is 6.42. This is for Windows 64-bit whereas, a download package is also available for Windows 32-bit.
macOS
For macOS 64-bit, REAPER has a 6.42 version. This version is compatible with macOS 10.5 – 10.14. Whereas, for macOS 10.15+, the available version of REAPER is 6.42 with a 15MB file size.
Linux
REAPER Recording Software is also compatible with Linux x86_64. The REAPER version is 6.42 with an 11 MB file size. This version can also work on AMD64 64-bit.
Downloading and Installing REAPER
Now that REAPER Record Computer Audio has impressed you a lot. You must be thinking about how to download it. If this is on your mind, then we got you. Allow us to share its steps that will guide you to download the software easily.
Step 1: To install REAPER software, first of all, visit its official website. Then locate and head over to its download section.
Step 2: Click on ‘Download REAPER from the download section.’ For Windows users, they can download the Windows installation package. At the same time, Linux and macOS users can select their installation packages.
Step 3: Lastly, after you have downloaded your systems compatible installation package, you simply have to run it and then install it according to your respective operating system.
Part 3. Tutorial for Using REAPER Recording Software
After its attractive features and detailed downloading procedure, it is finally the time to talk about its works. This section of the article will explain to you more about REAPER Recording Software as we are now going to present a tutorial on how to use the software.
Understand the Layout
Understanding and knowing the layout of your software before you start working on it is essential. The crucial components of REAPER software include the Timeline, Arrangement Window, Track Panel, Toolbar, and lastly, Transport.

The Arrangement window holds all the added items. The items are played from left to right order, similar to their timeline arrangement. You can also zoom in and out. Then comes the transport toolbar, which holds the functions to stop, rewind, play, fast forward, adjust the timeline speed, etc. The toolbar holds all the toggle buttons. You can also customize your toolbar.
New Track Creation
For creating a new track on REAPER, go to the Track menu and hit Insert New Track. A track is like another layer to your audio. Multiple layers and tracks make your work complex yet interesting as you can play all the different tracks at the same time. By double-clicking in the Track Control Panel, you can set a name for the added track.

Audio Hardware Settings for Audio Recording
It is best suggested always to check your audio hardware settings before you start to record, edit or mix with REAPER Recording Software. Your primary focus should be on the recording device’s devices should be set as Input Device, whereas the listening device should be set as the Output Device.
For this, you have to select Preferences from the Options menu. A window will appear in front of you, the REAPER Preference window. You have to select the correct Input and Output devices from the dropdown menu from this window.

Arm your Track
Arming your track is very important. For this, head over to the Track Control Panel, and next to your track name, hit the red circle. If you have various tracks, you should solo this track and mute the other tracks.
As soon as the track is armed, a Gain Meter will activate on the side. From this, you can check if you have properly set the microphone or not. This could be tested by tapping on the microphone.

Record
After all, the hardware settings are done, and your track is armed, it’s time to start the recording. For that, just tap on the Record button in the Transport toolbar. A yellow line in the timeline will indicate the end of the recording.

To end the recording, tap on the Stop button from the Transport Toolbar. Lastly, REAPER Recording Software will ask you to save the file. In case you don’t want it, you can also delete it.
Create and Manipulate Clips
Things like manipulation get a lot easier if you split the clips in REAPER. From the items menu, you have to select the option of Split Item on Cursor. This divides your clip into two clips on each side of the cursor. You can also remove the clips by going to the Items Menu. From there, you just have to hit the Remove Item option, or else, simply press the Delete key on your keyboard.

Removing clips will create a gap in the arrangement window that can be filled by dragging forward the remaining clip.
Volume Adjustments – Normalize
By double-clicking on the item or by selecting ‘Item Properties’ from a right-click, you can normalize the item. A new window will appear as Media Item Properties, from where you have to locate the Volume Settings and then select the option of Normalize.
If your item is already loud, then nothing will happen, but if it is not, then the slider will change from 0.00 dB showing an increase in the volume. Lastly, hit the ‘Apply’ or ‘OK’ button to imply the changes.
Fade in/out
With the Media Properties, you can also adjust a Fade in and a Fade out. For this, you simply have to set an end time for the Fade in, whereas a start time is entered for Fade out. Hit the ‘Ok’ or ‘Apply’ button to apply the changes.
From the Arrangement window, fades can be adjusted. For adjusting the fades, hover with your mouse over the red line. You will see a newly shaped cursor. Just drag on the timeline to play and adjust the Fade with this new cursor.

Automate Changes
With REAPER, you can also automate changes in track parameters. We will guide about automation from Track Envelopes. From Track Control Panel, hit the Trim option. A new Envelopes window will open at this point from where you have to check the Volume box.
A new Volume Track will open up. Here, you have to set new Envelope points. That could be done by holding the shift key, right-clicking on the point, and then selecting Create New Point. A green circle will indicate the new point.
By dragging the Envelope point, you can also adjust the volume. Dragging it towards the top will increase the volume, whereas dragging it towards the bottom will eventually decrease.

Finalize the Audio – Render
After all the above steps have been completed to set the order and adjust your desired volume, the last step comes to render your project file. For that, move to the File menu and select the ‘Render’ option. A window will be opened as ‘Render to File.’ Now, from the dropdown menu, select your desired Output Format.
Lastly, hit the Render 1 File button, and then REAPER will export your project. You can immediately listen to it by selecting the ‘Launch File’ option.

Concluding Thoughts
This article is everything you need to learn about REAPER Recording Software. The article that started from an introduction on DAW took you on a roller coaster ride. Everything about REAPER software has been shared.
We hope that this article helps you in all possible ways. The attractive features impress you, and its pricing and system specifications increase your knowledge. Along with that, the shared tutorial will guide you thoroughly on how to use it.
02 How to Download and Install REAPER Software?
03 Tutorial for Using REAPER Recording Software
Part 1. What Is REAPER Recording Software?
Recording software like REAPER records computer audio is used to produce music, edit it, transform, and customize your music. With REAPER Recording Software , you can record multi-layer audio and MIDI in various formats. REAPER has the easiest interface that allows you to drag and drop to import, split, move and do many other tasks.
This is just one feature of REAPER that sounds very interesting. In this section, we will talk about more of its features.
1. Record and Edit
You can easily record the audio and (MIDI) Musical Instrumental Digital Interface with REAPER recording software. It lets you edit and customize everything. You can record and edit things limitlessly. When it comes to recording, it’s not at all difficult for REAPER software to record various instruments or vocals.
2. Mixing
Initially, the mixer might seem inflexible, but in reality, REAPER has a lot to offer you. It has great automated capabilities for instrument and effect parameters. It doesn’t matter if you are working because you can still bounce or freeze tracks while working.
The mixer is very flexible. With REAPERs mixer, you just have to drag and drop your recordings so that you can create tracks, and also, you can customize the arrangements by moving the portions.
3. Interface
While looking at the interface, you might question yourself about how to use its interface. Some people love to learn about new things, such as the REAPER Recording Software. Whereas, some people seem least interested because the half-empty interface is not intuitive to them.
Whereas, the best thing about its interface is that you can customize it. REAPER allows you to add different wallpapers and layouts to your software interface.
4. Strong Stability
REAPER Recording Software has very strong stability. This is one of its strongest features as compared to other competitors. The RAM is rarely affected by the load time and the used resources. Moreover, the software offers a wide range of languages. You can select your desired language to run the software.
Part 2. How to Download and Install REAPER Software?
REAPER is a Digital Audio Workstation. The perfect platform where you can manipulate and transform your audio. With REAPER Record Computer audio, you can work efficiently in a resource-friendly studio with saving your time. Stay tuned if you plan to learn more about its pricing and requirements.
Pricing of REAPER Software
A reaper is a brilliant software. It has a 60-day trial period. REAPER costs $60 in total to register. It has complete MIDI sequencing. You can also get a discounted license if REAPER is the best private option for you or has commercial usage. You can set the equal license key on every computer for someone with multiple computers.
System Requirements
The recording software has uncountable features. REAPER software facilitates its users at every level by giving the best audio manipulating platform. The best thing about REAPER Recording Software is its compatibility with different operating systems. Let us add more to your knowledge on this.
Windows
REAPER software is available for Windows 7, 8, 10, XP, and Vista. The version of REAPER for Windows is 6.42. This is for Windows 64-bit whereas, a download package is also available for Windows 32-bit.
macOS
For macOS 64-bit, REAPER has a 6.42 version. This version is compatible with macOS 10.5 – 10.14. Whereas, for macOS 10.15+, the available version of REAPER is 6.42 with a 15MB file size.
Linux
REAPER Recording Software is also compatible with Linux x86_64. The REAPER version is 6.42 with an 11 MB file size. This version can also work on AMD64 64-bit.
Downloading and Installing REAPER
Now that REAPER Record Computer Audio has impressed you a lot. You must be thinking about how to download it. If this is on your mind, then we got you. Allow us to share its steps that will guide you to download the software easily.
Step 1: To install REAPER software, first of all, visit its official website. Then locate and head over to its download section.
Step 2: Click on ‘Download REAPER from the download section.’ For Windows users, they can download the Windows installation package. At the same time, Linux and macOS users can select their installation packages.
Step 3: Lastly, after you have downloaded your systems compatible installation package, you simply have to run it and then install it according to your respective operating system.
Part 3. Tutorial for Using REAPER Recording Software
After its attractive features and detailed downloading procedure, it is finally the time to talk about its works. This section of the article will explain to you more about REAPER Recording Software as we are now going to present a tutorial on how to use the software.
Understand the Layout
Understanding and knowing the layout of your software before you start working on it is essential. The crucial components of REAPER software include the Timeline, Arrangement Window, Track Panel, Toolbar, and lastly, Transport.
The Arrangement window holds all the added items. The items are played from left to right order, similar to their timeline arrangement. You can also zoom in and out. Then comes the transport toolbar, which holds the functions to stop, rewind, play, fast forward, adjust the timeline speed, etc. The toolbar holds all the toggle buttons. You can also customize your toolbar.
New Track Creation
For creating a new track on REAPER, go to the Track menu and hit Insert New Track. A track is like another layer to your audio. Multiple layers and tracks make your work complex yet interesting as you can play all the different tracks at the same time. By double-clicking in the Track Control Panel, you can set a name for the added track.
Audio Hardware Settings for Audio Recording
It is best suggested always to check your audio hardware settings before you start to record, edit or mix with REAPER Recording Software. Your primary focus should be on the recording device’s devices should be set as Input Device, whereas the listening device should be set as the Output Device.
For this, you have to select Preferences from the Options menu. A window will appear in front of you, the REAPER Preference window. You have to select the correct Input and Output devices from the dropdown menu from this window.
Arm your Track
Arming your track is very important. For this, head over to the Track Control Panel, and next to your track name, hit the red circle. If you have various tracks, you should solo this track and mute the other tracks.
As soon as the track is armed, a Gain Meter will activate on the side. From this, you can check if you have properly set the microphone or not. This could be tested by tapping on the microphone.
Record
After all, the hardware settings are done, and your track is armed, it’s time to start the recording. For that, just tap on the Record button in the Transport toolbar. A yellow line in the timeline will indicate the end of the recording.
To end the recording, tap on the Stop button from the Transport Toolbar. Lastly, REAPER Recording Software will ask you to save the file. In case you don’t want it, you can also delete it.
Create and Manipulate Clips
Things like manipulation get a lot easier if you split the clips in REAPER. From the items menu, you have to select the option of Split Item on Cursor. This divides your clip into two clips on each side of the cursor. You can also remove the clips by going to the Items Menu. From there, you just have to hit the Remove Item option, or else, simply press the Delete key on your keyboard.
Removing clips will create a gap in the arrangement window that can be filled by dragging forward the remaining clip.
Volume Adjustments – Normalize
By double-clicking on the item or by selecting ‘Item Properties’ from a right-click, you can normalize the item. A new window will appear as Media Item Properties, from where you have to locate the Volume Settings and then select the option of Normalize.
If your item is already loud, then nothing will happen, but if it is not, then the slider will change from 0.00 dB showing an increase in the volume. Lastly, hit the ‘Apply’ or ‘OK’ button to imply the changes.
Fade in/out
With the Media Properties, you can also adjust a Fade in and a Fade out. For this, you simply have to set an end time for the Fade in, whereas a start time is entered for Fade out. Hit the ‘Ok’ or ‘Apply’ button to apply the changes.
From the Arrangement window, fades can be adjusted. For adjusting the fades, hover with your mouse over the red line. You will see a newly shaped cursor. Just drag on the timeline to play and adjust the Fade with this new cursor.
Automate Changes
With REAPER, you can also automate changes in track parameters. We will guide about automation from Track Envelopes. From Track Control Panel, hit the Trim option. A new Envelopes window will open at this point from where you have to check the Volume box.
A new Volume Track will open up. Here, you have to set new Envelope points. That could be done by holding the shift key, right-clicking on the point, and then selecting Create New Point. A green circle will indicate the new point.
By dragging the Envelope point, you can also adjust the volume. Dragging it towards the top will increase the volume, whereas dragging it towards the bottom will eventually decrease.
Finalize the Audio – Render
After all the above steps have been completed to set the order and adjust your desired volume, the last step comes to render your project file. For that, move to the File menu and select the ‘Render’ option. A window will be opened as ‘Render to File.’ Now, from the dropdown menu, select your desired Output Format.
Lastly, hit the Render 1 File button, and then REAPER will export your project. You can immediately listen to it by selecting the ‘Launch File’ option.
Concluding Thoughts
This article is everything you need to learn about REAPER Recording Software. The article that started from an introduction on DAW took you on a roller coaster ride. Everything about REAPER software has been shared.
We hope that this article helps you in all possible ways. The attractive features impress you, and its pricing and system specifications increase your knowledge. Along with that, the shared tutorial will guide you thoroughly on how to use it.
Redefine Your Digital Companion: Voice Modification for Siri on iOS Devices
iPhone offers a lot of different features that other mobiles don’t provide. There is a reason why people prefer using iPhone. The different versions of the iPhone have different and advanced features. The sleek and stylish body is another factor why people want to have iPhone. Do you know any other interesting thing about Apple?
If you don’t know, then let us tell you something worth knowing. Apple offers a Siri feature in all its devices. Whether you are an iPhone, iPad, or Mac user, Siri is there to help you stay connected to the world without even lifting a finger. You can make calls and send text messages with Siri. If you want to learn more about Siri and Siri voice changer, then let’s get started.
In this article
01 How to Change Siri Voice on iPhone and iPad?
02 How to Change Siri Voice on Mac?
03 3 Nice Voice Changer to Help You Do Siri Voice
For Win 7 or later (64-bit)
For macOS 10.12 or later
Part 1. How to Change Siri Voice on iPhone and iPad?
Whether you are driving, cooking, or whatever, there are various things that Siri can do to help you. Without lifting your finger, your tasks are done with Siri. An interesting thing with Siri is that you can select your preferred language style along with a voice that you like.
It is not at all difficult to change Siri’s voice on iPhone or iPad, but new iPhone/iPad users might get confused. Let us help you hereby sharing the steps to change Siri voice on your Apple device.
Step 1: To change Siri Voice, you need to start by opening the ‘Settings’ app on your iPhone/iPad. Once that is opened, scroll down and look for ‘Siri & Search.’ Tap on it when you locate it.

Step 2: Now, the ‘Siri & Search’ menu will appear on the screen. Here, you need to look for the ‘Siri Voice’ option and then select it.

Step 3: It’s time to change Siri’s voice. Start by selecting your accent under the ‘Variety’ section. You get American, British, Australian, Indian, Irish, and also South African accents.

Step 4: After you have selected a variety, it’s now time to select a ‘Voice’ from the given options. You can listen and choose your desired male or female voice. Your device will take some time to download the voice. Once that’s done, you are good to go.

Part 2. How to Change Siri Voice on Mac?
The amazing Siri function is not just for iPhone and iPad users, but Mac users can also get a great benefit from it. You can manage your small tasks with Siri without any trouble. It is ideal for everyday tasks. You can quickly make calls, send text messages, play your favorite music, and a lot more things could be done with Siri.
This section is for you for any Mac user who wants to change Siri Voice on their device but doesn’t know how to do it. Just follow the steps shared below to change Siri Voice on your MacBook.
Step 1: Start by opening the ‘System Preferences’ section from the Dock. You can also open it by firstly clicking on the Apple Menu and then, from the dropdown menu, select ‘System Preferences.’

Step 2: At this point, a new screen for System Preferences will appear. From that, you have to select the ‘Siri’ option. Now comes the fun part where you have to select the voice variety for your Siri. From the ‘Siri’ screen, click on ‘Voice Variety’ and select your desired voice variety from the list of options.

Step 3: After the voice variety, next is the voice, and for that, hit the ‘Siri Voice’ option. Here, you can select the vocals’ gender, the accent, and you are all done. Keep one thing in mind that not all voice varieties offer different voice options.

Part 3. 3 Nice Voice Changer to Help You Do Siri Voice
As much as Siri is helpful, you can also have equal fun with it. Do you know how that is possible? Have you ever heard about any Siri voice changer? Don’t worry; we have the answer to all your questions. The following section of this article will talk about 3 excellent Siri voice changers that you can use to have fun. Let’s start!
1. Celebrity Voice Changer Parody
Do you know any Siri voice changer that can make you sound like a celebrity? If you want to do so, then ‘Celebrity Voice Changer Parody’ is a great option. You can instantly sound like your favorite celebrity by just speaking on the mic. The voice changer has a huge list of celebrities, and you can speak in English and return, get the celebrity voice.
Are you ready to know the best thing about this Siri voice changer? It promises to maintain the quality of your voice. It does not change the speed, pitch, or tone of your voice. With this, you can sound natural and normal yet like a celebrity.
Like Siri lets you sound like male or female, you can also sound like your favorite male or female celebrity. You only need a strong internet connection to use this Siri voice changer.

2. Live Voice Changer
Live Voice Changer is another Siri voice changer that is nice. With this voice changer, your iOS device transforms into a real-time voice changer. If you are bored with your normal life, then do some pranks with Live Voice Changer and call your friends to have fun. Something extra about the tool is that it is perfect for audio recording.
The voice changer is also great for use. You can use its equalizer, which is 12-band, so that you can sound natural and easily confuse others. With Live Voice Changer and its 15 reverb effects, you can polish your voice more beautifully. Another fascinating thing about this voice changer is that it supports Bluetooth.
The Siri voice changer is very easy to use. You don’t need any technical skills to use the voice changer as it is very clear and simple. Additionally, it is very good to change your voice for games too.

3. Funny Voice Effects & Changer
Who doesn’t want to have fun? Funny Voice Effects & Changer is such a platform that offers you endless fun and laughter. With this Siri voice changer, you can record your voice and apply cool effects. It provides various effects like alien, robot, ghost, male, female, etc.
After you have added your desired effects and filters, you can easily save your recordings from Funny Voice Effects & Changer once it has been modified. Not only this, but the voice changer also allows you to share your fantastic voice with your friends.

Wrapping Up
The article has shared great information reading Siri voice change on iPhone and iPad. Also, we talked about Siri voice change on Mac and gave its step-by-step guideline. Moreover, we shared 3 friendly Siri voice changers that are an amazing option to use.
Wondershare Filmora
Get started easily with Filmora’s powerful performance, intuitive interface, and countless effects Try AI Voice Changer Try AI Voice Changer Learn More >

02 How to Change Siri Voice on Mac?
03 3 Nice Voice Changer to Help You Do Siri Voice
For Win 7 or later (64-bit)
For macOS 10.12 or later
Part 1. How to Change Siri Voice on iPhone and iPad?
Whether you are driving, cooking, or whatever, there are various things that Siri can do to help you. Without lifting your finger, your tasks are done with Siri. An interesting thing with Siri is that you can select your preferred language style along with a voice that you like.
It is not at all difficult to change Siri’s voice on iPhone or iPad, but new iPhone/iPad users might get confused. Let us help you hereby sharing the steps to change Siri voice on your Apple device.
Step 1: To change Siri Voice, you need to start by opening the ‘Settings’ app on your iPhone/iPad. Once that is opened, scroll down and look for ‘Siri & Search.’ Tap on it when you locate it.
Step 2: Now, the ‘Siri & Search’ menu will appear on the screen. Here, you need to look for the ‘Siri Voice’ option and then select it.
Step 3: It’s time to change Siri’s voice. Start by selecting your accent under the ‘Variety’ section. You get American, British, Australian, Indian, Irish, and also South African accents.
Step 4: After you have selected a variety, it’s now time to select a ‘Voice’ from the given options. You can listen and choose your desired male or female voice. Your device will take some time to download the voice. Once that’s done, you are good to go.
Part 2. How to Change Siri Voice on Mac?
The amazing Siri function is not just for iPhone and iPad users, but Mac users can also get a great benefit from it. You can manage your small tasks with Siri without any trouble. It is ideal for everyday tasks. You can quickly make calls, send text messages, play your favorite music, and a lot more things could be done with Siri.
This section is for you for any Mac user who wants to change Siri Voice on their device but doesn’t know how to do it. Just follow the steps shared below to change Siri Voice on your MacBook.
Step 1: Start by opening the ‘System Preferences’ section from the Dock. You can also open it by firstly clicking on the Apple Menu and then, from the dropdown menu, select ‘System Preferences.’
Step 2: At this point, a new screen for System Preferences will appear. From that, you have to select the ‘Siri’ option. Now comes the fun part where you have to select the voice variety for your Siri. From the ‘Siri’ screen, click on ‘Voice Variety’ and select your desired voice variety from the list of options.
Step 3: After the voice variety, next is the voice, and for that, hit the ‘Siri Voice’ option. Here, you can select the vocals’ gender, the accent, and you are all done. Keep one thing in mind that not all voice varieties offer different voice options.
Part 3. 3 Nice Voice Changer to Help You Do Siri Voice
As much as Siri is helpful, you can also have equal fun with it. Do you know how that is possible? Have you ever heard about any Siri voice changer? Don’t worry; we have the answer to all your questions. The following section of this article will talk about 3 excellent Siri voice changers that you can use to have fun. Let’s start!
1. Celebrity Voice Changer Parody
Do you know any Siri voice changer that can make you sound like a celebrity? If you want to do so, then ‘Celebrity Voice Changer Parody’ is a great option. You can instantly sound like your favorite celebrity by just speaking on the mic. The voice changer has a huge list of celebrities, and you can speak in English and return, get the celebrity voice.
Are you ready to know the best thing about this Siri voice changer? It promises to maintain the quality of your voice. It does not change the speed, pitch, or tone of your voice. With this, you can sound natural and normal yet like a celebrity.
Like Siri lets you sound like male or female, you can also sound like your favorite male or female celebrity. You only need a strong internet connection to use this Siri voice changer.
2. Live Voice Changer
Live Voice Changer is another Siri voice changer that is nice. With this voice changer, your iOS device transforms into a real-time voice changer. If you are bored with your normal life, then do some pranks with Live Voice Changer and call your friends to have fun. Something extra about the tool is that it is perfect for audio recording.
The voice changer is also great for use. You can use its equalizer, which is 12-band, so that you can sound natural and easily confuse others. With Live Voice Changer and its 15 reverb effects, you can polish your voice more beautifully. Another fascinating thing about this voice changer is that it supports Bluetooth.
The Siri voice changer is very easy to use. You don’t need any technical skills to use the voice changer as it is very clear and simple. Additionally, it is very good to change your voice for games too.
3. Funny Voice Effects & Changer
Who doesn’t want to have fun? Funny Voice Effects & Changer is such a platform that offers you endless fun and laughter. With this Siri voice changer, you can record your voice and apply cool effects. It provides various effects like alien, robot, ghost, male, female, etc.
After you have added your desired effects and filters, you can easily save your recordings from Funny Voice Effects & Changer once it has been modified. Not only this, but the voice changer also allows you to share your fantastic voice with your friends.
Wrapping Up
The article has shared great information reading Siri voice change on iPhone and iPad. Also, we talked about Siri voice change on Mac and gave its step-by-step guideline. Moreover, we shared 3 friendly Siri voice changers that are an amazing option to use.
Wondershare Filmora
Get started easily with Filmora’s powerful performance, intuitive interface, and countless effects Try AI Voice Changer Try AI Voice Changer Learn More >
Also read:
- New What to Look for in Audio Editor for Mac, In 2024
- New Unlocking New Sounds A Journey to Discovering Personal Vocal Change for 2024
- 2024 Approved Silence Your Surroundings Advanced Strategies for Background Music Removal in Audacity
- Updated 2024 Approved Explore a New Sound Persona Learning Voice Changer Plus for iPhone Alterations
- Updated 2024 Approved Symphony of Screens The Best Music Pairings for Every Type of Video Content
- Updated 2024 Approved Unveiling the Premier Windows 10 Audio Blenders for Enhanced Sound Quality
- Expert Tips for Gradually Diminishing Audio Volume for 2024
- 2024 Approved Unlocking the Power of Pitch Alteration A Step-by-Step Voice Transformation Guide
- Updated 2 Key Steps to Achieve Clear Vocal Recordings without Echo for 2024
- Updated In 2024, Streamlining Access The Best Approaches for Downloading Spotify Music Content
- In 2024, FreeTranscribe Your Way Android & iOS Apps for Effortless Audio Transcription
- Updated 2024 Approved Top 5 Ultimate Free Audio Level Regulator
- The Art of Pitch Correction in Audacity Enhancing Sound Worthily
- Updated Ultimate Tutorial How to Record Audio on Windows 10
- Updated Discovering Preeminent Software for Mac Music File Management for 2024
- New 2024 Approved Perfecting Auditory Aesthetics in Video Production
- Top 10 Premium Platforms for High-Definition Video Wallpaper Acquisition
- Updated Mastering the Art of Downloading Podcast Episodes on Laptops and Desktops for 2024
- Digital Sound Seekers Five Progressive Tactics for MP4 Audio Extraction for 2024
- Updated In 2024, Achieving Sonic Excellence Incorporating Auto-Tune Into Your Audacity Workflow
- In 2024, Learn Color Correction in After Effects with These Videos
- New How to Make a Time-Lapse Video Online
- Unlock Apple ID without Phone Number From iPhone 13 Pro
- Updated Voice to Text Unlocking the Power of Automatic Transcription
- Recover iPhone 15 Data From iCloud | Dr.fone
- Read This Guide to Find a Reliable Alternative to Fake GPS On Realme 10T 5G | Dr.fone
- How to Change Lava Yuva 3 Pro Location on Skout | Dr.fone
- Updated In 2024, Maximize Your Reach A Guide to Optimizing Social Media Aspect Ratios
- A Complete Guide To OEM Unlocking on ZTE Nubia Flip 5G
- Which is the Best Fake GPS Joystick App On Realme C51? | Dr.fone
- How to Transfer Data After Switching From Samsung Galaxy Z Fold 5 to Latest Samsung | Dr.fone
- Top 15 Augmented Reality Games Like Pokémon GO To Play On Poco M6 Pro 5G | Dr.fone
- In 2024, iSpoofer is not working On Poco M6 5G? Fixed | Dr.fone
- Updated In 2024, Effortless Conversion A Step-by-Step Guide to YouTube MP3 Converters
- New Expert-Approved Video Editing Tools and Apps
- In 2024, Full Guide to Unlock Your Infinix Hot 40i
- Title: Updated 2024 Approved Complete List of Podcast Directories
- Author: David
- Created at : 2024-06-19 06:52:02
- Updated at : 2024-06-20 06:52:02
- Link: https://sound-tweaking.techidaily.com/updated-2024-approved-complete-list-of-podcast-directories/
- License: This work is licensed under CC BY-NC-SA 4.0.
