
:max_bytes(150000):strip_icc():format(webp)/Horserace-56ca33a85f9b5879cc4bcc6e.jpg)
Sonic Resource Hub A Curated List of Premium Websites with a Stockpile of Free Sound Scores for 2024
“Sonic Resource Hub: A Curated List of Premium Websites with a Stockpile of Free Sound Scores
FREE Top 10 Best Websites to Download Sound Clips for Videos

Liza Brown
Mar 27, 2024• Proven solutions


Are you working on animation , video, game, music, or maybe some other media file? Sound is a vital factor for all. It is the effect of the sound that can make or break a project.
But it can be difficult to find perfect and quality free sound clips. There are thousands of software for creating excellent videos, adding sounds , titles, overlays, tracks, and more. But what if you don’t wish to create a piece for just jazzing up your already existing video?
Free sound clips are great resources to download for videos if you don’t want to create sound effects.
Many people want to know the source of high-quality free audio for videos. These free sound samples are easy to find on the Internet.
In this article, you will get to know the 10 best websites to download free sound clips.
10 Best Free Sound Samples to Use
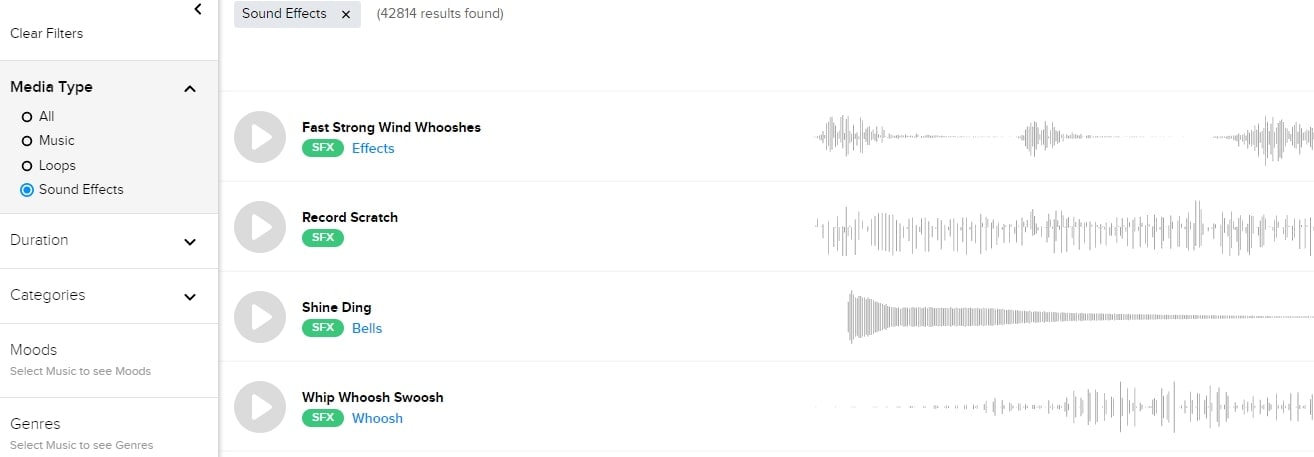
1. Freesound
Licensed under the Creative Commons License , the Freesound comprises of a large sound database. You can choose from the huge collection of sounds and decide which one is free and which sound needs attribution.
You can ensure if the sound can be used in commercial products or not. If you are not a professional and just need free sound samples for personal use, you may use free sound download from any site. The features of Freesound include-
- You can search for sounds or browse by tags or geotags
- The pack feature helps you to find a bunch of similar sounds very easily
- Preview the sound without logging in
- For downloading the sound, you need to log in
- Add your audio samples to contribute to the database
- You get 5 free sound clips download
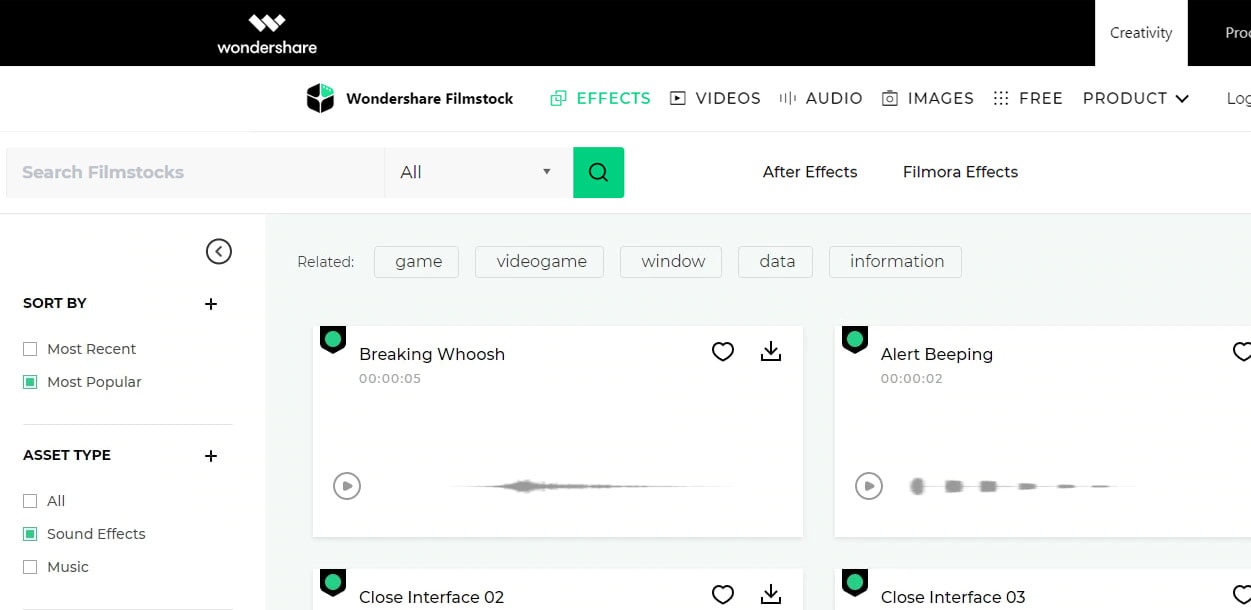
2. Filmstock
Filmstock from the house of Wondershare is one of the greatest libraries for free sound clips.
Any budget filmmaker would love to have this invaluable resource not just for free audio clips for videos but also for royalty-free sound clips.
You can bring your cinematic video to life from the Filmstock free-stuff one-stop-shop. The features of Filmstock include-
- Royalty-free video effects, audio, and stock media
- There are genres like science fiction, sci-fi, ufo, technology games
- Huge selection of curated quality stock images
- Filmstock library is continuously updated
- No attribution required for any project on Filmstock
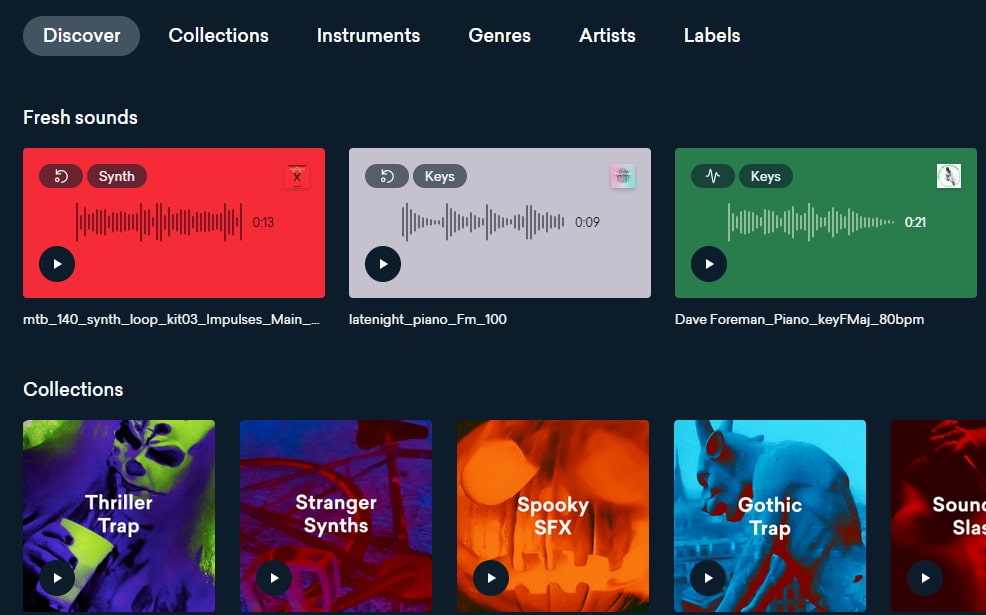
3. Landr
With a simple interface, Landr offers the best loops, packs, and samples to you. Make use of powerful Artificial Intelligence (AI) and you can spend lesser time searching and browsing. The features of Landr includes-
- You can browse free sound clips from the various collection of instruments
- Quickly find the right sound from the millions of free sound samples
- Get access to Selector tool powered by AI to make your browsing session faster
- Nourish your ideas with the curated collection and smart browsing
- The filter sounds by instrument, mood, BPM or key
- Go pro with your sampling
- Royalty-free sounds from today’s best artists, producers, and labels
4. Audio Micro
Audio Micro is one of the best tools for downloading horror-based free sound clips. Once you register with Audio Micro, you can easily download free audio clips for videos.
For downloading sound for commercial uses like TV or mass reproduction, you must be a paid subscriber. The features of Audio Micro are-
- Get access to the collection of royalty-free music and 2000 free good quality sound effects
- High-quality audio content for commercial use, available at competitive prices without any hidden cost
- Research, locate, purchase, and download stock audio
- Easy and fast search option with free sound collection visible from the navigation bar on the homepage
5. Audio Blocks
It is an intuitive platform to download loops, sound effects, and music. It has a low-cost subscription model and the content is constantly updated based on the search results. The features of Audio Blocks are-
- Unlimited royalty-free audio
- Loop, sound effects, and music download
- Low-cost subscription offers more content at a nominal price
- There are flexible plans for every budget
- Use content multiple times for commercial and personal projects
6. Free Stock Music
Whether YouTube project or your personal Vlog, Free Stock Music offers royalty-free music for a range of media platforms.
For any non-copyrighted sound clips free download, always feel free to reach Free Stock Music. The features are-
- Free access to non-copyrighted music
- Just put the attribution in credits to use the sound clips
- Unlimited royalty-free music in all moods, lengths, tempos, and categories
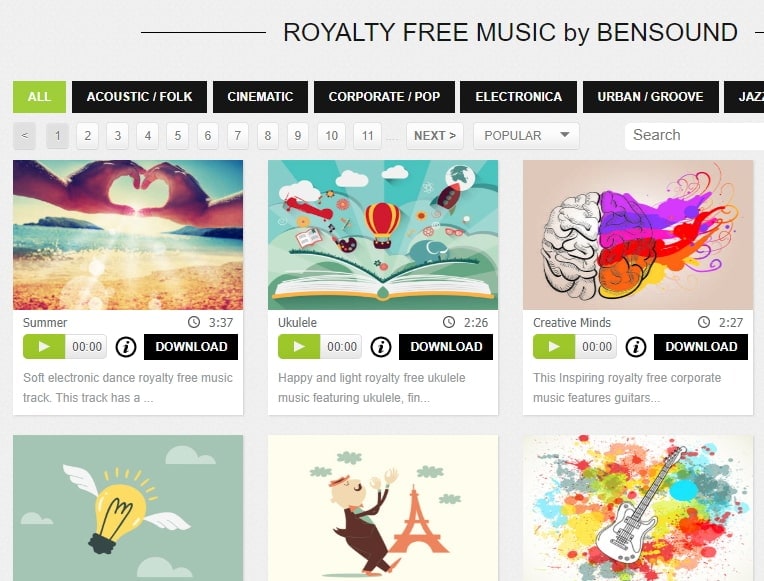
7. Bensound
Available under the Creative Common License, Bensound is used for multimedia projects like web applications or videos.
You can use the free tracks available with Bensound stock music in the various website background score, animations, web adverts, slideshows, etc. The features of Bensound include-
- Royalty-free stock music in various genres like electronica, urban, cinematic, jazz, rock, etc.
- Download free sound clips from the huge collection and add attributions in credits
- If you don’t wish to give credits and use the high-quality premium tracks, get the Bensound Pro License
8. Sounds Crate
Are you looking for the best soundtrack for your video? Sounds Crate offers some of the best royalty-free music and sound FX.
With the tracks completely mastered for your production, Sound Crate offers 100% quality content created by industry professionals from Hollywood. The Sound Crate features include-
- Sound FX for electricity, gun, explosion, weapons, sci-fi, vehicles, movements, etc.
- Royalty-free music in diverse genres
- You can also use idents for corporate, news jingles, holiday idents, etc.
- Download and use the royalty-free sound clips easily
- Over 10000 plus HD assets
- No attribution required
- Browse from unlimited music, sound effects, etc.

9. ZapSlat
Do your audio and video editing projects need some cool soundtracks to jazz it up? Look no further. ZapSlat is one of the best free sound download sites to make your project successful. The features of ZapSlat are-
- Comprises over 54,000 professional free sound effects and royalty-free music files
- Variety of free sound effect packs
- Download royalty-free music from a variety of genres
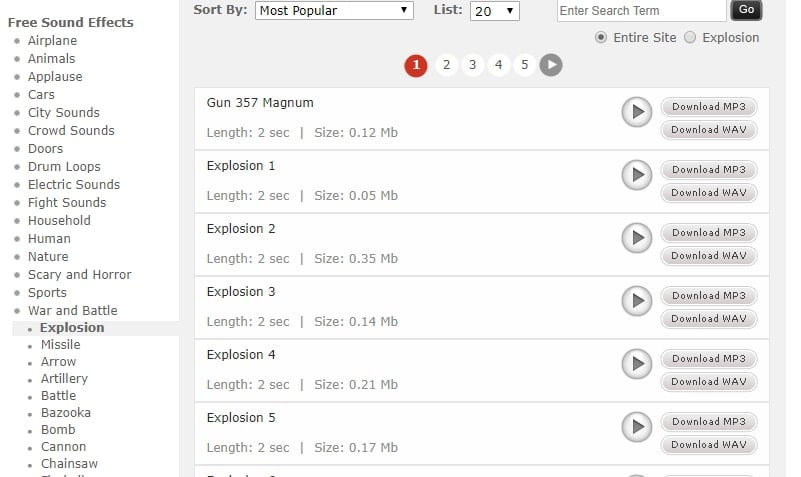
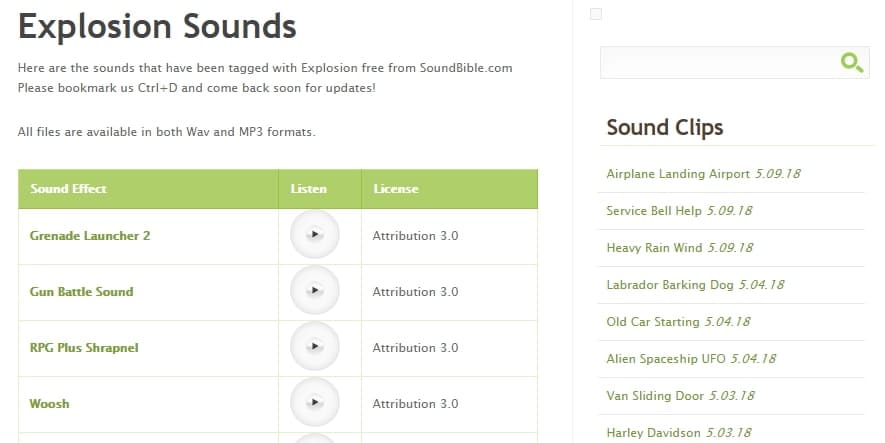
10. Sound Bible
Choose the best from 2000 free sound clips licensed under Creative Commons. To use the sound effect for commercial video, you can select from the royalty-free sounds. The features of SoundBible are-
- Download free sound clips without logging in or creating an account
- 2000 free sounds
- Copyright-free sound resources are weekly updated
Conclusion
Now that you know the best 10 free sound clip download sites, make use of it in your videos. Without worrying about the expense, you can use these sites to download free sound clips.
Liza Brown
Liza Brown is a writer and a lover of all things video.
Follow @Liza Brown
Liza Brown
Mar 27, 2024• Proven solutions
Are you working on animation , video, game, music, or maybe some other media file? Sound is a vital factor for all. It is the effect of the sound that can make or break a project.
But it can be difficult to find perfect and quality free sound clips. There are thousands of software for creating excellent videos, adding sounds , titles, overlays, tracks, and more. But what if you don’t wish to create a piece for just jazzing up your already existing video?
Free sound clips are great resources to download for videos if you don’t want to create sound effects.
Many people want to know the source of high-quality free audio for videos. These free sound samples are easy to find on the Internet.
In this article, you will get to know the 10 best websites to download free sound clips.
10 Best Free Sound Samples to Use
1. Freesound
Licensed under the Creative Commons License , the Freesound comprises of a large sound database. You can choose from the huge collection of sounds and decide which one is free and which sound needs attribution.
You can ensure if the sound can be used in commercial products or not. If you are not a professional and just need free sound samples for personal use, you may use free sound download from any site. The features of Freesound include-
- You can search for sounds or browse by tags or geotags
- The pack feature helps you to find a bunch of similar sounds very easily
- Preview the sound without logging in
- For downloading the sound, you need to log in
- Add your audio samples to contribute to the database
- You get 5 free sound clips download
2. Filmstock
Filmstock from the house of Wondershare is one of the greatest libraries for free sound clips.
Any budget filmmaker would love to have this invaluable resource not just for free audio clips for videos but also for royalty-free sound clips.
You can bring your cinematic video to life from the Filmstock free-stuff one-stop-shop. The features of Filmstock include-
- Royalty-free video effects, audio, and stock media
- There are genres like science fiction, sci-fi, ufo, technology games
- Huge selection of curated quality stock images
- Filmstock library is continuously updated
- No attribution required for any project on Filmstock
3. Landr
With a simple interface, Landr offers the best loops, packs, and samples to you. Make use of powerful Artificial Intelligence (AI) and you can spend lesser time searching and browsing. The features of Landr includes-
- You can browse free sound clips from the various collection of instruments
- Quickly find the right sound from the millions of free sound samples
- Get access to Selector tool powered by AI to make your browsing session faster
- Nourish your ideas with the curated collection and smart browsing
- The filter sounds by instrument, mood, BPM or key
- Go pro with your sampling
- Royalty-free sounds from today’s best artists, producers, and labels
4. Audio Micro
Audio Micro is one of the best tools for downloading horror-based free sound clips. Once you register with Audio Micro, you can easily download free audio clips for videos.
For downloading sound for commercial uses like TV or mass reproduction, you must be a paid subscriber. The features of Audio Micro are-
- Get access to the collection of royalty-free music and 2000 free good quality sound effects
- High-quality audio content for commercial use, available at competitive prices without any hidden cost
- Research, locate, purchase, and download stock audio
- Easy and fast search option with free sound collection visible from the navigation bar on the homepage
5. Audio Blocks
It is an intuitive platform to download loops, sound effects, and music. It has a low-cost subscription model and the content is constantly updated based on the search results. The features of Audio Blocks are-
- Unlimited royalty-free audio
- Loop, sound effects, and music download
- Low-cost subscription offers more content at a nominal price
- There are flexible plans for every budget
- Use content multiple times for commercial and personal projects
6. Free Stock Music
Whether YouTube project or your personal Vlog, Free Stock Music offers royalty-free music for a range of media platforms.
For any non-copyrighted sound clips free download, always feel free to reach Free Stock Music. The features are-
- Free access to non-copyrighted music
- Just put the attribution in credits to use the sound clips
- Unlimited royalty-free music in all moods, lengths, tempos, and categories
7. Bensound
Available under the Creative Common License, Bensound is used for multimedia projects like web applications or videos.
You can use the free tracks available with Bensound stock music in the various website background score, animations, web adverts, slideshows, etc. The features of Bensound include-
- Royalty-free stock music in various genres like electronica, urban, cinematic, jazz, rock, etc.
- Download free sound clips from the huge collection and add attributions in credits
- If you don’t wish to give credits and use the high-quality premium tracks, get the Bensound Pro License
8. Sounds Crate
Are you looking for the best soundtrack for your video? Sounds Crate offers some of the best royalty-free music and sound FX.
With the tracks completely mastered for your production, Sound Crate offers 100% quality content created by industry professionals from Hollywood. The Sound Crate features include-
- Sound FX for electricity, gun, explosion, weapons, sci-fi, vehicles, movements, etc.
- Royalty-free music in diverse genres
- You can also use idents for corporate, news jingles, holiday idents, etc.
- Download and use the royalty-free sound clips easily
- Over 10000 plus HD assets
- No attribution required
- Browse from unlimited music, sound effects, etc.
9. ZapSlat
Do your audio and video editing projects need some cool soundtracks to jazz it up? Look no further. ZapSlat is one of the best free sound download sites to make your project successful. The features of ZapSlat are-
- Comprises over 54,000 professional free sound effects and royalty-free music files
- Variety of free sound effect packs
- Download royalty-free music from a variety of genres
10. Sound Bible
Choose the best from 2000 free sound clips licensed under Creative Commons. To use the sound effect for commercial video, you can select from the royalty-free sounds. The features of SoundBible are-
- Download free sound clips without logging in or creating an account
- 2000 free sounds
- Copyright-free sound resources are weekly updated
Conclusion
Now that you know the best 10 free sound clip download sites, make use of it in your videos. Without worrying about the expense, you can use these sites to download free sound clips.
Liza Brown
Liza Brown is a writer and a lover of all things video.
Follow @Liza Brown
Fine-Tuning Audacity’s Decibel Settings for Perfect Balance
Audacity is a free, open access, cross-platform sound editing and recording tool. It is compatible with Windows, Mac OS X, Linux, and various other operating systems. All of these aspects have contributed to Audacity’s worldwide popularity. Audacity features an amplified effect that alters the loudness of your chosen audio and other practical tools that can change the sound in different ways.
As a result, Audacity can not only assist you in modifying the level of an audio file, but it can also help you equalize, reduce, normalize, and so on.
Yes, you have heard it right, Audacity increase volume, but the primary question is how? But don’t worry, you will get the answer after reading the article. This article will explain how you can increase or decrease the volume of a whole and a specific segment of the audio file. Let’s get started.
In this article
01 How to Increase or Decrease Volume Without Distortion and Clipping in Audacity
02 How to Increase Volume of Multiple Files in Audacity?
03 How to Increase Volume in Certain Parts of Track?
04 What’s the Difference between Normalize and Amplify?
Part 1: How to Increase or Decrease Volume Without Distortion and Clipping in Audacity
Audio clipping occurs when the audio input becomes too loud for an amplifier to produce, and the surplus signal creates distortion. When editing, you cannot add additional volume to your audio clip forever because this would result in clipping. In this case, you can use the Audacity application to emphasize your material by turning the volume up or down without distortion and clipping on a track or recording.
Learn how Audacity increase volume without distortion by following the procedure described below:
Step 1: First, download and install the Audacity software on your computer.
Step 2: Select the File from the menu above and click Open to open the audio file.

Step 3: Choose the audio track, go to the Effect menu and pick the Amplify option from the drop-down menu.

Note: You can increase or decrease the volume by double-clicking the track and using the slider under the Gain title.
Step 4: Increase or decrease the volume by sliding the slider or typing the amplification value in the text box next to it in the Amplify window as needed.

Note: Ensure that the Allow Clipping checkbox remains unchecked to avoid clipping. Moreover, keep in mind that increasing the volume to a greater extent can result in distortion.
Related: How to Change Audio Volume in Filmora
Part 2: How to Increase Volume of Multiple Files in Audacity?
Audacity is an open-source audio editing tool. It is used for various purposes, like audio recording, music creation, and audio file editing. It also allows you to increase and decrease the volume of audio files.
You may also apply the modifications to multiple files at once, rather than one at a time. Check out the instructions below to learn how to change the volume of multiple audio files:
Step 1: Select the Import option from the File menu, and then pick the Audio option. Browse to your audio files, choose all of them, and then click the Open option.

Step 2: To select all the files, press Ctrl + A, click on the Effect option in the menu bar and pick Amplify.

Step 3: Now, either enter the value in the text box next to the Amplification Decibels tab or use the slider under it. To verify the operation of increasing the volume, check the allow clipping checkbox. When you’re through with the options, click the Ok button.

Step 4: Amplification will be applied to all the tracks. Go to the File option from the above menu to export the files and then select the Export option.

If you’re running Audacity on macOS computer, you can watch the video tutorial below to apply effects to multiple files.
Part 3: How to Increase Volume in Certain Parts of Track?
The audacity software also allows you to alter a specific section of an audio file. The selection tool can assist in locating a particular area of the track. After you’ve chosen a section of the audio file, you may utilize the amplification effect to increase its loudness. Check out the instructions below to learn how you can achieve it:
Step 1: Launch the Audacity software on the computer. To open the audio file, go to the File menu and select Open. You may also open the file by dragging it.
Step 2: Ensure that the Selection tool is active now. Click and hold the mouse left-click to move from one spot on the track to another.

Step 3: After picking the part, go to the Effect option from the menu and select Amplify.

Step 4: Now, for that specific region, modify the amplification and click OK. This will only change the volume for the area you have selected.

Part 4: What’s the Difference between Normalize and Amplify?
Amplify and Normalize are two essential features of the Audacity tool. Many people think they are the same thing, they are right up to some extent, but there exists a big difference between both the features. Before discussing the differences, you need to know what the terms Normalize and Amplify imply.
Amplify
It is the quickest approach to comprehend the effect’s name if you want to know precisely what impacts are. The frequency of the vibration is enhanced to increase the amplification effect. As previously said, it raises a tiny sound.
Furthermore, because this amplification is extended to all frequencies and amplitude, the noise increases. If you choose ten sources and magnify them by ten decibels, each source will be ten decibels louder than your present sound.

Normalize
The meaning of normalizing is standardized, which is also a feature of its name. Whenever you pick an audio input and use the normalize feature, the level is adjusted automatically according to the previously indicated average volume size in Oda City.
As a result, when one sound source is normalized, there is no discernible difference between it and the amplification mechanism. Still, the effect is evident when several sound sources are performed concurrently.
By pressing Ctrl + A and selecting all ten various audio sources, you may compute the required standard of every sound source, enhance the audio input that is smaller than the normal, and create the audio signal more significant than the standard. Shrink the size of each noise source, such as the name, and normalize the sound.

Related: Best Audio Normalizers for Windows
Differences
To differentiate the meaning and impact precisely, amplification means increasing or reducing the sound, whereas normalizing means equalizing the sound. Simply defined, if you magnify ten sources by ten decibels, each of the shorter and louder noises equals ten decibels in their actual loudness.
When the ten sources are normalized, the louder sounds grow louder, conforming to the standard sound source size. Because the amplifying is done regardless, the little noises are going insane during this procedure.
Conclusion
All in all, Audacity does an excellent job at audio editing. If you simply need to modify an audio file, Audacity is a great option. For increasing and decreasing the volume of single and multiple audio files, Audacity is still one of the best bets in the market. We hope that now know how Audacity increase volume of the audio files after reading this article.
02 How to Increase Volume of Multiple Files in Audacity?
03 How to Increase Volume in Certain Parts of Track?
04 What’s the Difference between Normalize and Amplify?
Part 1: How to Increase or Decrease Volume Without Distortion and Clipping in Audacity
Audio clipping occurs when the audio input becomes too loud for an amplifier to produce, and the surplus signal creates distortion. When editing, you cannot add additional volume to your audio clip forever because this would result in clipping. In this case, you can use the Audacity application to emphasize your material by turning the volume up or down without distortion and clipping on a track or recording.
Learn how Audacity increase volume without distortion by following the procedure described below:
Step 1: First, download and install the Audacity software on your computer.
Step 2: Select the File from the menu above and click Open to open the audio file.
Step 3: Choose the audio track, go to the Effect menu and pick the Amplify option from the drop-down menu.
Note: You can increase or decrease the volume by double-clicking the track and using the slider under the Gain title.
Step 4: Increase or decrease the volume by sliding the slider or typing the amplification value in the text box next to it in the Amplify window as needed.
Note: Ensure that the Allow Clipping checkbox remains unchecked to avoid clipping. Moreover, keep in mind that increasing the volume to a greater extent can result in distortion.
Related: How to Change Audio Volume in Filmora
Part 2: How to Increase Volume of Multiple Files in Audacity?
Audacity is an open-source audio editing tool. It is used for various purposes, like audio recording, music creation, and audio file editing. It also allows you to increase and decrease the volume of audio files.
You may also apply the modifications to multiple files at once, rather than one at a time. Check out the instructions below to learn how to change the volume of multiple audio files:
Step 1: Select the Import option from the File menu, and then pick the Audio option. Browse to your audio files, choose all of them, and then click the Open option.
Step 2: To select all the files, press Ctrl + A, click on the Effect option in the menu bar and pick Amplify.
Step 3: Now, either enter the value in the text box next to the Amplification Decibels tab or use the slider under it. To verify the operation of increasing the volume, check the allow clipping checkbox. When you’re through with the options, click the Ok button.
Step 4: Amplification will be applied to all the tracks. Go to the File option from the above menu to export the files and then select the Export option.
If you’re running Audacity on macOS computer, you can watch the video tutorial below to apply effects to multiple files.
Part 3: How to Increase Volume in Certain Parts of Track?
The audacity software also allows you to alter a specific section of an audio file. The selection tool can assist in locating a particular area of the track. After you’ve chosen a section of the audio file, you may utilize the amplification effect to increase its loudness. Check out the instructions below to learn how you can achieve it:
Step 1: Launch the Audacity software on the computer. To open the audio file, go to the File menu and select Open. You may also open the file by dragging it.
Step 2: Ensure that the Selection tool is active now. Click and hold the mouse left-click to move from one spot on the track to another.
Step 3: After picking the part, go to the Effect option from the menu and select Amplify.
Step 4: Now, for that specific region, modify the amplification and click OK. This will only change the volume for the area you have selected.
Part 4: What’s the Difference between Normalize and Amplify?
Amplify and Normalize are two essential features of the Audacity tool. Many people think they are the same thing, they are right up to some extent, but there exists a big difference between both the features. Before discussing the differences, you need to know what the terms Normalize and Amplify imply.
Amplify
It is the quickest approach to comprehend the effect’s name if you want to know precisely what impacts are. The frequency of the vibration is enhanced to increase the amplification effect. As previously said, it raises a tiny sound.
Furthermore, because this amplification is extended to all frequencies and amplitude, the noise increases. If you choose ten sources and magnify them by ten decibels, each source will be ten decibels louder than your present sound.
Normalize
The meaning of normalizing is standardized, which is also a feature of its name. Whenever you pick an audio input and use the normalize feature, the level is adjusted automatically according to the previously indicated average volume size in Oda City.
As a result, when one sound source is normalized, there is no discernible difference between it and the amplification mechanism. Still, the effect is evident when several sound sources are performed concurrently.
By pressing Ctrl + A and selecting all ten various audio sources, you may compute the required standard of every sound source, enhance the audio input that is smaller than the normal, and create the audio signal more significant than the standard. Shrink the size of each noise source, such as the name, and normalize the sound.
Related: Best Audio Normalizers for Windows
Differences
To differentiate the meaning and impact precisely, amplification means increasing or reducing the sound, whereas normalizing means equalizing the sound. Simply defined, if you magnify ten sources by ten decibels, each of the shorter and louder noises equals ten decibels in their actual loudness.
When the ten sources are normalized, the louder sounds grow louder, conforming to the standard sound source size. Because the amplifying is done regardless, the little noises are going insane during this procedure.
Conclusion
All in all, Audacity does an excellent job at audio editing. If you simply need to modify an audio file, Audacity is a great option. For increasing and decreasing the volume of single and multiple audio files, Audacity is still one of the best bets in the market. We hope that now know how Audacity increase volume of the audio files after reading this article.
Clearing Up Your Digital Airwaves: The Ultimate Guide to Online Audio Sanitization
The primary sound in the video has to be clear. The presence of background noise can affect the user experience multifold. Don’t you agree? Background noise is known as irrelevant noise from the environment. Most content creators record in open space for better light. However, it leads to ambient noise.
Therefore, it becomes crucial to deal with background noise. The article highlights the top three websites for this purpose. These online tools remove background noise online. We shall discuss their key features as well. It will help creative professionals make sane decisions. Right? Wondershare Filmora will also be previewed as audio and video editors.
So, what are we waiting for? Time to start!
In this article
01 3 Recommended Sites to Remove Background Noise Online Free
02 How to Remove Background Noise from Video on Windows and Mac
Part 1: 3 Recommended Sites to Remove Background Noise Online Free
Video recording through devices usually leaves you with background noises that must be removed from the video for perfect results. In other cases, before adding recorded audio across a video, you might have come across some background noise that needs to be treated effectively before finalizing the video for publishing. Under such circumstances, a background noise removal tool comes in handy.
To remove noise from video online free, we have sketched out three websites that offer the potential option of removing background noise. The platforms remove noise from video online in seconds. Let us have a look at what each of them brings to the table! Shall we?
Veed.io

The first source to remove background noise from video online is Veed.io. The tool got famous due to its extreme workability in audio and media. The content publishers and streamers use Veed.io to clean their audios and videos from annoying noises. The “Clean Audio” function works based on the length of the video.
If your file is larger, it might take a couple of minutes. Willing to know more? You can have a look at the features below:
- The interface is interactive enough for entry-level beginners.
- The media file can be uploaded from a device, Dropbox, or you can record it.
- Moreover, you can insert a YouTube link to clean the audio.
AudioToolSet

Next on the list, we have AudioToolSet. AudioToolSet is a great platform to remove noise from audio online free. You can drag and drop the targeted media file or browse your system. The supported file formats for AudioToolSet include MP3, WAV, FLAC, OGG. Also known as Noise Reducer, this online tool is famous as an MP3 noise removal online free.
Are you satisfied with Audio Tool Set? Let us know more!
- The maximum file size is 50MB for your media files.
- The dark mode can be used based on your workability.
- AudioToolSet is designed to clean audio recordings, and no tweaking is needed with the settings.
Audiodenoise.com

Audiodenoise.com removes background noise from audio online free. The online tool takes the concerns of podcasters, vloggers, and creators seriously. Additionally, the noise reduction feature can be tested through the demo files. Isn’t that a dream?
Audiodenoise.com has a noise model type to choose from. It includes Adapted distribution, Spectral subtraction, and Autoregressive model. The user is free to play with noise reduction and analysis block size. The values can be set according to preference.
Following are some key features of Audiodenoise.com:
- The user can set the temporal soothing of the input by adjusting the playhead.
- You can alter the noise modulation tracking based on how slow and fast you need.
- One is free to preview the output before downloading it.
Part 2: How to Remove Background Noise from Video on Windows and Mac
There is no shortage of video and audio editors in the market. Wouldn’t you agree? It is the very reason the users can get confused about their choice. It is essential to have a hands-on tool that promises advanced features with high-quality output.
Wondershare Filmora is recommended as it understands the user’s needs. Being compatible with Windows and Mac, Filmora can be relied upon for different functions. For instance, Filmora is great for audio denoise. It assists you in eliminating unwanted noise from the recorded content.
Essentially, the audio denoise function has a slider. It is based on Weak, Mid, and Strong that permits you to set the level for noise reduction. You can also trim audio clips, add a voice-over, and adjust the audio volume. The audio equalizer, audio mixer, and audio ducking are among the most exceptional tools of the lot.
Apart from audio editing, Filmora specializes in video editing . From video trimming to rotating and splitting video to cropping, Filmora offers a balanced editor for everyone. You are free to join video clips and create freeze frames. There is nothing Filmora ceases to excel in. Don’t you think? Do not hesitate to preview render and change the video playback speed.
Do you wish to remove background noise from the video? Are you looking for proper guidance to do so? Worry no more, as we are in the picture! The steps below are for Filmora to eliminate background noise from the video effortlessly.
For Win 7 or later (64-bit)
For macOS 10.12 or later
Step 1: Launching Wondershare Filmora
First, double-click on Wondershare Filmora’s icon to open it. Click on “New Project” as the interface pops up. Now, it is time to import the media. Click on “File” from the top panel. After that, select “Import Media” and then “Import Media Files.”

Step 2: Browsing the Media File
Browse the targeted video from your system. The video will be shown in the Media Library. Now, drag it to the timeline of the editor. The program displays a dialogue box regarding the frame rate of the media. You can either keep the project settings or match them to media settings.

Step 3: Using the “Audio Denoise” Function
Moving on, right-click on the video located in the timeline. Click on “Show Properties” from the menus that appear. The properties would appear for video, audio, color, and animation. Head to “Audio” and enable the “Audio Denoise” feature.

Step 4: Selecting the Range
Choose the range for noise reduction. Filmora presents Weak, Mid, and Strong. Choose as you desire and hit “OK.” The background noise will be eliminated effectively.

Step 5: Exporting the Video
Click on “Export” to save the final video. Input the file name and output location. You can also pick the quality you need. Hit “Export,” and you are done!

Wrapping Up
A raw video doesn’t have a visual or sensory impact. Don’t you agree? It is crucial to perform necessary edits to make it viable. The removal of background noise is important for a creative creator. Hence, the article featured three workable ways to remove background noise audio online. Wondershare Filmora was also introduced as the perfect audio and video editor in the business.
Versatile Video Editor - Wondershare Filmora
An easy yet powerful editor
Numerous effects to choose from
Detailed tutorials provided by the official channel
02 How to Remove Background Noise from Video on Windows and Mac
Part 1: 3 Recommended Sites to Remove Background Noise Online Free
Video recording through devices usually leaves you with background noises that must be removed from the video for perfect results. In other cases, before adding recorded audio across a video, you might have come across some background noise that needs to be treated effectively before finalizing the video for publishing. Under such circumstances, a background noise removal tool comes in handy.
To remove noise from video online free, we have sketched out three websites that offer the potential option of removing background noise. The platforms remove noise from video online in seconds. Let us have a look at what each of them brings to the table! Shall we?
Veed.io
The first source to remove background noise from video online is Veed.io. The tool got famous due to its extreme workability in audio and media. The content publishers and streamers use Veed.io to clean their audios and videos from annoying noises. The “Clean Audio” function works based on the length of the video.
If your file is larger, it might take a couple of minutes. Willing to know more? You can have a look at the features below:
- The interface is interactive enough for entry-level beginners.
- The media file can be uploaded from a device, Dropbox, or you can record it.
- Moreover, you can insert a YouTube link to clean the audio.
AudioToolSet
Next on the list, we have AudioToolSet. AudioToolSet is a great platform to remove noise from audio online free. You can drag and drop the targeted media file or browse your system. The supported file formats for AudioToolSet include MP3, WAV, FLAC, OGG. Also known as Noise Reducer, this online tool is famous as an MP3 noise removal online free.
Are you satisfied with Audio Tool Set? Let us know more!
- The maximum file size is 50MB for your media files.
- The dark mode can be used based on your workability.
- AudioToolSet is designed to clean audio recordings, and no tweaking is needed with the settings.
Audiodenoise.com
Audiodenoise.com removes background noise from audio online free. The online tool takes the concerns of podcasters, vloggers, and creators seriously. Additionally, the noise reduction feature can be tested through the demo files. Isn’t that a dream?
Audiodenoise.com has a noise model type to choose from. It includes Adapted distribution, Spectral subtraction, and Autoregressive model. The user is free to play with noise reduction and analysis block size. The values can be set according to preference.
Following are some key features of Audiodenoise.com:
- The user can set the temporal soothing of the input by adjusting the playhead.
- You can alter the noise modulation tracking based on how slow and fast you need.
- One is free to preview the output before downloading it.
Part 2: How to Remove Background Noise from Video on Windows and Mac
There is no shortage of video and audio editors in the market. Wouldn’t you agree? It is the very reason the users can get confused about their choice. It is essential to have a hands-on tool that promises advanced features with high-quality output.
Wondershare Filmora is recommended as it understands the user’s needs. Being compatible with Windows and Mac, Filmora can be relied upon for different functions. For instance, Filmora is great for audio denoise. It assists you in eliminating unwanted noise from the recorded content.
Essentially, the audio denoise function has a slider. It is based on Weak, Mid, and Strong that permits you to set the level for noise reduction. You can also trim audio clips, add a voice-over, and adjust the audio volume. The audio equalizer, audio mixer, and audio ducking are among the most exceptional tools of the lot.
Apart from audio editing, Filmora specializes in video editing . From video trimming to rotating and splitting video to cropping, Filmora offers a balanced editor for everyone. You are free to join video clips and create freeze frames. There is nothing Filmora ceases to excel in. Don’t you think? Do not hesitate to preview render and change the video playback speed.
Do you wish to remove background noise from the video? Are you looking for proper guidance to do so? Worry no more, as we are in the picture! The steps below are for Filmora to eliminate background noise from the video effortlessly.
For Win 7 or later (64-bit)
For macOS 10.12 or later
Step 1: Launching Wondershare Filmora
First, double-click on Wondershare Filmora’s icon to open it. Click on “New Project” as the interface pops up. Now, it is time to import the media. Click on “File” from the top panel. After that, select “Import Media” and then “Import Media Files.”
Step 2: Browsing the Media File
Browse the targeted video from your system. The video will be shown in the Media Library. Now, drag it to the timeline of the editor. The program displays a dialogue box regarding the frame rate of the media. You can either keep the project settings or match them to media settings.
Step 3: Using the “Audio Denoise” Function
Moving on, right-click on the video located in the timeline. Click on “Show Properties” from the menus that appear. The properties would appear for video, audio, color, and animation. Head to “Audio” and enable the “Audio Denoise” feature.
Step 4: Selecting the Range
Choose the range for noise reduction. Filmora presents Weak, Mid, and Strong. Choose as you desire and hit “OK.” The background noise will be eliminated effectively.
Step 5: Exporting the Video
Click on “Export” to save the final video. Input the file name and output location. You can also pick the quality you need. Hit “Export,” and you are done!
Wrapping Up
A raw video doesn’t have a visual or sensory impact. Don’t you agree? It is crucial to perform necessary edits to make it viable. The removal of background noise is important for a creative creator. Hence, the article featured three workable ways to remove background noise audio online. Wondershare Filmora was also introduced as the perfect audio and video editor in the business.
Versatile Video Editor - Wondershare Filmora
An easy yet powerful editor
Numerous effects to choose from
Detailed tutorials provided by the official channel
Also read:
- Mute the Movie Guide to Erasing Auditory Elements From Various Video Formats
- In 2024, Top 7 Underrated Transition Sounds for Enhanced Audio Experience (Download Now!)
- In 2024, Comprehensive Playlists of Relaxing Melodies for Serene Atmospheres
- Updated In 2024, The Essentials of Silent Segment Creation Leveraging Audio Duck in PowerDirector to Quiet Music During Transitions
- In 2024, Steps to Create a Soft-Start Audio Experience
- Updated 2024 Approved The Ultimate List of Premium Android Audioscriptors to Enhance Your Music
- New Mastering Voice Recording on Your Mac A Simple Step-by-Step Tutorial for 2024
- New 2024 Approved Unveiling the 6 Top-Rated Digital Libraries for Haunting Audio Effects (2E Update)
- New 2024 Approved Guided Vocal Transformation Systems Insights Into Features and Other Options
- Updated Elevate Your Online Communication The Best Skype Voice Changing Technologies for 2024
- Updated Identifying Key Qualities to Pick a Premier Sound Editor Today
- Updated Audio Capturing Made Simple A Deep Dive Into Apowersoft & Exploring 4 Alternatives for 2024
- New Audio Anonymization in Multimedia A Step-by-Step Approach (Updated) for 2024
- Best-Selling Digital Audio Recorders Compatible with PCs
- New Discover the Ultimate 10 Audio Tools for Professionals on Both OSes
- Updated An Experts Manual on Extracting Sound Without Background Noise Using Audacity for 2024
- Updated Win & Apple Users Favorites Top Picks for Audio Recording Technology (MP3) for 2024
- In 2024, 15 Best Video Editing Courses Online with Certificate Free $ Paid
- In 2024, Unlock Your Apple iPhone 15 Pro in Minutes with ICCID Code Everything You Need to Know
- New Looking Beyond Virtualdub The Best Video Editing Software for Your Needs for 2024
- In 2024, 6 Ways To Transfer Contacts From Itel P55+ to iPhone | Dr.fone
- Updated Get Ready for Seamless Editing Filmora X on ARM Devices for 2024
- New In 2024, Green Screen Like a Pro FCP X Chroma Keying Essentials
- How to retrieve erased call logs from Honor 90 Lite?
- Updated In 2024, 5 Websites with Animated Logos That Can Catch Your Eyes
- How to Change Lock Screen Wallpaper on ZTE
- How to Unlock Apple iPhone XS Max With an Apple Watch & What to Do if It Doesnt Work | Dr.fone
- The Ultimate List of Free Online Video Merger Tools (2023 Edition)
- Updated In 2024, Best Video Editors for Windows 11
- Top Claymation Shows That Make Your Memories Unforgettable
- How to Transfer Data from Realme C67 4G to Any iOS Devices | Dr.fone
- Title: Sonic Resource Hub A Curated List of Premium Websites with a Stockpile of Free Sound Scores for 2024
- Author: David
- Created at : 2024-05-20 05:45:57
- Updated at : 2024-05-21 05:45:57
- Link: https://sound-tweaking.techidaily.com/sonic-resource-hub-a-curated-list-of-premium-websites-with-a-stockpile-of-free-sound-scores-for-2024/
- License: This work is licensed under CC BY-NC-SA 4.0.
