
:max_bytes(150000):strip_icc():format(webp)/streamfreesportsonline-5b1994178023b900364a81e5.jpg)
New In 2024, The Future of Branding 10 Indispensable Marketing Podcasts on Social Media Integration
“The Future of Branding: 10 Indispensable Marketing Podcasts on Social Media Integration”
10 Social Media Podcasts to Help You Make Marketing Strategy

Benjamin Arango
Mar 27, 2024• Proven solutions
The rise of podcasts has never been so demanding that it is as of now. Even though every digital marketer hasn’t exploited it to the fullest potential, there is still an upsurge in podcasting, mainly social media marketing podcasts. It is called useful digital marketing when you are excited to be on every customer’s platform and ultimately raise your product or service awareness. The format of the Podcast itself allows deep and regular connection with the audience. Along with that, we can list various other benefits of incorporating podcasts for your brand as an ideal digital marketing strategy.
Benefits of Podcasting
- Low Competition
- High Engagement
- Growing Platform
- Convenient for the audience
- On-Demand Technology
10 Social Media Marketing Podcasts Worth Listening To
One of the good aspects of using a Podcast is listening to them anytime, even in our downtimes. Luckily, this technology has provided us with some awesome social media mix Podcasts worth listening to for the audience. Let’s unleash the ten best social media Podcasts, as mentioned below!
- 1.Influencer Entrepreneurs
- 2.Instagram Secrets
- 3.The Blogging Millionaire
- 4.Social Media Marketing Talk Show
- 5.Social Pros Podcast
- 6.Marketing Smarts
- 7.Marketing School
- 8.Visual Marketing with Tailwind
- 9.Instagram Marketing Secrets
- 10.Maximize Your Social Influence
1.Influencer Entrepreneurs

Jenny Melrose hosts this Podcast with beneficial insights on productivity, turning a side hustle into a full-time job, workshops, online courses, and promoting her services or products. Listening to her podcast will let you channelize your entrepreneurship productivity in the best ways possible.
The frequency of her podcasts is around seven days, with an average duration of 27 minutes. The podcast topics are the How to Effectively Cultivate Community within Your Brand, How to Get Photography Clients, etc.
2.Instagram Secrets

Luke Thompson has started this podcast to let you get up from the baby steps of using the Instagram platform for lead generation and other customer services. Overall, it is a beginner-friendly podcast with different topics on the Instagram platform. He has also released some podcasts about technical issues such as gaining followers, Instagram’s new algorithm, etc.
His podcasts’ frequency is around 19-20 days, with an average duration of 7 minutes.
3.The Blogging Millionaire

Brandon Gaille hosts this awesome Blog Millionaire podcast while discussing various ways to be successful in blogging. The podcast is worth listening to as Brandon himself did a successful business out of his podcast even after facing medical hardships in childhood.
His podcast frequency is also around seven days, with an average duration of 8 minutes.
4.Social Media Marketing Talk Show

Social Media Examiner hosts this fantastic social media marketing podcast where they are used to talk about several different social media topics. Digital marketers, social media enthusiasts, and small businesses must listen to this useful podcast crucial to know about various social media platforms.
The frequency of Podcasts is around 7-14 days with a duration of 40-50 mins.
5.Social Pros Podcast
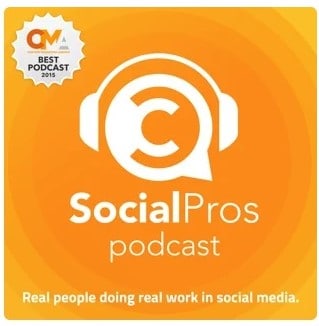
Jay Baer and his guest host this Social Pros Podcast, explicitly talking about social media industry trends. They generally discuss social media’s importance in getting the message out and encouraging the entire brand awareness. The answers are actionable, diverse, and pretty helpful to media leaders who want to increase their chances of getting noticed.
The frequency of this podcast is around seven days, with an average duration of 38 minutes.
6.Marketing Smarts
It is one of the best social media podcasts with a discussion on in-depth interviews of different marketers. MarketingProfss hosts this specific podcast after listening, which you will follow one or two strategies about social media marketing. You can manually search the Podcast’s topics by the names of different subcategories given along.
It is a weekly Podcast with a duration of 30 mins approx.
7.Marketing School

The marketing gurus Neil Patel and Eric Siu host this podcast to provide the audience with useful insights on marketing, statistics, and the entire game. This podcast has more than 1400 episodes in bite-sized, quick, and rapid-fire sessions. Thus, it is a must-listen podcast for digital and social media marketers. And, the best part is that a 5-10 mins Podcast uploads daily over the official website.
8.Visual Marketing with Tailwind

This podcast is perfect if you are on Pinterest and Instagram. Primarily, Alisa Meredith, marketing specialist at Tailwind, hosts this podcast. As the name suggests, the topics create incredible visuals on Instagram and Pinterest to engage the audience. However, there is no such organized scheduling of podcasts upload here. But, every episode is worth listening to for effective visual marketing.
9.Instagram Marketing Secrets

The Instagram Marketing Secrets podcast by Derek Videll is ideal for marketing enthusiasts. It is one of the best social media marketing podcasts, specifically on Instagram, for lead generation and successful conversions. Derek himself comes from a marketing and sales background to tell you the internal secrets and the so-called Instagram competitors.
The podcast is uploaded every 6th to 7th day with an average duration of 15 minutes.
10.Maximize Your Social Influence
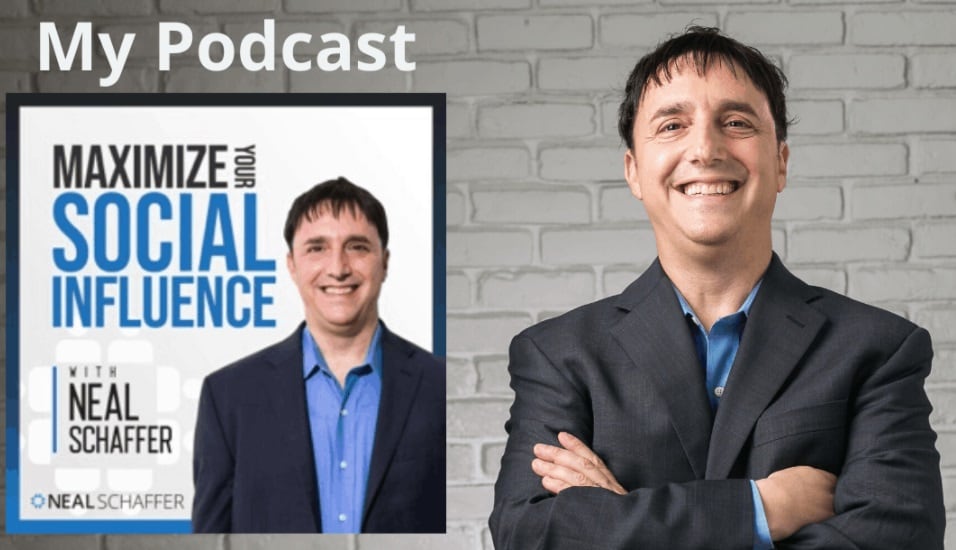
This Podcast ultimately teaches how to look at marketing from the angle of influencing. It is essential to become a social media influencer to level up the game and attract your niche’s right audience. Neil Schaffer, the digital and marketing expert host this podcast with the perspective of sharing his secrets and marketing success stories.
The above Podcast also has a weekly schedule of 30-35 mins each.
Start Your First Podcast with Wondershare Filmora


So yes, don’t wait to start your podcast with Wondershare Filmora X! Why Filmora X? It is because of the most intuitive, advanced, and simple to use video and audio editor. Furthermore, the newly launched features of Filmora X tell us about how easy it is to indulge professionalism online. A useful feature for creating podcasts in Wondershare Filmora is Audio Ducking. By checking the quality while editing your video podcast, you can effectively lower the volume of multiple clips in your style. It is the go-to option if you want to highlight your voice within the video. It is pretty easy to use audio ducking as you are only required to move the slider and adjust the video podcast’s background volume as per your needs.
Conclusion
Thus, now you can apply social media strategies learned from the best ten social media podcasts and make your Podcast as well. It is the correct time to reveal your creative side and start making video podcasts using Filmora X.
Benjamin Arango
Benjamin Arango is a writer and a lover of all things video.
Follow @Benjamin Arango
Benjamin Arango
Mar 27, 2024• Proven solutions
The rise of podcasts has never been so demanding that it is as of now. Even though every digital marketer hasn’t exploited it to the fullest potential, there is still an upsurge in podcasting, mainly social media marketing podcasts. It is called useful digital marketing when you are excited to be on every customer’s platform and ultimately raise your product or service awareness. The format of the Podcast itself allows deep and regular connection with the audience. Along with that, we can list various other benefits of incorporating podcasts for your brand as an ideal digital marketing strategy.
Benefits of Podcasting
- Low Competition
- High Engagement
- Growing Platform
- Convenient for the audience
- On-Demand Technology
10 Social Media Marketing Podcasts Worth Listening To
One of the good aspects of using a Podcast is listening to them anytime, even in our downtimes. Luckily, this technology has provided us with some awesome social media mix Podcasts worth listening to for the audience. Let’s unleash the ten best social media Podcasts, as mentioned below!
- 1.Influencer Entrepreneurs
- 2.Instagram Secrets
- 3.The Blogging Millionaire
- 4.Social Media Marketing Talk Show
- 5.Social Pros Podcast
- 6.Marketing Smarts
- 7.Marketing School
- 8.Visual Marketing with Tailwind
- 9.Instagram Marketing Secrets
- 10.Maximize Your Social Influence
1.Influencer Entrepreneurs
Jenny Melrose hosts this Podcast with beneficial insights on productivity, turning a side hustle into a full-time job, workshops, online courses, and promoting her services or products. Listening to her podcast will let you channelize your entrepreneurship productivity in the best ways possible.
The frequency of her podcasts is around seven days, with an average duration of 27 minutes. The podcast topics are the How to Effectively Cultivate Community within Your Brand, How to Get Photography Clients, etc.
2.Instagram Secrets
Luke Thompson has started this podcast to let you get up from the baby steps of using the Instagram platform for lead generation and other customer services. Overall, it is a beginner-friendly podcast with different topics on the Instagram platform. He has also released some podcasts about technical issues such as gaining followers, Instagram’s new algorithm, etc.
His podcasts’ frequency is around 19-20 days, with an average duration of 7 minutes.
3.The Blogging Millionaire
Brandon Gaille hosts this awesome Blog Millionaire podcast while discussing various ways to be successful in blogging. The podcast is worth listening to as Brandon himself did a successful business out of his podcast even after facing medical hardships in childhood.
His podcast frequency is also around seven days, with an average duration of 8 minutes.
4.Social Media Marketing Talk Show
Social Media Examiner hosts this fantastic social media marketing podcast where they are used to talk about several different social media topics. Digital marketers, social media enthusiasts, and small businesses must listen to this useful podcast crucial to know about various social media platforms.
The frequency of Podcasts is around 7-14 days with a duration of 40-50 mins.
5.Social Pros Podcast
Jay Baer and his guest host this Social Pros Podcast, explicitly talking about social media industry trends. They generally discuss social media’s importance in getting the message out and encouraging the entire brand awareness. The answers are actionable, diverse, and pretty helpful to media leaders who want to increase their chances of getting noticed.
The frequency of this podcast is around seven days, with an average duration of 38 minutes.
6.Marketing Smarts
It is one of the best social media podcasts with a discussion on in-depth interviews of different marketers. MarketingProfss hosts this specific podcast after listening, which you will follow one or two strategies about social media marketing. You can manually search the Podcast’s topics by the names of different subcategories given along.
It is a weekly Podcast with a duration of 30 mins approx.
7.Marketing School
The marketing gurus Neil Patel and Eric Siu host this podcast to provide the audience with useful insights on marketing, statistics, and the entire game. This podcast has more than 1400 episodes in bite-sized, quick, and rapid-fire sessions. Thus, it is a must-listen podcast for digital and social media marketers. And, the best part is that a 5-10 mins Podcast uploads daily over the official website.
8.Visual Marketing with Tailwind
This podcast is perfect if you are on Pinterest and Instagram. Primarily, Alisa Meredith, marketing specialist at Tailwind, hosts this podcast. As the name suggests, the topics create incredible visuals on Instagram and Pinterest to engage the audience. However, there is no such organized scheduling of podcasts upload here. But, every episode is worth listening to for effective visual marketing.
9.Instagram Marketing Secrets
The Instagram Marketing Secrets podcast by Derek Videll is ideal for marketing enthusiasts. It is one of the best social media marketing podcasts, specifically on Instagram, for lead generation and successful conversions. Derek himself comes from a marketing and sales background to tell you the internal secrets and the so-called Instagram competitors.
The podcast is uploaded every 6th to 7th day with an average duration of 15 minutes.
10.Maximize Your Social Influence
This Podcast ultimately teaches how to look at marketing from the angle of influencing. It is essential to become a social media influencer to level up the game and attract your niche’s right audience. Neil Schaffer, the digital and marketing expert host this podcast with the perspective of sharing his secrets and marketing success stories.
The above Podcast also has a weekly schedule of 30-35 mins each.
Start Your First Podcast with Wondershare Filmora
So yes, don’t wait to start your podcast with Wondershare Filmora X! Why Filmora X? It is because of the most intuitive, advanced, and simple to use video and audio editor. Furthermore, the newly launched features of Filmora X tell us about how easy it is to indulge professionalism online. A useful feature for creating podcasts in Wondershare Filmora is Audio Ducking. By checking the quality while editing your video podcast, you can effectively lower the volume of multiple clips in your style. It is the go-to option if you want to highlight your voice within the video. It is pretty easy to use audio ducking as you are only required to move the slider and adjust the video podcast’s background volume as per your needs.
Conclusion
Thus, now you can apply social media strategies learned from the best ten social media podcasts and make your Podcast as well. It is the correct time to reveal your creative side and start making video podcasts using Filmora X.
Benjamin Arango
Benjamin Arango is a writer and a lover of all things video.
Follow @Benjamin Arango
Top Picks: The Most Advanced MP3 Tags Organizers for Mac Users
Some people love to collect and organize songs, and they are addicted to creating music libraries. Are you one of them? If you are, you must know how things are organized, but if you have never organized a music library, let’s tell you how it’s done. ID3 tags are used to store information. You can use the tags and store the artist’s name, song name, genre, and whatever you want.
You might organize music according to artist or dates; however, you like it. The problem arises when you don’t have correct information stored in the tags. For this reason, Mac MP3 tag editors are used. If you are a Mac user, who wants to edit tags, let’s provide you with a list of the best Mac music tag editors. Let’s get started!
In this article
01 What Need to Be Considered Before Choosing a Mac MP3 Tag Editor?
02 5 Recommended Mac MP3 Tag Editor
Part 1. What Need to Be Considered Before Choosing a Mac MP3 Tag Editor
Have you ever looked at the internet and the number of options you get whenever you search for MP3 tag editor Mac free? The page is all packed and loaded with tons of different options. No doubt it’s tough to select a good tag editor, but what if we tell you some tricks for selecting a great Mac music tag editor? Without any further delay, let’s begin.
· Easy to User Interface
A primary factor that is considered while selecting any tool, the editor, is its interface. If any software offers a complex interface, users don’t prefer it. An easy interface means all the editing, manipulating, adding, deleting options appear on the front. Users don’t have to struggle to find basic options.
· Online Database Search
If any macOS MP3 tag editor offers an online database search means it’s a good editor. This is because not all editors support online search. The option is very helpful as the online search shares all the information related to any searched tag.
· Editing Options
How many editing options do you prefer? Editing metadata means that you should be able to edit and manipulate as many fields as possible. For instance, the Mac music tag editor should allow changing the singer’s name, year tag, and all the other fields.
· Batch Processing
Editing is a stressful and hectic job. Is there a way to help yourself? Let’s share about Batch Processing. If the Mac MP3 tag editor allows batch processing, then it’s a great choice. This is because editing individually can take hours, but batch processing reduces the editing time as well as the editing efforts.
· Supported Formats
How many formats can your Mac music tag editor support? Although all the tools are MP3 tag editors, not all audio files have MP3 format. For this reason, always select the tag editor that can support and edit different files formats.
Part 2. 5 Recommended Mac MP3 Tag Editor
After talking about the options to consider before selecting any macOS MP3 tag editor, it’s the perfect time to share some tag editors with all the Mac users. So, let’s talk about the 5 best tag editors without any further delay.
1. Wondershare UniConverter
Wondershare UniConverter is a great choice as a Mac MP3 tag editor. This software can be used for multiple purposes. UniConverter is amazing as it can download and record files from various sites. An extra thing, Wondershare UniConverter can also convert files to different formats.

Key Features
- The most important thing, UniConverter supports searching from online databases. You just have to type the information in the search bar.
- For fixing or editing the Metadata, head to the ‘Fix Media Metadata’ tab from the main screen so that you can manipulate the information.
- UniConverter offers a long list of options that you can amend, for instance, song name, artist, year, track number, and whatnot.
2. Metadatics
Metadatics is an audio metadata editor. It is developed by ‘Mark V.’ Metadatics is specially made for Mac OS X. Being powerful is not the description for Metadatics. It is an advanced-level editing tool for metadata editing. Metadatics allow multiple formats to be edited, including MP4, M3A, AIFF, WAV, FLAC, OGG, and WMA.

Key Features
- Metadatics can handle your problems with a large number of editing. It can quickly and easily edit a batch of up to 10,000 files.
- It allows you to rename your files. Along with that, it can generate directory structures depending on the file’s metadata.
- Metadatics has support for images and artwork. Artwork can be extracted from the files and saved as a separate image.
3. MetaBliss
Moving on, let’s talk about MetaBliss, ID3 tag editor. This editor is specifically for macOS X users that allows fast and quick editing of MP3 tags where you can change the comments, artist, song name, or whatever you like. This Mac MP3 tag editor is known for its performance, and hence, it can fix and edit hundreds of files at once without any trouble.

Key Features
- This tag editor provides easy search and easy replacement of words in tags. It is powerful enough to handle and edit multiple tags simultaneously.
- If you have any old tags as ID3v1, MetaBliss will remove them because they are now obsolete and useless.
- Do extra spaces annoy you? Try MetaBliss; it also features to remove extra spaces within the tags. Moreover, copying tags is very easy; you just have to drag them down.
4. Amvidia
Amvidia is a very famous macOS MP3 tag editor. Do you know the best part about Amvidia? You can edit over 60 types of tags with this editor for your videos. Amvidia MP3 tag editor works like magic as it can rename multiple files together. In addition to this, the editor also supports managing artworks.

Key Features
- The best thing about using Amvidia is its compatibility. The MP3 tag editor is fully compatible and works perfectly with all Mac operating system versions.
- Amvidia allows you to find and replace the texts and numbers. Moreover, this editor can also load tags from paths like Music or iTunes.
- This tag editor is magical as it can clean all the wrong encodings of the tags. Additionally, it removes all the extra spaces and characters.
5. MusicBrainz Picard
Picard is an editing tool developed by MusicBrainz. It is a cross-platform music tagger that is written in Python. Picard is mainly used by Mac users but can be used on any platform. It is an open-source editing tool that is licensed under GPL 2.0 or later.
It is hosted on GitHub. Picard is used for its efficiency, and it can look after entire music CDs with a single click quickly.

Key Features
- Picard has a variety of plug-in support. If you need anything, you can look into the available plug-in, or even you can write your own.
- It uses AcoustID audio fingerprints. This makes them identifiable by actual audio even there is no metadata available for the particular file.
- Picard supports all the popular formats that are used. These formats include MP3, M4A, FLAC, WMA, OGG, WAV, and many more.
Bottom Line
The article solely focused on sharing and discussing Mac MP3 tag editors. We hope that this article proves helpful for you. Let’s also talk a little about Wondershare Filmora Video Editor , the platform that has made editing easy.
You just name a feature, and Filmora will already have it. The editor offers Basic options like merge, split, cut, trim, etc. If we talk about Advanced options, you get AI Portrait, Normalization, Stabilize Video, Auto Reframe, and much more than this.
For Win 7 or later (64-bit)
For macOS 10.12 or later
02 5 Recommended Mac MP3 Tag Editor
Part 1. What Need to Be Considered Before Choosing a Mac MP3 Tag Editor
Have you ever looked at the internet and the number of options you get whenever you search for MP3 tag editor Mac free? The page is all packed and loaded with tons of different options. No doubt it’s tough to select a good tag editor, but what if we tell you some tricks for selecting a great Mac music tag editor? Without any further delay, let’s begin.
· Easy to User Interface
A primary factor that is considered while selecting any tool, the editor, is its interface. If any software offers a complex interface, users don’t prefer it. An easy interface means all the editing, manipulating, adding, deleting options appear on the front. Users don’t have to struggle to find basic options.
· Online Database Search
If any macOS MP3 tag editor offers an online database search means it’s a good editor. This is because not all editors support online search. The option is very helpful as the online search shares all the information related to any searched tag.
· Editing Options
How many editing options do you prefer? Editing metadata means that you should be able to edit and manipulate as many fields as possible. For instance, the Mac music tag editor should allow changing the singer’s name, year tag, and all the other fields.
· Batch Processing
Editing is a stressful and hectic job. Is there a way to help yourself? Let’s share about Batch Processing. If the Mac MP3 tag editor allows batch processing, then it’s a great choice. This is because editing individually can take hours, but batch processing reduces the editing time as well as the editing efforts.
· Supported Formats
How many formats can your Mac music tag editor support? Although all the tools are MP3 tag editors, not all audio files have MP3 format. For this reason, always select the tag editor that can support and edit different files formats.
Part 2. 5 Recommended Mac MP3 Tag Editor
After talking about the options to consider before selecting any macOS MP3 tag editor, it’s the perfect time to share some tag editors with all the Mac users. So, let’s talk about the 5 best tag editors without any further delay.
1. Wondershare UniConverter
Wondershare UniConverter is a great choice as a Mac MP3 tag editor. This software can be used for multiple purposes. UniConverter is amazing as it can download and record files from various sites. An extra thing, Wondershare UniConverter can also convert files to different formats.
Key Features
- The most important thing, UniConverter supports searching from online databases. You just have to type the information in the search bar.
- For fixing or editing the Metadata, head to the ‘Fix Media Metadata’ tab from the main screen so that you can manipulate the information.
- UniConverter offers a long list of options that you can amend, for instance, song name, artist, year, track number, and whatnot.
2. Metadatics
Metadatics is an audio metadata editor. It is developed by ‘Mark V.’ Metadatics is specially made for Mac OS X. Being powerful is not the description for Metadatics. It is an advanced-level editing tool for metadata editing. Metadatics allow multiple formats to be edited, including MP4, M3A, AIFF, WAV, FLAC, OGG, and WMA.
Key Features
- Metadatics can handle your problems with a large number of editing. It can quickly and easily edit a batch of up to 10,000 files.
- It allows you to rename your files. Along with that, it can generate directory structures depending on the file’s metadata.
- Metadatics has support for images and artwork. Artwork can be extracted from the files and saved as a separate image.
3. MetaBliss
Moving on, let’s talk about MetaBliss, ID3 tag editor. This editor is specifically for macOS X users that allows fast and quick editing of MP3 tags where you can change the comments, artist, song name, or whatever you like. This Mac MP3 tag editor is known for its performance, and hence, it can fix and edit hundreds of files at once without any trouble.
Key Features
- This tag editor provides easy search and easy replacement of words in tags. It is powerful enough to handle and edit multiple tags simultaneously.
- If you have any old tags as ID3v1, MetaBliss will remove them because they are now obsolete and useless.
- Do extra spaces annoy you? Try MetaBliss; it also features to remove extra spaces within the tags. Moreover, copying tags is very easy; you just have to drag them down.
4. Amvidia
Amvidia is a very famous macOS MP3 tag editor. Do you know the best part about Amvidia? You can edit over 60 types of tags with this editor for your videos. Amvidia MP3 tag editor works like magic as it can rename multiple files together. In addition to this, the editor also supports managing artworks.
Key Features
- The best thing about using Amvidia is its compatibility. The MP3 tag editor is fully compatible and works perfectly with all Mac operating system versions.
- Amvidia allows you to find and replace the texts and numbers. Moreover, this editor can also load tags from paths like Music or iTunes.
- This tag editor is magical as it can clean all the wrong encodings of the tags. Additionally, it removes all the extra spaces and characters.
5. MusicBrainz Picard
Picard is an editing tool developed by MusicBrainz. It is a cross-platform music tagger that is written in Python. Picard is mainly used by Mac users but can be used on any platform. It is an open-source editing tool that is licensed under GPL 2.0 or later.
It is hosted on GitHub. Picard is used for its efficiency, and it can look after entire music CDs with a single click quickly.
Key Features
- Picard has a variety of plug-in support. If you need anything, you can look into the available plug-in, or even you can write your own.
- It uses AcoustID audio fingerprints. This makes them identifiable by actual audio even there is no metadata available for the particular file.
- Picard supports all the popular formats that are used. These formats include MP3, M4A, FLAC, WMA, OGG, WAV, and many more.
Bottom Line
The article solely focused on sharing and discussing Mac MP3 tag editors. We hope that this article proves helpful for you. Let’s also talk a little about Wondershare Filmora Video Editor , the platform that has made editing easy.
You just name a feature, and Filmora will already have it. The editor offers Basic options like merge, split, cut, trim, etc. If we talk about Advanced options, you get AI Portrait, Normalization, Stabilize Video, Auto Reframe, and much more than this.
For Win 7 or later (64-bit)
For macOS 10.12 or later
The Essential Guide to Volume Manipulation in Audacity
Audacity is a free, open access, cross-platform sound editing and recording tool. It is compatible with Windows, Mac OS X, Linux, and various other operating systems. All of these aspects have contributed to Audacity’s worldwide popularity. Audacity features an amplified effect that alters the loudness of your chosen audio and other practical tools that can change the sound in different ways.
As a result, Audacity can not only assist you in modifying the level of an audio file, but it can also help you equalize, reduce, normalize, and so on.
Yes, you have heard it right, Audacity increase volume, but the primary question is how? But don’t worry, you will get the answer after reading the article. This article will explain how you can increase or decrease the volume of a whole and a specific segment of the audio file. Let’s get started.
In this article
01 How to Increase or Decrease Volume Without Distortion and Clipping in Audacity
02 How to Increase Volume of Multiple Files in Audacity?
03 How to Increase Volume in Certain Parts of Track?
04 What’s the Difference between Normalize and Amplify?
Part 1: How to Increase or Decrease Volume Without Distortion and Clipping in Audacity
Audio clipping occurs when the audio input becomes too loud for an amplifier to produce, and the surplus signal creates distortion. When editing, you cannot add additional volume to your audio clip forever because this would result in clipping. In this case, you can use the Audacity application to emphasize your material by turning the volume up or down without distortion and clipping on a track or recording.
Learn how Audacity increase volume without distortion by following the procedure described below:
Step 1: First, download and install the Audacity software on your computer.
Step 2: Select the File from the menu above and click Open to open the audio file.

Step 3: Choose the audio track, go to the Effect menu and pick the Amplify option from the drop-down menu.

Note: You can increase or decrease the volume by double-clicking the track and using the slider under the Gain title.
Step 4: Increase or decrease the volume by sliding the slider or typing the amplification value in the text box next to it in the Amplify window as needed.

Note: Ensure that the Allow Clipping checkbox remains unchecked to avoid clipping. Moreover, keep in mind that increasing the volume to a greater extent can result in distortion.
Related: How to Change Audio Volume in Filmora
Part 2: How to Increase Volume of Multiple Files in Audacity?
Audacity is an open-source audio editing tool. It is used for various purposes, like audio recording, music creation, and audio file editing. It also allows you to increase and decrease the volume of audio files.
You may also apply the modifications to multiple files at once, rather than one at a time. Check out the instructions below to learn how to change the volume of multiple audio files:
Step 1: Select the Import option from the File menu, and then pick the Audio option. Browse to your audio files, choose all of them, and then click the Open option.

Step 2: To select all the files, press Ctrl + A, click on the Effect option in the menu bar and pick Amplify.

Step 3: Now, either enter the value in the text box next to the Amplification Decibels tab or use the slider under it. To verify the operation of increasing the volume, check the allow clipping checkbox. When you’re through with the options, click the Ok button.

Step 4: Amplification will be applied to all the tracks. Go to the File option from the above menu to export the files and then select the Export option.

If you’re running Audacity on macOS computer, you can watch the video tutorial below to apply effects to multiple files.
Part 3: How to Increase Volume in Certain Parts of Track?
The audacity software also allows you to alter a specific section of an audio file. The selection tool can assist in locating a particular area of the track. After you’ve chosen a section of the audio file, you may utilize the amplification effect to increase its loudness. Check out the instructions below to learn how you can achieve it:
Step 1: Launch the Audacity software on the computer. To open the audio file, go to the File menu and select Open. You may also open the file by dragging it.
Step 2: Ensure that the Selection tool is active now. Click and hold the mouse left-click to move from one spot on the track to another.

Step 3: After picking the part, go to the Effect option from the menu and select Amplify.

Step 4: Now, for that specific region, modify the amplification and click OK. This will only change the volume for the area you have selected.

Part 4: What’s the Difference between Normalize and Amplify?
Amplify and Normalize are two essential features of the Audacity tool. Many people think they are the same thing, they are right up to some extent, but there exists a big difference between both the features. Before discussing the differences, you need to know what the terms Normalize and Amplify imply.
Amplify
It is the quickest approach to comprehend the effect’s name if you want to know precisely what impacts are. The frequency of the vibration is enhanced to increase the amplification effect. As previously said, it raises a tiny sound.
Furthermore, because this amplification is extended to all frequencies and amplitude, the noise increases. If you choose ten sources and magnify them by ten decibels, each source will be ten decibels louder than your present sound.

Normalize
The meaning of normalizing is standardized, which is also a feature of its name. Whenever you pick an audio input and use the normalize feature, the level is adjusted automatically according to the previously indicated average volume size in Oda City.
As a result, when one sound source is normalized, there is no discernible difference between it and the amplification mechanism. Still, the effect is evident when several sound sources are performed concurrently.
By pressing Ctrl + A and selecting all ten various audio sources, you may compute the required standard of every sound source, enhance the audio input that is smaller than the normal, and create the audio signal more significant than the standard. Shrink the size of each noise source, such as the name, and normalize the sound.

Related: Best Audio Normalizers for Windows
Differences
To differentiate the meaning and impact precisely, amplification means increasing or reducing the sound, whereas normalizing means equalizing the sound. Simply defined, if you magnify ten sources by ten decibels, each of the shorter and louder noises equals ten decibels in their actual loudness.
When the ten sources are normalized, the louder sounds grow louder, conforming to the standard sound source size. Because the amplifying is done regardless, the little noises are going insane during this procedure.
Conclusion
All in all, Audacity does an excellent job at audio editing. If you simply need to modify an audio file, Audacity is a great option. For increasing and decreasing the volume of single and multiple audio files, Audacity is still one of the best bets in the market. We hope that now know how Audacity increase volume of the audio files after reading this article.
02 How to Increase Volume of Multiple Files in Audacity?
03 How to Increase Volume in Certain Parts of Track?
04 What’s the Difference between Normalize and Amplify?
Part 1: How to Increase or Decrease Volume Without Distortion and Clipping in Audacity
Audio clipping occurs when the audio input becomes too loud for an amplifier to produce, and the surplus signal creates distortion. When editing, you cannot add additional volume to your audio clip forever because this would result in clipping. In this case, you can use the Audacity application to emphasize your material by turning the volume up or down without distortion and clipping on a track or recording.
Learn how Audacity increase volume without distortion by following the procedure described below:
Step 1: First, download and install the Audacity software on your computer.
Step 2: Select the File from the menu above and click Open to open the audio file.
Step 3: Choose the audio track, go to the Effect menu and pick the Amplify option from the drop-down menu.
Note: You can increase or decrease the volume by double-clicking the track and using the slider under the Gain title.
Step 4: Increase or decrease the volume by sliding the slider or typing the amplification value in the text box next to it in the Amplify window as needed.
Note: Ensure that the Allow Clipping checkbox remains unchecked to avoid clipping. Moreover, keep in mind that increasing the volume to a greater extent can result in distortion.
Related: How to Change Audio Volume in Filmora
Part 2: How to Increase Volume of Multiple Files in Audacity?
Audacity is an open-source audio editing tool. It is used for various purposes, like audio recording, music creation, and audio file editing. It also allows you to increase and decrease the volume of audio files.
You may also apply the modifications to multiple files at once, rather than one at a time. Check out the instructions below to learn how to change the volume of multiple audio files:
Step 1: Select the Import option from the File menu, and then pick the Audio option. Browse to your audio files, choose all of them, and then click the Open option.
Step 2: To select all the files, press Ctrl + A, click on the Effect option in the menu bar and pick Amplify.
Step 3: Now, either enter the value in the text box next to the Amplification Decibels tab or use the slider under it. To verify the operation of increasing the volume, check the allow clipping checkbox. When you’re through with the options, click the Ok button.
Step 4: Amplification will be applied to all the tracks. Go to the File option from the above menu to export the files and then select the Export option.
If you’re running Audacity on macOS computer, you can watch the video tutorial below to apply effects to multiple files.
Part 3: How to Increase Volume in Certain Parts of Track?
The audacity software also allows you to alter a specific section of an audio file. The selection tool can assist in locating a particular area of the track. After you’ve chosen a section of the audio file, you may utilize the amplification effect to increase its loudness. Check out the instructions below to learn how you can achieve it:
Step 1: Launch the Audacity software on the computer. To open the audio file, go to the File menu and select Open. You may also open the file by dragging it.
Step 2: Ensure that the Selection tool is active now. Click and hold the mouse left-click to move from one spot on the track to another.
Step 3: After picking the part, go to the Effect option from the menu and select Amplify.
Step 4: Now, for that specific region, modify the amplification and click OK. This will only change the volume for the area you have selected.
Part 4: What’s the Difference between Normalize and Amplify?
Amplify and Normalize are two essential features of the Audacity tool. Many people think they are the same thing, they are right up to some extent, but there exists a big difference between both the features. Before discussing the differences, you need to know what the terms Normalize and Amplify imply.
Amplify
It is the quickest approach to comprehend the effect’s name if you want to know precisely what impacts are. The frequency of the vibration is enhanced to increase the amplification effect. As previously said, it raises a tiny sound.
Furthermore, because this amplification is extended to all frequencies and amplitude, the noise increases. If you choose ten sources and magnify them by ten decibels, each source will be ten decibels louder than your present sound.
Normalize
The meaning of normalizing is standardized, which is also a feature of its name. Whenever you pick an audio input and use the normalize feature, the level is adjusted automatically according to the previously indicated average volume size in Oda City.
As a result, when one sound source is normalized, there is no discernible difference between it and the amplification mechanism. Still, the effect is evident when several sound sources are performed concurrently.
By pressing Ctrl + A and selecting all ten various audio sources, you may compute the required standard of every sound source, enhance the audio input that is smaller than the normal, and create the audio signal more significant than the standard. Shrink the size of each noise source, such as the name, and normalize the sound.
Related: Best Audio Normalizers for Windows
Differences
To differentiate the meaning and impact precisely, amplification means increasing or reducing the sound, whereas normalizing means equalizing the sound. Simply defined, if you magnify ten sources by ten decibels, each of the shorter and louder noises equals ten decibels in their actual loudness.
When the ten sources are normalized, the louder sounds grow louder, conforming to the standard sound source size. Because the amplifying is done regardless, the little noises are going insane during this procedure.
Conclusion
All in all, Audacity does an excellent job at audio editing. If you simply need to modify an audio file, Audacity is a great option. For increasing and decreasing the volume of single and multiple audio files, Audacity is still one of the best bets in the market. We hope that now know how Audacity increase volume of the audio files after reading this article.
Also read:
- In 2024, The Ultimate Compendium Mastering the Art of Finding Top Quality Free Audio Recorders
- New 2024 Approved Comparing Leading Virtual Chat Websites Whats Better than Omegle Today?
- 2024 Approved No Investment Needed? Discover the Free, Powerful Voice-Changing Software S Best!
- Updated Digital Dating Defense Adequate Measures for a Harmless Hangout
- New Crafting Quality Sound Utilizing Audacity for Professional Podcasting
- In 2024, Find Wolf Howling Sound Effect
- New Top Audio Splitter on Mac
- 2024 Approved No-Charge Audiophiles Choice Premium Conversion Software for MPA to MP3 Transition
- New In 2024, Transform Your Tone Top Applications Changing Masculine Vocal Traits to Feminine Sounds
- New Expediting Audio Imports in Premiere Pro A Concise, Step-by-Step Guide for 2024
- Updated HarmonyVoices Mastering Cross-Platform Audio Synchronization in Adobe Premiere Pro
- Updated 2024 Approved Digital Oasis Top 10 Where Technology Meets Calmness for Mental Relief
- New 10 Best Speech to Text Software/Converters for Windows for 2024
- Updated Zoom Sound Off Disabling Video Chat Volume on All Devices for 2024
- Updated 2024 Approved Deejay Discovery Compile DJ Beats for Your Playlist
- New The Invisible Touch Methods to Apply Fading Effects on Sound in iMovie
- In 2024, Harmonizing Sight and Sound Effective Methods for Audio Pairing in Android Video Production
- Updated Creating Cohesive Video Projects The Role of Sound Design in Adobe Premiere Pro for 2024
- New 2024 Approved Harmonizing Visuals and Audio The Impact of Piano Compositions in Film Production
- Updated In 2024, Audio Eradication on iOS Devices A Complete Guide to Clearer Videos
- Updated In 2024, Joyful Ambiance Tunes for a 24Th Anniversary Celebration
- New 2024 Approved Melody Meets Picture Infuse Photos with Free Audio Content
- Updated The AutoTune Plugin Companion for Advanced Sound Editing on Audacity
- New Top 10+ Best Free Online Audio Cutters
- New Enhancing Machine Learning with AI-Enabled Denoising Solutions
- Updated In 2024, Essential Handbook Mastering the Silence - A Users Journey Through Audio Cleanup
- New In 2024, Unlocking the Full Potential of Sound with Adobe Audition Features, Tips & Techniques
- 2024 Approved Premium Siri Recording Toolkit for PC and Mac Users
- New Exploring the World of Audio Production Top Alternatives to Audacity
- In 2024, Steps to Quieten Ambient Soundtracks in Films
- The Art of Vocal Transformation Utilizing Morphvox for Competitive Gaming Advantage for 2024
- 2024 Approved Mastering PC Speaker Capture with Audacity A Step-by-Step Guide
- In 2024, Choreography of Chords 15 Premier Musical Selections for a Multitude of Video Types
- New Unveiling the Seven Pillars of Contemporary Auditory Enhancement
- New In 2024, Maximizing Creativity A Look at the 6 Best Free Online Audio Adjustment Applications
- Updated Duties Assigned to Film Set Personnel for 2024
- Updated 2024 Approved Enhancing On-Screen Impact with Echoic Audio Adjustments A Deep Dive Into Ducking Techniques
- Harmonious Beginnings Inclusive Vocal Modification Software Options for Novices & Pros
- Unveiling an Assortment of Authentic Dog Noise Recordings
- Updated Lyric Purifier Toolkit Assemble Custom Music Beds
- Updated 2024 Approved Premiere Mac-Based Vehicle Sound Unifier
- Voice Transformation Powerhouses A Deep Dive Into 25 Leading Apps and Their Capabilities
- The Editors Beat Pairing Visual Sequences with Musical Tempo Using Adobe Premiere Pro
- Voice Recording on Android Unveiled Discovering the Top 10 Apps for 2024
- Updated Unveiling the 6 Finest Automatic Transcription Applications for 2024
- New Top 8 Auditory Frequency Patterns for Media Crafting for 2024
- New Innovative Sound Solutions for Videographers Streamlining Effect Implementation
- Updated Elevating Your Podcast Experience with Advanced Audacity Techniques
- New 5 Interesting Voice Changer to Make Your Calls Funnier
- How to Unlock iPhone 7 Without Passcode? | Dr.fone
- New Edit Your Way to Viral Best Vlog Video Editing Software for Hot Platforms
- Does Motorola Moto G84 5G has native MOV support?
- In 2024, Here Are Some Reliable Ways to Get Pokemon Go Friend Codes For Vivo Y27s | Dr.fone
- In 2024, How to Track WhatsApp Messages on Vivo Y55s 5G (2023) Without Them Knowing? | Dr.fone
- How to Recover FaceTime Call History on iPhone 7 Plus | Stellar
- In 2024, How Can I Unlock My iPhone 6 Plus After Forgetting my PIN Code?
- Android Unlock Code Sim Unlock Your Xiaomi Redmi 12 5G Phone and Remove Locked Screen
- New Unlock the Power of Slow Motion A Beginners Guide to Windows Live Movie Maker for 2024
- In 2024, How to Transfer Data from Google Pixel 7a to BlackBerry | Dr.fone
- Home Button Not Working on Poco X5? Here Are Real Fixes | Dr.fone
- Bypass iCloud Activation Lock with IMEI Code On your Apple iPhone 11 Pro Max
- Prevent Cross-Site Tracking on Samsung Galaxy F34 5G and Browser | Dr.fone
- Does HTC U23 Pro support MKV video files?
- New Free and Easy 3GP Video Rotation Top Picks for This Year
- In 2024, Guide to Mirror Your Oppo Reno 9A to Other Android devices | Dr.fone
- 4 Easy Ways for Your Nokia C110 Hard Reset | Dr.fone
- Updated The Best of Both Worlds 10 Free Android Video Editors Without Watermarks for 2024
- In 2024, How to Send and Fake Live Location on Facebook Messenger Of your Apple iPhone SE (2022) | Dr.fone
- Pokémon Go Cooldown Chart On Asus ROG Phone 7 | Dr.fone
- 2024 Approved The Ultimate Cloud Stop Motion Studio Features, Guidelines, and More
- In 2024, The Magnificent Art of Pokemon Go Streaming On Meizu 21? | Dr.fone
- Universal Unlock Pattern for Vivo G2
- New In 2024, The Best Free Online Movie Editing Solutions
- Top 5 Car Locator Apps for Nokia XR21 | Dr.fone
- What is Fake GPS Location Pro and Is It Good On Vivo V29? | Dr.fone
- Title: New In 2024, The Future of Branding 10 Indispensable Marketing Podcasts on Social Media Integration
- Author: David
- Created at : 2024-05-05 10:15:48
- Updated at : 2024-05-06 10:15:48
- Link: https://sound-tweaking.techidaily.com/new-in-2024-the-future-of-branding-10-indispensable-marketing-podcasts-on-social-media-integration/
- License: This work is licensed under CC BY-NC-SA 4.0.
