

New Comprehensive Guide to the Top 8 Free Cartoon Sound Effect Downloads
Comprehensive Guide to the Top 8 Free Cartoon Sound Effect Downloads
8 Best Cartoon Sound Effects You Can Download

Benjamin Arango
Mar 27, 2024• Proven solutions
The sound plays a significant role in the videos. Without the right sound effects, your videos become dull. It doesn’t create an impact to grab the attention of the viewers. Especially when it comes to attracting the attention of kids while they watch cartoons.
Are you working on a cartoon video for kids or some animated action cartoons? Use the cartoon sound effects to add more intensity and emotions to the videos. Every time creating a new sound effect for your cartoon video becomes difficult.
If you are on a strict budget, producing new content becomes almost impossible. In such situations, free cartoon sound effects are the best way to enhance your cartoon videos.
In this article, you will learn eight best cartoon sound effects that you can download and make your videos perfect.
8 Best Cartoon Sound Effects Resources
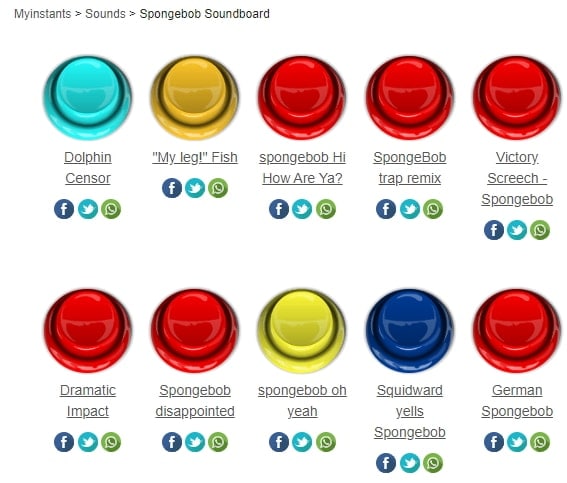
1. Spongebob Sound Effects
MyInstant’s Spongebob soundboard offers a range of cartoon sound effects that can be easily downloaded just by clicking on the Download mp3 sound effect button. You can listen to over 120 classic cartoon sound effects and download it for free. You can also copy the embed link and paste it to your website.
2. Hanna Barbera Sound Effects
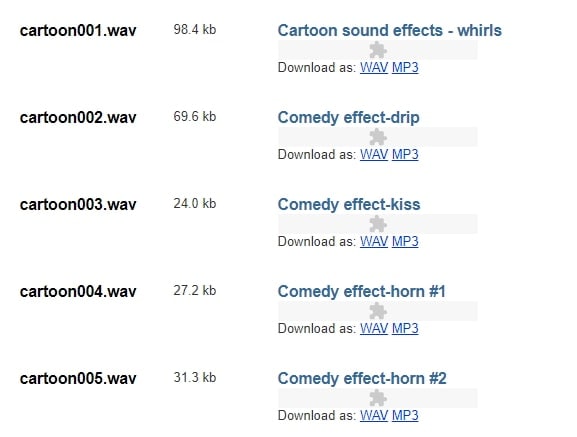
From Sounddogs, Hanna Barbera sound effects library, you can find over 2200 cartoon sound effects that are divided into 4 CDs. It has almost all the legendary classic cartoon sound effects from the cartoon shows like Yogi Bear, Huckleberry Hound, the Flintstones, The Jetsons, Quick Draw McGraw, and all the rest of the gang.
You can download the mp3 cartoon sound effects completely free by clicking on the Download ID number mentioned at the right end of each link.
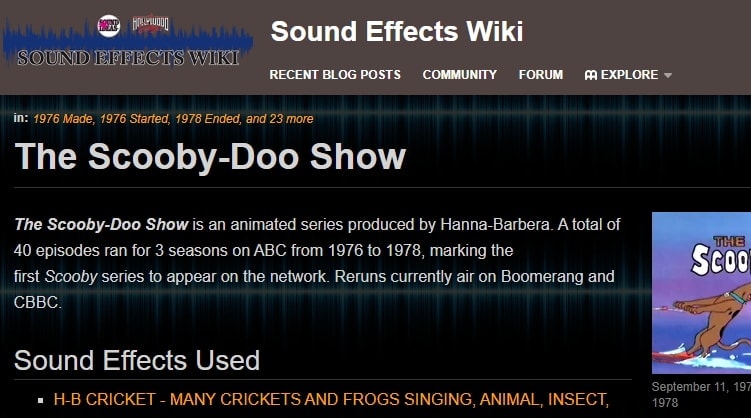
3. Scooby Doo Running Sound
Fandom’s Scooby Doo running sound effects offers all the ideas used in 40 episodes of Scooby Doo throughout the three seasons on ABC. It is over 37000 pages wiki that you can click and browse through the pages to find the right sound effect and download it for free.
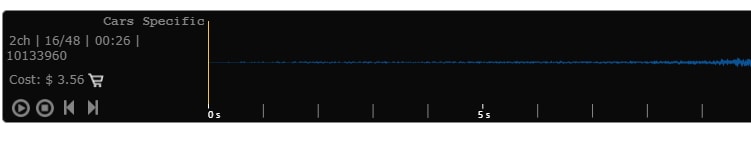
4. Tom and Jerry Sound Effects
Pond5 offers 13 Tom and Jerry sound effects that you can listen by scrolling the cursor over the boxes and download the free preview of cartoon sound effects by clicking on Download Preview.
If you want to download the entire cartoon sound effect, you need to register, log in, and pay for it. There are filters like price, collections, duration, etc. to make your selection more precise.
5. Free SFX
In FreeSFX website, you can find a range of comical cartoon sound effects that includes classic effects like descend, boink, impact, pop, musical, running, rip and snap, bounce spring, slide whistle, squelch and splat, horn and loads more.
You need to log in to the website to download free cartoon sound effects.

6.GRSites
With over 1980 cartoon sound effects, the GRSites is one of the best free sites for downloading both mp3 and WAV files. You can browse from a range of categories to find the best cartoon sound effects for your videos.
7. Cartoon Running Sound Effect
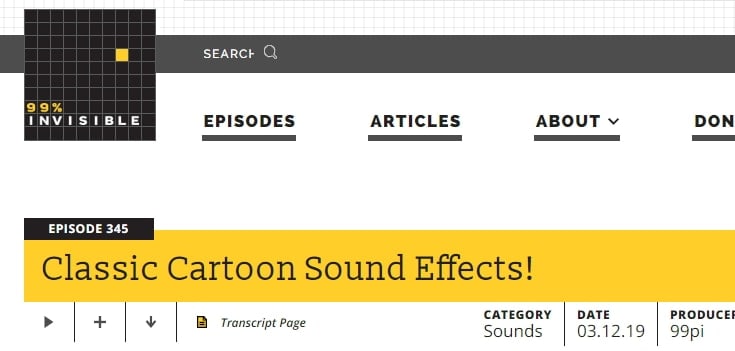
If you are looking for cartoon running sound effect, turn to Episode 345 in 99PercentInvisible. You can download the complete transcript page of around 30 minutes to use it in your video. Use the cartoon running sound effect produced by 99pi to enhance your video.
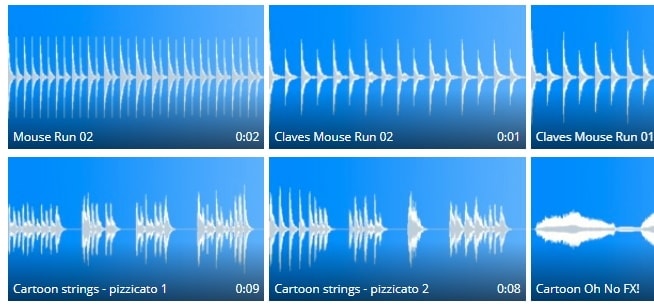
8. Big Fish Audio
The Big Fish Audio’s cartoon sound FX includes 23 free classic cartoon sound effects. The filters include a range of sound FX types, styles, format, brand, etc.
You can click on the cartoon sound effect and listen to it or add it to your playlist. But, if you wish to download the free cartoon sound effects, you need to register and pay to use the sound effect.

You may also like: How to Extract Audio from Videos on Win/Mac/Phone >>
Conclusion
Make your cartoon videos perfect with the fantastic free cartoon sound effects available for download completely free. With the range of free cartoon sound effects, you don’t need to worry about creating new sounds or expenses. You need to download the free sounds and beautifully enhance it with your creativity. There are several other sites for downloading free cartoon sound effects, but here you can check out some of the trusted ones to use.
Benjamin Arango
Benjamin Arango is a writer and a lover of all things video.
Follow @Benjamin Arango
Benjamin Arango
Mar 27, 2024• Proven solutions
The sound plays a significant role in the videos. Without the right sound effects, your videos become dull. It doesn’t create an impact to grab the attention of the viewers. Especially when it comes to attracting the attention of kids while they watch cartoons.
Are you working on a cartoon video for kids or some animated action cartoons? Use the cartoon sound effects to add more intensity and emotions to the videos. Every time creating a new sound effect for your cartoon video becomes difficult.
If you are on a strict budget, producing new content becomes almost impossible. In such situations, free cartoon sound effects are the best way to enhance your cartoon videos.
In this article, you will learn eight best cartoon sound effects that you can download and make your videos perfect.
8 Best Cartoon Sound Effects Resources
1. Spongebob Sound Effects
MyInstant’s Spongebob soundboard offers a range of cartoon sound effects that can be easily downloaded just by clicking on the Download mp3 sound effect button. You can listen to over 120 classic cartoon sound effects and download it for free. You can also copy the embed link and paste it to your website.
2. Hanna Barbera Sound Effects
From Sounddogs, Hanna Barbera sound effects library, you can find over 2200 cartoon sound effects that are divided into 4 CDs. It has almost all the legendary classic cartoon sound effects from the cartoon shows like Yogi Bear, Huckleberry Hound, the Flintstones, The Jetsons, Quick Draw McGraw, and all the rest of the gang.
You can download the mp3 cartoon sound effects completely free by clicking on the Download ID number mentioned at the right end of each link.
3. Scooby Doo Running Sound
Fandom’s Scooby Doo running sound effects offers all the ideas used in 40 episodes of Scooby Doo throughout the three seasons on ABC. It is over 37000 pages wiki that you can click and browse through the pages to find the right sound effect and download it for free.
4. Tom and Jerry Sound Effects
Pond5 offers 13 Tom and Jerry sound effects that you can listen by scrolling the cursor over the boxes and download the free preview of cartoon sound effects by clicking on Download Preview.
If you want to download the entire cartoon sound effect, you need to register, log in, and pay for it. There are filters like price, collections, duration, etc. to make your selection more precise.
5. Free SFX
In FreeSFX website, you can find a range of comical cartoon sound effects that includes classic effects like descend, boink, impact, pop, musical, running, rip and snap, bounce spring, slide whistle, squelch and splat, horn and loads more.
You need to log in to the website to download free cartoon sound effects.
6.GRSites
With over 1980 cartoon sound effects, the GRSites is one of the best free sites for downloading both mp3 and WAV files. You can browse from a range of categories to find the best cartoon sound effects for your videos.
7. Cartoon Running Sound Effect
If you are looking for cartoon running sound effect, turn to Episode 345 in 99PercentInvisible. You can download the complete transcript page of around 30 minutes to use it in your video. Use the cartoon running sound effect produced by 99pi to enhance your video.
8. Big Fish Audio
The Big Fish Audio’s cartoon sound FX includes 23 free classic cartoon sound effects. The filters include a range of sound FX types, styles, format, brand, etc.
You can click on the cartoon sound effect and listen to it or add it to your playlist. But, if you wish to download the free cartoon sound effects, you need to register and pay to use the sound effect.
You may also like: How to Extract Audio from Videos on Win/Mac/Phone >>
Conclusion
Make your cartoon videos perfect with the fantastic free cartoon sound effects available for download completely free. With the range of free cartoon sound effects, you don’t need to worry about creating new sounds or expenses. You need to download the free sounds and beautifully enhance it with your creativity. There are several other sites for downloading free cartoon sound effects, but here you can check out some of the trusted ones to use.
Benjamin Arango
Benjamin Arango is a writer and a lover of all things video.
Follow @Benjamin Arango
Discover the Top 5 Budget-Friendly Audio Intensity Normalizers
When you are listening to music, or to podcast, or some other type of audio files, would it make it enjoyable if the volume was so low at some point that you couldn’t understand anything? Now add another possibility to this very unpleasant imagination – what if the volume was so high at another point that your ears can’t handle it? – Of course, you would stop listening, and you would also not think high of the creator of this content. In other words, this will become the reason why this creator might lose their audiences. Well, sad story for the creator, isn’t it? And, what if YOU were the creator? A little laziness or a failure in paying attention to detail and your content goes to waste!
So, what is the solution? Of course, a little editing! Even if your voice doesn’t sound like it’s worth listening, you can make it happen by normalizing the volume. This actually is the process when a constant amount of gain is applied to the audio recording, bringing the amplitude to a desirable level, which is “the norm” for the project. When this tool is applied to the volume, the whole recording has the same amount of gain across it, every piece is affected the same way, and the relative dynamics are not changed.
With this tool, you have an extra guarantor that people will want to convert to being loyal subscribers, viewers and listeners, because simply, their user experience is now favored, they enjoy a good, edited content.
Actually, we might use audio normalizing when we need to get the maximum volume, but another reason is is when we need to match different volumes.
As in most cases, there is not only one type of audio normalization, so let’s explain what each of them represents: one is a so-called peak normalization, helping adjust the recording based on the highest signal level present in the recording; another is called loudness normalization and it adjusts the recording based on perceived loudness. RMS (Root-Mean-Square), changes the value of all the samples, where their average electrical volume overall is a specified level.
With this knowledge in mind, let’s now move to the topic we are going to cover in this article: let’s discuss 5 best free MP3 volume normalizers. Knowing about them will save you time and equip you with the right ways so that when you are going to need audio normalization, you will choose one of them, bypass exhausting process of the research, and find the free, easy-to-use programs that will help you master your sounds!
So, we chose the following programs as 5 best free MP3 normalizers: Wondershare Filmora X, Adobe Premiere Pro, VLC Media Player, MP3 Gain and Movavi.
Wondershare Filmora X
Now, even though we already know how to normalize audio in VLC in the simplest, as well as in the more advanced way, it might be even better if we know some more about normalizing audios in different programs. Something worth discussing is a software called Wondershare Filmora X , which carries out the same task wonderfully. Although, unlike VLC Media Player, it is a real video editor, but don’t panic if you have never laid your hand on editing – it is one of the easiest to use ini the word, operating also both on Mac and Windows, and its interface is utterly understandable for beginners right away. And, actually, it is a qhile that Wondershare Filmora X introduced the feature to normalize the audio for the first time. What to say more - you might want to stop now and download the latest version of Filmora X because now we are about to learn how to normalize audio from the video there – so, tune in For Win 7 or later(64-bit)
Free Download For macOS 10.14 or later
When it is done installing, open the software. Now, click and drag the video of which the audio you want to normalize. Now you can select the clip you have chosen – if there are multiple, select all of them, then right-click and choose Detach Audio.

Now if you have this kind of graphic before your eyes, you can be pretty sure without even listening, that the noises are really, really different from each other, which highlights once again how useful audio normalization can be:

Select these files, right-click and choose Adjust Audio. New panel will be opened on left top and there, you will see Audio Normalization – check the box there.


After you have clicked on it, wait until the normalization completes.

Soon, all audio will be normalized, and you will already be able to see on the graphics that the volumes are almost on the same level and when you listen to it, you will make sure that there is no longer apparent difference between how they sound. And from there on, you can save the file you just normalized!
Adobe Premiere Pro
Adobe Premiere Pro is the industry-leading video editing software, and it is a timeline-based. Premiere Pro always tries to make its use easier and easier, as new features are rolling out regularly to simplify steps and save time. The very same can be said about normalizing audio files, which is actually pretty easy once mastered in a very short time. That is actually why it used by beginners and professionals alike.
To normalize audio Adobe Premiere Pro, first, import your MP3 there. In the timeline, you will see your files in the sequence, in the sound section. Now, the best way to work on them is increase the track height – for that, you need to double-click on the empty space there, next to the little microphone icon.


Now, the track is high, and you can see more of your track. So, say that one of your MP3’s seems very loud, and another is much quieter. Speaking of the loud one, if you can see on the right that there is some red light, it is not a good sign – meaning that audio went above zero (so-called clipping), so you need to avoid it.

(If you can not see your audio meters, just go to Window menu and choose Audio Meters).
So, here, our goal is to bring our audio clips around -3 – and for it, it’s possible to bring up and down the white line on the track, but it can be pretty time-consuming actually.

So a better way to do it would be next: click on the track and then right-click, find Audio Gain, and choose Normalize Max Peak to…:

Max Peak is basically the loudest, highest peak in the audio clip. So, you can write in -3 and click OK, which will ensure the entire audio waveform will have the gain of it adjusted so that the max peak is at -3. You can proceed to the next track and carry out the exact same process on it too. Then, on Audio Meters on the right again, you will be able to see that both tracks (or more, if you have them) peak at -3. In case you have a lot of clips on the timeline, you can select them all, then go to Audio Gain and normalize all of their max peaks simultaneously, which will save you so much time and help you enormously!
VLC Media Player
VLC is a well-known media player, it is a free-to-use, robust, and feature-packed software that plays a wide range of audio, image, and video files. It is worth noting that it can also play multimedia files directly from extractable devices or the PC and can stream from the most successful websites such as Disney+, Hulu, Netflix, and so on.
But there is another magic a simple media player can actually do - we can also normalize volume in VLC Media Player. It is a very handy feature and it works on Windows as well as on Mac. It is very simple, so follow these steps:
You need to have VLC Media Player installed on your device. Once you have it installed, open VLC. Go to the Tools and Preferences and there, check the single box which is next to Normalize volume in Effects. Now, set the level to the one that works best for you. Then, when you are happy with the result, click on Save.
What VLC does is just let adjust the general volume, leaving the specifics out of our control.

If you are not so satisfied with the simple editing and want a little more to get from the editing process on VLC, you can do more with the Audio Effects menu:
Find Tools and in the menu, go to Preferences. The window will open, and you need to select All in Show settings – on the bottom left corner of the window. Then, navigate to Audio, and a little below, click on Filters and highlight it. You also need to check the checkbox next to the Dynamic range compressor.

In the left panel, find Compressor and select it. From now, you can make the changes to the levels as you wish.

Here, concentrate the most on Makeup gain, Threshold, and Ratio. The first one is by which you adjust in quiet sequences to raise the volume, the second will help you reduce louder sequences to even things out, and ratio is the maximum level of all audio within a movie, let’s say.
Attack time and release time can also be very helpful. You can play around with them set them to your liking, and see if it’s better sounding, because actually this will ensure that you have a fluid transition in and out of the scene and there are less sudden, unexpected volume changes.
MP3Gain
MP3Gain is actually the only one in this list which is developed exactly for the task we are discussing in this article. It is an audio normalization software tool. The tool is available on multiple platforms and is free software. It analyzes the MP3 and reversibly changes its volume. The volume can be adjusted for single files or as album where all files would have the same perceived loudness. When applying the tool, there is no quality lost in the change because the program adjusts the mp3 file directly, without decoding and re-encoding.
So, to use this software, go and download MP3Gain. Install and open it when it is ready. You will see that your program is absolutely empty and it has a lot of space inside, waiting for you to upload some file(s)…

Now, you can either choose adding files manually, with you choosing each of them, but let’s say you have an album (which would be more comfortable, needless to say) in which you want to change the volume of all MP3’s. So, in this case, you can choose Add Folder, and when the window opens, choose the folder full of your MP3’s – all your files will be added in the program.

Now, find the Target “Normal” Volume above the files, and fill in the gap, if you will, or just use default dB. Then, click Album Analysis, and the process will start.

The software will show you the volume of each of the file, and then you will need to just click on Track Gain.

Now, wait for the process to be completed, and then you will see that the volumes changed for each of your files – so, it’s done!

Movavi
Powerful multimedia software for creating and editing videos – this is Movavi. It packs lots of video and audio editing power into a simple interface. On their official web-site, the program is described as: “An all-in-one video maker: an editor, converter, screen recorder, and more. Perfect for remote work and distance learning.” So, you can go and download the program, and learn audio normalization there very easily!
Install and open the program and then proceed directly to Adding Files. After having chosen your file, you drag and drop it in the timeline sequence.

If the audio is uneven, now double-click on the audio track, which will open the Clip Properties window. You will see the Normalize box, which you need to check. Doing this will even out the sound level for the whole track.

To save the result, click Export, choose the format, folder and name for your file, and then click Start, so your file can be exported.
So, it’s done – now you know a whole lot more about audio normalization, its types, why and when should we use it, and which are the 5 best free MP3 normalizers, along with the detailed guidelines on how to work with those tools to have your desired results. Let’s hope that you will be able to choose from Wondershare Filmora X, Adobe Premiere Pro, VLC Media Player, MP3 Gain and Movavi, and make your user experience so wonderful, and shareable For macOS 10.14 or later
When it is done installing, open the software. Now, click and drag the video of which the audio you want to normalize. Now you can select the clip you have chosen – if there are multiple, select all of them, then right-click and choose Detach Audio.
Now if you have this kind of graphic before your eyes, you can be pretty sure without even listening, that the noises are really, really different from each other, which highlights once again how useful audio normalization can be:
Select these files, right-click and choose Adjust Audio. New panel will be opened on left top and there, you will see Audio Normalization – check the box there.
After you have clicked on it, wait until the normalization completes.
Soon, all audio will be normalized, and you will already be able to see on the graphics that the volumes are almost on the same level and when you listen to it, you will make sure that there is no longer apparent difference between how they sound. And from there on, you can save the file you just normalized!
Adobe Premiere Pro
Adobe Premiere Pro is the industry-leading video editing software, and it is a timeline-based. Premiere Pro always tries to make its use easier and easier, as new features are rolling out regularly to simplify steps and save time. The very same can be said about normalizing audio files, which is actually pretty easy once mastered in a very short time. That is actually why it used by beginners and professionals alike.
To normalize audio Adobe Premiere Pro, first, import your MP3 there. In the timeline, you will see your files in the sequence, in the sound section. Now, the best way to work on them is increase the track height – for that, you need to double-click on the empty space there, next to the little microphone icon.
Now, the track is high, and you can see more of your track. So, say that one of your MP3’s seems very loud, and another is much quieter. Speaking of the loud one, if you can see on the right that there is some red light, it is not a good sign – meaning that audio went above zero (so-called clipping), so you need to avoid it.
(If you can not see your audio meters, just go to Window menu and choose Audio Meters).
So, here, our goal is to bring our audio clips around -3 – and for it, it’s possible to bring up and down the white line on the track, but it can be pretty time-consuming actually.
So a better way to do it would be next: click on the track and then right-click, find Audio Gain, and choose Normalize Max Peak to…:
Max Peak is basically the loudest, highest peak in the audio clip. So, you can write in -3 and click OK, which will ensure the entire audio waveform will have the gain of it adjusted so that the max peak is at -3. You can proceed to the next track and carry out the exact same process on it too. Then, on Audio Meters on the right again, you will be able to see that both tracks (or more, if you have them) peak at -3. In case you have a lot of clips on the timeline, you can select them all, then go to Audio Gain and normalize all of their max peaks simultaneously, which will save you so much time and help you enormously!
VLC Media Player
VLC is a well-known media player, it is a free-to-use, robust, and feature-packed software that plays a wide range of audio, image, and video files. It is worth noting that it can also play multimedia files directly from extractable devices or the PC and can stream from the most successful websites such as Disney+, Hulu, Netflix, and so on.
But there is another magic a simple media player can actually do - we can also normalize volume in VLC Media Player. It is a very handy feature and it works on Windows as well as on Mac. It is very simple, so follow these steps:
You need to have VLC Media Player installed on your device. Once you have it installed, open VLC. Go to the Tools and Preferences and there, check the single box which is next to Normalize volume in Effects. Now, set the level to the one that works best for you. Then, when you are happy with the result, click on Save.
What VLC does is just let adjust the general volume, leaving the specifics out of our control.
If you are not so satisfied with the simple editing and want a little more to get from the editing process on VLC, you can do more with the Audio Effects menu:
Find Tools and in the menu, go to Preferences. The window will open, and you need to select All in Show settings – on the bottom left corner of the window. Then, navigate to Audio, and a little below, click on Filters and highlight it. You also need to check the checkbox next to the Dynamic range compressor.
In the left panel, find Compressor and select it. From now, you can make the changes to the levels as you wish.
Here, concentrate the most on Makeup gain, Threshold, and Ratio. The first one is by which you adjust in quiet sequences to raise the volume, the second will help you reduce louder sequences to even things out, and ratio is the maximum level of all audio within a movie, let’s say.
Attack time and release time can also be very helpful. You can play around with them set them to your liking, and see if it’s better sounding, because actually this will ensure that you have a fluid transition in and out of the scene and there are less sudden, unexpected volume changes.
MP3Gain
MP3Gain is actually the only one in this list which is developed exactly for the task we are discussing in this article. It is an audio normalization software tool. The tool is available on multiple platforms and is free software. It analyzes the MP3 and reversibly changes its volume. The volume can be adjusted for single files or as album where all files would have the same perceived loudness. When applying the tool, there is no quality lost in the change because the program adjusts the mp3 file directly, without decoding and re-encoding.
So, to use this software, go and download MP3Gain. Install and open it when it is ready. You will see that your program is absolutely empty and it has a lot of space inside, waiting for you to upload some file(s)…
Now, you can either choose adding files manually, with you choosing each of them, but let’s say you have an album (which would be more comfortable, needless to say) in which you want to change the volume of all MP3’s. So, in this case, you can choose Add Folder, and when the window opens, choose the folder full of your MP3’s – all your files will be added in the program.
Now, find the Target “Normal” Volume above the files, and fill in the gap, if you will, or just use default dB. Then, click Album Analysis, and the process will start.
The software will show you the volume of each of the file, and then you will need to just click on Track Gain.
Now, wait for the process to be completed, and then you will see that the volumes changed for each of your files – so, it’s done!
Movavi
Powerful multimedia software for creating and editing videos – this is Movavi. It packs lots of video and audio editing power into a simple interface. On their official web-site, the program is described as: “An all-in-one video maker: an editor, converter, screen recorder, and more. Perfect for remote work and distance learning.” So, you can go and download the program, and learn audio normalization there very easily!
Install and open the program and then proceed directly to Adding Files. After having chosen your file, you drag and drop it in the timeline sequence.
If the audio is uneven, now double-click on the audio track, which will open the Clip Properties window. You will see the Normalize box, which you need to check. Doing this will even out the sound level for the whole track.
To save the result, click Export, choose the format, folder and name for your file, and then click Start, so your file can be exported.
So, it’s done – now you know a whole lot more about audio normalization, its types, why and when should we use it, and which are the 5 best free MP3 normalizers, along with the detailed guidelines on how to work with those tools to have your desired results. Let’s hope that you will be able to choose from Wondershare Filmora X, Adobe Premiere Pro, VLC Media Player, MP3 Gain and Movavi, and make your user experience so wonderful, and shareable!
Seamless Setup of Audacity in Ubuntu: Instructional Steps
Open-source audio editor Audacity is available for free download and usage. It is one of the most popular multi-track audio editing tools for Windows, Mac OS X, and Linux. Audio recordings may be recorded, edited, spliced, and altered with Audacity. How to install Audacity on your Ubuntu 20.04 LTS system is explained in this post.
Key Features of Audacity
- Creative Commons Attribution-NonCommercial-ShareAlike License
- It is a cross-platform program
- Sound files may be imported, edited, and combined. Use a variety of file types when exporting your recordings. You may even export many files at once.
- Record and playback live sound
- Audio Quality: Audacity can playback 16-bit, 24-bit, and 32-bit audio files, respectively.
- Accessible in 38 different dialects
- Assistive Listening Device
- Keyboard shortcuts are many
- A wide range of audio formats is supported, including AIFF, WAV, FLAC, and MP2.
- With the keyboard, tracks and choices may be handled to their greatest extent
- VST and Audio Unit effect plug-ins are supported. Plug-ins may even be written by you.
- Duplicate, chop, combine, or splice together several sound documents.
- There is a slew of others…
Installation
The official website for Audacity shows version 2.4.2 as the most recent release. Download the newest version of Audacity for Ubuntu 20.04 and then install it.
- Install Audacity via PPA
- Install Audacity via Snap Store
First, we’ll use the PPA approach to install Audacity.
Install Audacity via PPA
Installing Audacity on an Ubuntu system is as simple as entering the following line in the terminal to include the unofficial PPA developed by “ubuntuhandbook” to the Ubuntu system’s software sources, then rebooting.

You will be prompted to hit the Enter key to proceed with the process of adding your Audacity package to your sources list. To begin the process of introducing PPA to the sources list, press the Enter key.

After you’ve added the Audacity package to the system’s software sources, you’ll need to update the package repository in order to get Audacity to work.

As soon as you have updated the package repository, you should be able to successfully install Audacity.
Navigate to Activities & type in the word ‘audacity’ to find it.

As you can see in the picture, Audacity has been successfully installed and is ready for usage on my PC.

Installing Audacity from the Snap Store
A version of Audacity is also available for download via the Snap shop. Using a Snap is among the quickest and most straightforward methods of installing any program since it takes into account all of the application’s updates and dependencies. In order to install Audacity using Snap, you must first ensure that Snap is already installed on the Ubuntu system. Snap is pre-installed in the newest versions of Ubuntu and is available as a default. If Snap is not already installed on your system, you may do it by using the instructions shown below.

After safely installing Snap, you’ll be able to proceed to install Audacity by using the script provided in the next section.

It will just take a few minutes to download & install Audacity on your computer.

As soon as Audacity has been installed via the Snap method, launch the program by searching for the phrase ‘audacity’ in the Application menu.
To launch Audacity, click on the Audacity icon on your desktop.
How to uninstall Audacity Ubuntu
For whatever reason, if you wish to remove the Audacity program from your computer, you may follow these instructions.
Method 1
If you installed Audacity through the Snap method, execute the following command in your terminal: $ sudo snap remove Audacity
Method 2
If you have installed the application using the PPA, you may remove it by performing the instructions shown below.
>Step 1:
The first step is to
This indicates that the add-apt-repository command was used to add the PPA to your system. You may also use the same command to uninstall the PPA from your computer. Simply include the —remove option in your command.
$ sudo add-apt-repository –remove ppa:ubuntuhandbook1/audacity
>Step 2:
As of the right moment, the PPA has been withdrawn. What happens to the programs that are installed using these PPAs? Will they be eliminated as a consequence of the abolition of the Patriot Act? The answer is a resounding no.
Thus, PPA-purge enters the scene to help solve the problem. The PPA is disabled, but all of the apps installed by the PPA are also uninstalled, or they are reverted to the original versions given by your distribution.
Install the PPA-purge package and remove the Audacity package may be accomplished by running the following command.
$ sudo apt install ppa-purge && sudo ppa-purge ppa:ubuntuhandbook1/audacity
Conclusion
I hope you now have a clear grasp of installing and uninstalling Audacity on Ubuntu 20.04 LTS Focal Fossa. I hope this article has been helpful. Additionally, we cover Filmora’s voice effects & how users may use the program to improve and change their own voices. Filmora allows you to re-voice video/audio & previously recorded voiceovers. The Pitch option on the Timeline may be used with video/audio and voiceover files. Change the tone of a video and recording to make it sound unique. You may quickly alter the voices in the videos with Filmora. A story or video should accompany your viral. Allows you to alter the pitch of your voice by selecting the Changing Pitch option. You may adjust the video’s pace (Optional). Make a duplicate of the video or audio that has been altered.
For Win 7 or later (64-bit)
For macOS 10.12 or later
You will be prompted to hit the Enter key to proceed with the process of adding your Audacity package to your sources list. To begin the process of introducing PPA to the sources list, press the Enter key.
After you’ve added the Audacity package to the system’s software sources, you’ll need to update the package repository in order to get Audacity to work.
As soon as you have updated the package repository, you should be able to successfully install Audacity.
Navigate to Activities & type in the word ‘audacity’ to find it.
As you can see in the picture, Audacity has been successfully installed and is ready for usage on my PC.
Installing Audacity from the Snap Store
A version of Audacity is also available for download via the Snap shop. Using a Snap is among the quickest and most straightforward methods of installing any program since it takes into account all of the application’s updates and dependencies. In order to install Audacity using Snap, you must first ensure that Snap is already installed on the Ubuntu system. Snap is pre-installed in the newest versions of Ubuntu and is available as a default. If Snap is not already installed on your system, you may do it by using the instructions shown below.
After safely installing Snap, you’ll be able to proceed to install Audacity by using the script provided in the next section.
It will just take a few minutes to download & install Audacity on your computer.
As soon as Audacity has been installed via the Snap method, launch the program by searching for the phrase ‘audacity’ in the Application menu.
To launch Audacity, click on the Audacity icon on your desktop.
How to uninstall Audacity Ubuntu
For whatever reason, if you wish to remove the Audacity program from your computer, you may follow these instructions.
Method 1
If you installed Audacity through the Snap method, execute the following command in your terminal: $ sudo snap remove Audacity
Method 2
If you have installed the application using the PPA, you may remove it by performing the instructions shown below.
>Step 1:
The first step is to
This indicates that the add-apt-repository command was used to add the PPA to your system. You may also use the same command to uninstall the PPA from your computer. Simply include the —remove option in your command.
$ sudo add-apt-repository –remove ppa:ubuntuhandbook1/audacity
>Step 2:
As of the right moment, the PPA has been withdrawn. What happens to the programs that are installed using these PPAs? Will they be eliminated as a consequence of the abolition of the Patriot Act? The answer is a resounding no.
Thus, PPA-purge enters the scene to help solve the problem. The PPA is disabled, but all of the apps installed by the PPA are also uninstalled, or they are reverted to the original versions given by your distribution.
Install the PPA-purge package and remove the Audacity package may be accomplished by running the following command.
$ sudo apt install ppa-purge && sudo ppa-purge ppa:ubuntuhandbook1/audacity
Conclusion
I hope you now have a clear grasp of installing and uninstalling Audacity on Ubuntu 20.04 LTS Focal Fossa. I hope this article has been helpful. Additionally, we cover Filmora’s voice effects & how users may use the program to improve and change their own voices. Filmora allows you to re-voice video/audio & previously recorded voiceovers. The Pitch option on the Timeline may be used with video/audio and voiceover files. Change the tone of a video and recording to make it sound unique. You may quickly alter the voices in the videos with Filmora. A story or video should accompany your viral. Allows you to alter the pitch of your voice by selecting the Changing Pitch option. You may adjust the video’s pace (Optional). Make a duplicate of the video or audio that has been altered.
For Win 7 or later (64-bit)
For macOS 10.12 or later
Also read:
- Updated Mastering the Art of Music Video Creation Expert Advice
- 2024 Approved Audiophiles Guide Evaluating Superior MP3 Karaoke Conversion Platforms, Both Online & Offline
- Premier 8 Voice Recognition Tools Windows, macOS & Cloud Solutions Roundup
- New Top 10 BGM Audio Archives for 2024
- New The Sound Barrier Breakthrough Streamlining Audio Processing for Digital Users for 2024
- Updated Dive Into Digital Alteration Mastering Voice Change Apps in iOS
- In 2024, Top-Rated Audio Editing Software for macOS Identifying the Ultimate MP3 Trimmer
- In 2024, Speech-to-Text Software Showdown Discover the Top 8 Options for PCs, Macs and Online Accessibility
- New In 2024, Transform Your Audio Projects Professional Tips on Utilizing Keyframes in Adobe Premiere Pro for macOS
- Exploring the Best Places to Get Bell Ringing Sounds for 2024
- New In 2024, Identify High-End Filters and Processors That Eradicate Unwanted Sounds From Audio Content
- Updated 2024 Approved Comprehensive Overview Discover the Best macOS-Based Music Editors Ranked Top 4
- New In 2024, Discover Top-Rated Software for Silencing Unwanted Sounds in Your Recordings
- 2024 Approved The Definitive Guide to Song Collection Top Ten Gadgets for Easy Audio Archive
- 2024 Approved Exploring the Pinnacle of Free & Paid Audio Creation on Linux
- Slow-Motion Music Methods Keeping Rhythmic Patterns Consistent in Volume and Hertz for 2024
- 2024 Approved 13+ Accessible No-Cost Audio Engineering Applications for All Platforms
- 2024 Approved Audiovisual Enhancement for a Robust Audio Presence in Filmora
- New Crowds Delight Auditory Replicator for 2024
- Updated In 2024, Enhance Business Efficiency Mastering Call Tracking with Google Voice Services
- Updated Consumers Recommended List of High-Quality Zero-Cost Audio Trimming Tools for Online Use
- In 2024, The Essential List 6 High-Performance Voice Alteration Apps
- New In 2024, Mastering the Art of Detaching Sound From Visuals in Adobe Premiere Pro
- New Navigating Audio Segmentation Easy Ways to Split Your MP3s and AACs
- New In 2024, Affordable Sound Mastery The Best Free Audio Editor Applications for Windows & macOS Users Today
- New Mastering Sound Clarity A Guide to Eliminating Ambient Sounds in Filmora
- New 2024 Approved Enhance Your PC Audio No-Cost Methods to Amplify Sound on Windows Systems
- New Essential Insights Into Image Stock Sourcing Pexels Uncovered
- In 2024, Hunt for Chuckling Sonic Elements
- New 2024 Approved Enhancing Sound Quality From Anywhere A Guide to Modifying Speed and Pitch Through the Web
- New In 2024, Locating the Dynamics of Whistling Audio
- Updated In 2024, Seeking Out Reputable Sources for Free, Unlicensed Avian Music Files
- Updated Innovations and Leaders in Audio-Video Disassociation A Top 10 Software List
- A Guide to Securing Subtle Soundscapes for 2024
- Updated Unlocking MP3 From AIFF Step-by-Step Processes Revealed
- New In 2024, Explore & Download the Latest Electronic Dance Music (EDM)
- 2024 Approved Mastering Audio Extraction From Video IMovie Techniques for Mac Users
- New Echoes of Celebration Finding the Perfect Applaud Tones for 2024
- Updated 2024 Approved Elite Chat Solutions Catering to the Gaming Sphere
- Updated MP4 Video Information Editors Best Choices for 2024
- New In 2024, Adobe Animate Text Effects Skills You Need to Know
- A Perfect Guide To Remove or Disable Google Smart Lock On Honor X50i+
- Forgot iPhone 15 Plus Password? – Here are the Best Solutions | Stellar
- In 2024, The Ultimate Guide to VSDC Video Editor Alternatives on Mac
- 2024 Approved No-Cost, No-Problem Best Free Video Editors for Beginners
- New 2024 Approved Transform Your Workflow Best Free Mac Speech Recognition Tools with No Downloads or Strings Attached
- How to Soft Reset Honor 80 Pro Straight Screen Edition phone? | Dr.fone
- In 2024, Switch Cards Between Apple iPhone 11 Pro Max and other iPhones Will Move All Phone Services? | Dr.fone
- New Create Stunning Animations Best Android and iPhone Apps (Free) for 2024
- Updated In 2024, Make Unforgettable Home Movies on Your Mac with Ease
- New 2024 Approved S Best Video Editing Software for HD Videos
- 2024 Approved Sleek and Powerful The Best Lightweight Video Editing Tools
- The Top 5 Android Apps That Use Fingerprint Sensor to Lock Your Apps On Realme V30T
- New 2024 Approved Unleash Your Creativity Top Gaming Intro Makers for Windows, Mac, and Online Platforms
- Reasons for Vivo V27 Stuck on Startup Screen and Ways To Fix Them | Dr.fone
- 5 Ways to Track Tecno Pova 5 Pro without App | Dr.fone
- New With Filmora X, You Can Create Such Transparent Background Reaction Videos without Such Expensive Material
- Full Guide to Unlock Your Vivo V29
- How to Fake Snapchat Location on Asus ROG Phone 8 Pro | Dr.fone
- In 2024, Ultimate Guide to Catch the Regional-Located Pokemon For Realme C53 | Dr.fone
- 4 Feasible Ways to Fake Location on Facebook For your Tecno Spark 10 4G | Dr.fone
- How to Transfer Videos from Realme C51 to iPad | Dr.fone
- In 2024, What Does Enter PUK Code Mean And Why Did The Sim Get PUK Blocked On Vivo Y200e 5G Device
- How to Bypass iCloud Lock from iPhone 13 Pro
- In 2024, Here are Some of the Best Pokemon Discord Servers to Join On Xiaomi Redmi Note 12T Pro | Dr.fone
- 4 Most-Known Ways to Find Someone on Tinder For Vivo Y77t by Name | Dr.fone
- In 2024, Unlock Your Device iCloud DNS Bypass Explained and Tested, Plus Easy Alternatives From Apple iPhone XR
- In 2024, How To Change Realme C55 Lock Screen Clock in Seconds
- Top 10 Best Spy Watches For your OnePlus Nord N30 5G | Dr.fone
- How to Erase an Apple iPhone 7 Plus without Apple ID?
- Full Guide on Mirroring Your Realme 12 5G to Your PC/Mac | Dr.fone
- In 2024, Hassle-Free Ways to Remove FRP Lock on HTC U23 Phones with/without a PC
- All You Need To Know About Mega Greninja For Xiaomi Redmi 13C 5G | Dr.fone
- Title: New Comprehensive Guide to the Top 8 Free Cartoon Sound Effect Downloads
- Author: David
- Created at : 2024-06-19 06:52:06
- Updated at : 2024-06-20 06:52:06
- Link: https://sound-tweaking.techidaily.com/new-comprehensive-guide-to-the-top-8-free-cartoon-sound-effect-downloads/
- License: This work is licensed under CC BY-NC-SA 4.0.
