
:max_bytes(150000):strip_icc():format(webp)/wimbledonlivestream-c22d5eefbf8f40e9b25ba4cab1734ece.jpg)
New Auditory Precision in Filmmaking Employing Audio Ducking Strategies
Auditory Precision in Filmmaking: Employing Audio Ducking Strategies
What is Audio Ducking and How to Use it in Filmora: A Beginner-friendly Guide

Benjamin Arango
Mar 27, 2024• Proven solutions
If you are a content creator, you might already know the importance of having the right audio component in a video. For attaining a perfect balance between voiceovers and the background audio, the concept of “ducking” is implemented. I have come up with this post to help you know more about audio ducking and its importance. I will also include a detailed guide for implementing audio ducking on a video in a stepwise manner. Let’s begin!

- Part 1: What Is Audio Ducking?
- Part 2: When to Use Audio Ducking?
- Part 3: How to Use the Audio Ducking Feature in Filmora?
Audio Ducking: What Is It All About?
In nutshell, it is a process that “ducks” or lowers the background volume when a voiceover appears. For instance, let’s consider that we already have a background score in our video playing. When we would add a narrator’s voice or apply a voiceover, it would create a lot of confusion. Therefore, we implement the audio ducking process to lower the background audio and amplify the voiceover instead.
In most cases, it is achieved through a side-chain compression technique. A control channel is set up that enables the compression of one sound (the background) while amplifying another (the voiceover).


When Do You Need to Implement Audio Ducking?
Since the concept of audio ducking is pretty useful, it can be implemented in different ways during the video editing process. While you can apply the process to any video, here are some of the major instances where it is used.
Travel Vlogs
If you are a travel vlogger, you might already know how tough it can be to make yourself heard in a video. When there are too many background noises, your voice can be diminished. This is exactly where you can apply audio ducking to decrease the background noise and focus on your voice.
Make-up Tutorials
While creating make-up video tutorials, most of us use a background track to keep our viewers engaged. At the same time, you need to let them know about the process by speaking clearly. If you use audio ducking, then you can easily attain a perfect balance between both sounds.
Other Instances
Ideally, if you are creating any other tutorial video for your audience, then audio ducking can be useful. From making video game tutorials to coming up with video lectures on a crucial topic, the concept would come in handy time and time again.
How to Use the Audio Ducking Feature in Filmora?
To implement audio ducking in your videos, you can use a reliable editing tool like Wondershare Filmora . It is a user-friendly and powerful video editing application that lets you “duck” the background sound and easily amplify voiceovers.
- Without undergoing any complicated process, you can implement audio ducking and even scale it (from 1 to 100) to attain the right balance in your videos.
- Filmora also offers tons of powerful audio features for video editing. It has a dedicated audio mixer that would let you split, detach, split, or mute the audio.
- The application can also be used to add voiceovers to your video on its native interface. You can also use its inbuilt operations like noise remover, fade in/fade out, equalizer, etc. to make the needed changes.
- Besides audio ducking, you can also access tons of advanced editing features in Filmora like motion tracking, color grading, keyframing, and so much more.
- The application also offers a wide range of filters, presets, effects, stickers, and royalty-free music that you can easily use in your videos.
To learn how to implement audio ducking in your videos using Filmora, you can go through these basic steps:
Step 1. Import Your Videos on Filmora
To begin with, you have to install Wondershare Filmora on your computer and launch it. Now, go to the “Import” feature from the top, choose to add files, and browse and load your videos. After adding the video, you can drag it to the timeline below to start editing.

Step 2. Import An Audio or Record Voiceovers
Let’s suppose that your video already has an audio track in the background, and now you wish to add another audio component. Most of the people would like to record their voices in the video. For this, you can click on the voiceover (mic) icon at the bottom of the preview panel. This will open a dedicated window so that you can start recording your voice for the video.

Apart from that, you can also go to the “Import” feature to add any other audio component to the project. Besides that, Wondershare Filmora also has a wide range of royalty-free audio files that you can easily add to your projects.

Step 3. Apply Audio Ducking to Your Video
After adding the second audio component, you can view it under the video timeline on Filmora. Now, you need to select the audio track you wish to amplify (like your voiceover) and not the track that already has a prominent volume.

Once you have selected the audio you wish to amplify, right-click to get its context menu. Just select the “Adjust Audio” feature from all the available options.

This will launch a dedicated window on the screen with various audio options to apply. Go to the “Ducking” option here and enable the “Lower the volume of other clips” feature. You can also use a slider here to adjust how much you wish to lower the volume of other clips in the project.

That’s it! Once you have selected the value, click on the “OK” button. You can now preview the results on Filmora and check that the volume of other audio components has been ducked. You can later go to the “Export” option and save the project in the format of your choice.

After reading this post, I’m sure that you will know more about audio ducking and how we can implement it. Since many content creators encounter issues while working on their videos, audio ducking would certainly be a helpful feature. With an application like Wondershare Filmora, you can easily implement audio ducking on multiple files and further edit your videos like a pro!
Benjamin Arango
Benjamin Arango is a writer and a lover of all things video.
Follow @Benjamin Arango
Benjamin Arango
Mar 27, 2024• Proven solutions
If you are a content creator, you might already know the importance of having the right audio component in a video. For attaining a perfect balance between voiceovers and the background audio, the concept of “ducking” is implemented. I have come up with this post to help you know more about audio ducking and its importance. I will also include a detailed guide for implementing audio ducking on a video in a stepwise manner. Let’s begin!
- Part 1: What Is Audio Ducking?
- Part 2: When to Use Audio Ducking?
- Part 3: How to Use the Audio Ducking Feature in Filmora?
Audio Ducking: What Is It All About?
In nutshell, it is a process that “ducks” or lowers the background volume when a voiceover appears. For instance, let’s consider that we already have a background score in our video playing. When we would add a narrator’s voice or apply a voiceover, it would create a lot of confusion. Therefore, we implement the audio ducking process to lower the background audio and amplify the voiceover instead.
In most cases, it is achieved through a side-chain compression technique. A control channel is set up that enables the compression of one sound (the background) while amplifying another (the voiceover).
When Do You Need to Implement Audio Ducking?
Since the concept of audio ducking is pretty useful, it can be implemented in different ways during the video editing process. While you can apply the process to any video, here are some of the major instances where it is used.
Travel Vlogs
If you are a travel vlogger, you might already know how tough it can be to make yourself heard in a video. When there are too many background noises, your voice can be diminished. This is exactly where you can apply audio ducking to decrease the background noise and focus on your voice.
Make-up Tutorials
While creating make-up video tutorials, most of us use a background track to keep our viewers engaged. At the same time, you need to let them know about the process by speaking clearly. If you use audio ducking, then you can easily attain a perfect balance between both sounds.
Other Instances
Ideally, if you are creating any other tutorial video for your audience, then audio ducking can be useful. From making video game tutorials to coming up with video lectures on a crucial topic, the concept would come in handy time and time again.
How to Use the Audio Ducking Feature in Filmora?
To implement audio ducking in your videos, you can use a reliable editing tool like Wondershare Filmora . It is a user-friendly and powerful video editing application that lets you “duck” the background sound and easily amplify voiceovers.
- Without undergoing any complicated process, you can implement audio ducking and even scale it (from 1 to 100) to attain the right balance in your videos.
- Filmora also offers tons of powerful audio features for video editing. It has a dedicated audio mixer that would let you split, detach, split, or mute the audio.
- The application can also be used to add voiceovers to your video on its native interface. You can also use its inbuilt operations like noise remover, fade in/fade out, equalizer, etc. to make the needed changes.
- Besides audio ducking, you can also access tons of advanced editing features in Filmora like motion tracking, color grading, keyframing, and so much more.
- The application also offers a wide range of filters, presets, effects, stickers, and royalty-free music that you can easily use in your videos.
To learn how to implement audio ducking in your videos using Filmora, you can go through these basic steps:
Step 1. Import Your Videos on Filmora
To begin with, you have to install Wondershare Filmora on your computer and launch it. Now, go to the “Import” feature from the top, choose to add files, and browse and load your videos. After adding the video, you can drag it to the timeline below to start editing.
Step 2. Import An Audio or Record Voiceovers
Let’s suppose that your video already has an audio track in the background, and now you wish to add another audio component. Most of the people would like to record their voices in the video. For this, you can click on the voiceover (mic) icon at the bottom of the preview panel. This will open a dedicated window so that you can start recording your voice for the video.
Apart from that, you can also go to the “Import” feature to add any other audio component to the project. Besides that, Wondershare Filmora also has a wide range of royalty-free audio files that you can easily add to your projects.
Step 3. Apply Audio Ducking to Your Video
After adding the second audio component, you can view it under the video timeline on Filmora. Now, you need to select the audio track you wish to amplify (like your voiceover) and not the track that already has a prominent volume.
Once you have selected the audio you wish to amplify, right-click to get its context menu. Just select the “Adjust Audio” feature from all the available options.
This will launch a dedicated window on the screen with various audio options to apply. Go to the “Ducking” option here and enable the “Lower the volume of other clips” feature. You can also use a slider here to adjust how much you wish to lower the volume of other clips in the project.
That’s it! Once you have selected the value, click on the “OK” button. You can now preview the results on Filmora and check that the volume of other audio components has been ducked. You can later go to the “Export” option and save the project in the format of your choice.
After reading this post, I’m sure that you will know more about audio ducking and how we can implement it. Since many content creators encounter issues while working on their videos, audio ducking would certainly be a helpful feature. With an application like Wondershare Filmora, you can easily implement audio ducking on multiple files and further edit your videos like a pro!
Benjamin Arango
Benjamin Arango is a writer and a lover of all things video.
Follow @Benjamin Arango
Top 10 Transformative Voice Modification Tools: High-Pitched Female Renditions for Males
If you’ve been searching for the best android and iOS voice-changing apps around the internet, you’re on the right spot. Voice-changing applications are always fun. They’re handy when you’re pulling a prank on a friend, or you want some amazing effects to test your voice. Thus, we provide you with all the best male to female voice changer apps in the list below.
Record & Edit Voice Fast before Changing Voice
Before changing your voice from male to female, I suggest you edit your voice first. Filmora is an easy-to-use yet powerful video editor helping you quickly edit voice no matter your voice or the audio extracted from videos. Explore Filmora’s audio editing features and get ready for changing voice!
For Win 7 or later (64-bit)
For macOS 10.12 or later


Part 1: Changing Voice Online for Free with Media.io
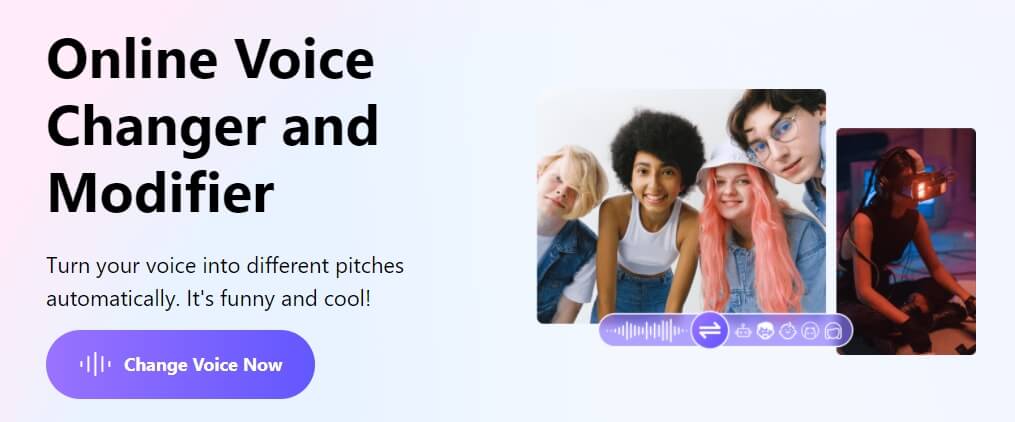
If you want to change voice without downloading and installing any app on your mobile phone, you can try some online solutions. Media.io is an all-in-one online video toolkit that allows you to edit, convert and compress video, audio and image files easily. The online voice changer from Media.io can transform your voice to a male voice, female voice, child voice, robot voice, and Donald Duck voice. If you wish to have voice filters, you won’t have any problems in the future with the Media.io voice changer.

This online voice changer works best on the Chrome browser, so you can utilize it whether using a Windows, Mac, Linux, or Chromebook device. As a result, you can deceive your family or friends by speaking in another people’s voice rather than your own. Doesn’t that sound like fun?
![]()
A cross-platform for making videos anywhere for all creators

Why your video editing isn’t good enough? How about some creative inspo?
- 100 Million+ Users
- 150+ Countries and Regions
- 4 Million+ Social Media Followers
- 5 Million+ Stock Media for Use
* Secure Download

Part 2: Best Male to Female Voice Changer Apps for iPhone and Android
- Girls Voice Changer
- Voice Changer Voice Recorder Editor & Effect
- VoiceFX
- Voice Changer
- Voice Changer - Audio effects
- Magic Call App
- Voice Changer and Sound Recorder
- Super Voice Editor
- Voice Changer with Effects
- Voice Changer - Girls Voice changer Male to Female
1. Girls Voice Changer
Available for: Android, iOS
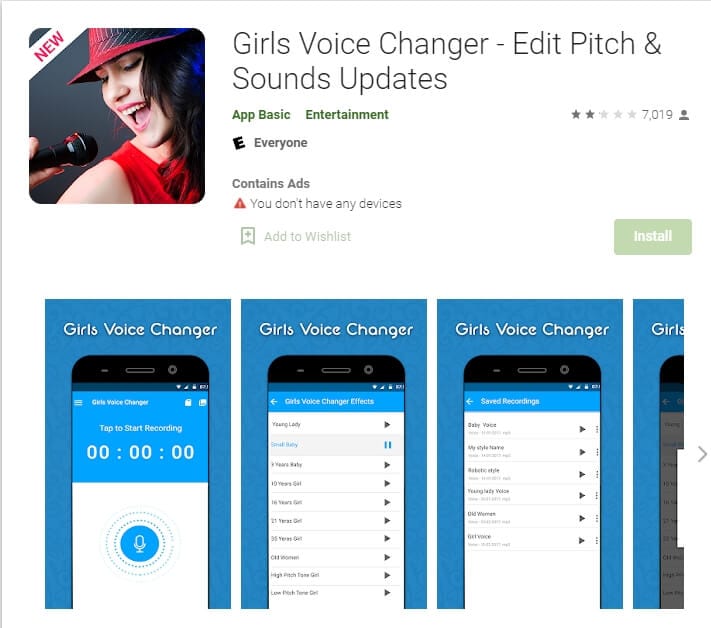
This girl voice changer app is highly portable and easy for any user to use comfortably. It is specifically more popular for changing male voice to female and for pitch adjustments. It’s completely free, so download on your android if you have a storage of about 8MB ready, and start using it!
This male-to-female voice changer app has several options in the library. Though the pitch adjustments are easy to make, some users have informed a lack of performance on very high-pitched settings. However, the smoothness of an android application also depends on how much space is readily available in the device. So next time you’re bored at a part, you have the perfect partner!
2. Voice Changer Voice Recorder Editor & Effect
Available for: Android
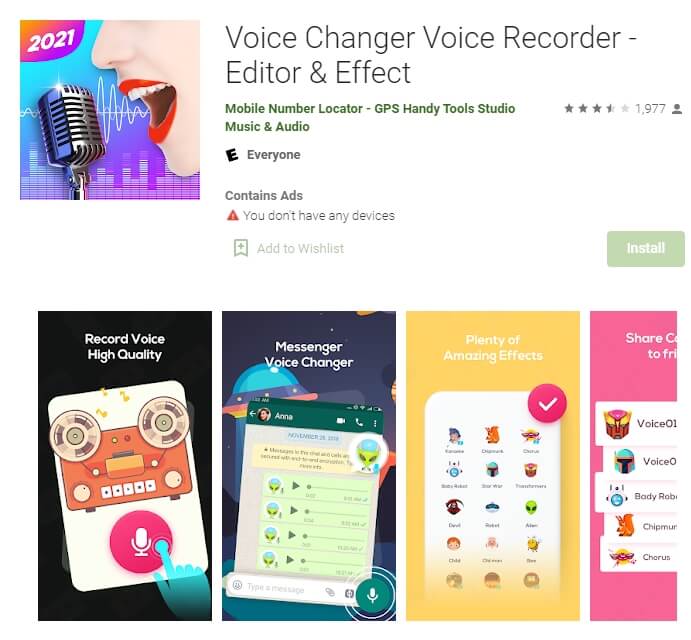
This voice changer application is for multi-purpose. Yes, you can use it as a girl voice changer smoothly and with ease. But apart from male to female voice changing, The “voice changer - voice editor application” can also be used to autotune your voice.
Now autotune is a big feature that every singer uses to make their voices tuned perfectly. With this app, you can also do the same to record your music or have fun while you are bored. The application is pretty to use and can be used as a girl voice changer not only for entertainment but also if you’re practicing. Many people who wish to seek a career in background voices might find this useful.
3. VoiceFX
Available for: Android

The VoiceFX application is filled with a lot of exciting options and features. If you are looking for an app that is more than just a male-to-female voice changer app, the voice fx is highly recommended.
You can also convert your voice into a robot or even an animal from male to female voice. Yes, you read it right. You can turn your manly voice into any of the fictional cartoons you want. This one’s a very easy and efficient way of filming a video with added effects or developing a mini-game with different voice characters. If you haven’t forgotten, there was a very big trend of converting famous music into chipmunk voices. With this app, you can convert your favorite songs into a chipmunk addition song without any problem.
4. Voice Changer
Available for: Android

The voice changer is a very famous male-to-female voice changer app. With over 10 million downloads on the google play store, the voice changer is highly recommended for users who have fun changing their voices from male to female. Compared to other voice changer applications, The Voice changer app has a very elegant and sleek design that makes it very easy to use.
Apart from the male to female voice change option, There are more than 50 other options that you can enjoy. Furthermore, you can share your creations with your friends through Bluetooth or other social media.
5. Voice Changer - Audio effects
Available for: Android

There are a lot of girl voice changer applications on the google play store. But not all of them are up to the mark. The Voice changer - audio effects is another highly recommended voice changer application.
The Voice Changer - Audio effects have a lot of other things to offer as well. Converting your voice from a male to a female has never been easier. Not only can you convert your voice into a girl, but you can also modify it. Furthermore, you can talk to your friends on the phone while you use the voice changer application. Moreover, the voices of animals and robots can also be an alternative to the female voice if you ever get bored of it.
6. Magic Call App
Available for: Android

The magic call is a real-time voice changer app that you can use for changing your voice during a call specifically. It is a really fun app which you can use with your friends to prank even your family!
This is a perfect option for people looking for a real-time girl voice changer app. The main purpose of this application is real-time calls. The magic call is ideal specifically for a male-to-female voice modification. And you can operate this application easily in call durations.
All you have to do is open the voice changer app and dial your call. Apart from Female voice, you can also convert your voice into a cartoon or an animal.
7. Voice Changer and Sound Recorder
Available for: iOS

If you are an iPhone user, then you must know that finding a voice changer on the apple store is like digging a diamond from the ground.
The Voice changer and sound recorder application is found exclusively on the apple store for people who love girl voice changer apps. It is a live call voice changer app, which means converting your voice from a male to a female in between the call. Furthermore, you can even add background voices such as traffic and echo to make your call even funnier. If you are looking for an excuse to get off from your call, then this application has got your back.
8. Super Voice Editor
Available for: Android
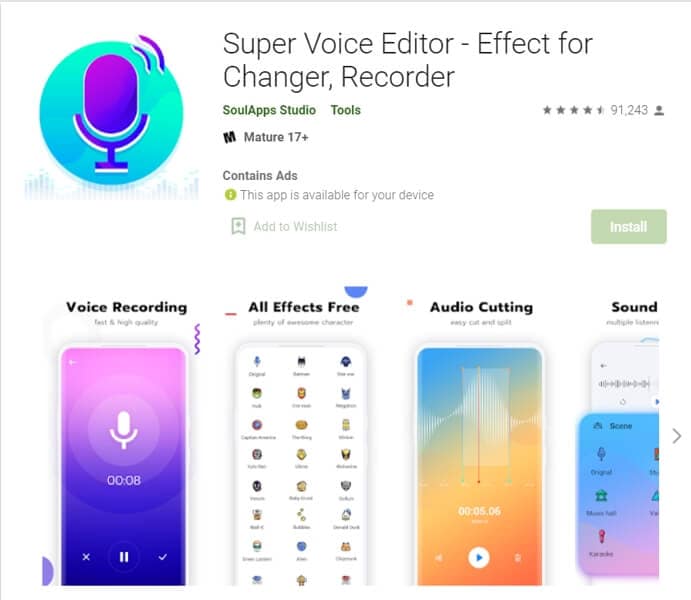
This one is a fun application for people searching for a voice changer app male to female. Not only can you record the audio that you edit, but also use it in real-time! Amazing right? Super voice editor enables you to add effects to your voice while you’re on a call as well. This feature means, next time you’re pulling a prank on the birthday boy, he won’t ever know! Sound like the wonder woman or dexter from his laboratory. The Super-Voice editor is perfect for kids playing in the house and even teenagers looking for something interesting. The SoulApps studio has made it easy for you to sound like your dream faces on the screen. With an MP3 cutter and Ringtone maker, this girl voice changer app is pure creativity.
9. Voice Changer with Effects
Available for: Android

Our list of girl voice changers, Voice changer with effects, is a very practical application that we highly recommend to our users.
With over 50 million downloads on google play, Voice changer with effects is highly suited for anyone looking for more than just a male-to-female voice changer. It has over 40 plus options such as helium, chipmunk, zombie, alien, and many more. With this application, you can even import a favorite audio clip of yours, and then you can easily convert it into a voice you like. If you want to modify your ringtone to an audio clip you just converted, then there is no better application than this one.
10. Voice Changer - Girls Voice changer Male to Female
Available for: Android

If you are looking for a girl voice changer app solely, this application perfectly fits you. The application is specifically designed only to change your voice from a male to a female. Although this application does provide options apart from female voice conversions, those features don’t function ideally. However, if you want a girl voice changer, you won’t have any trouble.
You can use this application while you are on a call. Hence, you can fool your family or friends by using a girl voice instead of your own. We recommend this as an average application that would fit your needs sufficiently.
In conclusion, you have now gone through the list of the perfect options for your android or iOS. Therefore, now you must be ready to choose the best girl voice changer app. So head on to your play store and search for your favorite app right now!
For Win 7 or later (64-bit)
For macOS 10.12 or later
Part 1: Changing Voice Online for Free with Media.io
If you want to change voice without downloading and installing any app on your mobile phone, you can try some online solutions. Media.io is an all-in-one online video toolkit that allows you to edit, convert and compress video, audio and image files easily. The online voice changer from Media.io can transform your voice to a male voice, female voice, child voice, robot voice, and Donald Duck voice. If you wish to have voice filters, you won’t have any problems in the future with the Media.io voice changer.
This online voice changer works best on the Chrome browser, so you can utilize it whether using a Windows, Mac, Linux, or Chromebook device. As a result, you can deceive your family or friends by speaking in another people’s voice rather than your own. Doesn’t that sound like fun?
![]()
A cross-platform for making videos anywhere for all creators
Why your video editing isn’t good enough? How about some creative inspo?
- 100 Million+ Users
- 150+ Countries and Regions
- 4 Million+ Social Media Followers
- 5 Million+ Stock Media for Use
* Secure Download
Part 2: Best Male to Female Voice Changer Apps for iPhone and Android
- Girls Voice Changer
- Voice Changer Voice Recorder Editor & Effect
- VoiceFX
- Voice Changer
- Voice Changer - Audio effects
- Magic Call App
- Voice Changer and Sound Recorder
- Super Voice Editor
- Voice Changer with Effects
- Voice Changer - Girls Voice changer Male to Female
1. Girls Voice Changer
Available for: Android, iOS
This girl voice changer app is highly portable and easy for any user to use comfortably. It is specifically more popular for changing male voice to female and for pitch adjustments. It’s completely free, so download on your android if you have a storage of about 8MB ready, and start using it!
This male-to-female voice changer app has several options in the library. Though the pitch adjustments are easy to make, some users have informed a lack of performance on very high-pitched settings. However, the smoothness of an android application also depends on how much space is readily available in the device. So next time you’re bored at a part, you have the perfect partner!
2. Voice Changer Voice Recorder Editor & Effect
Available for: Android
This voice changer application is for multi-purpose. Yes, you can use it as a girl voice changer smoothly and with ease. But apart from male to female voice changing, The “voice changer - voice editor application” can also be used to autotune your voice.
Now autotune is a big feature that every singer uses to make their voices tuned perfectly. With this app, you can also do the same to record your music or have fun while you are bored. The application is pretty to use and can be used as a girl voice changer not only for entertainment but also if you’re practicing. Many people who wish to seek a career in background voices might find this useful.
3. VoiceFX
Available for: Android
The VoiceFX application is filled with a lot of exciting options and features. If you are looking for an app that is more than just a male-to-female voice changer app, the voice fx is highly recommended.
You can also convert your voice into a robot or even an animal from male to female voice. Yes, you read it right. You can turn your manly voice into any of the fictional cartoons you want. This one’s a very easy and efficient way of filming a video with added effects or developing a mini-game with different voice characters. If you haven’t forgotten, there was a very big trend of converting famous music into chipmunk voices. With this app, you can convert your favorite songs into a chipmunk addition song without any problem.
4. Voice Changer
Available for: Android
The voice changer is a very famous male-to-female voice changer app. With over 10 million downloads on the google play store, the voice changer is highly recommended for users who have fun changing their voices from male to female. Compared to other voice changer applications, The Voice changer app has a very elegant and sleek design that makes it very easy to use.
Apart from the male to female voice change option, There are more than 50 other options that you can enjoy. Furthermore, you can share your creations with your friends through Bluetooth or other social media.
5. Voice Changer - Audio effects
Available for: Android
There are a lot of girl voice changer applications on the google play store. But not all of them are up to the mark. The Voice changer - audio effects is another highly recommended voice changer application.
The Voice Changer - Audio effects have a lot of other things to offer as well. Converting your voice from a male to a female has never been easier. Not only can you convert your voice into a girl, but you can also modify it. Furthermore, you can talk to your friends on the phone while you use the voice changer application. Moreover, the voices of animals and robots can also be an alternative to the female voice if you ever get bored of it.
6. Magic Call App
Available for: Android
The magic call is a real-time voice changer app that you can use for changing your voice during a call specifically. It is a really fun app which you can use with your friends to prank even your family!
This is a perfect option for people looking for a real-time girl voice changer app. The main purpose of this application is real-time calls. The magic call is ideal specifically for a male-to-female voice modification. And you can operate this application easily in call durations.
All you have to do is open the voice changer app and dial your call. Apart from Female voice, you can also convert your voice into a cartoon or an animal.
7. Voice Changer and Sound Recorder
Available for: iOS
If you are an iPhone user, then you must know that finding a voice changer on the apple store is like digging a diamond from the ground.
The Voice changer and sound recorder application is found exclusively on the apple store for people who love girl voice changer apps. It is a live call voice changer app, which means converting your voice from a male to a female in between the call. Furthermore, you can even add background voices such as traffic and echo to make your call even funnier. If you are looking for an excuse to get off from your call, then this application has got your back.
8. Super Voice Editor
Available for: Android
This one is a fun application for people searching for a voice changer app male to female. Not only can you record the audio that you edit, but also use it in real-time! Amazing right? Super voice editor enables you to add effects to your voice while you’re on a call as well. This feature means, next time you’re pulling a prank on the birthday boy, he won’t ever know! Sound like the wonder woman or dexter from his laboratory. The Super-Voice editor is perfect for kids playing in the house and even teenagers looking for something interesting. The SoulApps studio has made it easy for you to sound like your dream faces on the screen. With an MP3 cutter and Ringtone maker, this girl voice changer app is pure creativity.
9. Voice Changer with Effects
Available for: Android
Our list of girl voice changers, Voice changer with effects, is a very practical application that we highly recommend to our users.
With over 50 million downloads on google play, Voice changer with effects is highly suited for anyone looking for more than just a male-to-female voice changer. It has over 40 plus options such as helium, chipmunk, zombie, alien, and many more. With this application, you can even import a favorite audio clip of yours, and then you can easily convert it into a voice you like. If you want to modify your ringtone to an audio clip you just converted, then there is no better application than this one.
10. Voice Changer - Girls Voice changer Male to Female
Available for: Android
If you are looking for a girl voice changer app solely, this application perfectly fits you. The application is specifically designed only to change your voice from a male to a female. Although this application does provide options apart from female voice conversions, those features don’t function ideally. However, if you want a girl voice changer, you won’t have any trouble.
You can use this application while you are on a call. Hence, you can fool your family or friends by using a girl voice instead of your own. We recommend this as an average application that would fit your needs sufficiently.
In conclusion, you have now gone through the list of the perfect options for your android or iOS. Therefore, now you must be ready to choose the best girl voice changer app. So head on to your play store and search for your favorite app right now!
Elevating Windows Speaker Output: Three Effective, Costless Strategies
3 Easy Ways to Booster/Increase Volume on Windows for Free

Shanoon Cox
Mar 27, 2024• Proven solutions
Most computers have attached speakers, which present adequate sound levels for listening to your favorite music on your screen. However, there are instances when it seems that the volume levels aren’t enough. I know how it feels when you play your favorite playlists and can’t listen to them at the pitch you want. There are many possibilities to increase volume on your windows without speakers.
There are many methods for raising the default sound levels on Windows. You can control and booster volume and the audio quality on your device sometimes through some of the built-in settings and most of the time with a third-party app that may increase it by 500%.
Here in this article is a discussion about how to help boost volume as desired on your computer.
- Method 1: Boost volume by Native Windows Volume Booster
- Method 2: Boost sound by Equalizer APO Application
- Method 3: Increase volume by Chrome Volume Booster Plugin
- Bonus Tip: Edit your audio with Wondershare Filmora
Method 1: Boost volume by Native Windows Volume Booster
Most users ignore sound and video settings within Windows without ensuring that the volume is set to a satisfactory level and the display quality is accurate. Windows has an equalizer, which you can use to improve the audio quality. The Windows 10 equalizer focuses on the critical techniques for modifying audio properties like balance and volume and can help you boost volume.
1. Click the Control Panel by typing Control at the Windows Run prompt to have the equalizer settings. Click Hardware and Sound under the Sound when the Control Panel appears. This will bring up a dialogue box with a list of all of your computer’s audio hardware.

2. The default setting for spatial Sound is to switch it off. You can, therefore, have some options for allowing spatial Sound based on your audio hardware and the software you’ve enabled. For example, in the picture below, there is a feature called Windows Sonic for Headphones.

3. Pick the Bass Boost (or any of your profiles) and hit the Settings key to make adjustments. This enables Windows to display a dialogue box to adjust the raised level for each Frequency individually.

4. To get to the Windows Video Playback settings, click the Settings, then Apps, then Video Playback, choose automatic processing to enhance video playback.

5. Some more settings will be accessed via this screen that helps to change the HD color settings if your PC allows it. A preview window enables you to see how your choices would affect the final result.

Method 2: Boost sound by Equalizer APO Application
Equalizer APO Application is an excellent graphic equalizer for Windows that can be used to boost volume. With VST plugin support and unlimited filters, this application is easy to use.
1. From the start, the menu clicks in the Equalizer APO or configuration Editor.

2. Apply the Equalizer at the given arrow part.

3. The arrow mentioned in the below picture can change booster sound. The sound wave will shift, and the maximum will come out; just split it with an equalizer, so it’s probably best to lower the boost to avoid cutting.

4. Better insert the limiter at the end of the Equalizer; this may avoid clipping. Hit the plus icon, then click plugins/VST plugin.

5. The VST container will be inserted at the end of the process.

6. Hit upon the file option.

7. Click the VST file when the VST preview window opens (extension .dll). VST 2 is the only format that is supported. Because there is no connection feature, you must use VST with the same number of items as Equalizer APO. Now VST can be loaded.

8. Now click on the “Open Panel“ tab.

9. The user interface is visible now. Kindly remember that, unlike DAW, the setting may not be applied until you hit the “OK“ or “Apply“ buttons. If “Apply automatically“ is selected, the settings will be displayed instantly, just as in DAW.

Method 3: Increase volume by Chrome Volume Booster Plugin
Another effective way to increase volume without any hassle is by using the Chrome extension. For this purpose, the Volume Master extension serves to boost volume without affecting audio quality. This extension can increase volume up to 600%. By using this, you can booster the volume of individual tabs. Plus, Volume Master is super easy to use.
With a simple slider, the usability and convenience of this extension are impressive. Through this, you can enhance, reduce, or increase the volume of a specific tab without affecting the default web browser or system volume settings.
There are three steps to increase volume by using the chrome booster volume plugin.
1. First, open Google Chrome, then move to Chrome Web Store. By searching the Volume Master here, you will be directed to the link which will open the extension page. Here hit the Add to Chrome button.

2. A dialogue box will appear. When requested, click the Add Extension button to confirm.

3. Click on the extension icon in the right top corner after adding the extension. Now set the volume how much you want it to be boosted as shown in the mentioned slider.

Bonus Tip: Edit your audio with Wondershare Filmora
Wondershare Filmora is a comprehensive all-in-one video editor. It can be used with ease by beginners and professionals alike. Filmora comes loaded with one-click editing features such as motion tracking, color match, silence detection, and much more.
With Filmora, you can add cinematic effects to your videos and enhance their audio quality or increase volume.
1. Download, install and launch Filmora. Click on File, and then tap on Import Media Files. Now, import your media and drag it to the timeline.

2. Right-click the video file on the timeline, select the Adjust Audio option.

3. You will get the advanced audio settings in Filmora. You can easily change the volume and pitch, fade in and out the audio, and select the equalizer mode for your file, etc.

3. Finally, click on Export, adjust the output parameters and save the file locally or share to social media.

Conclusion
Sound isn’t something you think about very much, but your Windows can also give you many ways to boost the volume to the highest capacity. This article covered how to boost sound within the windows via different platforms. I hope you can now experience a clear, loud sound and make use of all of your speakers when playing music, browsing the internet, or binge-watching Netflix or Prime Video.
Now, you can increase sound and enhance your listening experience without any hassle. You can also use Wondershare Filmora, a powerful video editor, to boost volume and edit your videos.
Shanoon Cox
Shanoon Cox is a writer and a lover of all things video.
Follow @Shanoon Cox
Shanoon Cox
Mar 27, 2024• Proven solutions
Most computers have attached speakers, which present adequate sound levels for listening to your favorite music on your screen. However, there are instances when it seems that the volume levels aren’t enough. I know how it feels when you play your favorite playlists and can’t listen to them at the pitch you want. There are many possibilities to increase volume on your windows without speakers.
There are many methods for raising the default sound levels on Windows. You can control and booster volume and the audio quality on your device sometimes through some of the built-in settings and most of the time with a third-party app that may increase it by 500%.
Here in this article is a discussion about how to help boost volume as desired on your computer.
- Method 1: Boost volume by Native Windows Volume Booster
- Method 2: Boost sound by Equalizer APO Application
- Method 3: Increase volume by Chrome Volume Booster Plugin
- Bonus Tip: Edit your audio with Wondershare Filmora
Method 1: Boost volume by Native Windows Volume Booster
Most users ignore sound and video settings within Windows without ensuring that the volume is set to a satisfactory level and the display quality is accurate. Windows has an equalizer, which you can use to improve the audio quality. The Windows 10 equalizer focuses on the critical techniques for modifying audio properties like balance and volume and can help you boost volume.
1. Click the Control Panel by typing Control at the Windows Run prompt to have the equalizer settings. Click Hardware and Sound under the Sound when the Control Panel appears. This will bring up a dialogue box with a list of all of your computer’s audio hardware.
2. The default setting for spatial Sound is to switch it off. You can, therefore, have some options for allowing spatial Sound based on your audio hardware and the software you’ve enabled. For example, in the picture below, there is a feature called Windows Sonic for Headphones.
3. Pick the Bass Boost (or any of your profiles) and hit the Settings key to make adjustments. This enables Windows to display a dialogue box to adjust the raised level for each Frequency individually.
4. To get to the Windows Video Playback settings, click the Settings, then Apps, then Video Playback, choose automatic processing to enhance video playback.
5. Some more settings will be accessed via this screen that helps to change the HD color settings if your PC allows it. A preview window enables you to see how your choices would affect the final result.
Method 2: Boost sound by Equalizer APO Application
Equalizer APO Application is an excellent graphic equalizer for Windows that can be used to boost volume. With VST plugin support and unlimited filters, this application is easy to use.
1. From the start, the menu clicks in the Equalizer APO or configuration Editor.
2. Apply the Equalizer at the given arrow part.
3. The arrow mentioned in the below picture can change booster sound. The sound wave will shift, and the maximum will come out; just split it with an equalizer, so it’s probably best to lower the boost to avoid cutting.
4. Better insert the limiter at the end of the Equalizer; this may avoid clipping. Hit the plus icon, then click plugins/VST plugin.
5. The VST container will be inserted at the end of the process.
6. Hit upon the file option.
7. Click the VST file when the VST preview window opens (extension .dll). VST 2 is the only format that is supported. Because there is no connection feature, you must use VST with the same number of items as Equalizer APO. Now VST can be loaded.
8. Now click on the “Open Panel“ tab.
9. The user interface is visible now. Kindly remember that, unlike DAW, the setting may not be applied until you hit the “OK“ or “Apply“ buttons. If “Apply automatically“ is selected, the settings will be displayed instantly, just as in DAW.
Method 3: Increase volume by Chrome Volume Booster Plugin
Another effective way to increase volume without any hassle is by using the Chrome extension. For this purpose, the Volume Master extension serves to boost volume without affecting audio quality. This extension can increase volume up to 600%. By using this, you can booster the volume of individual tabs. Plus, Volume Master is super easy to use.
With a simple slider, the usability and convenience of this extension are impressive. Through this, you can enhance, reduce, or increase the volume of a specific tab without affecting the default web browser or system volume settings.
There are three steps to increase volume by using the chrome booster volume plugin.
1. First, open Google Chrome, then move to Chrome Web Store. By searching the Volume Master here, you will be directed to the link which will open the extension page. Here hit the Add to Chrome button.
2. A dialogue box will appear. When requested, click the Add Extension button to confirm.
3. Click on the extension icon in the right top corner after adding the extension. Now set the volume how much you want it to be boosted as shown in the mentioned slider.
Bonus Tip: Edit your audio with Wondershare Filmora
Wondershare Filmora is a comprehensive all-in-one video editor. It can be used with ease by beginners and professionals alike. Filmora comes loaded with one-click editing features such as motion tracking, color match, silence detection, and much more.
With Filmora, you can add cinematic effects to your videos and enhance their audio quality or increase volume.
1. Download, install and launch Filmora. Click on File, and then tap on Import Media Files. Now, import your media and drag it to the timeline.
2. Right-click the video file on the timeline, select the Adjust Audio option.
3. You will get the advanced audio settings in Filmora. You can easily change the volume and pitch, fade in and out the audio, and select the equalizer mode for your file, etc.
3. Finally, click on Export, adjust the output parameters and save the file locally or share to social media.
Conclusion
Sound isn’t something you think about very much, but your Windows can also give you many ways to boost the volume to the highest capacity. This article covered how to boost sound within the windows via different platforms. I hope you can now experience a clear, loud sound and make use of all of your speakers when playing music, browsing the internet, or binge-watching Netflix or Prime Video.
Now, you can increase sound and enhance your listening experience without any hassle. You can also use Wondershare Filmora, a powerful video editor, to boost volume and edit your videos.
Shanoon Cox
Shanoon Cox is a writer and a lover of all things video.
Follow @Shanoon Cox
Also read:
- New 15 Essential Soundtracks Curating the Perfect Score for Various Video Genres for 2024
- Updated Exploring the Best Audio Alteration Smartphone Apps for 2024
- Melodic Accompaniment to Frame the 24 Birthday Spectacle
- New Expert Techniques for Isolating Singers From Visual Media
- Updated How to Create Audio Keyframes in Adobe Premiere Pro on Mac
- Updated Hear the Difference Techniques for Neutralizing Unwanted Audio in Real-Time Settings (Digital vs Analog) for 2024
- Harnessing Your iPhones Capabilities Mastering the Art of Speech Savings for 2024
- New Best Bet AIFF to MP3 Suite Fast and Easy High-Quality Converting for 2024
- In 2024, Mastering Free Audio Recording Using Audacitys Capabilities
- New Premiere List Ultimate Voice Alteration Technology for Drama Schools, 2024
- The Novices Blueprint for Efficient Audio Track Mixing in Adobe Premiere Pro for 2024
- Updated Comprehensive Methods for Adding Sound to Modernized AVI Videos for 2024
- Mastering Music Creation at Home Ranking the Top 10 Digital Audio Environments
- Updated 2024 Approved Ultimate Playlist The 10 Most Motivational Tunes for Creative Projects
- Audio Enhancement in Your Windows Environment - Maximizing Sound on Budget for 2024
- Updated Best Video Editing Apps to Sync Video to the Beat of a Song
- Superior Systems for Infusing Vocal Elements Into Instagram TV Content for 2024
- In 2024, Embed Audio Elements in Avid Media Composer
- 2024 Approved Convert Videos Into High-Quality Audio - The 10 Best Tools at Your Fingertips (Free)
- 2024 Approved Perfect Purity of Sound Unveiling Techniques to Exclude Voices in Adobe Audition Projects
- New In 2024, The Definitive Guide to High-Quality Audio Edits on Apples Mobile Devices This Year
- In 2024, Remove Sound From Video on Desktop or Online
- Updated From Beginner to Pro Your Complete Guide to Using GarageBands Recording Features for 2024
- Updated Unveiling the Top 10 Audio Editing Platforms A Guide to Free & Paid Services for Musicians
- Discover the Ultimate List of Podcast-Friendly Free Recording Apps for 2024
- Updated In 2024, Premium 10 Sound Enhancement Apps for Android and iOS Devices
- 8 Must-Have Cartoon Audio Elements You Can Access Now 2023 Releases
- New In 2024, Best Background Music Remover to Help You Remove Background Music
- New In 2024, Discover Budget-Friendly Tips for Syncing Sound with Videography
- New 2024 Approved Best Online Video Rotators Rotate Your Videos with Ease
- Why is iPogo not working On Oppo A38? Fixed | Dr.fone
- In 2024, 3 Facts You Need to Know about Screen Mirroring Realme GT 5 (240W) | Dr.fone
- New How to Make Memes on iPhone and Android for 2024
- Top 10 Password Cracking Tools For Itel P55
- Complete Guide to Hard Reset Your Infinix Hot 40 Pro | Dr.fone
- Strategies for Apps That Wont Download From Play Store On ZTE Nubia Z60 Ultra | Dr.fone
- In 2024, 4 Ways to Transfer Music from Samsung Galaxy M34 5G to iPhone | Dr.fone
- Recommended Best Applications for Mirroring Your Infinix Note 30 VIP Racing Edition Screen | Dr.fone
- Best Android Data Recovery - undelete lost call logs from Xiaomi Redmi 12 5G
- 3 Ways to Change Location on Facebook Marketplace for Oppo Reno 8T | Dr.fone
- MKVtoolnix for Mac The Easiest Way to Edit Videos
- New Microsoft Video Editor Easily Edit Videos in Windows 10/8/7 for 2024
- How to Change Asus ROG Phone 7 Location on Skout | Dr.fone
- How to Repair corrupt MP4 and AVI files of HTC ?
- In 2024, Recommended Best Applications for Mirroring Your Samsung Galaxy F14 5G Screen | Dr.fone
- Fixing Foneazy MockGo Not Working On Tecno Spark 20 Pro | Dr.fone
- In 2024, Forgot Your Apple ID Password and Email On iPhone 7? Heres the Best Fixes
- Home Button Not Working on Vivo Y78+? Here Are Real Fixes | Dr.fone
- Different Methods for Resetting Samsung Galaxy A05 Phones with Screen Locked and Not | Dr.fone
- Ultimate Guide to Free PPTP VPN For Beginners On Nokia C12 | Dr.fone
- How and Where to Find a Shiny Stone Pokémon For Lava Blaze 2? | Dr.fone
- Mastering Lock Screen Settings How to Enable and Disable on Realme GT Neo 5 SE
- Title: New Auditory Precision in Filmmaking Employing Audio Ducking Strategies
- Author: David
- Created at : 2024-05-20 05:45:23
- Updated at : 2024-05-21 05:45:23
- Link: https://sound-tweaking.techidaily.com/new-auditory-precision-in-filmmaking-employing-audio-ducking-strategies/
- License: This work is licensed under CC BY-NC-SA 4.0.
