
:max_bytes(150000):strip_icc():format(webp)/GettyImages-970157966-65f3dd434f3e4dc98e28a635b8cacc87.jpg)
New 2024 Approved The Ultimate Manual for Sonic Enhancement Using Sony Vegas Pro 2023
The Ultimate Manual for Sonic Enhancement Using Sony Vegas Pro 2023
Sony Vegas Audio Editor: How to Edit Audio in Vegas Pro

Benjamin Arango
Mar 27, 2024• Proven solutions
Being the most commonly used professional video editing tool, Sony (Magix) Vegas Pro provides complete control over audio files inside every project. If you are new to this platform then following details will help you to get complete information about how to edit audio volume, apply unique effects, remove noise and adjust fade in as well as fade out options for projects.
You May Also Like: How to Edit YouTube Audio >>
Sony (Magix) Vegas Audio Editor: How to edit audio in Vegas Pro
This tutorial is divided into 6 different sections that contain complete details about all possible audio track adjustments and customization options.
- Section 1: Edit volume for audio track
- Section 2: Fade in and Fade Out
- Section 3: Speed up or Slow down
- Section 4: Reverse audio clip
- Section 5: Noise Removal
- Section 6: Apply unique Audio Effects
Section 1: Edit volume for audio track
First of all you need to import your desired audio file to timeline of Vegas Pro; it can be done by using drag and drop option directly. On Vegas timeline you will find so many sound adjustment options that appear on audio track header.

- Mute the Audio Track: Press M

- Manage volume control for all events of loaded track: Use Volume Slider switch that is denoted by dB.
- Pan Slider: It is possible to make adjustments for audio pan using a slider named as Center. Users can slide it to left side or right side as per audio project requirements.
Note:
1. Put on your headphone to better verify the output result.
2. To reset the volume, just double click on the options.
Those who want to control volume separately for different portions of audio file can go to Audio Envelop (go Insert > Audio Envelopes)and then make all essential settings as:
Mute: A blue line is visible on timeline at your selected audio event, simply double click over it for addition of a specific point and then right click for mute adjustments. From appeared drop down menu you can select muted or not muted and the adjustments will be effective on right side of event point.

Volume: Check the deep blue line on selected event and then double click over it for addition of a marking point. Drag this point up or down for appropriate volume settings and use right click option for additional adjustments.

Pan: Pan Adjustments can be done using red lien control over event. Double click over it and move the point up or down to set pan at specific range. Use right click button for advanced options.

Section 2: Fade in and Fade Out
Some professional settings to audio project can be made using fade in/out options. Users can pull the fade adjust curser to any direction for easy customization.
Hover your cursor on the audio event in timeline, you will find the fade in/out offset handle at the up side corner of the audio event. Pull the Fade in/out offset handle as long as you want:

Section 3: Speed up or Slow down
If you want to change the speed of specific portions of your audio project then hold CTRL button and then start moving your curser over Trim Event handle. If you drag it to right side then it will directly speed up your audio clip and dragging to left side will automatically reduce speed.

Section 4: Reverse audio clip
One can easily reverse his selected audio clip; simply right click over it and then choose Reverse option from drop down menu; it will help to move audio frames in reverse order.

Section 5: Noise Removal
One classic feature of Vegas Pro is its Sound Restoration in Audio FX control. But it does not work as good compared to Audacity. Check this article to see how to remove noise from audio using Sony Vegas Pro & Audacity.
Or check this video tutorial below:
Section 6: Apply unique Audio Effects
If you want to add specific effects to your audio files then use two simple methods on Vegas Pro with its Audio FX tool: One is to add effects on entire video file and second option is to make changes to specific layers of audio project. Use these steps to achieve great results:
To entire audio layer

To an individual portion of the audio layer

Step 1: First of all go to Track Description Box and then press the Track FX icon, an audio track FX will soon appear on your device screen. The three basic controls are always activated, that are Track Compressor, Track EQ and Track Noise Gate.

For additional personalization you need to use plug-in chain button from right corner.

Step 2: Now select any desired effect from list that can make your audio track more impressive and press Add; once applied then hit OK.

Step 3: Make required adjustments with the help of slider or users can also open the drop down box on screen for selection of present templates as per need.

Recommendation
The Vegas Pro is rated as a professional editing software tool due to its advanced user interface, high price range and availability on Mac devices only. If you are searching for some video editing tools that can work on Windows as well as Mac devices then Wondershare Filmora is one of the best options for you all.
 Download Mac Version ](https://tools.techidaily.com/wondershare/filmora/download/ )
Benjamin Arango
Benjamin Arango is a writer and a lover of all things video.
Follow @Benjamin Arango
Benjamin Arango
Mar 27, 2024• Proven solutions
Being the most commonly used professional video editing tool, Sony (Magix) Vegas Pro provides complete control over audio files inside every project. If you are new to this platform then following details will help you to get complete information about how to edit audio volume, apply unique effects, remove noise and adjust fade in as well as fade out options for projects.
You May Also Like: How to Edit YouTube Audio >>
Sony (Magix) Vegas Audio Editor: How to edit audio in Vegas Pro
This tutorial is divided into 6 different sections that contain complete details about all possible audio track adjustments and customization options.
- Section 1: Edit volume for audio track
- Section 2: Fade in and Fade Out
- Section 3: Speed up or Slow down
- Section 4: Reverse audio clip
- Section 5: Noise Removal
- Section 6: Apply unique Audio Effects
Section 1: Edit volume for audio track
First of all you need to import your desired audio file to timeline of Vegas Pro; it can be done by using drag and drop option directly. On Vegas timeline you will find so many sound adjustment options that appear on audio track header.
- Mute the Audio Track: Press M
- Manage volume control for all events of loaded track: Use Volume Slider switch that is denoted by dB.
- Pan Slider: It is possible to make adjustments for audio pan using a slider named as Center. Users can slide it to left side or right side as per audio project requirements.
Note:
1. Put on your headphone to better verify the output result.
2. To reset the volume, just double click on the options.
Those who want to control volume separately for different portions of audio file can go to Audio Envelop (go Insert > Audio Envelopes)and then make all essential settings as:
Mute: A blue line is visible on timeline at your selected audio event, simply double click over it for addition of a specific point and then right click for mute adjustments. From appeared drop down menu you can select muted or not muted and the adjustments will be effective on right side of event point.
Volume: Check the deep blue line on selected event and then double click over it for addition of a marking point. Drag this point up or down for appropriate volume settings and use right click option for additional adjustments.
Pan: Pan Adjustments can be done using red lien control over event. Double click over it and move the point up or down to set pan at specific range. Use right click button for advanced options.
Section 2: Fade in and Fade Out
Some professional settings to audio project can be made using fade in/out options. Users can pull the fade adjust curser to any direction for easy customization.
Hover your cursor on the audio event in timeline, you will find the fade in/out offset handle at the up side corner of the audio event. Pull the Fade in/out offset handle as long as you want:
Section 3: Speed up or Slow down
If you want to change the speed of specific portions of your audio project then hold CTRL button and then start moving your curser over Trim Event handle. If you drag it to right side then it will directly speed up your audio clip and dragging to left side will automatically reduce speed.
Section 4: Reverse audio clip
One can easily reverse his selected audio clip; simply right click over it and then choose Reverse option from drop down menu; it will help to move audio frames in reverse order.
Section 5: Noise Removal
One classic feature of Vegas Pro is its Sound Restoration in Audio FX control. But it does not work as good compared to Audacity. Check this article to see how to remove noise from audio using Sony Vegas Pro & Audacity.
Or check this video tutorial below:
Section 6: Apply unique Audio Effects
If you want to add specific effects to your audio files then use two simple methods on Vegas Pro with its Audio FX tool: One is to add effects on entire video file and second option is to make changes to specific layers of audio project. Use these steps to achieve great results:
To entire audio layer
To an individual portion of the audio layer
Step 1: First of all go to Track Description Box and then press the Track FX icon, an audio track FX will soon appear on your device screen. The three basic controls are always activated, that are Track Compressor, Track EQ and Track Noise Gate.
For additional personalization you need to use plug-in chain button from right corner.
Step 2: Now select any desired effect from list that can make your audio track more impressive and press Add; once applied then hit OK.
Step 3: Make required adjustments with the help of slider or users can also open the drop down box on screen for selection of present templates as per need.
Recommendation
The Vegas Pro is rated as a professional editing software tool due to its advanced user interface, high price range and availability on Mac devices only. If you are searching for some video editing tools that can work on Windows as well as Mac devices then Wondershare Filmora is one of the best options for you all.
Download Mac Version ](https://tools.techidaily.com/wondershare/filmora/download/ )
Benjamin Arango
Benjamin Arango is a writer and a lover of all things video.
Follow @Benjamin Arango
Top Ten AI-Driven Melodic Architects: The Prelude to 2024’S Musical Maestros
Top Best 10 AI Music Composers in 2024
Benjamin Arango
Mar 27, 2024• Proven solutions
Robots can’t be creative, right? A number of startups that focus on the development of artificial intelligence that is capable of composing music have proved this statement wrong. AI music composers generate original, copyright-free music you can use in your latest YouTube video or social media video ad. You don’t even have to be a sound designer or a musician to produce soundtracks for your videos with AI Music Composers, because you can upload the music that has already been recorded and create variations of it. So, let’s take a look at what AI music composers have to offer in 2024.
| 1 - Amper Music | 2 - AIVA |
|---|---|
| 3 - Jukedeck | 4 - Ecrett Music |
| 5 - Melodrive | 6 - ORB Composer |
| 7 - Amadeus Code | 8 - Humtap |
| 9 - Muzeek | 10 - Brain.fm |
Ten Best AI Music Composers You Should Know About
The AI technologies that can compose music are still relatively novel, and as time passes, they can only develop and grow further. Consequently, each of the AI music composers we featured in this article offers a different range of possibilities. Here are the ten best AI music composers you shouldn’t miss out on in 2024.

Filmora AI Music Editor
Edit Audio with AI Music Editor
Experience the power of Filmora’s AI tools and make your audio or music stand out like never before! Audio Denoise, Audio Ducking, Audio Synchronization, Audio Stretch, etc…
Try It Free Try It Free Try It Free Learn More >
1. Amper Music
Price: Available upon request
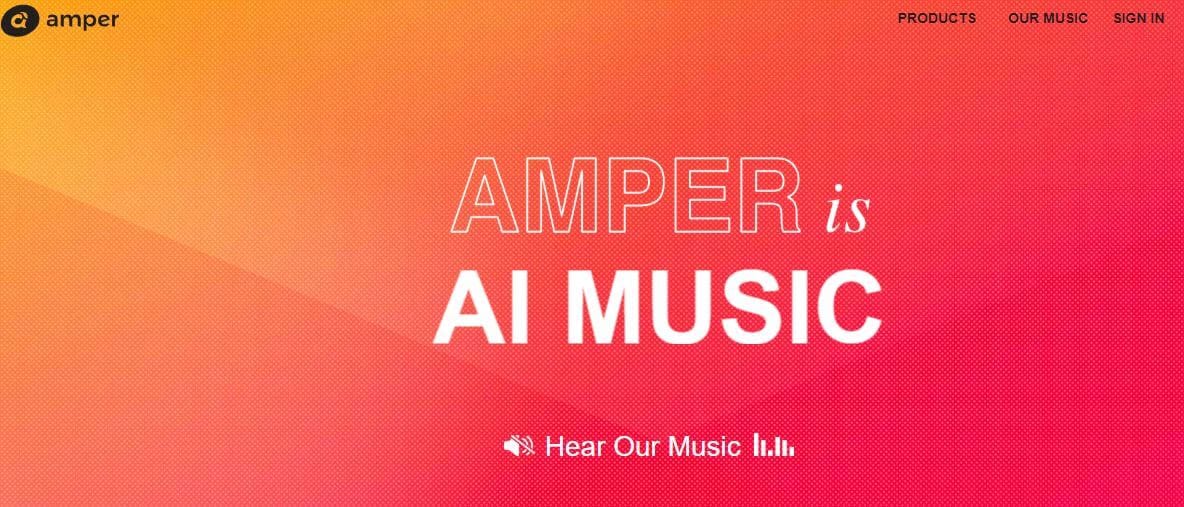
Industry professionals know just how frustrating the music licensing process can be. Amper Music is a cloud-based platform designed to simplify the process of creating soundtracks for movies and video games, as it produces AI generated algorithms that help users create music in a variety of music genres. You must first create an account on this platform, in order to be able to use the free version of Amper Music that provides only a limited amount of features. Upgrading to the pro version of Amper Music will enable you to enjoy the full potential of this rapidly growing AI Music Composer.
2. AIVA
Price: Free version available, subscription plans start from €14 p/month
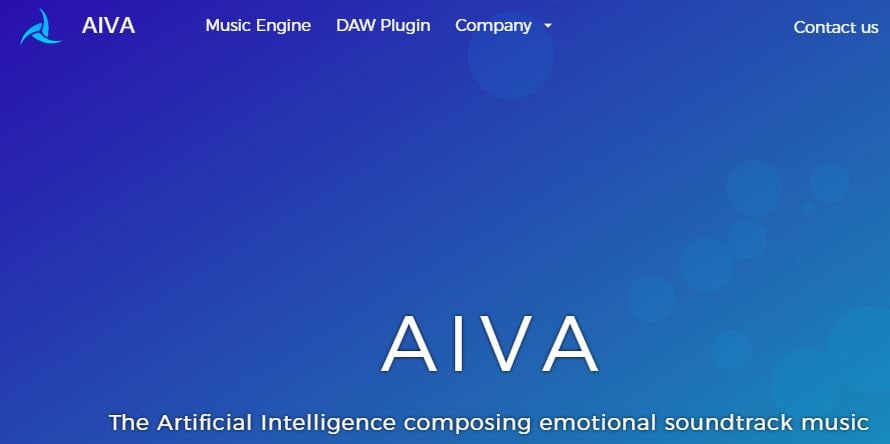
Since 2016, when AIVA Technologies was founded, its team has worked on developing an AI script that can compose emotional soundtracks for ads, video games, or movies. Soon after, the AI published its first oeuvre titled ‘Opus 1 for Piano Solo and in the subsequent years, AIVA released an album and composed music for a video game. Besides enabling its users to create music from scratch, AIVA can also be used to produce variations of existing songs. The music engine that powers this AI music composer makes the production of corporate or social media videos much easier, as it eliminates the need to go through the music licensing process.
3. Jukedeck
Price: Free version available, Pricing plans start from $0.99 per download

The AI music composer developed by the Jukedeck startup resembles the Amper’s music composer because they both rely on neural networks to analyze music data, that is then used by the AI to learn how to compose original music. Each track that is available through this AI music composer can be edited, so you can change its length or its tempo. You can create music with Jukedeck for free if you decide to give all the rights to the AI composer, while both individuals and small businesses can purchase the license to use the song created with Jukedeck for just $0.99.
Note: Jukedeck has been acquired by TikTok, and we are waiting for a new Jukedeck.
![]()
A cross-platform for making videos anywhere for all creators

Why your video editing isn’t good enough? How about some creative inspo?
- 100 Million+ Users
- 150+ Countries and Regions
- 4 Million+ Social Media Followers
- 5 Million+ Stock Media for Use
* Secure Download

4. Ecrett Music
Price: Subscription plans start at $5
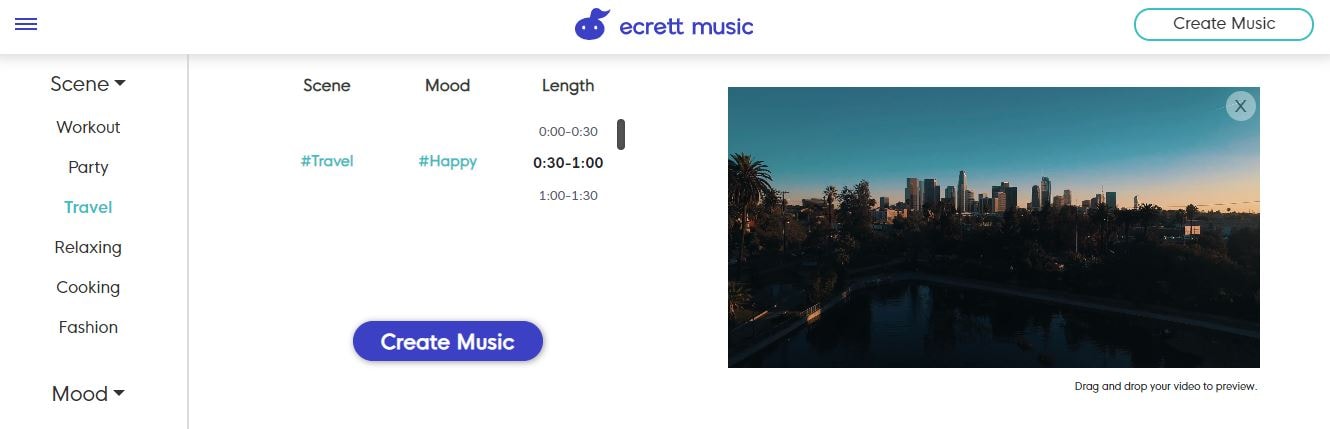
This online AI music composer makes creating stunning soundtracks for videos look easy. You just have to upload a video for which you want to generate music and select the type of scene and the mood of that scene. Party, Travel or Fashion are among the types of scenes you can choose from, while moods range from happy to serious. When done, simply click on the Create Music button, and the platform will automatically generate the soundtrack for your video. In case you are producing videos on a constant basis, you should consider purchasing one of the available subscription plans.
5. Melodrive
Price: Free
Compatibility: iOS, Windows
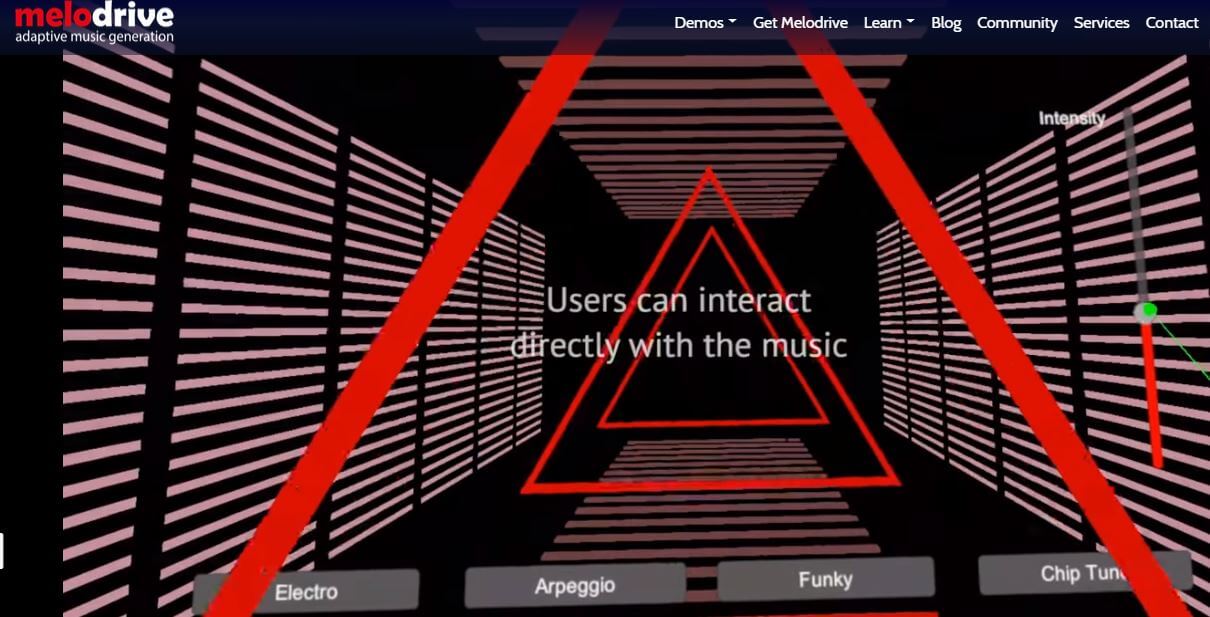
At the moment, the Lite and Indie versions of Melodrive are available for download free of charge, but the Indie version of this AI music composer still offers more options. Melodrive is one of the first AI systems that can compose emotional and unique music in real time. The AI generates music by adapting to the media environment and aims to match the mood and the style of the video. It is worth noting that Melodrive is still under development and that through time its capabilities to compose music are going to become even more refined than they already are.
6. ORB Composer
Price: Pricing plans start at $149,00
Compatibility: macOS, Windows

You can’t generate music automatically with ORB Composer, because the AI creates music based on your choices. That’s why you need to know at least the basic rules of music composition in order to be able to use the ORB Composer properly. The AI music composer comes bundled with a rich collection of chord progressions, that contains almost all chords used in popular music. This tool is aimed at artists who are interested in experimenting with the possibilities of creating music with artificial intelligence and discovering new styles of music. There are six music templates you can choose from, and you can create compositions by simply organizing different blocks of music.

Filmora AI Audio Stretcher
Wondershare Filmora - AI Audio Stretcher
• Retime any audio track to fit the duration of your video almost instantly.
• Rearrange songs without quality loss.
• Cross-platform supported - (Windows, Mac, iOS, Android)
Start Audio Stretch Start Audio Stretch Start Audio Stretch Learn More >
7. Amadeus Code
Price: Free, but the app offers in-app purchases
Compatibility: iOS
Both skilled musicians and music enthusiast can use this iOS-based app to create new melodies in just a few minutes. The AI engine that the Amadeus Code uses contains chord progressions of some of the most famous songs ever created and it let you use them to create new and innovative structures of music compositions. Moreover, you can use gestures to create new songs or recreate specific segments of songs you composed earlier. Even though Amadeus Code lets its users export audio and MIDI files to audio editing software, you still have to purchase all songs you want to keep.
8. Humtap
Price: Free
Compatibility: iOS

Musicians who have a tough time remembering their own ideas are going to love using Humtap because they can just hum a melody and the app will automatically generate an entire song using different instruments. What’s more, beats can be added with a single tap, and after the music is generated you can proceed to add the vocals as well. Humptap also has video making capabilities, so you can create videos for all songs you compose with this app. All tracks and videos generated with the Humtap AI music composer can be saved to your phone, but you can’t share your new creations to social media directly from the app.
9. Muzeek
Price: Free trial available, pricing plans start from $19 per month
Compatibility: macOS
If you are in need of licensed music for the video you’re planning on sharing to social media networks, then Muzeek is one of the best choices you can make. The AI algorithm Muzeek uses analyzes the videos for which you are generating music and it creates soundtracks that perfectly fit the rhythm of the video. All content creators, including online marketing agencies or video game developers, can rely on Muzeek AI music composer to create authentic music in high quality. Moreover, Muzeek can also analyze the video’s original audio and create subtitles from it or adjust its volume automatically.
10. Brain.fm
Price: Subscription plans start from $6,95 per month
Compatibility: Android, online

The idea that music can make our brains more productive is at the very core of what Brain.fm platform is all about. A team of scientists, musicians and engineers uses artificial intelligence to generate music designed to make your brain more productive and focused. They claim that the music created with their AI music composer achieve its effects in just ten to fifteen minutes. However, you can’t use Brain.fm to create your own music, as this platform is better suited for people who spend a lot of time at work and have a tough time maintaining their focus while performing important tasks.
Conclusion
The opportunities AI music composers offer are still not properly explored, because most of these technologies are still under development. The results AI music composers we included in this article have managed to achieve so far are impressive because each of them can produce high-quality audio files for all sorts of video content. Which AI music composer do you like to use the most? Leave a comment, and let us know.
Benjamin Arango
Benjamin Arango is a writer and a lover of all things video.
Follow @Benjamin Arango
Benjamin Arango
Mar 27, 2024• Proven solutions
Robots can’t be creative, right? A number of startups that focus on the development of artificial intelligence that is capable of composing music have proved this statement wrong. AI music composers generate original, copyright-free music you can use in your latest YouTube video or social media video ad. You don’t even have to be a sound designer or a musician to produce soundtracks for your videos with AI Music Composers, because you can upload the music that has already been recorded and create variations of it. So, let’s take a look at what AI music composers have to offer in 2024.
| 1 - Amper Music | 2 - AIVA |
|---|---|
| 3 - Jukedeck | 4 - Ecrett Music |
| 5 - Melodrive | 6 - ORB Composer |
| 7 - Amadeus Code | 8 - Humtap |
| 9 - Muzeek | 10 - Brain.fm |
Ten Best AI Music Composers You Should Know About
The AI technologies that can compose music are still relatively novel, and as time passes, they can only develop and grow further. Consequently, each of the AI music composers we featured in this article offers a different range of possibilities. Here are the ten best AI music composers you shouldn’t miss out on in 2024.
Filmora AI Music Editor
Edit Audio with AI Music Editor
Experience the power of Filmora’s AI tools and make your audio or music stand out like never before! Audio Denoise, Audio Ducking, Audio Synchronization, Audio Stretch, etc…
Try It Free Try It Free Try It Free Learn More >
1. Amper Music
Price: Available upon request
Industry professionals know just how frustrating the music licensing process can be. Amper Music is a cloud-based platform designed to simplify the process of creating soundtracks for movies and video games, as it produces AI generated algorithms that help users create music in a variety of music genres. You must first create an account on this platform, in order to be able to use the free version of Amper Music that provides only a limited amount of features. Upgrading to the pro version of Amper Music will enable you to enjoy the full potential of this rapidly growing AI Music Composer.
2. AIVA
Price: Free version available, subscription plans start from €14 p/month
Since 2016, when AIVA Technologies was founded, its team has worked on developing an AI script that can compose emotional soundtracks for ads, video games, or movies. Soon after, the AI published its first oeuvre titled ‘Opus 1 for Piano Solo and in the subsequent years, AIVA released an album and composed music for a video game. Besides enabling its users to create music from scratch, AIVA can also be used to produce variations of existing songs. The music engine that powers this AI music composer makes the production of corporate or social media videos much easier, as it eliminates the need to go through the music licensing process.
3. Jukedeck
Price: Free version available, Pricing plans start from $0.99 per download
The AI music composer developed by the Jukedeck startup resembles the Amper’s music composer because they both rely on neural networks to analyze music data, that is then used by the AI to learn how to compose original music. Each track that is available through this AI music composer can be edited, so you can change its length or its tempo. You can create music with Jukedeck for free if you decide to give all the rights to the AI composer, while both individuals and small businesses can purchase the license to use the song created with Jukedeck for just $0.99.
Note: Jukedeck has been acquired by TikTok, and we are waiting for a new Jukedeck.
![]()
A cross-platform for making videos anywhere for all creators
Why your video editing isn’t good enough? How about some creative inspo?
- 100 Million+ Users
- 150+ Countries and Regions
- 4 Million+ Social Media Followers
- 5 Million+ Stock Media for Use
* Secure Download
4. Ecrett Music
Price: Subscription plans start at $5

This online AI music composer makes creating stunning soundtracks for videos look easy. You just have to upload a video for which you want to generate music and select the type of scene and the mood of that scene. Party, Travel or Fashion are among the types of scenes you can choose from, while moods range from happy to serious. When done, simply click on the Create Music button, and the platform will automatically generate the soundtrack for your video. In case you are producing videos on a constant basis, you should consider purchasing one of the available subscription plans.
5. Melodrive
Price: Free
Compatibility: iOS, Windows
At the moment, the Lite and Indie versions of Melodrive are available for download free of charge, but the Indie version of this AI music composer still offers more options. Melodrive is one of the first AI systems that can compose emotional and unique music in real time. The AI generates music by adapting to the media environment and aims to match the mood and the style of the video. It is worth noting that Melodrive is still under development and that through time its capabilities to compose music are going to become even more refined than they already are.
6. ORB Composer
Price: Pricing plans start at $149,00
Compatibility: macOS, Windows

You can’t generate music automatically with ORB Composer, because the AI creates music based on your choices. That’s why you need to know at least the basic rules of music composition in order to be able to use the ORB Composer properly. The AI music composer comes bundled with a rich collection of chord progressions, that contains almost all chords used in popular music. This tool is aimed at artists who are interested in experimenting with the possibilities of creating music with artificial intelligence and discovering new styles of music. There are six music templates you can choose from, and you can create compositions by simply organizing different blocks of music.
Filmora AI Audio Stretcher
Wondershare Filmora - AI Audio Stretcher
• Retime any audio track to fit the duration of your video almost instantly.
• Rearrange songs without quality loss.
• Cross-platform supported - (Windows, Mac, iOS, Android)
Start Audio Stretch Start Audio Stretch Start Audio Stretch Learn More >
7. Amadeus Code
Price: Free, but the app offers in-app purchases
Compatibility: iOS
Both skilled musicians and music enthusiast can use this iOS-based app to create new melodies in just a few minutes. The AI engine that the Amadeus Code uses contains chord progressions of some of the most famous songs ever created and it let you use them to create new and innovative structures of music compositions. Moreover, you can use gestures to create new songs or recreate specific segments of songs you composed earlier. Even though Amadeus Code lets its users export audio and MIDI files to audio editing software, you still have to purchase all songs you want to keep.
8. Humtap
Price: Free
Compatibility: iOS
Musicians who have a tough time remembering their own ideas are going to love using Humtap because they can just hum a melody and the app will automatically generate an entire song using different instruments. What’s more, beats can be added with a single tap, and after the music is generated you can proceed to add the vocals as well. Humptap also has video making capabilities, so you can create videos for all songs you compose with this app. All tracks and videos generated with the Humtap AI music composer can be saved to your phone, but you can’t share your new creations to social media directly from the app.
9. Muzeek
Price: Free trial available, pricing plans start from $19 per month
Compatibility: macOS
If you are in need of licensed music for the video you’re planning on sharing to social media networks, then Muzeek is one of the best choices you can make. The AI algorithm Muzeek uses analyzes the videos for which you are generating music and it creates soundtracks that perfectly fit the rhythm of the video. All content creators, including online marketing agencies or video game developers, can rely on Muzeek AI music composer to create authentic music in high quality. Moreover, Muzeek can also analyze the video’s original audio and create subtitles from it or adjust its volume automatically.
10. Brain.fm
Price: Subscription plans start from $6,95 per month
Compatibility: Android, online
The idea that music can make our brains more productive is at the very core of what Brain.fm platform is all about. A team of scientists, musicians and engineers uses artificial intelligence to generate music designed to make your brain more productive and focused. They claim that the music created with their AI music composer achieve its effects in just ten to fifteen minutes. However, you can’t use Brain.fm to create your own music, as this platform is better suited for people who spend a lot of time at work and have a tough time maintaining their focus while performing important tasks.
Conclusion
The opportunities AI music composers offer are still not properly explored, because most of these technologies are still under development. The results AI music composers we included in this article have managed to achieve so far are impressive because each of them can produce high-quality audio files for all sorts of video content. Which AI music composer do you like to use the most? Leave a comment, and let us know.
Benjamin Arango
Benjamin Arango is a writer and a lover of all things video.
Follow @Benjamin Arango
Best Audio Editors to Remove Background Noise From Audio
Background noise is the unwanted sound present in the background while recording audio. It diminishes the overall sound quality of the audio or video. It is not always possible to make a call or record an audio or video from a silent room. Then the noise was made by working machines like a fan, air conditioner, etc., or people talking. It will make it difficult to hear the recording and concentrate on the topic. Quite annoying, right?
Best Audio Editors to Remove Background Noise from Audio
We all know background noise will reduce the overall impression of the video no matter how perfect the video is. Here we will discuss 4 applications that can be used to remove background noise from any audio clip (they are listed in no particular order).
In this article
02 Audacity
Part 1: Wondershare Filmora
Wondershare Filmora is a video editing app with extensive features and options for editing a video or audio. Amateurs, as well as professionals, equally use this application. You can remove background noise by its simple denoise feature in several mins. Let’s see how noise reduction is done using Filmora:
Download Filmora below, and install it on your computer.
For Win 7 or later (64-bit)
For macOS 10.12 or later
Open Filmora, and go to File-Import Media to import your source video to the Media Library.

Add or drag-n-drop the source video to the video track. Then right-click the video on the track, and select Adjust Audio option.

The audio settings panel will pop up. Please enable the Remove background noise option, and then adjust the denoising level to Strong by moving the pointer to the extreme right.

Playback your video on the line and check whether the voice quality has been improved.
Filmora supports various video formats. You can select the format you want and export the video or upload your video to Youtube and Vimeo directly. Once done, click Export to save or export your video.

Tips:
The audio can also be fine-tuned by using the Equalizer feature of Filmora, making the audio sound more natural. Also, the Audio Mixer feature will help you to edit the audio further and save it in MP3 format.
Part 2: Audacity
Audacity is an open platform for audio recording and editing. It is a very simple-to-use application and can be used to record, play, import, and export any audio files of WAV, MP3, AIFF, and OGG. Audacity also offers mixing tracks and applying special effects to the audios.
First, select the “silent” part of the audio, where only the noise can be heard.
Tap on the Effects menu at the top and select Noise Removal.

Tap on the Get Noise Profile option.

Select all the audios from which you wish to remove the background noise.
Now once again, go to the Effects menu and tap on the Noise Removal option.
Adjust the settings if you feel it is necessary and click OK to save the settings.
Listen to the audio clip to ensure the quality has been improved and the noise reduced. And here are the waveforms before and after the noise removal.

Tips:
It is always recommended to reduce the noise before recording audio on Audacity.
Part 3: VSDC Video Editor
VSDC is a top-notch video editor with various high-end editing tools that allow users to enhance their videos easily. It offers screen recording, voice-overs, color correction, and even the green screen effect. To help you refine your videos to the highest quality, you can use the noise removal tool in VSDC.
Here are the easy steps to de-noise audio:
Open the VSDC video editor. Then click on the Editor tab and click on Run Sprite Wizard or Audio.
![]()
Select a file to be imported or drag and drop it to the slides. Click Apply Settings to proceed.

Open the Audio effects drop-down menu, tap on Filters, and finally on Gate.

Now, adjust the threshold level in the right panel by reducing it.

Similarly, adjust the Attack and Release levels to reduce the background noise.

Part 4: Movavi Video Editor
Movavi is a simple video editing application that anyone can use to edit videos based on the time it was taken, for example, wedding videos, birthday videos, etc. it offers a lot of features to edit a video clip based on a specific theme. Here is how noise reduction can be done by using Movavi Video Editor.
Open the Movavi Video editor on your desktop and open an audio/video clip on your timeline.
Click on the audio clip to select it and then tap on the Settings icon on the extreme left.
Then choose the Audio Editing option and tap on the Noise Removal box.

Adjust the Noise Suppression pointer according to the video’s need.
Playback the video on the timeline and check if the sound quality gets better.
Tips:
The Noise Suppression level needs to be adjusted for every video as the noise level will be different for every one of them. Using speakers while playing back the audio after noise suppression is also recommended to check the audio quality.
To sum up
The above are 4 of the best editing applications available in the market in which unwanted background music can be removed. These applications also have a lot of other features that can be useful for audio and video editing.
Versatile Video Editor - Wondershare Filmora
An easy yet powerful editor
Numerous effects to choose from
Detailed tutorials provided by the official channel
Best Audio Editors to Remove Background Noise from Audio
We all know background noise will reduce the overall impression of the video no matter how perfect the video is. Here we will discuss 4 applications that can be used to remove background noise from any audio clip (they are listed in no particular order).
In this article
02 Audacity
Part 1: Wondershare Filmora
Wondershare Filmora is a video editing app with extensive features and options for editing a video or audio. Amateurs, as well as professionals, equally use this application. You can remove background noise by its simple denoise feature in several mins. Let’s see how noise reduction is done using Filmora:
Download Filmora below, and install it on your computer.
For Win 7 or later (64-bit)
For macOS 10.12 or later
Open Filmora, and go to File-Import Media to import your source video to the Media Library.
Add or drag-n-drop the source video to the video track. Then right-click the video on the track, and select Adjust Audio option.
The audio settings panel will pop up. Please enable the Remove background noise option, and then adjust the denoising level to Strong by moving the pointer to the extreme right.
Playback your video on the line and check whether the voice quality has been improved.
Filmora supports various video formats. You can select the format you want and export the video or upload your video to Youtube and Vimeo directly. Once done, click Export to save or export your video.
Tips:
The audio can also be fine-tuned by using the Equalizer feature of Filmora, making the audio sound more natural. Also, the Audio Mixer feature will help you to edit the audio further and save it in MP3 format.
Part 2: Audacity
Audacity is an open platform for audio recording and editing. It is a very simple-to-use application and can be used to record, play, import, and export any audio files of WAV, MP3, AIFF, and OGG. Audacity also offers mixing tracks and applying special effects to the audios.
First, select the “silent” part of the audio, where only the noise can be heard.
Tap on the Effects menu at the top and select Noise Removal.
Tap on the Get Noise Profile option.
Select all the audios from which you wish to remove the background noise.
Now once again, go to the Effects menu and tap on the Noise Removal option.
Adjust the settings if you feel it is necessary and click OK to save the settings.
Listen to the audio clip to ensure the quality has been improved and the noise reduced. And here are the waveforms before and after the noise removal.
Tips:
It is always recommended to reduce the noise before recording audio on Audacity.
Part 3: VSDC Video Editor
VSDC is a top-notch video editor with various high-end editing tools that allow users to enhance their videos easily. It offers screen recording, voice-overs, color correction, and even the green screen effect. To help you refine your videos to the highest quality, you can use the noise removal tool in VSDC.
Here are the easy steps to de-noise audio:
Open the VSDC video editor. Then click on the Editor tab and click on Run Sprite Wizard or Audio.
![]()
Select a file to be imported or drag and drop it to the slides. Click Apply Settings to proceed.
Open the Audio effects drop-down menu, tap on Filters, and finally on Gate.
Now, adjust the threshold level in the right panel by reducing it.
Similarly, adjust the Attack and Release levels to reduce the background noise.
Part 4: Movavi Video Editor
Movavi is a simple video editing application that anyone can use to edit videos based on the time it was taken, for example, wedding videos, birthday videos, etc. it offers a lot of features to edit a video clip based on a specific theme. Here is how noise reduction can be done by using Movavi Video Editor.
Open the Movavi Video editor on your desktop and open an audio/video clip on your timeline.
Click on the audio clip to select it and then tap on the Settings icon on the extreme left.
Then choose the Audio Editing option and tap on the Noise Removal box.
Adjust the Noise Suppression pointer according to the video’s need.
Playback the video on the timeline and check if the sound quality gets better.
Tips:
The Noise Suppression level needs to be adjusted for every video as the noise level will be different for every one of them. Using speakers while playing back the audio after noise suppression is also recommended to check the audio quality.
To sum up
The above are 4 of the best editing applications available in the market in which unwanted background music can be removed. These applications also have a lot of other features that can be useful for audio and video editing.
Versatile Video Editor - Wondershare Filmora
An easy yet powerful editor
Numerous effects to choose from
Detailed tutorials provided by the official channel
Also read:
- Orchestrating Audio in Cyberspace A Curated Selection of Text-to-Speech Websites
- Updated In 2024, Innovative Vocalization Crafting A Selection of Top-Ranked Generators for Audio Enthusiasts
- Updated Refinement of Music Files on Mac A Look at the Most Acclaimed MP3 Editors for 2024
- New 2024 Approved Integrate Audio File Into iMovie Timeline
- Updated In 2024, What Is Omegle, Is Omegle Safe?
- In 2024, Top Ten Applications That Alter Male Vocalizations Into a Feminine Hue
- Updated Podcasting Made Simple Your Step-by-Step Guide to Effortless Production for 2024
- Updated Audacity Automation Implementing Auto-Tune Effectively in Your Projects
- New Fast-Track MP3 Splitting A Convenient Guide to Rapidly Dividing Audio Files for 2024
- Updated 2024 Approved Essential Tips for Adding Lame Library to Your Audacity Setup
- 2024 Approved Cataloging Extensive Canine Acoustic Effects Online
- Updated Turntable Tunes Archive Stream Your DJ Favorites
- In 2024, MAGIX Samplitude Vs. Competitors Unveiling the Top Music Producer
- New Put Headsphones On & Record New Auditory Elements Through Windows Video Editor Platform
- Cost-Free Harmonies for Cinematic Cutting A Compilation Guide
- New 2024 Approved Mastering Audio Removal in Windows 10 Videos A Cost-Free Technique
- Navigating Advanced Sound Design The Top 5 Most Innovative Ducking Plugins for the Year for 2024
- In 2024, Here Are Some Reliable Ways to Get Pokemon Go Friend Codes For Nokia G22 | Dr.fone
- New 2024 Approved Optimize Your View Amazon Prime Video Aspect Ratio Hacks
- How to Track a Lost Xiaomi Redmi Note 12 Pro+ 5G for Free? | Dr.fone
- Updated 2024 Approved Windows Movie Maker Mac Version Top 5 Closest Alternatives
- New In 2024, How to Create an URL for Your Video?
- In 2024, How to Fake GPS on Android without Mock Location For your Motorola Edge 2023 | Dr.fone
- Updated In 2024, How To Change Font In Premiere Pro
- CatchEmAll Celebrate National Pokémon Day with Virtual Location On Xiaomi Redmi Note 12 Pro 4G | Dr.fone
- How To Activate and Use Life360 Ghost Mode On Vivo Y27 4G | Dr.fone
- How Can I Catch the Regional Pokémon without Traveling On Realme Narzo 60x 5G | Dr.fone
- In 2024, Easy Tutorial for Activating iCloud from iPhone 6s Safe and Legal
- Title: New 2024 Approved The Ultimate Manual for Sonic Enhancement Using Sony Vegas Pro 2023
- Author: David
- Created at : 2024-05-05 10:18:14
- Updated at : 2024-05-06 10:18:14
- Link: https://sound-tweaking.techidaily.com/new-2024-approved-the-ultimate-manual-for-sonic-enhancement-using-sony-vegas-pro-2023/
- License: This work is licensed under CC BY-NC-SA 4.0.
