
:max_bytes(150000):strip_icc():format(webp)/how-to-use-remote-access-on-your-samsung-smart-tv-4688935-01-29c7de5dc77e4747a8070d12f0c3d84c.jpg)
New 2024 Approved Innovative Top 10 Applications for Switching Masculine and Feminine Vocal Traits
Innovative Top 10 Applications for Switching Masculine and Feminine Vocal Traits
If you’ve been searching for the best android and iOS voice-changing apps around the internet, you’re on the right spot. Voice-changing applications are always fun. They’re handy when you’re pulling a prank on a friend, or you want some amazing effects to test your voice. Thus, we provide you with all the best male to female voice changer apps in the list below.
Record & Edit Voice Fast before Changing Voice
Before changing your voice from male to female, I suggest you edit your voice first. Filmora is an easy-to-use yet powerful video editor helping you quickly edit voice no matter your voice or the audio extracted from videos. Explore Filmora’s audio editing features and get ready for changing voice!
For Win 7 or later (64-bit)
For macOS 10.12 or later


Part 1: Changing Voice Online for Free with Media.io
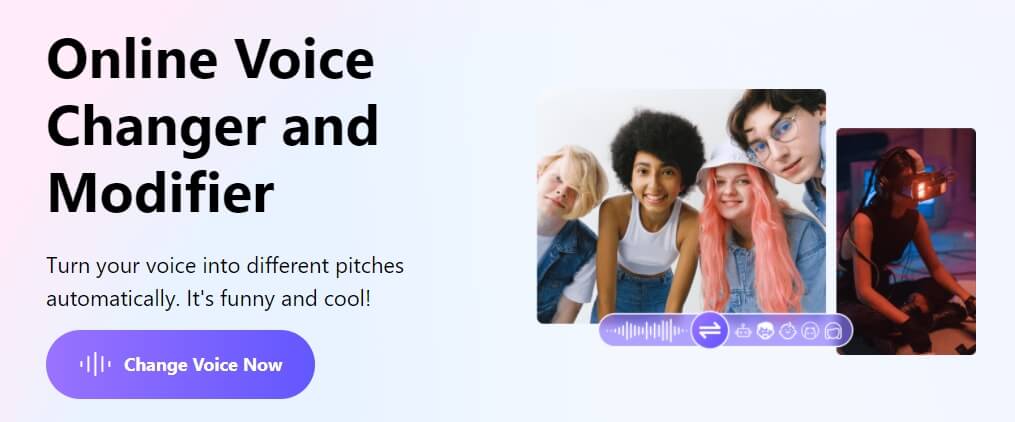
If you want to change voice without downloading and installing any app on your mobile phone, you can try some online solutions. Media.io is an all-in-one online video toolkit that allows you to edit, convert and compress video, audio and image files easily. The online voice changer from Media.io can transform your voice to a male voice, female voice, child voice, robot voice, and Donald Duck voice. If you wish to have voice filters, you won’t have any problems in the future with the Media.io voice changer.

This online voice changer works best on the Chrome browser, so you can utilize it whether using a Windows, Mac, Linux, or Chromebook device. As a result, you can deceive your family or friends by speaking in another people’s voice rather than your own. Doesn’t that sound like fun?
![]()
A cross-platform for making videos anywhere for all creators

Why your video editing isn’t good enough? How about some creative inspo?
- 100 Million+ Users
- 150+ Countries and Regions
- 4 Million+ Social Media Followers
- 5 Million+ Stock Media for Use
* Secure Download

Part 2: Best Male to Female Voice Changer Apps for iPhone and Android
- Girls Voice Changer
- Voice Changer Voice Recorder Editor & Effect
- VoiceFX
- Voice Changer
- Voice Changer - Audio effects
- Magic Call App
- Voice Changer and Sound Recorder
- Super Voice Editor
- Voice Changer with Effects
- Voice Changer - Girls Voice changer Male to Female
1. Girls Voice Changer
Available for: Android, iOS
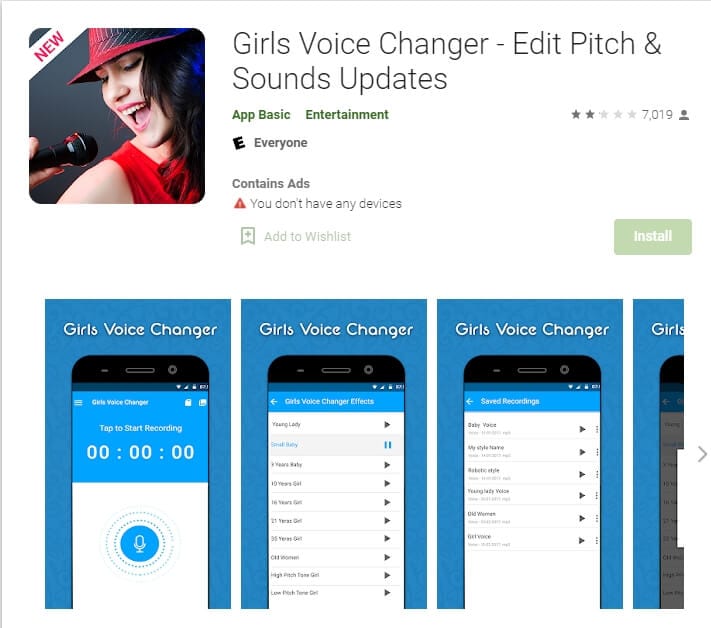
This girl voice changer app is highly portable and easy for any user to use comfortably. It is specifically more popular for changing male voice to female and for pitch adjustments. It’s completely free, so download on your android if you have a storage of about 8MB ready, and start using it!
This male-to-female voice changer app has several options in the library. Though the pitch adjustments are easy to make, some users have informed a lack of performance on very high-pitched settings. However, the smoothness of an android application also depends on how much space is readily available in the device. So next time you’re bored at a part, you have the perfect partner!
2. Voice Changer Voice Recorder Editor & Effect
Available for: Android
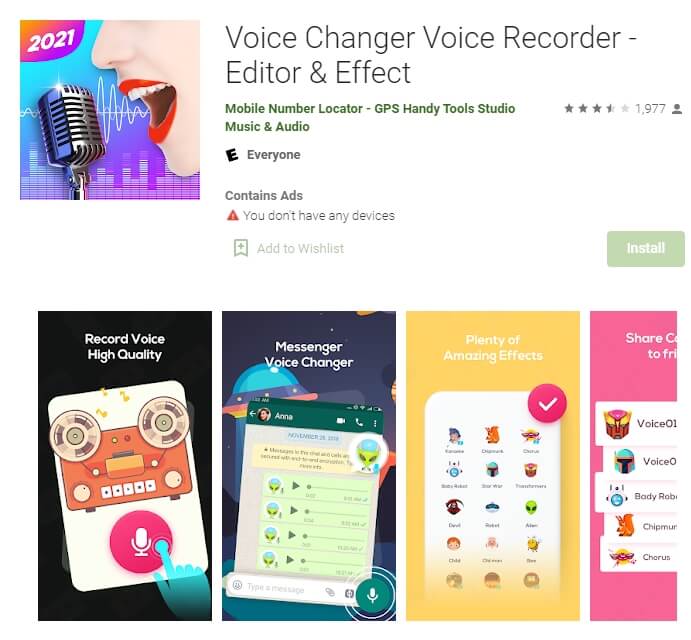
This voice changer application is for multi-purpose. Yes, you can use it as a girl voice changer smoothly and with ease. But apart from male to female voice changing, The “voice changer - voice editor application” can also be used to autotune your voice.
Now autotune is a big feature that every singer uses to make their voices tuned perfectly. With this app, you can also do the same to record your music or have fun while you are bored. The application is pretty to use and can be used as a girl voice changer not only for entertainment but also if you’re practicing. Many people who wish to seek a career in background voices might find this useful.
3. VoiceFX
Available for: Android

The VoiceFX application is filled with a lot of exciting options and features. If you are looking for an app that is more than just a male-to-female voice changer app, the voice fx is highly recommended.
You can also convert your voice into a robot or even an animal from male to female voice. Yes, you read it right. You can turn your manly voice into any of the fictional cartoons you want. This one’s a very easy and efficient way of filming a video with added effects or developing a mini-game with different voice characters. If you haven’t forgotten, there was a very big trend of converting famous music into chipmunk voices. With this app, you can convert your favorite songs into a chipmunk addition song without any problem.
4. Voice Changer
Available for: Android

The voice changer is a very famous male-to-female voice changer app. With over 10 million downloads on the google play store, the voice changer is highly recommended for users who have fun changing their voices from male to female. Compared to other voice changer applications, The Voice changer app has a very elegant and sleek design that makes it very easy to use.
Apart from the male to female voice change option, There are more than 50 other options that you can enjoy. Furthermore, you can share your creations with your friends through Bluetooth or other social media.
5. Voice Changer - Audio effects
Available for: Android

There are a lot of girl voice changer applications on the google play store. But not all of them are up to the mark. The Voice changer - audio effects is another highly recommended voice changer application.
The Voice Changer - Audio effects have a lot of other things to offer as well. Converting your voice from a male to a female has never been easier. Not only can you convert your voice into a girl, but you can also modify it. Furthermore, you can talk to your friends on the phone while you use the voice changer application. Moreover, the voices of animals and robots can also be an alternative to the female voice if you ever get bored of it.
6. Magic Call App
Available for: Android

The magic call is a real-time voice changer app that you can use for changing your voice during a call specifically. It is a really fun app which you can use with your friends to prank even your family!
This is a perfect option for people looking for a real-time girl voice changer app. The main purpose of this application is real-time calls. The magic call is ideal specifically for a male-to-female voice modification. And you can operate this application easily in call durations.
All you have to do is open the voice changer app and dial your call. Apart from Female voice, you can also convert your voice into a cartoon or an animal.
7. Voice Changer and Sound Recorder
Available for: iOS

If you are an iPhone user, then you must know that finding a voice changer on the apple store is like digging a diamond from the ground.
The Voice changer and sound recorder application is found exclusively on the apple store for people who love girl voice changer apps. It is a live call voice changer app, which means converting your voice from a male to a female in between the call. Furthermore, you can even add background voices such as traffic and echo to make your call even funnier. If you are looking for an excuse to get off from your call, then this application has got your back.
8. Super Voice Editor
Available for: Android
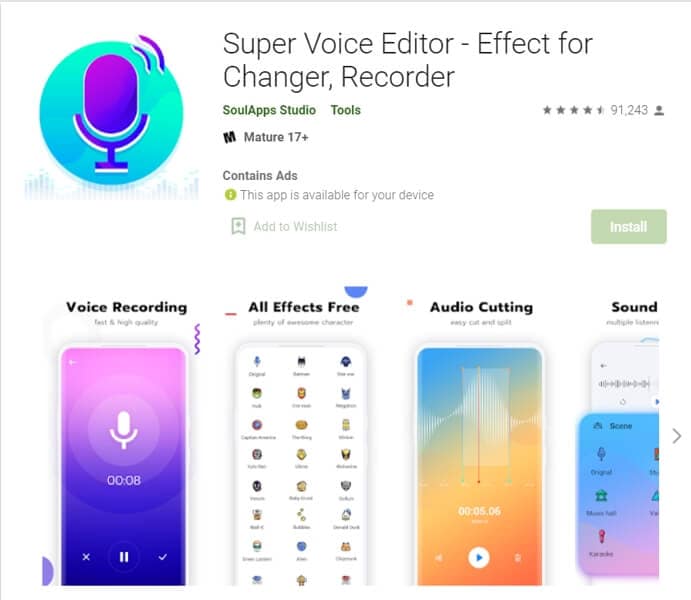
This one is a fun application for people searching for a voice changer app male to female. Not only can you record the audio that you edit, but also use it in real-time! Amazing right? Super voice editor enables you to add effects to your voice while you’re on a call as well. This feature means, next time you’re pulling a prank on the birthday boy, he won’t ever know! Sound like the wonder woman or dexter from his laboratory. The Super-Voice editor is perfect for kids playing in the house and even teenagers looking for something interesting. The SoulApps studio has made it easy for you to sound like your dream faces on the screen. With an MP3 cutter and Ringtone maker, this girl voice changer app is pure creativity.
9. Voice Changer with Effects
Available for: Android

Our list of girl voice changers, Voice changer with effects, is a very practical application that we highly recommend to our users.
With over 50 million downloads on google play, Voice changer with effects is highly suited for anyone looking for more than just a male-to-female voice changer. It has over 40 plus options such as helium, chipmunk, zombie, alien, and many more. With this application, you can even import a favorite audio clip of yours, and then you can easily convert it into a voice you like. If you want to modify your ringtone to an audio clip you just converted, then there is no better application than this one.
10. Voice Changer - Girls Voice changer Male to Female
Available for: Android

If you are looking for a girl voice changer app solely, this application perfectly fits you. The application is specifically designed only to change your voice from a male to a female. Although this application does provide options apart from female voice conversions, those features don’t function ideally. However, if you want a girl voice changer, you won’t have any trouble.
You can use this application while you are on a call. Hence, you can fool your family or friends by using a girl voice instead of your own. We recommend this as an average application that would fit your needs sufficiently.
In conclusion, you have now gone through the list of the perfect options for your android or iOS. Therefore, now you must be ready to choose the best girl voice changer app. So head on to your play store and search for your favorite app right now!
For Win 7 or later (64-bit)
For macOS 10.12 or later
Part 1: Changing Voice Online for Free with Media.io
If you want to change voice without downloading and installing any app on your mobile phone, you can try some online solutions. Media.io is an all-in-one online video toolkit that allows you to edit, convert and compress video, audio and image files easily. The online voice changer from Media.io can transform your voice to a male voice, female voice, child voice, robot voice, and Donald Duck voice. If you wish to have voice filters, you won’t have any problems in the future with the Media.io voice changer.
This online voice changer works best on the Chrome browser, so you can utilize it whether using a Windows, Mac, Linux, or Chromebook device. As a result, you can deceive your family or friends by speaking in another people’s voice rather than your own. Doesn’t that sound like fun?
![]()
A cross-platform for making videos anywhere for all creators
Why your video editing isn’t good enough? How about some creative inspo?
- 100 Million+ Users
- 150+ Countries and Regions
- 4 Million+ Social Media Followers
- 5 Million+ Stock Media for Use
* Secure Download
Part 2: Best Male to Female Voice Changer Apps for iPhone and Android
- Girls Voice Changer
- Voice Changer Voice Recorder Editor & Effect
- VoiceFX
- Voice Changer
- Voice Changer - Audio effects
- Magic Call App
- Voice Changer and Sound Recorder
- Super Voice Editor
- Voice Changer with Effects
- Voice Changer - Girls Voice changer Male to Female
1. Girls Voice Changer
Available for: Android, iOS
This girl voice changer app is highly portable and easy for any user to use comfortably. It is specifically more popular for changing male voice to female and for pitch adjustments. It’s completely free, so download on your android if you have a storage of about 8MB ready, and start using it!
This male-to-female voice changer app has several options in the library. Though the pitch adjustments are easy to make, some users have informed a lack of performance on very high-pitched settings. However, the smoothness of an android application also depends on how much space is readily available in the device. So next time you’re bored at a part, you have the perfect partner!
2. Voice Changer Voice Recorder Editor & Effect
Available for: Android
This voice changer application is for multi-purpose. Yes, you can use it as a girl voice changer smoothly and with ease. But apart from male to female voice changing, The “voice changer - voice editor application” can also be used to autotune your voice.
Now autotune is a big feature that every singer uses to make their voices tuned perfectly. With this app, you can also do the same to record your music or have fun while you are bored. The application is pretty to use and can be used as a girl voice changer not only for entertainment but also if you’re practicing. Many people who wish to seek a career in background voices might find this useful.
3. VoiceFX
Available for: Android
The VoiceFX application is filled with a lot of exciting options and features. If you are looking for an app that is more than just a male-to-female voice changer app, the voice fx is highly recommended.
You can also convert your voice into a robot or even an animal from male to female voice. Yes, you read it right. You can turn your manly voice into any of the fictional cartoons you want. This one’s a very easy and efficient way of filming a video with added effects or developing a mini-game with different voice characters. If you haven’t forgotten, there was a very big trend of converting famous music into chipmunk voices. With this app, you can convert your favorite songs into a chipmunk addition song without any problem.
4. Voice Changer
Available for: Android
The voice changer is a very famous male-to-female voice changer app. With over 10 million downloads on the google play store, the voice changer is highly recommended for users who have fun changing their voices from male to female. Compared to other voice changer applications, The Voice changer app has a very elegant and sleek design that makes it very easy to use.
Apart from the male to female voice change option, There are more than 50 other options that you can enjoy. Furthermore, you can share your creations with your friends through Bluetooth or other social media.
5. Voice Changer - Audio effects
Available for: Android
There are a lot of girl voice changer applications on the google play store. But not all of them are up to the mark. The Voice changer - audio effects is another highly recommended voice changer application.
The Voice Changer - Audio effects have a lot of other things to offer as well. Converting your voice from a male to a female has never been easier. Not only can you convert your voice into a girl, but you can also modify it. Furthermore, you can talk to your friends on the phone while you use the voice changer application. Moreover, the voices of animals and robots can also be an alternative to the female voice if you ever get bored of it.
6. Magic Call App
Available for: Android
The magic call is a real-time voice changer app that you can use for changing your voice during a call specifically. It is a really fun app which you can use with your friends to prank even your family!
This is a perfect option for people looking for a real-time girl voice changer app. The main purpose of this application is real-time calls. The magic call is ideal specifically for a male-to-female voice modification. And you can operate this application easily in call durations.
All you have to do is open the voice changer app and dial your call. Apart from Female voice, you can also convert your voice into a cartoon or an animal.
7. Voice Changer and Sound Recorder
Available for: iOS
If you are an iPhone user, then you must know that finding a voice changer on the apple store is like digging a diamond from the ground.
The Voice changer and sound recorder application is found exclusively on the apple store for people who love girl voice changer apps. It is a live call voice changer app, which means converting your voice from a male to a female in between the call. Furthermore, you can even add background voices such as traffic and echo to make your call even funnier. If you are looking for an excuse to get off from your call, then this application has got your back.
8. Super Voice Editor
Available for: Android
This one is a fun application for people searching for a voice changer app male to female. Not only can you record the audio that you edit, but also use it in real-time! Amazing right? Super voice editor enables you to add effects to your voice while you’re on a call as well. This feature means, next time you’re pulling a prank on the birthday boy, he won’t ever know! Sound like the wonder woman or dexter from his laboratory. The Super-Voice editor is perfect for kids playing in the house and even teenagers looking for something interesting. The SoulApps studio has made it easy for you to sound like your dream faces on the screen. With an MP3 cutter and Ringtone maker, this girl voice changer app is pure creativity.
9. Voice Changer with Effects
Available for: Android
Our list of girl voice changers, Voice changer with effects, is a very practical application that we highly recommend to our users.
With over 50 million downloads on google play, Voice changer with effects is highly suited for anyone looking for more than just a male-to-female voice changer. It has over 40 plus options such as helium, chipmunk, zombie, alien, and many more. With this application, you can even import a favorite audio clip of yours, and then you can easily convert it into a voice you like. If you want to modify your ringtone to an audio clip you just converted, then there is no better application than this one.
10. Voice Changer - Girls Voice changer Male to Female
Available for: Android
If you are looking for a girl voice changer app solely, this application perfectly fits you. The application is specifically designed only to change your voice from a male to a female. Although this application does provide options apart from female voice conversions, those features don’t function ideally. However, if you want a girl voice changer, you won’t have any trouble.
You can use this application while you are on a call. Hence, you can fool your family or friends by using a girl voice instead of your own. We recommend this as an average application that would fit your needs sufficiently.
In conclusion, you have now gone through the list of the perfect options for your android or iOS. Therefore, now you must be ready to choose the best girl voice changer app. So head on to your play store and search for your favorite app right now!
Understanding Vimeo Content: A Focus on Different Aspect Ratios
Video customization does not come automatically. There is something extraordinary you need to look around. One platform that most people are aware of is YouTube that offers video sharing services. But the world is not so small. There exists a new genre picking up pace with personalized effect. The talk is about Vimeo, the latest trending video streaming site, with a vast viewer base after YouTube.

It is a beautiful platform for those professional videographers, filmmakers, event organizers, graphic designers, or those who want to expand their business and gain a viewer base. While creating videos for the platform, there are some basic requirements such as Vimeo Aspect RatioorVimeo Thumbnail Dimensions. If all these terms look unknown to you, and you are eager to discover more with Vimeo Ratio, you have landed the right place. Here, you will get all the recipe ingredients required to prepare for a professional-looking, customized video through Vimeo.
In this article
04 How big of a File can upload to Vimeo
Part 1: What is Vimeo?
Vimeo is a video streaming and hosting services provider online platform that equips a user with a powerful video customization feature. This feature distinguishes it from other video streaming sites. Vimeo reflects the vision of its founder filmmakers, who furnish advanced video customization features for Audio and Video content. Vimeo renders services from “Freemium” the free users to that of Advance business partners.

Basic features it enabled in itself are:
- Users can customize and promote their videos
- HD audio and video quality
- Freemium account for free usage
- Supports 8K Video resolution
- The pricing plan ranges from $7 to $75
- Specific sites promotion option
- Customized screen end view
- Multiple options such as color, size, or different types of buttons
- For the same URL video replacement option
- Featuring Team collaboration
- Live Streaming
In addition, additional features and services get added up with each account up-gradation.
Part 2: Vimeo Video Requirement
If you are also interested in being a part of Vimeo’s community and geared up to share the video, you must be aware of Vimeo Video requirements and Vimeo dimensions. So that you can upload the video with ease on the site without facing any issue. Let’s look at some of the critical video ratios and other requirements.

- Frame Rate:
Keep the Video Frame Rate constant. Some common frame rates are: 60, 59.94, 50, 30, 29.97, 25, 24, and 23.98. While compressing, keep the frame rate below 60.
- Codecs:
Codecs represent video encoded format. Some of the most recommended codecs are , (), Apple ProRes (HQ) 422
- Color
Most of the color display is acceptable. But the recommended ones are:
- Color Matrix Coefficients/Primaries- [BT.709 (Rec.709), BT.2020, whereas Rec.2020 HLG for Dolby Vision]
- Bit Depth- 10 or more than 10 for better quality.
- Characteristics of Color Transfer- Multiple ranges for SDR. But HLG or PQ (SMPTE 2084) for HDR
- Bit Rate- Video file size, visual quality control by data rate/Bit-rate. Go with Variable Bit Rate. That might range in different parameters, or you can choose from 2 to 50 MBPS. Where for SD (2 to 5), 720P (5 to 10), 1080p (10 to 20), 2k (20 to 30), 4k (30 to 60), 8k (50 to 80).
- Scan Type- Progressive playback is advisable before uploading de-interlace the video.
- Resolution/Aspect Ratio
Though all shapes and sizes are available, the most preferable Vimeo Video Aspect Ratio and Proportions are:
| Format | Aspect Ratio | Resolution |
|---|---|---|
| HD (720P) | 16:9 | 1280X720 |
| HD (1080P) | 16:9 | 1920X1080 |
| SD | 16:9 | 640X360 |
| SD | 4:3 | 640X480 |
| 2K | 16:9 | 2560X1440 |
| UHD (4K) | 16:9 | 3840X2160 |
| UHD (DCI 4K) | 17:9 | 4096X2160 |
| Stereoscopic 360 4K | 2:1 | 4096X2048 |
| Monoscopic 3604K | 2:1 | 4096X2048 |
| UHD 8K | 17:9 | 8192X4320 |
Here, a question that might arise. OK, these are the requirements by Vimeo Video Ratio. But, how to set the Vimeo dimensions? For this purpose, one valuable suggestion is the Wondershare Filmora Video Editing tool.
Wondershare Filmora is a friendly and effective interface if looking to adjust the Vimeo Video size ratio or pre-setting the Vimeo Aspect Ratio to make it as per the norms of Vimeo. Then we can go with the efficient, quick, and easy-to-use way to edit the Vimeo Aspect ratio.
Versatile Video Editor - Wondershare Filmora
An easy yet powerful editor
Numerous effects to choose from
Detailed tutorials provided by the official channel
Steps are simple: land the home page of Wondershare Filmora, upload your video project, and select the desired video Ratiounder project settings.
Part 3: Size Limit of Vimeo File
Are you ready to create an exciting video and about to upload that into your Vimeo account? Then, there is a precious suggestion to you. Wait for a while, as some restrictions come under Vimeo dimensions uploading. And you must be aware of that. Let’s first understand about Size Limit of the Vimeo File. In terms of duration, there is no limit, but for file size following criteria is used:
As per Vimeo, the user can upload a file of any size. For instance, it can upload videos ranging from the most minor 30 seconds to a whopping 3-hour duration epics. The maximum limit is 25GB per video.
Part 4: How big of a File can upload to Vimeo
The following important question comes out, how big a file can you upload to Vimeo? Let’s scrap out this information for you:
- Basic account- 5GB total
- Vimeo Plus- Up to 250 GB in a year
- Vimeo Pro- 1TB in a Year
- Vimeo Business- 5 TB in total
- Vimeo Premium – 7 TB in total
So, by checking the above criteria, it becomes easy for you to create and upload your video as per the mentioned guidelines. So, let you be ready with your sizzling video following Vimeo ratio and size criteria.
Part 5: Vimeo Weekly Upload Limit
Now, it is crucial to understand. What could be the weekly upload limit to your Vimeo account? As accordingly, you will plan for the appropriate tab. Here are the details:
- Free Account- 500 MB/week
- Vimeo Plus Account- 5GB/week
- Vimeo Pro Account- 20GB/week
- Vimeo Business Account- No Weekly Limit
- Vimeo Premium Account- Unlimited Live Streaming
It looks like Vimeo has divided its size criteria into different frames, usage, daily basis, weekly basis, yearly basis, and maximum limit. So, if you, as a potential user, have all this valuable information to grow your business, hobby, or any peculiar interest, it will become a bonanza to your efforts. As exemplary efforts always show the way to success. I hope that till now, all your queries, concerns such as Vimeo Thumbnail dimensions, Vimeo Video Size ratio, duration, size limit gets filled up. So, without delay, rock on in the video world of Vimeo and let the world know your potential right away.
Conclusion:
Vimeo Video Size Ratio and other requirements to upload your video to the Vimeo site are covered here. Indeed, these will be going to be the milestone to start or progress your business with Vimeo. Vimeo is trending nowadays, especially among the users who prefer a customized look to their video and a solution to grow their business with proper after support. So, doing little pre-work in terms of Vimeo Video Dimensions will pave the way to start your journey. In addition, while adjusting Vimeo Aspect Ratio, Wondershare Filmora will act as the right approach with appropriate tools to change the Vimeo Aspect Ratio and other important editing options. All the best!
04 How big of a File can upload to Vimeo
Part 1: What is Vimeo?
Vimeo is a video streaming and hosting services provider online platform that equips a user with a powerful video customization feature. This feature distinguishes it from other video streaming sites. Vimeo reflects the vision of its founder filmmakers, who furnish advanced video customization features for Audio and Video content. Vimeo renders services from “Freemium” the free users to that of Advance business partners.
Basic features it enabled in itself are:
- Users can customize and promote their videos
- HD audio and video quality
- Freemium account for free usage
- Supports 8K Video resolution
- The pricing plan ranges from $7 to $75
- Specific sites promotion option
- Customized screen end view
- Multiple options such as color, size, or different types of buttons
- For the same URL video replacement option
- Featuring Team collaboration
- Live Streaming
In addition, additional features and services get added up with each account up-gradation.
Part 2: Vimeo Video Requirement
If you are also interested in being a part of Vimeo’s community and geared up to share the video, you must be aware of Vimeo Video requirements and Vimeo dimensions. So that you can upload the video with ease on the site without facing any issue. Let’s look at some of the critical video ratios and other requirements.
- Frame Rate:
Keep the Video Frame Rate constant. Some common frame rates are: 60, 59.94, 50, 30, 29.97, 25, 24, and 23.98. While compressing, keep the frame rate below 60.
- Codecs:
Codecs represent video encoded format. Some of the most recommended codecs are , (), Apple ProRes (HQ) 422
- Color
Most of the color display is acceptable. But the recommended ones are:
- Color Matrix Coefficients/Primaries- [BT.709 (Rec.709), BT.2020, whereas Rec.2020 HLG for Dolby Vision]
- Bit Depth- 10 or more than 10 for better quality.
- Characteristics of Color Transfer- Multiple ranges for SDR. But HLG or PQ (SMPTE 2084) for HDR
- Bit Rate- Video file size, visual quality control by data rate/Bit-rate. Go with Variable Bit Rate. That might range in different parameters, or you can choose from 2 to 50 MBPS. Where for SD (2 to 5), 720P (5 to 10), 1080p (10 to 20), 2k (20 to 30), 4k (30 to 60), 8k (50 to 80).
- Scan Type- Progressive playback is advisable before uploading de-interlace the video.
- Resolution/Aspect Ratio
Though all shapes and sizes are available, the most preferable Vimeo Video Aspect Ratio and Proportions are:
| Format | Aspect Ratio | Resolution |
|---|---|---|
| HD (720P) | 16:9 | 1280X720 |
| HD (1080P) | 16:9 | 1920X1080 |
| SD | 16:9 | 640X360 |
| SD | 4:3 | 640X480 |
| 2K | 16:9 | 2560X1440 |
| UHD (4K) | 16:9 | 3840X2160 |
| UHD (DCI 4K) | 17:9 | 4096X2160 |
| Stereoscopic 360 4K | 2:1 | 4096X2048 |
| Monoscopic 3604K | 2:1 | 4096X2048 |
| UHD 8K | 17:9 | 8192X4320 |
Here, a question that might arise. OK, these are the requirements by Vimeo Video Ratio. But, how to set the Vimeo dimensions? For this purpose, one valuable suggestion is the Wondershare Filmora Video Editing tool.
Wondershare Filmora is a friendly and effective interface if looking to adjust the Vimeo Video size ratio or pre-setting the Vimeo Aspect Ratio to make it as per the norms of Vimeo. Then we can go with the efficient, quick, and easy-to-use way to edit the Vimeo Aspect ratio.
Versatile Video Editor - Wondershare Filmora
An easy yet powerful editor
Numerous effects to choose from
Detailed tutorials provided by the official channel
Steps are simple: land the home page of Wondershare Filmora, upload your video project, and select the desired video Ratiounder project settings.
Part 3: Size Limit of Vimeo File
Are you ready to create an exciting video and about to upload that into your Vimeo account? Then, there is a precious suggestion to you. Wait for a while, as some restrictions come under Vimeo dimensions uploading. And you must be aware of that. Let’s first understand about Size Limit of the Vimeo File. In terms of duration, there is no limit, but for file size following criteria is used:
As per Vimeo, the user can upload a file of any size. For instance, it can upload videos ranging from the most minor 30 seconds to a whopping 3-hour duration epics. The maximum limit is 25GB per video.
Part 4: How big of a File can upload to Vimeo
The following important question comes out, how big a file can you upload to Vimeo? Let’s scrap out this information for you:
- Basic account- 5GB total
- Vimeo Plus- Up to 250 GB in a year
- Vimeo Pro- 1TB in a Year
- Vimeo Business- 5 TB in total
- Vimeo Premium – 7 TB in total
So, by checking the above criteria, it becomes easy for you to create and upload your video as per the mentioned guidelines. So, let you be ready with your sizzling video following Vimeo ratio and size criteria.
Part 5: Vimeo Weekly Upload Limit
Now, it is crucial to understand. What could be the weekly upload limit to your Vimeo account? As accordingly, you will plan for the appropriate tab. Here are the details:
- Free Account- 500 MB/week
- Vimeo Plus Account- 5GB/week
- Vimeo Pro Account- 20GB/week
- Vimeo Business Account- No Weekly Limit
- Vimeo Premium Account- Unlimited Live Streaming
It looks like Vimeo has divided its size criteria into different frames, usage, daily basis, weekly basis, yearly basis, and maximum limit. So, if you, as a potential user, have all this valuable information to grow your business, hobby, or any peculiar interest, it will become a bonanza to your efforts. As exemplary efforts always show the way to success. I hope that till now, all your queries, concerns such as Vimeo Thumbnail dimensions, Vimeo Video Size ratio, duration, size limit gets filled up. So, without delay, rock on in the video world of Vimeo and let the world know your potential right away.
Conclusion:
Vimeo Video Size Ratio and other requirements to upload your video to the Vimeo site are covered here. Indeed, these will be going to be the milestone to start or progress your business with Vimeo. Vimeo is trending nowadays, especially among the users who prefer a customized look to their video and a solution to grow their business with proper after support. So, doing little pre-work in terms of Vimeo Video Dimensions will pave the way to start your journey. In addition, while adjusting Vimeo Aspect Ratio, Wondershare Filmora will act as the right approach with appropriate tools to change the Vimeo Aspect Ratio and other important editing options. All the best!
The Professional’s Method for Removing Unwanted Sounds From Media Projects Using Premiere Pro
Adobe Premiere Pro is a video editing tool. In the editing world, Premiere Pro has a separate fan base; people use this video editing tool because of its unmatchable features. People love the quality of editing that Premiere Pro delivers. Among its many features, few are color correction, safe margins, rulers, and audio assign.
Moreover, the video editor has an Auto Reframe feature. Along with this, Premiere Pro offers Comparison View and many other things. If you want to learn more about Premiere Pro and how to remove noise from video in Premiere Pro, then stay with us.
In this article
01 Remove Background Noise Premiere Pro
02 How to Mute A Clip in Premiere Pro
03 Tips and Tricks to Help You Better Editing Audio in Premiere Pro
Part 1. Remove Background Noise Premiere Pro
While recording a video, you cannot control every noise. Sometimes, you get disturbed by your doorbell. Sometimes, it’s your neighbor’s horn that might bother you or anything else. What do you do when this happens to you? Do you stop the recording and wait until it’s quiet?
If this is what you do, then let us share a smart solution with you. Background noise can be removed from your video using the remove background noise Premiere Pro feature. Allow us to share its steps to guide you more about it.
Step 1: Import the File
To remove background noise from your videos, you first need to import the media file to Premiere Pro. Then drag and drop the file onto the timeline. After that, you need to select and open the ‘Effects’ menu.

Step 2: Add Denoise Effect
On the right side of the Effects menu, type and search for ‘Denoise.’ Then, you should select the Denoise option and drag it onto the timeline over the media file. The Denoise feature removes nearly 50% of the noise automatically.

Step 3: Denoise Effects Control
The rest of the background noise can be customized. For that, head to the ‘Effects Control’ section. You will see Denoise-related options. There, click on ‘Edit’ for Custom Setup. You can adjust both the ‘Frequency’ and ‘Amount’ values.

Step 4: Voice Enhance Effect
Removing background noise damages the quality of voice. This quality can be improved by using ‘Vocal Enhance.’ You can search it from the search bar in the Effects tab and drag it over to the media file in the timeline. You can also customize this from the ‘Effects Control’ tab.

Part 2. How to Mute A Clip in Premiere Pro
Sometimes, you might need to mute a clip. You can use such clips as your status. You can also add your desired background music and then share the clips. In any case, you need to mute the clip, but what if you don’t know how to mute the clip in Premiere Pro?
Don’t worry because we are here to help you. The following section of this article will share different methods to mute clips in Adobe Premiere Pro.
Method 1: The first method is to mute an entire clip on the timeline. This could be done by checking the Mute Track ‘M’ button. You will find the mute button beside the track name.

Method 2: The next method is to mute a specific clip. For that, go to the ‘Audio’ section from the menu bar. Then, look at the ‘Essential Sound’ panel on the right side of the screen. From you will see various tags. Open your desired tag and check the box against the ‘Mute’ option.

Method 3: Another method that could be used to mute a clip is by right-clicking on the clip that you want to mute. A menu appears on the screen. From that menu, you need to uncheck the ‘Enable’ button. This mutes the clip.

Method 4: The next method demands you to first select the video clip. Then, from the menu bar, head over to the ‘Editing’ tab. There go to the ‘Audio Clip Mixer’ section. You will see volume sliders; drag down the Volume slider to negative to mute the clip.

Part 3. Tips and Tricks to Help You Better Editing Audio in Premiere Pro
As we have mentioned earlier, noise removal damages the overall quality of the audio. All your effort goes to waste if your voice is not clear or anything else. Now that you know how you can handle background noise removal, it’s time to talk about something new and different.
The following section of this article is going to share tips and tricks that could be adopted. These will help you to get better and improved quality while editing audio.
1. Restore Bass
The first tip that we are going to introduce is restoring the bass of the media file. You can do this by using the Parametric Equalizer and dragging it onto the timeline. With an equalizer, you can play with different audio frequencies. Whatsoever suits the best, you can set it.
2. Atmosphere Setting
Its essential to first of all create an atmosphere. For this, you can mix sounds, add reverb and even adjust the loudness. An ambiance audio tag can be used for background noise. You need to set the scene for your music or the dialogue.
3. Compress the Audio
To make the audio better and more consistent, it is essential to compress it. Like the name is presenting, compression lowers the volume of loud parts, increases the volume of fairly quiet parts, it compresses the waveform of audio. After compression, your audio sounds instantly better, especially the voices.
4. Dialogue Adjustments
You can unify different recordings for a common loudness if you tag audio clips as Dialogue. If you plan to add a voiceover to your video, then you must improve the clarity, reduce or remove any background noise and also, adjust the reverb. Subtitles could be added to make the conversation understandable in your video.
5. Remove Noise
The noise of the computer fan or the weird hissing noise of the microphone and other similar things are referred to as Background noise. This can become a distracting element. While editing the audio, it matters that you remove the background noise because it does not get automatically removed. So, to have good audio, always remove background noise.
Bottom Line
If background noise is bothering you, then this problem is resolved. The article above has shared how to remove noise from video in premiere pro. The easy step-by-step guide for removing background noise with Premiere Pro has been shared.
To remove background noise, Premiere Pro is not the only editor. Wondershare Filmora is another stunning and known video editor. You can use the tool to remove background noise from your videos. With this editor, you can also mute your clips.
Not just this, but the editor has many more classic features. Filmora allows keyframing, motion tracking, and doing cool edits with a split-screen. Color match is another offered feature among the many other features of Filmora. It also has an asset library. You can get fantastic effects, transitions, elements, and whatnot from its library.
For Win 7 or later (64-bit)
For macOS 10.12 or later
02 How to Mute A Clip in Premiere Pro
03 Tips and Tricks to Help You Better Editing Audio in Premiere Pro
Part 1. Remove Background Noise Premiere Pro
While recording a video, you cannot control every noise. Sometimes, you get disturbed by your doorbell. Sometimes, it’s your neighbor’s horn that might bother you or anything else. What do you do when this happens to you? Do you stop the recording and wait until it’s quiet?
If this is what you do, then let us share a smart solution with you. Background noise can be removed from your video using the remove background noise Premiere Pro feature. Allow us to share its steps to guide you more about it.
Step 1: Import the File
To remove background noise from your videos, you first need to import the media file to Premiere Pro. Then drag and drop the file onto the timeline. After that, you need to select and open the ‘Effects’ menu.
Step 2: Add Denoise Effect
On the right side of the Effects menu, type and search for ‘Denoise.’ Then, you should select the Denoise option and drag it onto the timeline over the media file. The Denoise feature removes nearly 50% of the noise automatically.
Step 3: Denoise Effects Control
The rest of the background noise can be customized. For that, head to the ‘Effects Control’ section. You will see Denoise-related options. There, click on ‘Edit’ for Custom Setup. You can adjust both the ‘Frequency’ and ‘Amount’ values.
Step 4: Voice Enhance Effect
Removing background noise damages the quality of voice. This quality can be improved by using ‘Vocal Enhance.’ You can search it from the search bar in the Effects tab and drag it over to the media file in the timeline. You can also customize this from the ‘Effects Control’ tab.
Part 2. How to Mute A Clip in Premiere Pro
Sometimes, you might need to mute a clip. You can use such clips as your status. You can also add your desired background music and then share the clips. In any case, you need to mute the clip, but what if you don’t know how to mute the clip in Premiere Pro?
Don’t worry because we are here to help you. The following section of this article will share different methods to mute clips in Adobe Premiere Pro.
Method 1: The first method is to mute an entire clip on the timeline. This could be done by checking the Mute Track ‘M’ button. You will find the mute button beside the track name.
Method 2: The next method is to mute a specific clip. For that, go to the ‘Audio’ section from the menu bar. Then, look at the ‘Essential Sound’ panel on the right side of the screen. From you will see various tags. Open your desired tag and check the box against the ‘Mute’ option.
Method 3: Another method that could be used to mute a clip is by right-clicking on the clip that you want to mute. A menu appears on the screen. From that menu, you need to uncheck the ‘Enable’ button. This mutes the clip.
Method 4: The next method demands you to first select the video clip. Then, from the menu bar, head over to the ‘Editing’ tab. There go to the ‘Audio Clip Mixer’ section. You will see volume sliders; drag down the Volume slider to negative to mute the clip.
Part 3. Tips and Tricks to Help You Better Editing Audio in Premiere Pro
As we have mentioned earlier, noise removal damages the overall quality of the audio. All your effort goes to waste if your voice is not clear or anything else. Now that you know how you can handle background noise removal, it’s time to talk about something new and different.
The following section of this article is going to share tips and tricks that could be adopted. These will help you to get better and improved quality while editing audio.
1. Restore Bass
The first tip that we are going to introduce is restoring the bass of the media file. You can do this by using the Parametric Equalizer and dragging it onto the timeline. With an equalizer, you can play with different audio frequencies. Whatsoever suits the best, you can set it.
2. Atmosphere Setting
Its essential to first of all create an atmosphere. For this, you can mix sounds, add reverb and even adjust the loudness. An ambiance audio tag can be used for background noise. You need to set the scene for your music or the dialogue.
3. Compress the Audio
To make the audio better and more consistent, it is essential to compress it. Like the name is presenting, compression lowers the volume of loud parts, increases the volume of fairly quiet parts, it compresses the waveform of audio. After compression, your audio sounds instantly better, especially the voices.
4. Dialogue Adjustments
You can unify different recordings for a common loudness if you tag audio clips as Dialogue. If you plan to add a voiceover to your video, then you must improve the clarity, reduce or remove any background noise and also, adjust the reverb. Subtitles could be added to make the conversation understandable in your video.
5. Remove Noise
The noise of the computer fan or the weird hissing noise of the microphone and other similar things are referred to as Background noise. This can become a distracting element. While editing the audio, it matters that you remove the background noise because it does not get automatically removed. So, to have good audio, always remove background noise.
Bottom Line
If background noise is bothering you, then this problem is resolved. The article above has shared how to remove noise from video in premiere pro. The easy step-by-step guide for removing background noise with Premiere Pro has been shared.
To remove background noise, Premiere Pro is not the only editor. Wondershare Filmora is another stunning and known video editor. You can use the tool to remove background noise from your videos. With this editor, you can also mute your clips.
Not just this, but the editor has many more classic features. Filmora allows keyframing, motion tracking, and doing cool edits with a split-screen. Color match is another offered feature among the many other features of Filmora. It also has an asset library. You can get fantastic effects, transitions, elements, and whatnot from its library.
For Win 7 or later (64-bit)
For macOS 10.12 or later
Also read:
- Updated How to Use Autotune in Audacity with Plugins? Free
- New Optimal Audio Removal Programs for Windows Videos
- New 2024 Approved Unveiling the Best MacDAW Software of the Year Detailed Reviews and Comparisons
- Skype Voice Changer Useful Tools to Change Voice for Skype
- New 2024 Approved Understanding the Basics of YouTubes Audio Archives
- Updated Mastering the Art of Photographic Audio Fusion Visual & Auditory Synthesis
- Updated Achieving Smooth Transitions Utilizing Audio Ducking for Elegant Music Fades in PowerDirector for 2024
- Updated Essential Techniques for Silencing Background Sounds Off- and Online Solutions for 2024
- Updated 2024 Approved Audiophiles Toolkit Implementing Smooth Audio Transitions with Ducking in Adobe Premiere Pro (Mac)
- Updated 2024 Approved Discovering the Best 8 Android-Compatible DAWs for Musicians and Producers
- Updated Top 10 iPhone Voice Capture Apps The Ultimate List
- Muting the Mundane Essential Insights for Filtering Background Noise in Audiovisual Content
- The Insiders Handbook to Efficient Sound Source Isolation in Films and Videos
- 2024 Approved Advanced Audio Editing Implementing Real-Time Ducking in Windows Version of Adobe Premiere Pro
- 2024 Approved From Novice to Pro Harnessing the Potential of Adobes Audio Editor (Adobe Audition)
- New 2024 Approved From Ambient Noises to Melodies Detailed Audio Recording on Windows 10
- New 2024 Approved Enhancing Listening Experience Steps for Standardizing Audio Amplitude in VLC
- New 2024 Approved Sonic Palette An Intensive Look at AVS Editors Features, User Reviews, and Alternate Choices in Audio Editing
- New Mastering the Art of Implementing Audio Decline Techniques
- Updated 2024 Approved Unveiling Techniques for Discriminating Premium Sound Artists
- 2024 Approved Advanced Audio Filtration How to Mute Irrelevant Clips in CinemaPro
- Integrating Lame Library Into Audacity for Advanced Audio Editing
- New Top 7 Digital Tools for Seamless Audio Cutting and Editing for 2024
- 2024 Approved The Ultimate List 6 Must-Have Voice Amplification Tools for Mobile Phones
- New The Ultimate Checklist for Utilizing Adobe Audition in Sound Production
- 2024 Approved The Premier List Masterful MP3 Shredders
- Updated Convert Text to MP3 on Windows, Mac, Android and iPhone
- 2024 Approved Sonic Selection Series Finding the Perfect Soundtrack for Any Visual Storytelling
- New Picture-in-Picture Made Easy A Final Cut Pro Tutorial for 2024
- Updated How to Define AI Video? | Wondershare Virbo Glossary for 2024
- 15 Best Strongest Pokémon To Use in Pokémon GO PvP Leagues For Itel A05s | Dr.fone
- Is pgsharp legal when you are playing pokemon On Realme 11 5G? | Dr.fone
- Full Guide on Mirroring Your Vivo Y100i to Your PC/Mac | Dr.fone
- Ways to trade pokemon go from far away On Vivo S18e? | Dr.fone
- In 2024, Full Tutorial to Bypass Your Poco F5 Pro 5G Face Lock?
- In 2024, How to Mirror PC Screen to Realme 11 Pro+ Phones? | Dr.fone
- In 2024, How to Transfer Data from Vivo Y28 5G to BlackBerry | Dr.fone
- New VSDC Video Editor for Mac Explore Better Options for 2024
- 5 Ways to Track Vivo S17e without App | Dr.fone
- In 2024, Universal Unlock Pattern for Nubia Z50 Ultra
- 2024 Approved How to Make a Smooth Speed Ramping in Premiere Pro?
- In 2024, 5 Ways to Transfer Music from Itel A60 to Other Android Devices Easily | Dr.fone
- Full Guide How To Fix Connection Is Not Private on Vivo S17 Pro | Dr.fone
- In 2024, Where Is the Best Place to Catch Dratini On Realme V30T | Dr.fone
- New 2024 Approved Intelligent Video Editors with One-Touch Reframe
- Updated The Basics of HD Video Pixel Size Explained
- In 2024, Planning to Use a Pokemon Go Joystick on Huawei P60? | Dr.fone
- Title: New 2024 Approved Innovative Top 10 Applications for Switching Masculine and Feminine Vocal Traits
- Author: David
- Created at : 2024-05-05 10:04:20
- Updated at : 2024-05-06 10:04:20
- Link: https://sound-tweaking.techidaily.com/new-2024-approved-innovative-top-10-applications-for-switching-masculine-and-feminine-vocal-traits/
- License: This work is licensed under CC BY-NC-SA 4.0.
