
:max_bytes(150000):strip_icc():format(webp)/GettyImages-1250476440-2ff779100e984029aa752236f9791b11.jpg)
In 2024, Top 10 Premium Platforms for High-Definition Video Wallpaper Acquisition
Top 10 Premium Platforms for High-Definition Video Wallpaper Acquisition (2024 Edition)
Top 10 Best Sites to Download Free HD Video Backgrounds [2024]

Liza Brown
Mar 27, 2024• Proven solutions
To attract and engage readers and viewers with a video background, you have to do it well. Otherwise, your visitors will close the video or website page within a second. And why should this happen yet you can download the best free video background that matches your content?
If you are looking for the best free stock HD video background sites this is the best place for you. Since the biggest challenge is selecting the most suitable video background, read carefully the do and don’ts to help you make a better choice.
You will Learn :
- What Is a Video Background?
- Why Use a Video Background on Website/Video
- Where To Use a Video Background?
- Top 10 Websites To Source Free Video Overlays and Backgrounds
- Do and Don’ts When Using Free Video Background
- How To Create a Video Background Overlay?
Also included in this article is a tutorial on how to add a video background to your videos. Before that, let’s look at what video backgrounds are and why they are important?
What Is a Video Background?
Video background refers to the motion video clips or animations playing behind foreground content or video. Video backgrounds fall under two categories:
- Real background
They are real people videos, product videos, office videos or a clip of real image videos of physical things like sky, water storm, and animals.
- Fake background
These are computer created animations in motion appearing behind texts on a website landing page or a video. The main used fake background is a green screen.
Advantages of Using a Video Background on Website/Video
There are many reasons you should use a video background on your website or video. Here are some of the reasons;
- You can use a video background to visually showcase your products
- After an adventure, the best way to share your experience is using your recorded video as a background on your landing page
- To make your website more appealing
- To engage and increase your contents conversion rate
- It’s human to be attracted to anything in motion. For this reason, website experts use motion backgrounds to grab the attention of the readers and hold them on the page for longer.
Where To Use a Video Background?
Simply because you can download as many free video backgrounds as you want, you cannot use them on every website or video.
For your video background to be of advantage, these are the places to use it:
- Wordpress websites- Wordpress has a video background plugin for website owners.
- PowerPoint- If you love creating PowerPoint presentations, the best option to make presentable is by using a video background.
- YouTube – If you own a YouTube channel, use the best free stock video clips to win more viewership.
To select the top free HD video backgrounds for download, here are the best sites to consider.
Top 10 Websites To Source Free Video Overlays and Backgrounds
The usage of free background videos and loop backgrounds has been on the rise. Equally, a number of sites to source free video looping clips and backgrounds have gone up significantly. To be inclusive, these sites are split into two parts:
Part I: Top Sites To Download Royalty Free HD Video Backgrounds
Part II: Where To Download Free HD Looping Video Backgrounds
Top Sites To Download Royalty Free HD Video Backgrounds
Royalty free (RF) means you don’t have to pay royalties to the selling agencies. This license allows you to pay a one-time fee to use the video background. After paying the fee, you use it as many times as you want without retaining its property or transferring copyright to yourself.
Here are the most preferred sites to buy high-quality royalty-free video background:
1. Pexels

Pexels is among the fastest-growing site with thousands of free video backgrounds for websites. All images and videos are free to use, edit or modify to suit your desired background. You can use them for commercial or personal use. However, you have no right to sell or post them to other stock free sites.
Founded in 2014, Pexels mission is to help website builders, writers, video creators, programmers, and designers to create sites with stunning website backgrounds. All videos here are in MP4 format and HD status.
2. Videezy

The separation between the premium videos and the royalty-free videos is quite clear so you never mistake when selecting. Every style of video background is well categorized at the top bar menu in bold. To choose only royalty-free background videos, select the standard option on the license type menu.
Whether you want free motion video background, loopable videos for your video background or motion stock free videos this is the best site. Every style of video is available here.
The videos are available in two formats: MP4 and MOV. Depending on your video resolution, these are the resolutions to choose Ultra HD, 4K, SD, HD-720, and HD- 1080.
3. X Stock Video

Are you looking for real video backgrounds for your website? If yes, XStockvideo is renowned for real videos that are free. The categories include real people videos, holiday videos, buildings, and landmark video backgrounds. X stock allows you to download free for either commercial promos or personal videos and backgrounds.
All videos have a web resolution of 960x540, 1280 x 720 and 1920 x 1080. Extended use of a single video can lead to charges. You can only upload HD videos with a MOV format from this site.
4. Clip Canvas

There are both paid and royalty-free stock HD video clips on this website. Hover over the video clip to read its details including the price details. Majority of filmmakers as well as TV programmers source free background videos from Clip Canvas.
Among the reasons Clip Canvas is preferred by different users is the wide range of video formats and codecs. The video resolutions are HD, SD, and 4K. The main disadvantage of using free clips is the watermark. However, you can download the paid clips to avoid watermarks.
Where To Download Free HD Looping Video Backgrounds
Using a looping video background relieves website designers and video creators the burden of setting background video in loops. The list below comprises of websites with free HD looping video backgrounds to download for website and videos.
5. Mazwai

Like most of the other free video backgrounds, Mazwai has a wide variety of both loopable videos and still images. In partnership with other free stock video sites, they have listed over a thousand HD video backgrounds in all formats.
Most of the videos are 720pixels and 1080 pixels. Two types of licenses apply on this site; Mazwai license which gives full free usage without any condition and Creative Commons license. To use a video clip under Creative License, you must credit the author.
6. Life of Vids

Our second best website to download free background video loops is Life Of Vids due to its user-friendly website. To find your preferred loops category, enter your keyword and the result will be amazing. You can also click the “Left Arrow” or “Right Arrow” to browse all the loops categories. All looping videos are available in Vimeo for download in MP4 or 4K formats.
There are neither copyright restrictions nor ownership license conditions. To use photos, animations and images for your video background tap the “Free Pix” at the top menu.
7. Free Loops

Free Loops is designed to provide a wide selection of video loops for all users. However, the free plan is limited to only 10 free loops every day, and they are 100% royalty-free. To download the video loops, you have to sign up for a free account.
This is the best website to either download free video loops or buy a video loops pack. The free pack loops are only available in MP4 formats. To download video loops in other formats, subscribe to the Pro plan for $19/month, Pro Plus plan for $30/month or Pro Gold for $55/month.
8. Videvo

Videvo is widely renowned due to its large collection of high-quality free video overlays and backgrounds. You don’t have to create an account or sign up to download the free nor the premium video background.
The free motion backgrounds for video editing are also available in both Video free plan and Videvo paid plans. Other features include sound effects and music. All videos, loops and motion graphics are HD, 4K or UHD resolution.
9. Pixabay

As of today, there over 260 free loopable video backgrounds available for download without any type of license condition. The sponsored loop videos marked as Shutterstock are high-quality premium videos also available for download.
Pixabay is a popular website with over 1+ million free stock HD/4K images, photos, and videos.
10. Ignitemotion

The major free HD video backgrounds for download include cloud, abstracts, sports, nature, science, people and cities. You can use them for commercial or personal purposes without any royalty fee.
If you want to download free Christmas video backgrounds, just tap “Holiday videos” at the top menu. Other holiday video background videos are Easter videos, Valentine’s videos, Halloween videos and New Year videos.
Do and Don’ts When Using Free Video Background
Any video background on your website can reduce website speed, destruct important texts and messages or cause a drop in conversion rate. It’s therefore important to learn where to draw the lines when using background videos.
Here are the best five tips to help use free video backgrounds the right way.
- Use short video of low bitrate
To avoid buffering of the video and affecting the speed of your website page negatively, consider using background videos that are 2MB or less. A three-second video is good enough to make a website homepage or video background stunning.
- Use loopable video background
Setting your website background video to play in loops is one way of ensuring the video is short. The other preferred option is setting the video background to play continuously. This tends to work better as it does not affect the CPU functionality.
- Use slow-motion videos
Fast-moving video backgrounds are destructive and in some cases reduce the content conversion rate. To avoid visitors sticking to the video background for long, reduce the movements.
- Use compressed background videos
A compressed video has a low bitrate and therefore plays smoothly without affecting the page load speed. It’s good to compress the video to 720 pixels. Even though high pixel videos are of the best quality, avoid them completely.
- Use an overlay
To hide poor quality videos or very bright background videos, use an overlay on top of the video. A semitransparent overlay makes the video more attractive, engaging and creates more interest to look at, as the details are not clearly visible.
How To Create a Video Background Overlay?
Filmora Video editor from Wondershare is the most used software for editing green screen backgrounds, blurring videos and creating video overlays. Use these steps to set a video background overlay.
Step 1: On your preferred browser, open Filmora.Wondershare.com and click “Free Download” below. After downloading, tap install.


Step 2: Download two video clips to the video timeline from your library
Step 3: Drag the first video down to the play timeline, the remove the video audio if any. Do the same to the second video clip but place it on the background.

Step 4: Double click on the second clip and use the “Composition” menu to set the videos blending mode.
Step 5: Adjust the Opacity % and save your video background overlay.
Here is the video tutorial to show you how to create your own video background overlay.
Conclusion
There are more websites to download royalty-free video backgrounds for a website than their demand. Where to download the video background is never a challenge: how to use them is the biggest hurdle to website owners. Use the tips highlighted to avoid losing your traffic.
Different websites have different video formats and resolutions. When selecting free video backgrounds for your website or video, consider these four key features; video length, resolution, contrast and motion speed.
Was this article helpful to you? Please leave comments or suggestions on our social media platforms.
Liza Brown
Liza Brown is a writer and a lover of all things video.
Follow @Liza Brown
Liza Brown
Mar 27, 2024• Proven solutions
To attract and engage readers and viewers with a video background, you have to do it well. Otherwise, your visitors will close the video or website page within a second. And why should this happen yet you can download the best free video background that matches your content?
If you are looking for the best free stock HD video background sites this is the best place for you. Since the biggest challenge is selecting the most suitable video background, read carefully the do and don’ts to help you make a better choice.
You will Learn :
- What Is a Video Background?
- Why Use a Video Background on Website/Video
- Where To Use a Video Background?
- Top 10 Websites To Source Free Video Overlays and Backgrounds
- Do and Don’ts When Using Free Video Background
- How To Create a Video Background Overlay?
Also included in this article is a tutorial on how to add a video background to your videos. Before that, let’s look at what video backgrounds are and why they are important?
What Is a Video Background?
Video background refers to the motion video clips or animations playing behind foreground content or video. Video backgrounds fall under two categories:
- Real background
They are real people videos, product videos, office videos or a clip of real image videos of physical things like sky, water storm, and animals.
- Fake background
These are computer created animations in motion appearing behind texts on a website landing page or a video. The main used fake background is a green screen.
Advantages of Using a Video Background on Website/Video
There are many reasons you should use a video background on your website or video. Here are some of the reasons;
- You can use a video background to visually showcase your products
- After an adventure, the best way to share your experience is using your recorded video as a background on your landing page
- To make your website more appealing
- To engage and increase your contents conversion rate
- It’s human to be attracted to anything in motion. For this reason, website experts use motion backgrounds to grab the attention of the readers and hold them on the page for longer.
Where To Use a Video Background?
Simply because you can download as many free video backgrounds as you want, you cannot use them on every website or video.
For your video background to be of advantage, these are the places to use it:
- Wordpress websites- Wordpress has a video background plugin for website owners.
- PowerPoint- If you love creating PowerPoint presentations, the best option to make presentable is by using a video background.
- YouTube – If you own a YouTube channel, use the best free stock video clips to win more viewership.
To select the top free HD video backgrounds for download, here are the best sites to consider.
Top 10 Websites To Source Free Video Overlays and Backgrounds
The usage of free background videos and loop backgrounds has been on the rise. Equally, a number of sites to source free video looping clips and backgrounds have gone up significantly. To be inclusive, these sites are split into two parts:
Part I: Top Sites To Download Royalty Free HD Video Backgrounds
Part II: Where To Download Free HD Looping Video Backgrounds
Top Sites To Download Royalty Free HD Video Backgrounds
Royalty free (RF) means you don’t have to pay royalties to the selling agencies. This license allows you to pay a one-time fee to use the video background. After paying the fee, you use it as many times as you want without retaining its property or transferring copyright to yourself.
Here are the most preferred sites to buy high-quality royalty-free video background:
1. Pexels
Pexels is among the fastest-growing site with thousands of free video backgrounds for websites. All images and videos are free to use, edit or modify to suit your desired background. You can use them for commercial or personal use. However, you have no right to sell or post them to other stock free sites.
Founded in 2014, Pexels mission is to help website builders, writers, video creators, programmers, and designers to create sites with stunning website backgrounds. All videos here are in MP4 format and HD status.
2. Videezy
The separation between the premium videos and the royalty-free videos is quite clear so you never mistake when selecting. Every style of video background is well categorized at the top bar menu in bold. To choose only royalty-free background videos, select the standard option on the license type menu.
Whether you want free motion video background, loopable videos for your video background or motion stock free videos this is the best site. Every style of video is available here.
The videos are available in two formats: MP4 and MOV. Depending on your video resolution, these are the resolutions to choose Ultra HD, 4K, SD, HD-720, and HD- 1080.
3. X Stock Video
Are you looking for real video backgrounds for your website? If yes, XStockvideo is renowned for real videos that are free. The categories include real people videos, holiday videos, buildings, and landmark video backgrounds. X stock allows you to download free for either commercial promos or personal videos and backgrounds.
All videos have a web resolution of 960x540, 1280 x 720 and 1920 x 1080. Extended use of a single video can lead to charges. You can only upload HD videos with a MOV format from this site.
4. Clip Canvas
There are both paid and royalty-free stock HD video clips on this website. Hover over the video clip to read its details including the price details. Majority of filmmakers as well as TV programmers source free background videos from Clip Canvas.
Among the reasons Clip Canvas is preferred by different users is the wide range of video formats and codecs. The video resolutions are HD, SD, and 4K. The main disadvantage of using free clips is the watermark. However, you can download the paid clips to avoid watermarks.
Where To Download Free HD Looping Video Backgrounds
Using a looping video background relieves website designers and video creators the burden of setting background video in loops. The list below comprises of websites with free HD looping video backgrounds to download for website and videos.
5. Mazwai
Like most of the other free video backgrounds, Mazwai has a wide variety of both loopable videos and still images. In partnership with other free stock video sites, they have listed over a thousand HD video backgrounds in all formats.
Most of the videos are 720pixels and 1080 pixels. Two types of licenses apply on this site; Mazwai license which gives full free usage without any condition and Creative Commons license. To use a video clip under Creative License, you must credit the author.
6. Life of Vids
Our second best website to download free background video loops is Life Of Vids due to its user-friendly website. To find your preferred loops category, enter your keyword and the result will be amazing. You can also click the “Left Arrow” or “Right Arrow” to browse all the loops categories. All looping videos are available in Vimeo for download in MP4 or 4K formats.
There are neither copyright restrictions nor ownership license conditions. To use photos, animations and images for your video background tap the “Free Pix” at the top menu.
7. Free Loops
Free Loops is designed to provide a wide selection of video loops for all users. However, the free plan is limited to only 10 free loops every day, and they are 100% royalty-free. To download the video loops, you have to sign up for a free account.
This is the best website to either download free video loops or buy a video loops pack. The free pack loops are only available in MP4 formats. To download video loops in other formats, subscribe to the Pro plan for $19/month, Pro Plus plan for $30/month or Pro Gold for $55/month.
8. Videvo
Videvo is widely renowned due to its large collection of high-quality free video overlays and backgrounds. You don’t have to create an account or sign up to download the free nor the premium video background.
The free motion backgrounds for video editing are also available in both Video free plan and Videvo paid plans. Other features include sound effects and music. All videos, loops and motion graphics are HD, 4K or UHD resolution.
9. Pixabay
As of today, there over 260 free loopable video backgrounds available for download without any type of license condition. The sponsored loop videos marked as Shutterstock are high-quality premium videos also available for download.
Pixabay is a popular website with over 1+ million free stock HD/4K images, photos, and videos.
10. Ignitemotion
The major free HD video backgrounds for download include cloud, abstracts, sports, nature, science, people and cities. You can use them for commercial or personal purposes without any royalty fee.
If you want to download free Christmas video backgrounds, just tap “Holiday videos” at the top menu. Other holiday video background videos are Easter videos, Valentine’s videos, Halloween videos and New Year videos.
Do and Don’ts When Using Free Video Background
Any video background on your website can reduce website speed, destruct important texts and messages or cause a drop in conversion rate. It’s therefore important to learn where to draw the lines when using background videos.
Here are the best five tips to help use free video backgrounds the right way.
- Use short video of low bitrate
To avoid buffering of the video and affecting the speed of your website page negatively, consider using background videos that are 2MB or less. A three-second video is good enough to make a website homepage or video background stunning.
- Use loopable video background
Setting your website background video to play in loops is one way of ensuring the video is short. The other preferred option is setting the video background to play continuously. This tends to work better as it does not affect the CPU functionality.
- Use slow-motion videos
Fast-moving video backgrounds are destructive and in some cases reduce the content conversion rate. To avoid visitors sticking to the video background for long, reduce the movements.
- Use compressed background videos
A compressed video has a low bitrate and therefore plays smoothly without affecting the page load speed. It’s good to compress the video to 720 pixels. Even though high pixel videos are of the best quality, avoid them completely.
- Use an overlay
To hide poor quality videos or very bright background videos, use an overlay on top of the video. A semitransparent overlay makes the video more attractive, engaging and creates more interest to look at, as the details are not clearly visible.
How To Create a Video Background Overlay?
Filmora Video editor from Wondershare is the most used software for editing green screen backgrounds, blurring videos and creating video overlays. Use these steps to set a video background overlay.
Step 1: On your preferred browser, open Filmora.Wondershare.com and click “Free Download” below. After downloading, tap install.
Step 2: Download two video clips to the video timeline from your library
Step 3: Drag the first video down to the play timeline, the remove the video audio if any. Do the same to the second video clip but place it on the background.
Step 4: Double click on the second clip and use the “Composition” menu to set the videos blending mode.
Step 5: Adjust the Opacity % and save your video background overlay.
Here is the video tutorial to show you how to create your own video background overlay.
Conclusion
There are more websites to download royalty-free video backgrounds for a website than their demand. Where to download the video background is never a challenge: how to use them is the biggest hurdle to website owners. Use the tips highlighted to avoid losing your traffic.
Different websites have different video formats and resolutions. When selecting free video backgrounds for your website or video, consider these four key features; video length, resolution, contrast and motion speed.
Was this article helpful to you? Please leave comments or suggestions on our social media platforms.
Liza Brown
Liza Brown is a writer and a lover of all things video.
Follow @Liza Brown
“Delving Into REAPER’s Arsenal: A Thorough Review of Features & Easy Learning Resources”
DAW stands for Digital Audio Workstation. It is where you can record, edit, mix or even master your music. You always need good DAW software to help you with the job to produce music or live recording musicians.
A good DAW software must have a multi-track audio recording , virtual instruments, MIDI sequencer, excellent mixing capabilities, and plug-in processor hosting. The software is found for all major operating systems such as Linux , Windows, and Mac. If you want to learn more about DAW, then stay with us. The article will discuss in detail REAPER Recording Software.
In this article
01 What Is REAPER Recording Software?
02 How to Download and Install REAPER Software?
03 Tutorial for Using REAPER Recording Software
Part 1. What Is REAPER Recording Software?
Recording software like REAPER records computer audio is used to produce music, edit it, transform, and customize your music. With REAPER Recording Software , you can record multi-layer audio and MIDI in various formats. REAPER has the easiest interface that allows you to drag and drop to import, split, move and do many other tasks.

This is just one feature of REAPER that sounds very interesting. In this section, we will talk about more of its features.
1. Record and Edit
You can easily record the audio and (MIDI) Musical Instrumental Digital Interface with REAPER recording software. It lets you edit and customize everything. You can record and edit things limitlessly. When it comes to recording, it’s not at all difficult for REAPER software to record various instruments or vocals.
2. Mixing
Initially, the mixer might seem inflexible, but in reality, REAPER has a lot to offer you. It has great automated capabilities for instrument and effect parameters. It doesn’t matter if you are working because you can still bounce or freeze tracks while working.
The mixer is very flexible. With REAPERs mixer, you just have to drag and drop your recordings so that you can create tracks, and also, you can customize the arrangements by moving the portions.
3. Interface
While looking at the interface, you might question yourself about how to use its interface. Some people love to learn about new things, such as the REAPER Recording Software. Whereas, some people seem least interested because the half-empty interface is not intuitive to them.
Whereas, the best thing about its interface is that you can customize it. REAPER allows you to add different wallpapers and layouts to your software interface.
4. Strong Stability
REAPER Recording Software has very strong stability. This is one of its strongest features as compared to other competitors. The RAM is rarely affected by the load time and the used resources. Moreover, the software offers a wide range of languages. You can select your desired language to run the software.
Part 2. How to Download and Install REAPER Software?
REAPER is a Digital Audio Workstation. The perfect platform where you can manipulate and transform your audio. With REAPER Record Computer audio, you can work efficiently in a resource-friendly studio with saving your time. Stay tuned if you plan to learn more about its pricing and requirements.

Pricing of REAPER Software
A reaper is a brilliant software. It has a 60-day trial period. REAPER costs $60 in total to register. It has complete MIDI sequencing. You can also get a discounted license if REAPER is the best private option for you or has commercial usage. You can set the equal license key on every computer for someone with multiple computers.
System Requirements
The recording software has uncountable features. REAPER software facilitates its users at every level by giving the best audio manipulating platform. The best thing about REAPER Recording Software is its compatibility with different operating systems. Let us add more to your knowledge on this.
Windows
REAPER software is available for Windows 7, 8, 10, XP, and Vista. The version of REAPER for Windows is 6.42. This is for Windows 64-bit whereas, a download package is also available for Windows 32-bit.
macOS
For macOS 64-bit, REAPER has a 6.42 version. This version is compatible with macOS 10.5 – 10.14. Whereas, for macOS 10.15+, the available version of REAPER is 6.42 with a 15MB file size.
Linux
REAPER Recording Software is also compatible with Linux x86_64. The REAPER version is 6.42 with an 11 MB file size. This version can also work on AMD64 64-bit.
Downloading and Installing REAPER
Now that REAPER Record Computer Audio has impressed you a lot. You must be thinking about how to download it. If this is on your mind, then we got you. Allow us to share its steps that will guide you to download the software easily.
Step 1: To install REAPER software, first of all, visit its official website. Then locate and head over to its download section.
Step 2: Click on ‘Download REAPER from the download section.’ For Windows users, they can download the Windows installation package. At the same time, Linux and macOS users can select their installation packages.
Step 3: Lastly, after you have downloaded your systems compatible installation package, you simply have to run it and then install it according to your respective operating system.
Part 3. Tutorial for Using REAPER Recording Software
After its attractive features and detailed downloading procedure, it is finally the time to talk about its works. This section of the article will explain to you more about REAPER Recording Software as we are now going to present a tutorial on how to use the software.
Understand the Layout
Understanding and knowing the layout of your software before you start working on it is essential. The crucial components of REAPER software include the Timeline, Arrangement Window, Track Panel, Toolbar, and lastly, Transport.

The Arrangement window holds all the added items. The items are played from left to right order, similar to their timeline arrangement. You can also zoom in and out. Then comes the transport toolbar, which holds the functions to stop, rewind, play, fast forward, adjust the timeline speed, etc. The toolbar holds all the toggle buttons. You can also customize your toolbar.
New Track Creation
For creating a new track on REAPER, go to the Track menu and hit Insert New Track. A track is like another layer to your audio. Multiple layers and tracks make your work complex yet interesting as you can play all the different tracks at the same time. By double-clicking in the Track Control Panel, you can set a name for the added track.

Audio Hardware Settings for Audio Recording
It is best suggested always to check your audio hardware settings before you start to record, edit or mix with REAPER Recording Software. Your primary focus should be on the recording device’s devices should be set as Input Device, whereas the listening device should be set as the Output Device.
For this, you have to select Preferences from the Options menu. A window will appear in front of you, the REAPER Preference window. You have to select the correct Input and Output devices from the dropdown menu from this window.

Arm your Track
Arming your track is very important. For this, head over to the Track Control Panel, and next to your track name, hit the red circle. If you have various tracks, you should solo this track and mute the other tracks.
As soon as the track is armed, a Gain Meter will activate on the side. From this, you can check if you have properly set the microphone or not. This could be tested by tapping on the microphone.

Record
After all, the hardware settings are done, and your track is armed, it’s time to start the recording. For that, just tap on the Record button in the Transport toolbar. A yellow line in the timeline will indicate the end of the recording.

To end the recording, tap on the Stop button from the Transport Toolbar. Lastly, REAPER Recording Software will ask you to save the file. In case you don’t want it, you can also delete it.
Create and Manipulate Clips
Things like manipulation get a lot easier if you split the clips in REAPER. From the items menu, you have to select the option of Split Item on Cursor. This divides your clip into two clips on each side of the cursor. You can also remove the clips by going to the Items Menu. From there, you just have to hit the Remove Item option, or else, simply press the Delete key on your keyboard.

Removing clips will create a gap in the arrangement window that can be filled by dragging forward the remaining clip.
Volume Adjustments – Normalize
By double-clicking on the item or by selecting ‘Item Properties’ from a right-click, you can normalize the item. A new window will appear as Media Item Properties, from where you have to locate the Volume Settings and then select the option of Normalize.
If your item is already loud, then nothing will happen, but if it is not, then the slider will change from 0.00 dB showing an increase in the volume. Lastly, hit the ‘Apply’ or ‘OK’ button to imply the changes.
Fade in/out
With the Media Properties, you can also adjust a Fade in and a Fade out. For this, you simply have to set an end time for the Fade in, whereas a start time is entered for Fade out. Hit the ‘Ok’ or ‘Apply’ button to apply the changes.
From the Arrangement window, fades can be adjusted. For adjusting the fades, hover with your mouse over the red line. You will see a newly shaped cursor. Just drag on the timeline to play and adjust the Fade with this new cursor.

Automate Changes
With REAPER, you can also automate changes in track parameters. We will guide about automation from Track Envelopes. From Track Control Panel, hit the Trim option. A new Envelopes window will open at this point from where you have to check the Volume box.
A new Volume Track will open up. Here, you have to set new Envelope points. That could be done by holding the shift key, right-clicking on the point, and then selecting Create New Point. A green circle will indicate the new point.
By dragging the Envelope point, you can also adjust the volume. Dragging it towards the top will increase the volume, whereas dragging it towards the bottom will eventually decrease.

Finalize the Audio – Render
After all the above steps have been completed to set the order and adjust your desired volume, the last step comes to render your project file. For that, move to the File menu and select the ‘Render’ option. A window will be opened as ‘Render to File.’ Now, from the dropdown menu, select your desired Output Format.
Lastly, hit the Render 1 File button, and then REAPER will export your project. You can immediately listen to it by selecting the ‘Launch File’ option.

Concluding Thoughts
This article is everything you need to learn about REAPER Recording Software. The article that started from an introduction on DAW took you on a roller coaster ride. Everything about REAPER software has been shared.
We hope that this article helps you in all possible ways. The attractive features impress you, and its pricing and system specifications increase your knowledge. Along with that, the shared tutorial will guide you thoroughly on how to use it.
02 How to Download and Install REAPER Software?
03 Tutorial for Using REAPER Recording Software
Part 1. What Is REAPER Recording Software?
Recording software like REAPER records computer audio is used to produce music, edit it, transform, and customize your music. With REAPER Recording Software , you can record multi-layer audio and MIDI in various formats. REAPER has the easiest interface that allows you to drag and drop to import, split, move and do many other tasks.
This is just one feature of REAPER that sounds very interesting. In this section, we will talk about more of its features.
1. Record and Edit
You can easily record the audio and (MIDI) Musical Instrumental Digital Interface with REAPER recording software. It lets you edit and customize everything. You can record and edit things limitlessly. When it comes to recording, it’s not at all difficult for REAPER software to record various instruments or vocals.
2. Mixing
Initially, the mixer might seem inflexible, but in reality, REAPER has a lot to offer you. It has great automated capabilities for instrument and effect parameters. It doesn’t matter if you are working because you can still bounce or freeze tracks while working.
The mixer is very flexible. With REAPERs mixer, you just have to drag and drop your recordings so that you can create tracks, and also, you can customize the arrangements by moving the portions.
3. Interface
While looking at the interface, you might question yourself about how to use its interface. Some people love to learn about new things, such as the REAPER Recording Software. Whereas, some people seem least interested because the half-empty interface is not intuitive to them.
Whereas, the best thing about its interface is that you can customize it. REAPER allows you to add different wallpapers and layouts to your software interface.
4. Strong Stability
REAPER Recording Software has very strong stability. This is one of its strongest features as compared to other competitors. The RAM is rarely affected by the load time and the used resources. Moreover, the software offers a wide range of languages. You can select your desired language to run the software.
Part 2. How to Download and Install REAPER Software?
REAPER is a Digital Audio Workstation. The perfect platform where you can manipulate and transform your audio. With REAPER Record Computer audio, you can work efficiently in a resource-friendly studio with saving your time. Stay tuned if you plan to learn more about its pricing and requirements.
Pricing of REAPER Software
A reaper is a brilliant software. It has a 60-day trial period. REAPER costs $60 in total to register. It has complete MIDI sequencing. You can also get a discounted license if REAPER is the best private option for you or has commercial usage. You can set the equal license key on every computer for someone with multiple computers.
System Requirements
The recording software has uncountable features. REAPER software facilitates its users at every level by giving the best audio manipulating platform. The best thing about REAPER Recording Software is its compatibility with different operating systems. Let us add more to your knowledge on this.
Windows
REAPER software is available for Windows 7, 8, 10, XP, and Vista. The version of REAPER for Windows is 6.42. This is for Windows 64-bit whereas, a download package is also available for Windows 32-bit.
macOS
For macOS 64-bit, REAPER has a 6.42 version. This version is compatible with macOS 10.5 – 10.14. Whereas, for macOS 10.15+, the available version of REAPER is 6.42 with a 15MB file size.
Linux
REAPER Recording Software is also compatible with Linux x86_64. The REAPER version is 6.42 with an 11 MB file size. This version can also work on AMD64 64-bit.
Downloading and Installing REAPER
Now that REAPER Record Computer Audio has impressed you a lot. You must be thinking about how to download it. If this is on your mind, then we got you. Allow us to share its steps that will guide you to download the software easily.
Step 1: To install REAPER software, first of all, visit its official website. Then locate and head over to its download section.
Step 2: Click on ‘Download REAPER from the download section.’ For Windows users, they can download the Windows installation package. At the same time, Linux and macOS users can select their installation packages.
Step 3: Lastly, after you have downloaded your systems compatible installation package, you simply have to run it and then install it according to your respective operating system.
Part 3. Tutorial for Using REAPER Recording Software
After its attractive features and detailed downloading procedure, it is finally the time to talk about its works. This section of the article will explain to you more about REAPER Recording Software as we are now going to present a tutorial on how to use the software.
Understand the Layout
Understanding and knowing the layout of your software before you start working on it is essential. The crucial components of REAPER software include the Timeline, Arrangement Window, Track Panel, Toolbar, and lastly, Transport.
The Arrangement window holds all the added items. The items are played from left to right order, similar to their timeline arrangement. You can also zoom in and out. Then comes the transport toolbar, which holds the functions to stop, rewind, play, fast forward, adjust the timeline speed, etc. The toolbar holds all the toggle buttons. You can also customize your toolbar.
New Track Creation
For creating a new track on REAPER, go to the Track menu and hit Insert New Track. A track is like another layer to your audio. Multiple layers and tracks make your work complex yet interesting as you can play all the different tracks at the same time. By double-clicking in the Track Control Panel, you can set a name for the added track.
Audio Hardware Settings for Audio Recording
It is best suggested always to check your audio hardware settings before you start to record, edit or mix with REAPER Recording Software. Your primary focus should be on the recording device’s devices should be set as Input Device, whereas the listening device should be set as the Output Device.
For this, you have to select Preferences from the Options menu. A window will appear in front of you, the REAPER Preference window. You have to select the correct Input and Output devices from the dropdown menu from this window.
Arm your Track
Arming your track is very important. For this, head over to the Track Control Panel, and next to your track name, hit the red circle. If you have various tracks, you should solo this track and mute the other tracks.
As soon as the track is armed, a Gain Meter will activate on the side. From this, you can check if you have properly set the microphone or not. This could be tested by tapping on the microphone.
Record
After all, the hardware settings are done, and your track is armed, it’s time to start the recording. For that, just tap on the Record button in the Transport toolbar. A yellow line in the timeline will indicate the end of the recording.
To end the recording, tap on the Stop button from the Transport Toolbar. Lastly, REAPER Recording Software will ask you to save the file. In case you don’t want it, you can also delete it.
Create and Manipulate Clips
Things like manipulation get a lot easier if you split the clips in REAPER. From the items menu, you have to select the option of Split Item on Cursor. This divides your clip into two clips on each side of the cursor. You can also remove the clips by going to the Items Menu. From there, you just have to hit the Remove Item option, or else, simply press the Delete key on your keyboard.
Removing clips will create a gap in the arrangement window that can be filled by dragging forward the remaining clip.
Volume Adjustments – Normalize
By double-clicking on the item or by selecting ‘Item Properties’ from a right-click, you can normalize the item. A new window will appear as Media Item Properties, from where you have to locate the Volume Settings and then select the option of Normalize.
If your item is already loud, then nothing will happen, but if it is not, then the slider will change from 0.00 dB showing an increase in the volume. Lastly, hit the ‘Apply’ or ‘OK’ button to imply the changes.
Fade in/out
With the Media Properties, you can also adjust a Fade in and a Fade out. For this, you simply have to set an end time for the Fade in, whereas a start time is entered for Fade out. Hit the ‘Ok’ or ‘Apply’ button to apply the changes.
From the Arrangement window, fades can be adjusted. For adjusting the fades, hover with your mouse over the red line. You will see a newly shaped cursor. Just drag on the timeline to play and adjust the Fade with this new cursor.
Automate Changes
With REAPER, you can also automate changes in track parameters. We will guide about automation from Track Envelopes. From Track Control Panel, hit the Trim option. A new Envelopes window will open at this point from where you have to check the Volume box.
A new Volume Track will open up. Here, you have to set new Envelope points. That could be done by holding the shift key, right-clicking on the point, and then selecting Create New Point. A green circle will indicate the new point.
By dragging the Envelope point, you can also adjust the volume. Dragging it towards the top will increase the volume, whereas dragging it towards the bottom will eventually decrease.
Finalize the Audio – Render
After all the above steps have been completed to set the order and adjust your desired volume, the last step comes to render your project file. For that, move to the File menu and select the ‘Render’ option. A window will be opened as ‘Render to File.’ Now, from the dropdown menu, select your desired Output Format.
Lastly, hit the Render 1 File button, and then REAPER will export your project. You can immediately listen to it by selecting the ‘Launch File’ option.
Concluding Thoughts
This article is everything you need to learn about REAPER Recording Software. The article that started from an introduction on DAW took you on a roller coaster ride. Everything about REAPER software has been shared.
We hope that this article helps you in all possible ways. The attractive features impress you, and its pricing and system specifications increase your knowledge. Along with that, the shared tutorial will guide you thoroughly on how to use it.
13 Free Music Production Software for Windows/Mac/Online
13 Free Music Production Software for Windows/Mac/Online

Benjamin Arango
Mar 27, 2024• Proven solutions
13 Free Music Production Software for Windows/Mac/Online
Technology advances have spread through all fields of human activity, including music recording and development. The invention of music development tools has made it simpler for people engaged in the creation of music in one form or another.
Numerous applications for music development are on the market, and some are meant for musicians, and others are for educators and teachers. There is also a need to direct prospective customers to the right free music production software.
A comprehensive analysis of some of the best music development tools has been conducted to help you make the correct decision while you’re ready to purchase the app. This comprehensive Music Production Software Guide will provide solutions to many of your unanswered questions relating to the purchase of music production software.
- Part 1: Free Music Production Software for Windows
- Part 2: Free Music Production Software for Mac
- Part 3: Free Music Production Software Online
Part 1: Free Music Production Software for Windows
1. Audacity
The system for music development is not complete without an audio editor. Audacity is the best free music creation software available on the market. Audacity is open-source and extensive and provides a wide range of tools and effects for performing all audio editing and recording activities. It is created by a community of volunteers and provides regular notifications almost every month. It’s lightweight, safe, and intuitive enough to be used by novice music makers.
Pros
- It is open-source
- It can load VST plugins
Cons
- Only 32-bit plugins are allowed
- Limited features
2. Ardour
Ardour is a highly integrated program of music production that allows users to record and edit on Mac, Linux, and Windows operating systems. Ardour Music Production Software was created by integrating the efforts of the world’s skilled team, such as recording technicians, programmers, and musicians. Such experienced technicians make their concerted and thorough efforts to build the program. Ardour is one of the few applications in music production that respects honesty. The accessibility of this program allows app developers to concentrate on functionality that matters to consumers rather than to construct compelling apps for advertising purposes. This is a system that should be celebrated for its user-focused functionality.
Pros
- It has excellent user-friendliness
- It is available on Mac, Linux, and Windows
Cons
- It lacks a few integral features
- It is difficult to operate for people new to audio editing

3. Tracktion T7
The people at Tracktion seem to have reached a reasonably canny business model by launching older DAW versions for free and without anything removed.
The convention appears to make it possible to access the edition without charge of two iterations before the new one. You will not be provided with all new functionality, but you will receive an update every time the company updates its flagship DAW, which it does nearly every year.
The growing section is adjustable to match the workflow, and the bottom panel adjusts so that any parameters anywhere on the screen can be seen.
Pros
- It features an unlimited number of audio and MIDI tracks
- It is able to host multiple plugin formats
Cons
- It doesn’t provide all the features at once
- It does not support many plugins
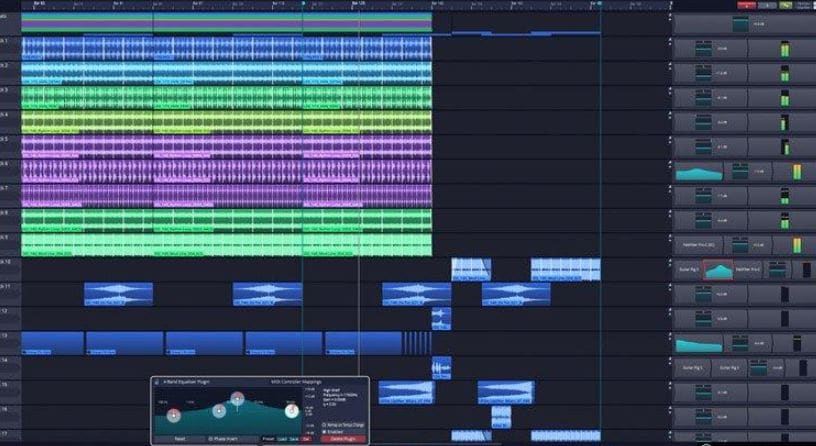
4. LMMS
LMMS is a fully free music production software for windows for music development. It is an open-source and also a project platform for the community. LMMS is a cross-platform device app. It makes it easier to manufacture beats, particularly when many music production professionals have to manufacture quality music with their computers.
Thanks to the powerful sample, beat and melody design, mixing and synthetic sound processes, and many other features, the LMMS music production software provides high-quality audio output. The product also features playback tools, plugins, and samples to produce powerful, high-quality sound.
Pros
- It is compatible with Linux, Windows, and Mac
- Hydrogen project files and MIDI can be imported easily for editing
Cons
- It eats a lot of memory and requires a high-end device to support it
- Some users complained that understanding its working is difficult

5. Cakewalk
This is an exciting app for music production to purchase. It is a fantastic tech to invest in music production. Cakewalk Sonar Artist Software is one of Cakewalk Sonar Artist ‘s great productions. Cakewalk is known for an excellent GUI, an excellent mixing console, an excellent commercial radio system, and limitless MIDI tracks.
A good device to use as part of your instruments for the development of music is the Cakewalk Sonar Artist Music Production program. It stands out as a program packed with excellent features amongst its counterparts. And the app is unmatched in the area of apps.
Pros
- You can share music compilation directly to social media
- You can easily add effects to your tracks
Cons
- It is priced, very high
- One window interface makes it hectic

6. Music Maker by Magix
This app is a special program for sound engineers, skilled musicians, and accomplished music producers, developed by US Magix Entertainment. It offers an excellent forum for creative music development in music production professionals.
In reality, the software for music production is excellent software for the Music Maker by Magix. In the field of music post-production and music mastering, mixing and arrangement, recording, and more, the software achieved remarkable breakthroughs. Thanks to the successful combination of a technical device and highly flexible workflow, the Music Maker by Magix has achieved this groundbreaking success.
With creative algorithm and superb plugin effects, the Music Maker by Magix program enables music manufacturers to develop their ideas in line with the highest quality in this industry.
Pros
- It is great for EDM producers
Cons
- It is not suitable for newbies
- The GUI feels a bit cluttered
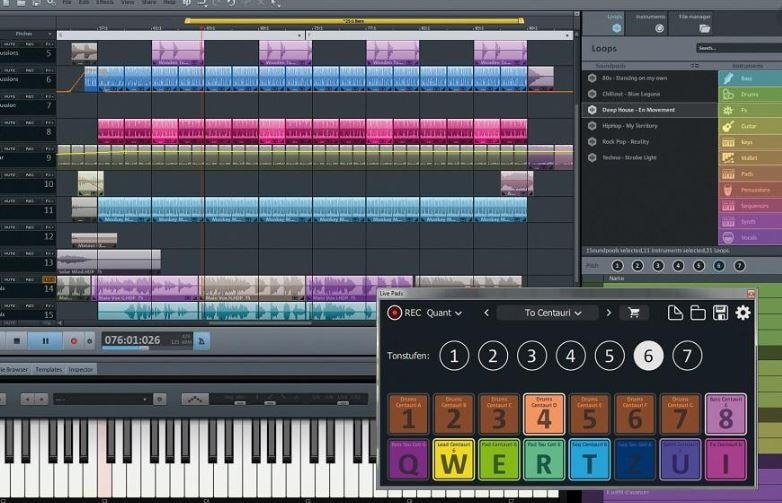
Part 2: Free Music Production Software for Mac
7. Garageband
This is a music development studio app that is designed to function on Mac. It is a great free music production software for Mac. This software has a full sound collection, which includes virtual instruments, voice, and guitar preset.
GarageBand is a well-known app for music development and is an excellent tool for music beginners. Many people have chosen GarageBand because it does not match the ease and ease of use for recording purposes in particular.
The user-friendly interface makes you easy to create music with a more unobstructed view of what you’re recording. Apps from GarageBand captured the attention of others because of their ease-to-use and user-friendliness.
Pros
- The software offers some nicely packaged preset for vocal and guitar recording
- Productive workflow
Cons
- It has limited plugins
- It is only supported for Mac platforms

8. Ableton Live
The Ableton Live 10 Suite is a dynamic and comprehensive program for the creation and performance of musical recordings.
An essential feature of this software is that it allows you to work on your time-based workflow without affecting the live session. This means that the software gives you a rare chance to get involved with the workflow without stopping live performance.
The Multitrack Recording Technology of Ableton Live10 Suite allows music producers to adjust the speed and pacing of any audio during the recording. To make these adjustments, you don’t have to pause the recording. This is one of the striking characteristics which makes this product a good option for all.
Pros
- Adjusting the speed and pace of audio is a delight
- Sophisticated MIDI/audio routing capabilities
Cons
- It has a traditional design
- Not enough updates to fix the buggy features

9. Boom 3D
Boom 3D for Mac & Windows is an award-winning pro sound improvement software designed to play your media content on any and all of your devices, phones, or streaming services with amazing 3D effects. No costly headphones or sound boosters will be needed to make your music feel like it! Designed in a new immersive 3D surround sound technology, Boom 3D redefines how people listen to music, watch films, or play games with some headphones on their devices. 3D sound provides the option to check the LFE (subwoofer), and the audio intensity of each Virtual 3D Surround audio system speaker.
Pros
- It comes with loads of content
- Audio quality can be enhanced
Cons
- The design is not suitable for everybody
- It does not have a Linux version
10. Mixxx
For beginners, Mixxx is just another great device. This is also one of the best free music production software downloads for your music. This software supports all Mac, Windows, and Linux platforms.
The application provides you with a DJ-mixing environment and supports all standard formats such as Mp3 and many other formats.
Pros
- It is a great app for beginners
- Supported by Mac, Windows, and Linux
Cons
- It doesn’t support many plugins
- GUI isn’t that great

Part 3: Free Music Production Software Online
11. Soundation
Soundation is a platform that provides free music production software online only capabilities. The free version and three paid versions are offered. You can use this to build your tracks unless you have the resources to do so if you need a web-based music maker and editor.
If you pay, even after you have made your music, you can always cancel. Remember first to save them to your hard drive. If you need paid characteristics, pay for the monthly plan again through PayPal, and you have to use it for a month.
Pros
- Great SSL-modelled mixer
- You can use its devices as a plugin
Cons
- It works only online

12. Audiotool
Audiotool is a popular app for music production hosted online and can be used without installation from inside your browser. It uses a cloud-based network to store all your music and files wherever you are. It is also confirmed that you will share music and tracks directly with YouTube, SoundCloud, and Facebook on its own publishing site. They have premium releases from Loopmasters and some fantastic online VSTs, for example, Heisenberg, Machiniste, Bassline, and Beatbox 8 & 9.
Pros
- No installation needed
- You can directly share it to your social media
Cons
- It works only online
- No upgrades

13. Soundtrap
Soundtrap is not only an online music studio but a training site for students and instructors. The STEAM Curriculum is an online learning resource that helps students to follow music and podcasts, incorporated into the Web app. As we mentioned earlier, in addition to the online Web App, you can also use it on different devices, share it with other users, and work in innovative projects for your music.
The interface is simple, easy to use, and easy to understand. It is simply an instrument for innovation; you don’t have to learn how to apply VST or any other technical elements to music creation. You can also record your MIDI instruments directly from your machine or device’s mic.
Pros
- It provides a great platform for teachers to teach their students
- It is very easy to use
Cons
- It only has a limited number of plugins
- It cannot be used professionally

Conclusion
If you make music on a computer, the most important resource in your artistic arsenal is your DAW; in your home recording system, you ‘re probably going to have the MIDI keyboard, audio interface, studio monitor speakers, and maybe a microphone or two. But your program is at the core of it all. Not everyone can afford expensive DAWs, but one must not worry as free music production software are present to aid us.
It is important to have a DAW with which you are pleased and, perhaps more importantly, a DAW, which allows you to turn your ideas into music as quickly and painlessly as possible. So make sure you choose the best one for you according to your needs. Hopefully, this guide will aid you!

Benjamin Arango
Benjamin Arango is a writer and a lover of all things video.
Follow @Benjamin Arango
Benjamin Arango
Mar 27, 2024• Proven solutions
13 Free Music Production Software for Windows/Mac/Online
Technology advances have spread through all fields of human activity, including music recording and development. The invention of music development tools has made it simpler for people engaged in the creation of music in one form or another.
Numerous applications for music development are on the market, and some are meant for musicians, and others are for educators and teachers. There is also a need to direct prospective customers to the right free music production software.
A comprehensive analysis of some of the best music development tools has been conducted to help you make the correct decision while you’re ready to purchase the app. This comprehensive Music Production Software Guide will provide solutions to many of your unanswered questions relating to the purchase of music production software.
- Part 1: Free Music Production Software for Windows
- Part 2: Free Music Production Software for Mac
- Part 3: Free Music Production Software Online
Part 1: Free Music Production Software for Windows
1. Audacity
The system for music development is not complete without an audio editor. Audacity is the best free music creation software available on the market. Audacity is open-source and extensive and provides a wide range of tools and effects for performing all audio editing and recording activities. It is created by a community of volunteers and provides regular notifications almost every month. It’s lightweight, safe, and intuitive enough to be used by novice music makers.
Pros
- It is open-source
- It can load VST plugins
Cons
- Only 32-bit plugins are allowed
- Limited features
2. Ardour
Ardour is a highly integrated program of music production that allows users to record and edit on Mac, Linux, and Windows operating systems. Ardour Music Production Software was created by integrating the efforts of the world’s skilled team, such as recording technicians, programmers, and musicians. Such experienced technicians make their concerted and thorough efforts to build the program. Ardour is one of the few applications in music production that respects honesty. The accessibility of this program allows app developers to concentrate on functionality that matters to consumers rather than to construct compelling apps for advertising purposes. This is a system that should be celebrated for its user-focused functionality.
Pros
- It has excellent user-friendliness
- It is available on Mac, Linux, and Windows
Cons
- It lacks a few integral features
- It is difficult to operate for people new to audio editing
3. Tracktion T7
The people at Tracktion seem to have reached a reasonably canny business model by launching older DAW versions for free and without anything removed.
The convention appears to make it possible to access the edition without charge of two iterations before the new one. You will not be provided with all new functionality, but you will receive an update every time the company updates its flagship DAW, which it does nearly every year.
The growing section is adjustable to match the workflow, and the bottom panel adjusts so that any parameters anywhere on the screen can be seen.
Pros
- It features an unlimited number of audio and MIDI tracks
- It is able to host multiple plugin formats
Cons
- It doesn’t provide all the features at once
- It does not support many plugins
4. LMMS
LMMS is a fully free music production software for windows for music development. It is an open-source and also a project platform for the community. LMMS is a cross-platform device app. It makes it easier to manufacture beats, particularly when many music production professionals have to manufacture quality music with their computers.
Thanks to the powerful sample, beat and melody design, mixing and synthetic sound processes, and many other features, the LMMS music production software provides high-quality audio output. The product also features playback tools, plugins, and samples to produce powerful, high-quality sound.
Pros
- It is compatible with Linux, Windows, and Mac
- Hydrogen project files and MIDI can be imported easily for editing
Cons
- It eats a lot of memory and requires a high-end device to support it
- Some users complained that understanding its working is difficult
5. Cakewalk
This is an exciting app for music production to purchase. It is a fantastic tech to invest in music production. Cakewalk Sonar Artist Software is one of Cakewalk Sonar Artist ‘s great productions. Cakewalk is known for an excellent GUI, an excellent mixing console, an excellent commercial radio system, and limitless MIDI tracks.
A good device to use as part of your instruments for the development of music is the Cakewalk Sonar Artist Music Production program. It stands out as a program packed with excellent features amongst its counterparts. And the app is unmatched in the area of apps.
Pros
- You can share music compilation directly to social media
- You can easily add effects to your tracks
Cons
- It is priced, very high
- One window interface makes it hectic
6. Music Maker by Magix
This app is a special program for sound engineers, skilled musicians, and accomplished music producers, developed by US Magix Entertainment. It offers an excellent forum for creative music development in music production professionals.
In reality, the software for music production is excellent software for the Music Maker by Magix. In the field of music post-production and music mastering, mixing and arrangement, recording, and more, the software achieved remarkable breakthroughs. Thanks to the successful combination of a technical device and highly flexible workflow, the Music Maker by Magix has achieved this groundbreaking success.
With creative algorithm and superb plugin effects, the Music Maker by Magix program enables music manufacturers to develop their ideas in line with the highest quality in this industry.
Pros
- It is great for EDM producers
Cons
- It is not suitable for newbies
- The GUI feels a bit cluttered
Part 2: Free Music Production Software for Mac
7. Garageband
This is a music development studio app that is designed to function on Mac. It is a great free music production software for Mac. This software has a full sound collection, which includes virtual instruments, voice, and guitar preset.
GarageBand is a well-known app for music development and is an excellent tool for music beginners. Many people have chosen GarageBand because it does not match the ease and ease of use for recording purposes in particular.
The user-friendly interface makes you easy to create music with a more unobstructed view of what you’re recording. Apps from GarageBand captured the attention of others because of their ease-to-use and user-friendliness.
Pros
- The software offers some nicely packaged preset for vocal and guitar recording
- Productive workflow
Cons
- It has limited plugins
- It is only supported for Mac platforms
8. Ableton Live
The Ableton Live 10 Suite is a dynamic and comprehensive program for the creation and performance of musical recordings.
An essential feature of this software is that it allows you to work on your time-based workflow without affecting the live session. This means that the software gives you a rare chance to get involved with the workflow without stopping live performance.
The Multitrack Recording Technology of Ableton Live10 Suite allows music producers to adjust the speed and pacing of any audio during the recording. To make these adjustments, you don’t have to pause the recording. This is one of the striking characteristics which makes this product a good option for all.
Pros
- Adjusting the speed and pace of audio is a delight
- Sophisticated MIDI/audio routing capabilities
Cons
- It has a traditional design
- Not enough updates to fix the buggy features
9. Boom 3D
Boom 3D for Mac & Windows is an award-winning pro sound improvement software designed to play your media content on any and all of your devices, phones, or streaming services with amazing 3D effects. No costly headphones or sound boosters will be needed to make your music feel like it! Designed in a new immersive 3D surround sound technology, Boom 3D redefines how people listen to music, watch films, or play games with some headphones on their devices. 3D sound provides the option to check the LFE (subwoofer), and the audio intensity of each Virtual 3D Surround audio system speaker.
Pros
- It comes with loads of content
- Audio quality can be enhanced
Cons
- The design is not suitable for everybody
- It does not have a Linux version
10. Mixxx
For beginners, Mixxx is just another great device. This is also one of the best free music production software downloads for your music. This software supports all Mac, Windows, and Linux platforms.
The application provides you with a DJ-mixing environment and supports all standard formats such as Mp3 and many other formats.
Pros
- It is a great app for beginners
- Supported by Mac, Windows, and Linux
Cons
- It doesn’t support many plugins
- GUI isn’t that great
Part 3: Free Music Production Software Online
11. Soundation
Soundation is a platform that provides free music production software online only capabilities. The free version and three paid versions are offered. You can use this to build your tracks unless you have the resources to do so if you need a web-based music maker and editor.
If you pay, even after you have made your music, you can always cancel. Remember first to save them to your hard drive. If you need paid characteristics, pay for the monthly plan again through PayPal, and you have to use it for a month.
Pros
- Great SSL-modelled mixer
- You can use its devices as a plugin
Cons
- It works only online
12. Audiotool
Audiotool is a popular app for music production hosted online and can be used without installation from inside your browser. It uses a cloud-based network to store all your music and files wherever you are. It is also confirmed that you will share music and tracks directly with YouTube, SoundCloud, and Facebook on its own publishing site. They have premium releases from Loopmasters and some fantastic online VSTs, for example, Heisenberg, Machiniste, Bassline, and Beatbox 8 & 9.
Pros
- No installation needed
- You can directly share it to your social media
Cons
- It works only online
- No upgrades
13. Soundtrap
Soundtrap is not only an online music studio but a training site for students and instructors. The STEAM Curriculum is an online learning resource that helps students to follow music and podcasts, incorporated into the Web app. As we mentioned earlier, in addition to the online Web App, you can also use it on different devices, share it with other users, and work in innovative projects for your music.
The interface is simple, easy to use, and easy to understand. It is simply an instrument for innovation; you don’t have to learn how to apply VST or any other technical elements to music creation. You can also record your MIDI instruments directly from your machine or device’s mic.
Pros
- It provides a great platform for teachers to teach their students
- It is very easy to use
Cons
- It only has a limited number of plugins
- It cannot be used professionally
Conclusion
If you make music on a computer, the most important resource in your artistic arsenal is your DAW; in your home recording system, you ‘re probably going to have the MIDI keyboard, audio interface, studio monitor speakers, and maybe a microphone or two. But your program is at the core of it all. Not everyone can afford expensive DAWs, but one must not worry as free music production software are present to aid us.
It is important to have a DAW with which you are pleased and, perhaps more importantly, a DAW, which allows you to turn your ideas into music as quickly and painlessly as possible. So make sure you choose the best one for you according to your needs. Hopefully, this guide will aid you!
Benjamin Arango
Benjamin Arango is a writer and a lover of all things video.
Follow @Benjamin Arango
Also read:
- New Epicurean Echoes Unearthing the Auditory Art of Amusement
- Updated Streamlining the Transformation Turning Audacity Sessions Into MP3 Audio
- Updated Essential Techniques for Silencing Background Sounds Off- and Online Solutions for 2024
- 2024 Approved Sound Silence Strategies How to Get Cleaner Videos without Lossy Audio Removal
- Updated In 2024, The Latest Evolution Whats Changed in Nero WaveEdit for 2 Writers and Editors
- 2024 Approved Beginners Journey Into Podcasting Making Sounds Count Using Audacity
- Updated In 2024, Mastering Volume Transitions Keyframe Techniques in Filmora (Mac)
- Updated Essential Audio Frequency Templates The Top 8 Selection for Video Editors
- In 2024, 5 Innovative Voice Altering Apps for Zoom Sessions That Add Humor to Discussions
- New 2024 Approved Unveiling Top Audio Capture Alternatives Your Ultimate Resource Guide to Free Voice Recorders for the Upcoming Year
- 10 Best Free and Paid Podcast Editing Software Products for 2024
- Updated In 2024, Unlocking the Power of Audacity Capturing Computer Sound Without Spending a Dime
- New In 2024, Unveiling the Premier 11 Techniques for Changing Ones Tone or Pitch
- Updated In 2024, Optimal Audio Tuning Parameters for Gadgets
- New Invaluable Tips Harness the Power of Voxal Audio Alteration for Enhanced Discord Engagement
- New 2024 Approved Easy Steps to Mastering Voice Transformation Apps for iPhones
- Updated In 2024, 5 Best Zoom Sound Enhancers Personalize Your Speech for a Chuckle-Worthy Experience!
- 2024 Approved Acclaimed Internet-Based Audible Normalization Applications
- Explore No-Cost Music Libraries for Cutting-Edge Edits for 2024
- In 2024, 5 Best Auto Music Mixer for Mac
- New Essential Techniques for No-Cost Audio Capture via Audacity for 2024
- Updated In 2024, Duties Assigned to Film Set Personnel
- Cost-Free Tips for Incorporating Sound Into Online Video Content for 2024
- Updated Explore the Best-Free Soundtrack Libraries for Your Videos and Films
- 2024 Approved S Leading Text Motion Capture Tools
- Updated In 2024, MacVideo Editor
- In 2024, 15 Best Strongest Pokémon To Use in Pokémon GO PvP Leagues For Samsung Galaxy M14 4G | Dr.fone
- New The Ultimate List of Video Dubbing Software for PC (Free Download)
- In 2024, Best Ways on How to Unlock/Bypass/Swipe/Remove Oppo Find N3 Flip Fingerprint Lock
- Updated 2024 Approved VHS on the Go Best Mobile Apps for Retro Video Playback
- Updated In 2024, Get Started with 3D Animation Best Free and Paid Software Options
- Updated 2024 Approved 10 Best Free Security Camera Software
- Hassle-Free Ways to Remove FRP Lock on Vivo S17twith/without a PC
- Guide to Mirror Your Nokia G310 to Other Android devices | Dr.fone
- New Convert Video to MP3 Like a Pro Tips for Maintaining Audio Quality for 2024
- How to Change GPS Location on Realme Narzo 60 Pro 5G Easily & Safely | Dr.fone
- How to Simulate GPS Movement in AR games On Realme GT 3? | Dr.fone
- How To Transfer WhatsApp From iPhone 14 Pro to other iPhone 11 Pro devices? | Dr.fone
- In 2024, Things You Should Know When Unlocking Total Wireless Of iPhone 8
- In 2024, Does Airplane Mode Turn off GPS Location On Vivo Y78t? | Dr.fone
- How to Mirror Your Oppo Reno 10 Pro+ 5G Screen to PC with Chromecast | Dr.fone
- In 2024, The Ultimate Guide to Get the Rare Candy on Pokemon Go Fire Red On Samsung Galaxy F14 5G | Dr.fone
- A Detailed Guide on Faking Your Location in Mozilla Firefox On Samsung Galaxy S23 Ultra | Dr.fone
- In 2024, How can I get more stardust in pokemon go On Tecno Spark 20 Pro+? | Dr.fone
- Best Infinix Hot 40 Pattern Lock Removal Tools Remove Android Pattern Lock Without Losing Data
- Updated In 2024, Best Free Subtitle Editors for Video Creators
- Can I use iTools gpx file to catch the rare Pokemon On Samsung Galaxy A24 | Dr.fone
- Updated The Ultimate List of Reaction Video Makers to Watch for 2024
- Title: In 2024, Top 10 Premium Platforms for High-Definition Video Wallpaper Acquisition
- Author: David
- Created at : 2024-05-05 09:44:35
- Updated at : 2024-05-06 09:44:35
- Link: https://sound-tweaking.techidaily.com/in-2024-top-10-premium-platforms-for-high-definition-video-wallpaper-acquisition/
- License: This work is licensed under CC BY-NC-SA 4.0.
