

In 2024, The Newbies Roadmap to Successful Podcast Editing
The Newbie’s Roadmap to Successful Podcast Editing
Podcast Editing 101: How to Edit a Podcast

Benjamin Arango
Mar 27, 2024• Proven solutions
We are glad that you took the first steps to create your podcast episodes. We’d also like to know how far you have reached. Well, most probably, you are at the podcast editing stage as per your search query. So, you are in the right place if this is your concern. We have structured this entire post on how to edit podcasts, especially for the newbies. You can continue reading the article if you have already created a podcast episode and level up the steps with better podcast editing. Remember that editing can either make or break the game! So, don’t take any chances in editing a podcast right from the beginners’ level.

Without further ado, let’s get started with the following editing basics a podcaster should keep in mind.
- Part 1: Editing Basics that Beginners’ Should Keep in Mind
- Part 2: Which DAW should you use?
- Part 3: Advanced Editing Tips to Spice Up Your Podcasts
- Part 4: Edit Podcast with Video Editor
Editing Basics that Beginners’ Should Keep in Mind
Well, it is all dependent upon the approach you follow regarding the podcast audio editing. There are various podcast editing services, and styles worth consider. The list below is the critical podcast editing basics a beginner should follow before publishing the podcast. Overall, it would be awesome if you learn new skills instead of outsourcing the whole stuff. That’s fantastic as well!
Firstly, import the audio.
The editing process starts with importing the audio track. The audio material in the sequence must be at the primary place. Always place the audio track in the first position even if you are importing multiple audio tracks. You can leave the track underneath for editing purposes. After adding this first audio file, you can add sound effects, music, and other secondary audio files for further editing.
Listen again
Don’t proceed before re-listening your added audio! This manner will let you think for different sections, and you can further decide what to keep and what to preserve. Remove any computer noise, background hiss, and unwanted audio areas. Here, you can help with different noise reduction tools available or go for the reliable podcast editing software, specifically the audio ducking feature for noise removal.
Make it consistent throughout
The next step is to make the volume consistent at every stage of the podcast. After removing all the unwanted noises, take the necessary action to normalize the audio levels and specifically select -2.0 for peak amplitude. Amplify the tranquil areas.
Sound Designing and Mixing
Then, you are required to do sound designing and mixing for the podcast. Take it lightly and only especially when you are a beginner. Add the sound effects as per the message of the podcast. Always keep in mind to use significant sound effects that effectively evoke the emotion and ultimately save the audience engaged. The mixing part comes when you compress, equalize, and process the audio to adjust accordingly in the different sections.
Preview and Post
Once your podcast is edited and ready, preview it ensure everything is in place, especially if it is your first time. It would be best to post a clear, concise, and to the point audio/video. Finally, post your podcast, either for free or using one of the software available online on your desired blog/online media.
Which DAW should you use?
You can’t miss using Digital Audio Workstation (DAW) for podcast editing at any cost. It is an audio editing program with all the facilities right from recording the podcast to editing it. To start with, you must consider using among the following three DAWs.
Audacity

Audacity is the most common program providing free podcast editing services. The foremost reason for its popularity is the free and open-source availability. Secondly, the primary user interface makes it the best option for beginners. You can right away start recording with Audacity.
Alitu

Alitu is another recommended tool to make your podcast episodes easily. However, you have to pay to get the podcast editing services of Alitu. It can incredibly do the podcast editing for raw audios and provide you with different options of adding music, transitions, and segments, etc. It also contains the facility to publish your podcast.
Reaper

Reaper is another best podcast editing DAW with the availability of 60 days free trial. Despite a bit high learning curve in Reaper, you will ultimately feel like an artist working upon it. Moreover, it comes with lots of new updates and features for better outcomes. It is compatible with AU, VST, and JS plugins as well.
Advanced Editing Tips to Spice Up Your Podcasts
Don’t miss out on this portion if you want to upgrade your podcasting skills like professionals! Learn some advanced formulas of podcast audio editing as follows.
Trim the Ends
It’s better if you trim the ends before editing the podcast. And, make sure there are no blanks at the beginning or end of the podcast. You can also add fade-in or fade-out effects to avoid unprofessional vibes.
Work on your planning and presentation skills
Focus on having a time-saving podcast editing by working upon your planning and presentation skills. Don’t be that guy who tries to edit every verbal crutch. Instead, focus on being confident while presenting the podcast so that you will need to have significantly fewer editing issues or may not need editing at all. Think upon changing the approach of podcast recording as well.
Provide margin and look for transitions
Offer a little margin and say that thing smoothly again if you have misread or misspell the statement while recording the podcast. Thus, you must not squeeze the information that doesn’t provide a better room for podcast editing. The provided margin will make it a breeze to cut out the messy audio portion.
Then, you have to look for transitions precisely when you are recording in multiple tracks, co-hosting, or taking a long space while recording your podcast. These transitions could be like pointless babbles, awkward silences, cross talks, etc., that need careful watch at both the beginning and the end. Most of the editing will improve by considering and editing these kinds of transitions.
Eliminate awkward silences
Sometimes a podcast is full of awkward silences that look crap at all. Well, you don’t have to remove every silence taken at the end of a talk or something like that. Eliminate only long, awkward silences or reduce their duration. Different plugins are available within the DAWs to remove these background noises and long duration silences.
Adjust the volume of the podcast
It may be a bit tricky to edit the podcast when one person or interviewee is a lot quieter. First of all, check if their microphone signals and settings are strong enough to provide you with audio. Then, you can increase the gain of their speaker before podcast editing. Normalize the voice or add some compression to increase the loudness ultimately.
Save podcast to the right format
Finally, you must be careful while exporting your podcast to the correct format to ensure the best quality. Go to the export settings and find MP3 extension and 192kbps bitrate.
Edit Podcast with Video Editor
Are you recording a video podcast? If yes, you must make very little room for editing while considering the best recording equipment and settings. Secondly, you can look for a high-tech video editor that can do the task of both video editing and podcast editing. The Wondershare Filmora X is one such famous name in the world of video editing. But, the point is to check its features for podcast editing. Are they worth it or not? That is what we’d like to tell you by highlighting the podcast editing services of Filmora.


Video Podcast Editing Services of Wondershare Filmora X
- The very thing needed while podcast editing is the shortcut key commands to save time. The Wondershare Filmora X consists of several such hotkey commands for quick editing.
- You can use Audio Ducking to eliminate background noises and unwanted awkward silences recorded while making the podcast.
- Inject beautiful animations in your video podcast using the keyframing tool of Wondershare Filmora X.
- Use 1000+ Video Effects, including filters, transitions, motion elements, titles, etc., exclusively provided on Filmora.
- Use the Split Screen and showcase multiple screens to make an eye-catchy video podcast appearance.
Conclusion
Now, we are going to end our discussion on podcast editing basics as well as advanced concepts. Try following every tip and suggestion, especially when you are a beginner. Make up your mind to create eye-catchy content that well engages the audience while also providing useful information. Using the best video editor with stunning effects, as mentioned above, won’t make your content look boring at all.
Benjamin Arango
Benjamin Arango is a writer and a lover of all things video.
Follow @Benjamin Arango
Benjamin Arango
Mar 27, 2024• Proven solutions
We are glad that you took the first steps to create your podcast episodes. We’d also like to know how far you have reached. Well, most probably, you are at the podcast editing stage as per your search query. So, you are in the right place if this is your concern. We have structured this entire post on how to edit podcasts, especially for the newbies. You can continue reading the article if you have already created a podcast episode and level up the steps with better podcast editing. Remember that editing can either make or break the game! So, don’t take any chances in editing a podcast right from the beginners’ level.
Without further ado, let’s get started with the following editing basics a podcaster should keep in mind.
- Part 1: Editing Basics that Beginners’ Should Keep in Mind
- Part 2: Which DAW should you use?
- Part 3: Advanced Editing Tips to Spice Up Your Podcasts
- Part 4: Edit Podcast with Video Editor
Editing Basics that Beginners’ Should Keep in Mind
Well, it is all dependent upon the approach you follow regarding the podcast audio editing. There are various podcast editing services, and styles worth consider. The list below is the critical podcast editing basics a beginner should follow before publishing the podcast. Overall, it would be awesome if you learn new skills instead of outsourcing the whole stuff. That’s fantastic as well!
Firstly, import the audio.
The editing process starts with importing the audio track. The audio material in the sequence must be at the primary place. Always place the audio track in the first position even if you are importing multiple audio tracks. You can leave the track underneath for editing purposes. After adding this first audio file, you can add sound effects, music, and other secondary audio files for further editing.
Listen again
Don’t proceed before re-listening your added audio! This manner will let you think for different sections, and you can further decide what to keep and what to preserve. Remove any computer noise, background hiss, and unwanted audio areas. Here, you can help with different noise reduction tools available or go for the reliable podcast editing software, specifically the audio ducking feature for noise removal.
Make it consistent throughout
The next step is to make the volume consistent at every stage of the podcast. After removing all the unwanted noises, take the necessary action to normalize the audio levels and specifically select -2.0 for peak amplitude. Amplify the tranquil areas.
Sound Designing and Mixing
Then, you are required to do sound designing and mixing for the podcast. Take it lightly and only especially when you are a beginner. Add the sound effects as per the message of the podcast. Always keep in mind to use significant sound effects that effectively evoke the emotion and ultimately save the audience engaged. The mixing part comes when you compress, equalize, and process the audio to adjust accordingly in the different sections.
Preview and Post
Once your podcast is edited and ready, preview it ensure everything is in place, especially if it is your first time. It would be best to post a clear, concise, and to the point audio/video. Finally, post your podcast, either for free or using one of the software available online on your desired blog/online media.
Which DAW should you use?
You can’t miss using Digital Audio Workstation (DAW) for podcast editing at any cost. It is an audio editing program with all the facilities right from recording the podcast to editing it. To start with, you must consider using among the following three DAWs.
Audacity
Audacity is the most common program providing free podcast editing services. The foremost reason for its popularity is the free and open-source availability. Secondly, the primary user interface makes it the best option for beginners. You can right away start recording with Audacity.
Alitu
Alitu is another recommended tool to make your podcast episodes easily. However, you have to pay to get the podcast editing services of Alitu. It can incredibly do the podcast editing for raw audios and provide you with different options of adding music, transitions, and segments, etc. It also contains the facility to publish your podcast.
Reaper
Reaper is another best podcast editing DAW with the availability of 60 days free trial. Despite a bit high learning curve in Reaper, you will ultimately feel like an artist working upon it. Moreover, it comes with lots of new updates and features for better outcomes. It is compatible with AU, VST, and JS plugins as well.
Advanced Editing Tips to Spice Up Your Podcasts
Don’t miss out on this portion if you want to upgrade your podcasting skills like professionals! Learn some advanced formulas of podcast audio editing as follows.
Trim the Ends
It’s better if you trim the ends before editing the podcast. And, make sure there are no blanks at the beginning or end of the podcast. You can also add fade-in or fade-out effects to avoid unprofessional vibes.
Work on your planning and presentation skills
Focus on having a time-saving podcast editing by working upon your planning and presentation skills. Don’t be that guy who tries to edit every verbal crutch. Instead, focus on being confident while presenting the podcast so that you will need to have significantly fewer editing issues or may not need editing at all. Think upon changing the approach of podcast recording as well.
Provide margin and look for transitions
Offer a little margin and say that thing smoothly again if you have misread or misspell the statement while recording the podcast. Thus, you must not squeeze the information that doesn’t provide a better room for podcast editing. The provided margin will make it a breeze to cut out the messy audio portion.
Then, you have to look for transitions precisely when you are recording in multiple tracks, co-hosting, or taking a long space while recording your podcast. These transitions could be like pointless babbles, awkward silences, cross talks, etc., that need careful watch at both the beginning and the end. Most of the editing will improve by considering and editing these kinds of transitions.
Eliminate awkward silences
Sometimes a podcast is full of awkward silences that look crap at all. Well, you don’t have to remove every silence taken at the end of a talk or something like that. Eliminate only long, awkward silences or reduce their duration. Different plugins are available within the DAWs to remove these background noises and long duration silences.
Adjust the volume of the podcast
It may be a bit tricky to edit the podcast when one person or interviewee is a lot quieter. First of all, check if their microphone signals and settings are strong enough to provide you with audio. Then, you can increase the gain of their speaker before podcast editing. Normalize the voice or add some compression to increase the loudness ultimately.
Save podcast to the right format
Finally, you must be careful while exporting your podcast to the correct format to ensure the best quality. Go to the export settings and find MP3 extension and 192kbps bitrate.
Edit Podcast with Video Editor
Are you recording a video podcast? If yes, you must make very little room for editing while considering the best recording equipment and settings. Secondly, you can look for a high-tech video editor that can do the task of both video editing and podcast editing. The Wondershare Filmora X is one such famous name in the world of video editing. But, the point is to check its features for podcast editing. Are they worth it or not? That is what we’d like to tell you by highlighting the podcast editing services of Filmora.
Video Podcast Editing Services of Wondershare Filmora X
- The very thing needed while podcast editing is the shortcut key commands to save time. The Wondershare Filmora X consists of several such hotkey commands for quick editing.
- You can use Audio Ducking to eliminate background noises and unwanted awkward silences recorded while making the podcast.
- Inject beautiful animations in your video podcast using the keyframing tool of Wondershare Filmora X.
- Use 1000+ Video Effects, including filters, transitions, motion elements, titles, etc., exclusively provided on Filmora.
- Use the Split Screen and showcase multiple screens to make an eye-catchy video podcast appearance.
Conclusion
Now, we are going to end our discussion on podcast editing basics as well as advanced concepts. Try following every tip and suggestion, especially when you are a beginner. Make up your mind to create eye-catchy content that well engages the audience while also providing useful information. Using the best video editor with stunning effects, as mentioned above, won’t make your content look boring at all.
Benjamin Arango
Benjamin Arango is a writer and a lover of all things video.
Follow @Benjamin Arango
The Filmmaker’s Voice: How to Raise Your Pitch for Impact Using Filmora
How to Make Your Voice Higher With Filmora

Liza Brown
Mar 27, 2024• Proven solutions
A video is nothing without a clear and smooth voice. It doesn’t matter if you have a high definition video quality but your video doesn’t have a clear and loud voice, it will be a failure. If you are recording a video and you don’t have the equipment to record your voice properly, low voice can become a big problem in your recorded videos. But some steps can help you and show you the ways of how to make your voice higher. Increasing one’s voice is not an as easy task as it may seem. Just like other skills, it is also a form of skill that requires a lot of practice and experience to master. There are o many factors to consider while recording a video with a high voice or pitch. In this article, we are going to describe how to make your voice higher with two steps. In the first step, we will talk about the factors that you must consider while recording your video. And in the 2nd step, we will be discussing the way of how to make your voice higher using Filmora. Both of these steps require patience and practice.
Step 1: How to make your voice higher while recording
Step 2: How to make your voice higher with Filmora
So let’s start with the first step to making your voice higher while you are recording your video. If you can successfully make your voice higher during this process, it will not require any hard work to make it higher in the post-production process.

You might be interested in:
How to make your Voice Higher while Recording
There are so many ways and exercises that can help change the pitch of your voice and make it higher even if you don’t have high pitch voice. We are going to discuss 5 exercises that can help you achieve this task. But remember that these exercises will practice and patience in order to show the required results.
- Focus on Breathing
The higher voice you want the more air it will need. To higher your voice, you have to take deep breathes from your nose and release them while speaking. It will boost the pitch of your voice and make it higher than your usual voice. Singers use this technique while they want to hit a high pitch. It gives your body and lungs the power to generate a higher voice. Breathing plays a very vital role in making your voice higher. If you are not breathing correctly, you can’t keep the voice higher for a longer period of time. Just like all other skills, this exercise also needs a lot of practice to master. Start practicing this technique by reading a sentence, then move forward to a paragraph, and so on. Following this process will make you master the process of highering your voice using your own breaths. Then you can start using this technique in all of your videos very easily.
- Listen to Your Voice
Do you find it amusing to know that you haven’t ever heard your own voice if you haven’t listened to your own recorded audio or video? You will find your voice very different on the recording than in reality. Because in reality, it is difficult to focus on listening to your own voice while you speak. You will probably hate your own voice the first time you listen to it as a recording. To make your voice higher, it is important to listen and observe your voice very carefully and analyze where it goes down and where it goes up. It will help you improve your voice after every try. This practice will help you master the process of highering your voice using your own analyzes.
- Remove the Obstacles
Since now we know that the main way to make your voice higher is to provide your lungs power with the help of your own breathes. But what makes it decrease its intensity is the obstacles that come in the way of your voice. The first and main obstacle that your voice faces is your tongue. Everyone knows the importance of tongue in helping you speak and generate words. But it sometimes works as a hindrance to block the sounds our lungs make. Therefore, it is very important to keep your tongue in the right position while generating high pitched voice. Try to keep your tongue as low as possible and don’t let it touch the upper part of your mouth to avoid creating a blockage for your voice. In the beginning, it will feel like an impossible task, but as you move forward and practice it more often, you will notice the difference. This will enhance your voice a lot and take it to a level, where you had never imagined it would reach. If you are failing again and again, then don’t worry. This is not an easy task to accomplish, it requires patience and consistency to master.
- Use Nasal Voice
There are multiple ways of generating voice in a human body. Just like the mouth, sometimes the nose is also used to release voices. Those who use Nasal voices while they speak have a higher voice than those who don’t. The gateway used by the nose to release voice is very narrow, producing a thinner voice resulting in high pitched sound. It is also not a good practice to use this technique very often. Because it can make you irritated and annoying. Try to mix the nasal voice only 50% to the voice of your mouth to keep it safe, and sound normal.
- Focus on your Posture
If you know anything about signing or you know any singer, you will come to know that your posture plays a very vital role in generating the sound of your choice. The ideal posture for a higher voice and proper tone is to sit with your back straight, keep your tongue as low as possible, rest your mouth and look slightly upward to make your neck relax a bit. This can completely transform your voice and make it sound like a professional.
How to make your Voice Higher with Filmora
If you have already recorded a video and that video has a very pathetic voice quality, then there is also a hope to make your voice higher by using Filmora. The previous step will help you improve your voice quality to a great extent, but if you don’t want to re-record the video and improve the existing video, you can follow these steps to make sound better.
Method 1: Low Bass
Step 1: Open Filmora, and export the video to a higher voice.

Step 2: Drag and drop the video into the timeline to enable its editing options.

Step 3: Right Click on the video, and select Adjust Audio from the list to open the option.

Step 4: It will open the settings related to the sound of your video, you make any required changes from here, in order to higher its voice.

Step 5: From the equalizer drop-down menu, select the low base option. It will make your voice heavy and will make it more audible than its original voice.

Method 2: High-Pitched Voice
Step 1: Open Filmora and export the video to a higher voice.

Step 2: Drag and drop the video into the timeline to enable its editing options.

Step 3: Right Click on the video, and select Adjust Audio from the list to open the option.

Step 4: It will open the settings related to the sound of your video, you make any required changes from here, in order to higher its voice.

Step 5: From these options, go to the pitch, and increase by two to three points. Now play your video and check the results. It will make the voice of your video higher with a high pitch.

Method 3: Low-Pitched Voice
Step 1: Open Filmora, and export the video to a higher voice.

Step 2: Drag and drop the video into the timeline to enable its editing options.

Step 3: Right Click on the video, and select Adjust Audio from the list to open the option.

Step 4: It will open the settings related to the sound of your video, you make any required changes from here, in order to higher its voice.

Step 5: From settings, go to the pitch settings, and decrease it by two to three points. It will make your voice sound intense and make it a bit higher than its original voice. Play the video and notice the changes. You can change the pitch settings accordingly after checking its results and choose a setting that best suits your video.

Both of these steps can help you enhance the quality of your voice to a great extent. For better results, follow both steps, higher your voice while recording and higher your voice with Filmora. The first step will let you make your voice higher using your own mouth and lungs. The second step will help you improve it more and you can choose any one method from the three available methods that best suits your video and voice of the video and make your videos more engaging and interesting video. So, let’s transform your videos to make them more engaging and appealing to the viewers.
Liza Brown
Liza Brown is a writer and a lover of all things video.
Follow @Liza Brown
Liza Brown
Mar 27, 2024• Proven solutions
A video is nothing without a clear and smooth voice. It doesn’t matter if you have a high definition video quality but your video doesn’t have a clear and loud voice, it will be a failure. If you are recording a video and you don’t have the equipment to record your voice properly, low voice can become a big problem in your recorded videos. But some steps can help you and show you the ways of how to make your voice higher. Increasing one’s voice is not an as easy task as it may seem. Just like other skills, it is also a form of skill that requires a lot of practice and experience to master. There are o many factors to consider while recording a video with a high voice or pitch. In this article, we are going to describe how to make your voice higher with two steps. In the first step, we will talk about the factors that you must consider while recording your video. And in the 2nd step, we will be discussing the way of how to make your voice higher using Filmora. Both of these steps require patience and practice.
Step 1: How to make your voice higher while recording
Step 2: How to make your voice higher with Filmora
So let’s start with the first step to making your voice higher while you are recording your video. If you can successfully make your voice higher during this process, it will not require any hard work to make it higher in the post-production process.
You might be interested in:
How to make your Voice Higher while Recording
There are so many ways and exercises that can help change the pitch of your voice and make it higher even if you don’t have high pitch voice. We are going to discuss 5 exercises that can help you achieve this task. But remember that these exercises will practice and patience in order to show the required results.
- Focus on Breathing
The higher voice you want the more air it will need. To higher your voice, you have to take deep breathes from your nose and release them while speaking. It will boost the pitch of your voice and make it higher than your usual voice. Singers use this technique while they want to hit a high pitch. It gives your body and lungs the power to generate a higher voice. Breathing plays a very vital role in making your voice higher. If you are not breathing correctly, you can’t keep the voice higher for a longer period of time. Just like all other skills, this exercise also needs a lot of practice to master. Start practicing this technique by reading a sentence, then move forward to a paragraph, and so on. Following this process will make you master the process of highering your voice using your own breaths. Then you can start using this technique in all of your videos very easily.
- Listen to Your Voice
Do you find it amusing to know that you haven’t ever heard your own voice if you haven’t listened to your own recorded audio or video? You will find your voice very different on the recording than in reality. Because in reality, it is difficult to focus on listening to your own voice while you speak. You will probably hate your own voice the first time you listen to it as a recording. To make your voice higher, it is important to listen and observe your voice very carefully and analyze where it goes down and where it goes up. It will help you improve your voice after every try. This practice will help you master the process of highering your voice using your own analyzes.
- Remove the Obstacles
Since now we know that the main way to make your voice higher is to provide your lungs power with the help of your own breathes. But what makes it decrease its intensity is the obstacles that come in the way of your voice. The first and main obstacle that your voice faces is your tongue. Everyone knows the importance of tongue in helping you speak and generate words. But it sometimes works as a hindrance to block the sounds our lungs make. Therefore, it is very important to keep your tongue in the right position while generating high pitched voice. Try to keep your tongue as low as possible and don’t let it touch the upper part of your mouth to avoid creating a blockage for your voice. In the beginning, it will feel like an impossible task, but as you move forward and practice it more often, you will notice the difference. This will enhance your voice a lot and take it to a level, where you had never imagined it would reach. If you are failing again and again, then don’t worry. This is not an easy task to accomplish, it requires patience and consistency to master.
- Use Nasal Voice
There are multiple ways of generating voice in a human body. Just like the mouth, sometimes the nose is also used to release voices. Those who use Nasal voices while they speak have a higher voice than those who don’t. The gateway used by the nose to release voice is very narrow, producing a thinner voice resulting in high pitched sound. It is also not a good practice to use this technique very often. Because it can make you irritated and annoying. Try to mix the nasal voice only 50% to the voice of your mouth to keep it safe, and sound normal.
- Focus on your Posture
If you know anything about signing or you know any singer, you will come to know that your posture plays a very vital role in generating the sound of your choice. The ideal posture for a higher voice and proper tone is to sit with your back straight, keep your tongue as low as possible, rest your mouth and look slightly upward to make your neck relax a bit. This can completely transform your voice and make it sound like a professional.
How to make your Voice Higher with Filmora
If you have already recorded a video and that video has a very pathetic voice quality, then there is also a hope to make your voice higher by using Filmora. The previous step will help you improve your voice quality to a great extent, but if you don’t want to re-record the video and improve the existing video, you can follow these steps to make sound better.
Method 1: Low Bass
Step 1: Open Filmora, and export the video to a higher voice.
Step 2: Drag and drop the video into the timeline to enable its editing options.
Step 3: Right Click on the video, and select Adjust Audio from the list to open the option.
Step 4: It will open the settings related to the sound of your video, you make any required changes from here, in order to higher its voice.
Step 5: From the equalizer drop-down menu, select the low base option. It will make your voice heavy and will make it more audible than its original voice.
Method 2: High-Pitched Voice
Step 1: Open Filmora and export the video to a higher voice.
Step 2: Drag and drop the video into the timeline to enable its editing options.
Step 3: Right Click on the video, and select Adjust Audio from the list to open the option.
Step 4: It will open the settings related to the sound of your video, you make any required changes from here, in order to higher its voice.
Step 5: From these options, go to the pitch, and increase by two to three points. Now play your video and check the results. It will make the voice of your video higher with a high pitch.
Method 3: Low-Pitched Voice
Step 1: Open Filmora, and export the video to a higher voice.
Step 2: Drag and drop the video into the timeline to enable its editing options.
Step 3: Right Click on the video, and select Adjust Audio from the list to open the option.
Step 4: It will open the settings related to the sound of your video, you make any required changes from here, in order to higher its voice.
Step 5: From settings, go to the pitch settings, and decrease it by two to three points. It will make your voice sound intense and make it a bit higher than its original voice. Play the video and notice the changes. You can change the pitch settings accordingly after checking its results and choose a setting that best suits your video.
Both of these steps can help you enhance the quality of your voice to a great extent. For better results, follow both steps, higher your voice while recording and higher your voice with Filmora. The first step will let you make your voice higher using your own mouth and lungs. The second step will help you improve it more and you can choose any one method from the three available methods that best suits your video and voice of the video and make your videos more engaging and interesting video. So, let’s transform your videos to make them more engaging and appealing to the viewers.
Liza Brown
Liza Brown is a writer and a lover of all things video.
Follow @Liza Brown
Exhaustive Register of Podcast Discovery Systems
Submitting your podcast show on different platforms is essential to get the right audiences. As we all know, the more podcast directories you publish your show, the more listeners you get.
Yet, finding the ideal choices can take time and effort with many podcast directories available online. Worry less. We’ve compiled a list of the best podcast directories you can always count on to publish your podcast show anytime.
- YouTube
- Spotify
- Apple Podcasts
- Google Podcasts
- Pandora
- Audible
- NPR One
- Tune In
- Podcast Addict
- RadioPublic
- Overcast
- Pocket Casts
- CastBox
- Stitcher
- More choices to submit your podcast shows
- How to submit a show to podcast directories?
- Hot FAQs on Podcast Directories
Part 1. What are podcast directories?
A podcast directory is a listening app. It’s the place where podcasts and their listeners meet. Podcast listeners search for, subscribe to, and listen to your Podcast using their podcast directory of choice. Popular podcast directories include Apple Podcasts, Spotify, and Google Podcasts.
Part 2. 15 Top podcast directories to focus on in 2024
Thankfully, research conducted by EdisonResearch shows the weekly audience reach of top podcast directories. So this list will help us locate the best podcasting directories. And it can multiply your audience size and quickly reach a more extensive user base.
According to Edison Research, the top 15 Podcast Networks are:
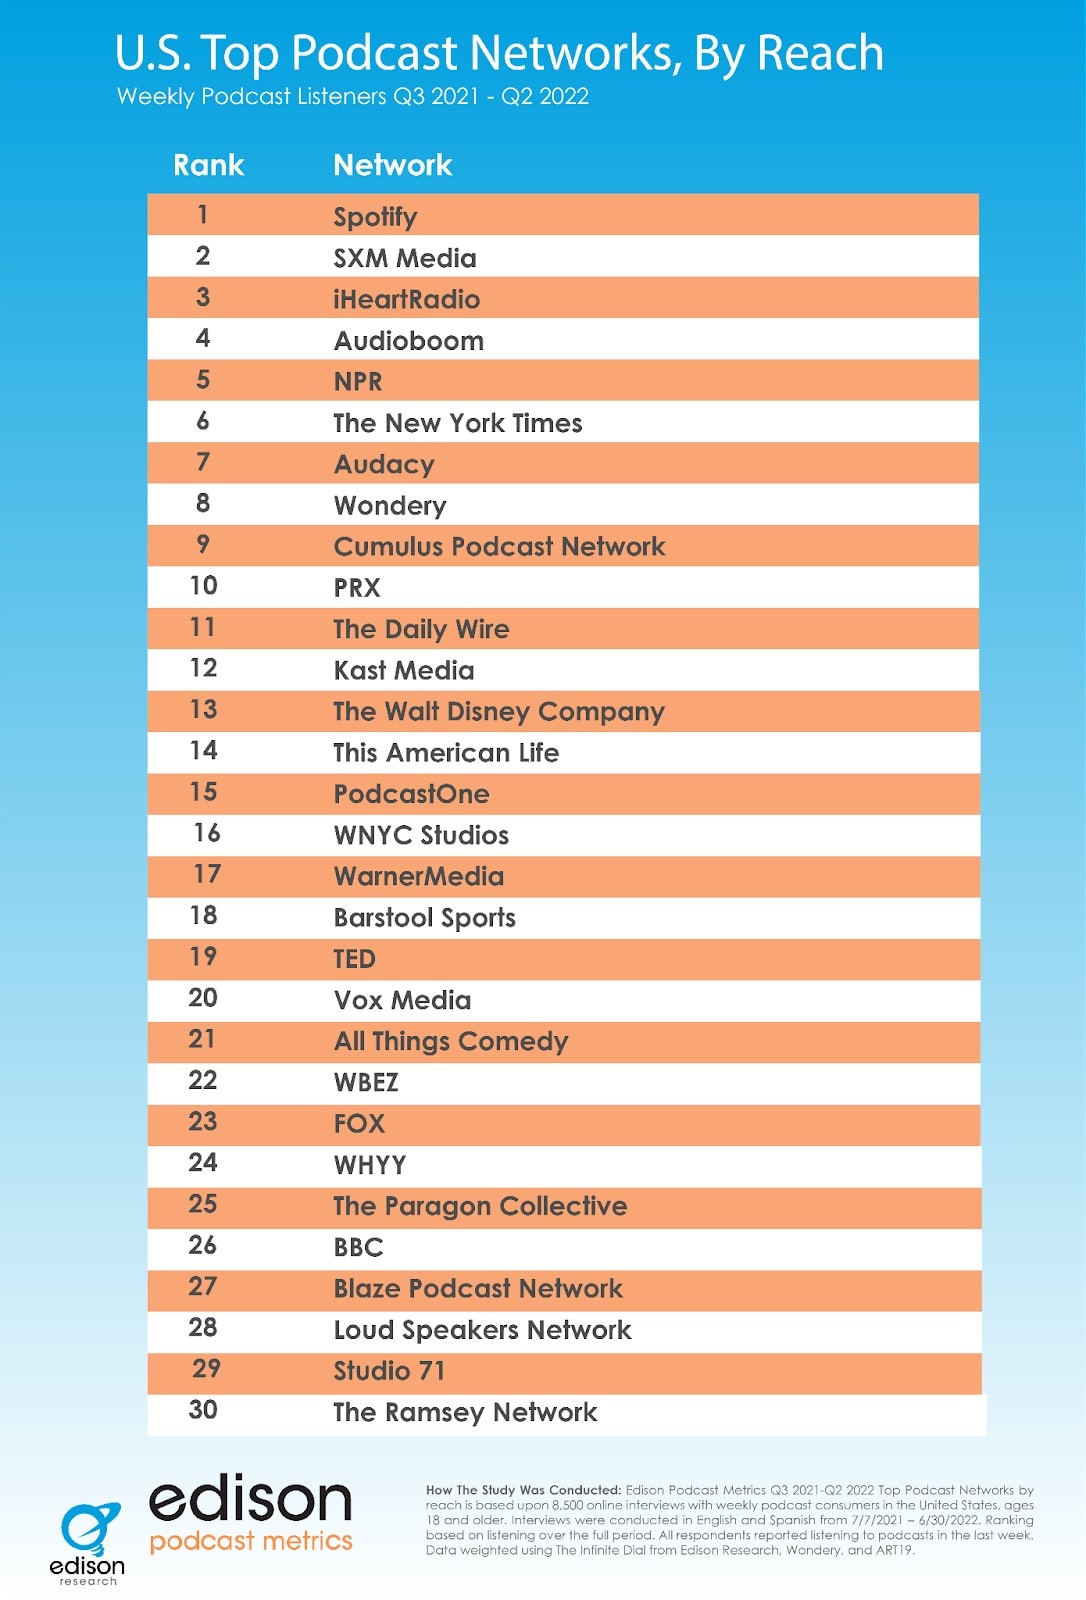
You must retain that Edison’s research only analyzes the US podcast services. Yet, our guide has compiled the best podcasting directories to connect with users worldwide.
Below you will find the list of top podcast directories and their reviews. But keep in mind that when it comes to podcast directories, there is no such thing as best or worse. Instead, it’s all about the user base and audience reach. So, it is best to submit your podcasts to multiple podcasting directories.
1. YouTube
With a monthly active user base of 2.5 billion, YouTube should be the top choice of any podcast creator. According to a recent survey by Statista, YouTube took over Spotify to become the largest platform for podcast consumption worldwide. Additionally, 47.7% of the US audience prefers YouTube over other platforms for listening to podcasts.
Not to forget, YouTube comes pre-installed on all smartphones and is also accessible via the Web to users worldwide. Another benefit of YouTube is that it is free for creators and users. Plus, once you grow your user base, it also allows you to get surplus revenue.

Of course, YouTube is a video-only platform. Still, you can use tools like Wondershare Filmora to create video-based podcasts seamlessly. You can simply convert the video podcasts into an audio format using Filmora itself and then reupload the same Podcast to even audio-based podcast directories.
Free Download For Win 7 or later(64-bit)
Free Download For macOS 10.14 or later
Tools like Fimora also allow you to directly publish the created Podcast on YouTube (so you do not have to worry about video requirements mandatory for YouTube).
- User Review of YouTube on G2: “YouTube is one of those sites that you can’t live without for a business. Everyone knows what YouTube is, and users (globally) use the platform daily.”
- Monthly User Base: Over 2.5 billion active users.
- Supported OS: All major OS and web browsers.
2. Spotify
Spotify has over 389 million listeners across 187 markets worldwide. Available on all major OS and its web presence makes it one of the best directories of podcasts on the internet.
Aside from its audience base, Spotify also provides real-time insights, like who your audience is, what they like, which episodes they prefer, and even what songs they want. All these insights will also help you plan your future content according to the audience.

Spotify’s personalized recommendations and algorithms are another pluses, given you can get discovered easily/ Like YouTube, Spotify allows you to upload even video podcasts. While you can also create and upload podcasts in audio format only.
- User Review of Spotify on G2: “I can find any song, artist, album, and even podcasts at any time and no commercials.”
- Monthly User Base: Over 360 million active users.
- Supported OS: All major OS and web browsers.
3. Apple Podcasts
Apple Podcast is another top directory for a podcast that creators cannot ignore. Given it is an exclusive-podcast platform, its 28.5 million active user base in more than 170 countries and regions is enough to tell its greatness.
It is essential to understand that YouTube and Spotify are not exclusive podcast platforms like Apple Podcasts. And while Spotify and YouTube are best for connecting novice podcast listeners, Apple Podcast is the way to go if you want to connect with a dedicated podcast community.
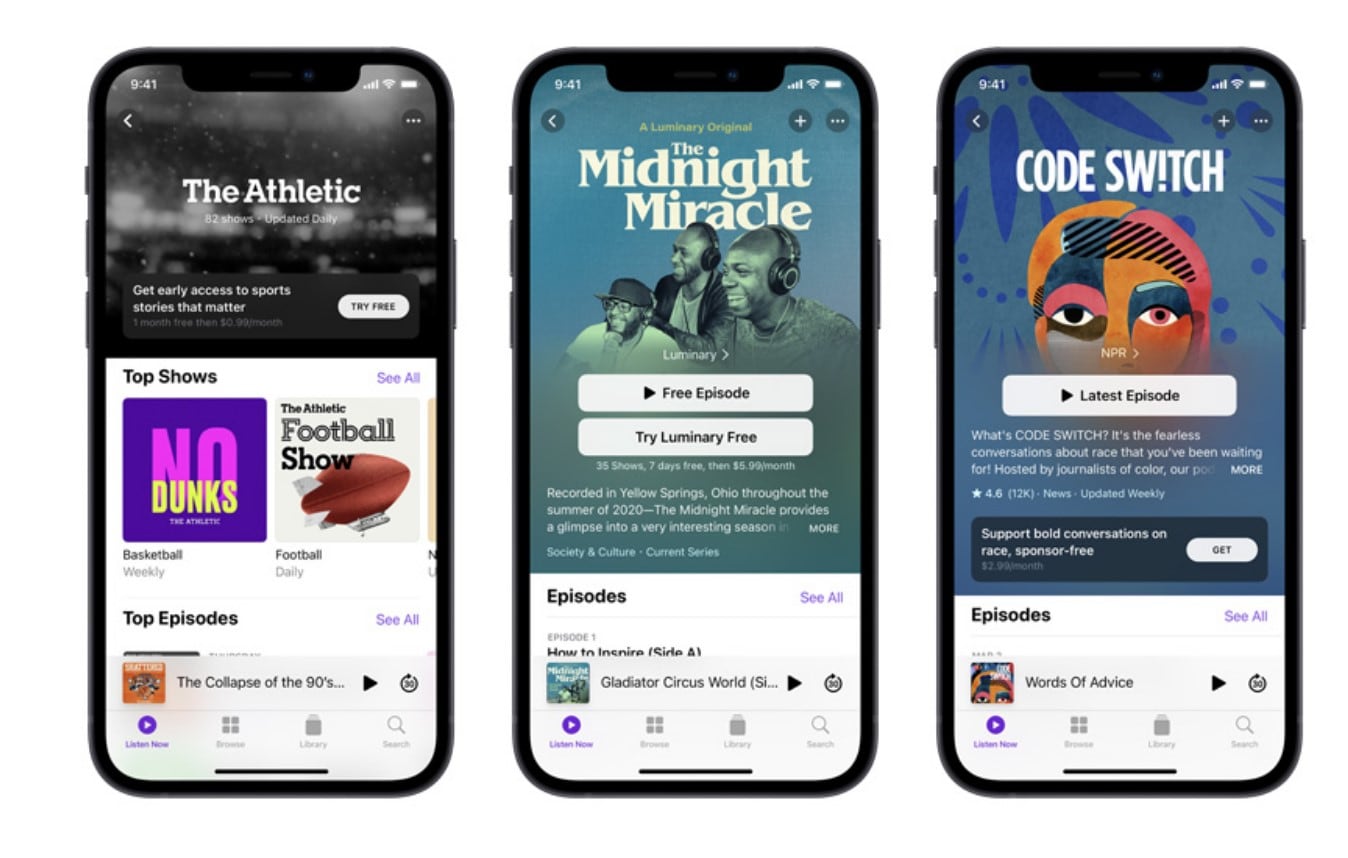
The best thing about the Apple Podcast directory is it allows you to create a podcast (via Apple Podcast Connect), but you must be an Apple user. However, you can submit your podcasts to Apple Podcast via RSS feed even if you are not an Apple user.
In all, given Apple Podcast is available for Apple users and is known by default on all Apple devices (the most prominent smartphone company in the world), Apple Podcast is a must-use podcast directory.
- User Review of Apple Podcast: “Apple once again nails with simplicity, millions of shows of my interest, and freemium service.”
- Monthly User Base: Over 28.5 million active users.
- Supported OS: All Apple devices.
4. Google Podcasts
Google Podcasts has over 100 million downloads on Play Store alone and is also available on the web, App Store, Blackberry, and ChromeOS users. A completely subscription-free and ad-free platform, Google Podcasts is one of the top podcasting directories among users.
However, unlike the Apple Podcast directory, it does not have a studio, so you can only submit your podcasts via RSS feeds. Still, its user base and the advanced algorithms are an opportunity to connect with users who like the subjects you discuss.
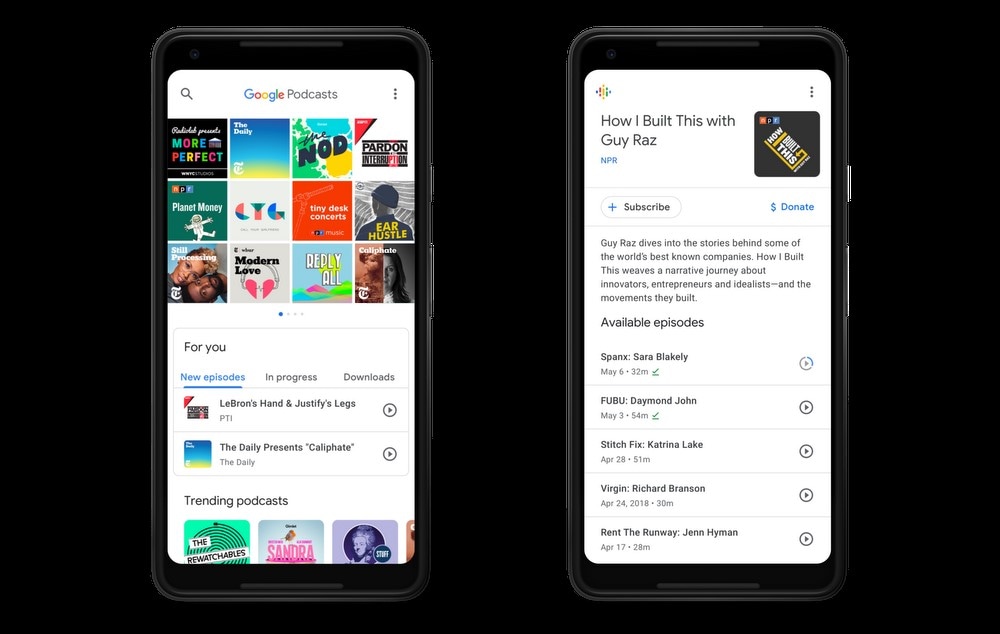
Like Spotify and Apple Podcast directories, Google Podcasts also show you real-time analytics and guide you about users so that you can plan your content accordingly. Given that it only requires a Google account to start, it is another top podcast directory you cannot ignore.
- User Review of Google Podcast
“Google Podcast includes everything that a podcast listener wants. It’s simple, free, and includes valuable options like Sleep Timer, Playback speed, and more.”
- Monthly User Base: Over 30 million active users.
- Supported OS: Dedicated apps for all major OS and web presence.
5. Pandora
Pandora has over 64 million monthly active users, with a listener spending up to 24 hours/monthly on the platform. It explains that users spend up to 45 minutes on the Pandora platform tuning in to their favorite podcasts. Again, its search-based algorithms allow you to get discovered by users that like subjects and topics on which you’re creating podcasts, meaning it is simple to connect with a large user base conveniently.
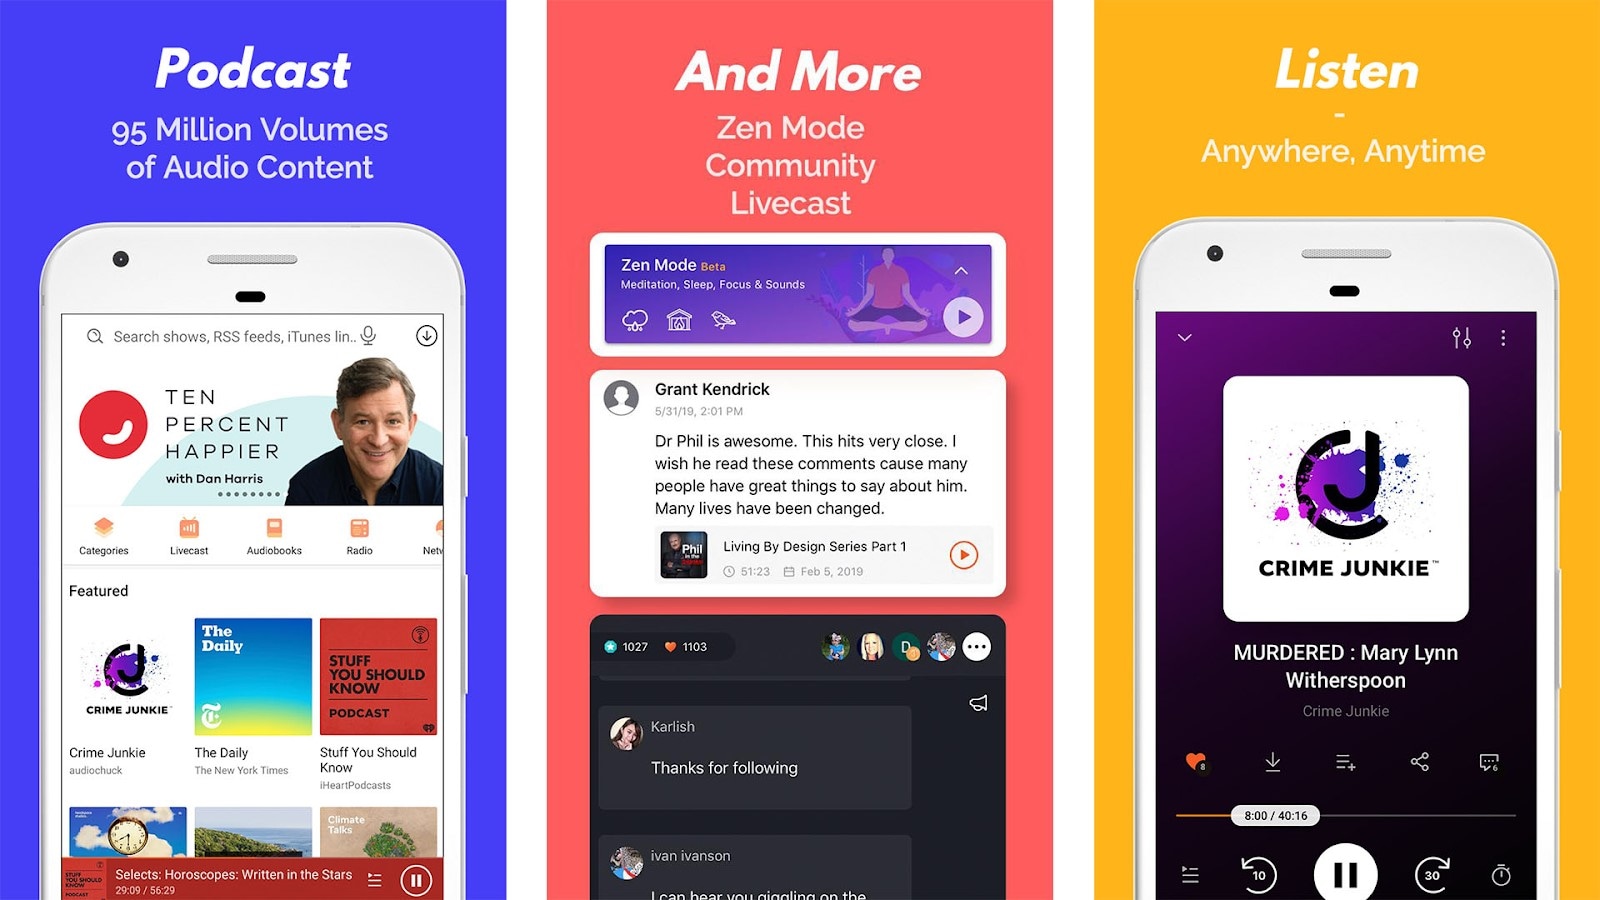
Pandora only accepts podcasts via RSS feed, which should be in MP3 format. But recent notifications have shown more audio formats will be added.
However, it is vital to retain that Pandora Podcast’s team critically analyzes all submissions manually. So, it might take up to 4-6 weeks for your first Podcast to appear on the platform.
- User Review of Pandora Podcast
“Pandora Podcasts recommendations are a blessing for me, who always finds it confusing to locate the right episode to spend my time on.”
- Monthly User Base: Over 64 million active users.
- Supported OS: Dedicated apps for all major OS and web presence.
6. Audible
Although popular among audiobook lovers, Audible has a considerable podcast following too. Its monthly active user base is around 41 million. The biggest benefit of registering your Podcast on the Audible directory of podcasts is that it connects with users who use Alexa to discover new podcasts.
Besides Audible, the Podcast will also be available for users of the Amazon Music app. That means you can connect with even more users via one submission only. Not to forget, Amazon Prime Video (a massive following) users get a free subscription to Amazon Music, so there’s a perfect chance that you will connect with users conveniently.
It is important to note that both Amazon Music and Audible offer podcasts for entirely free to users, so a more extensive user base prefers these platforms over paid platforms.
- User Review of Pandora Podcast
“You get to listen to any audiobook in the “included” library no matter which subscription you purchase..”
- Monthly User Base: Over 64 million active users.
- Supported OS: Android, iOS,
7. NPR One
With an average listener spending up to 145 minutes weekly, the NPR One podcast directory is one of the best podcast directories you can trust to submit your show online. The podcast directory has a userbase of over 500 thousand users globally, and
- User Review of NPR One Podcast
“I’ve been using this app for years now. It’s been my trusty companion to give me the news. I primarily use it with the sleep timer. I’m not a super picky consumer, especially when I don’t pay for the app!
But for many months now, the sleep timer will frequently think the time is up and shut off the player well before it should. The player will often shut off within 5 minutes of using the 30 min sleep timer. It’s annoying to open the player hit resume, and reset the sleep timer.”
- Monthly User Base: 500 thousand
- Supported OS: Android, iOS
8. Tune In

Technically, TuneIn is a radio. But lately, it has become prevalent amongst podcast listeners to find their favorite shows and also listen to music. The podcast directory has a global user base of over 75 million and a monthly visit of 7million+, which makes it a great spot for any podcaster to publish their show.
- User Review of Tune In Podcast
“I’ve been using the app for 4 years. I like it, but there are some annoying “features.”
the screen won’t time out when the app is active.
the developers must have recently made a change. I used to search through my list of “recent” (there were about 20) to look for new episodes of my favorite podcasts.
Now, the app only allows me to see the last four podcasts or stations I have listened to. So it is not helpful.’
- Monthly User Base: Over 7 million active users
- Supported OS: Dedicated apps for all major OS and web presence.
9. Podcast Addict
With over 10 million downloads on Google Playstore, Podcast Addict is one of Android’s most popular podcast apps. You can publish your podcast show, as it allows you to connect with the ideal audience quickly and easily.
Also, Podcast Addict is one of the few podcast directories available in various languages, including French and German. So it’s a perfect choice non-English podcasters.
- User Review of PodcastAddit
**”**Been using this for years. It does everything I could ever want when listening/ referencing/ re-listening to my favorite podcasts and a lot more.
I’ve suffered through having to use other podcast players (e.g., listening to something “exclusive”), but I couldn’t stand the inane simplicity of other players long enough to finish their content.
Also, it takes a bit to get used to (especially if you’re coming from other stripped-down players), but very worth the small effort for a powerful app.”
- Monthly User Base: Over 750 thousand active users.
- Supported OS: Dedicated Android App and web presence.
10. RadioPublic

Having been in the game for over 15 years, RadioPublic is another excellent podcast directory you can count on to submit your show. Although the platform does not have a massive user base compared to its competitors, it will help you grow your listeners and business by getting your podcast show to the right audience.
On RadioPublic, an average listener spends up to 72 minutes every day finding new podcast shows and listening to new episodes from their favorite podcasts. And given that the platform offers many robust features, listeners can enjoy a seamless listening experience on any device.
Overall, the RadioPublic podcast directory offers you a smart way to publish your show and grow your audience without going through stress.
- User Review of RadioPublic
“Glad I waited a while to find a podcast website provider. Starting from scratch in WordPress seemed too much hassle. Luckily the site came along while I was dithering about what to do.
The RadioPublic team onboarded the other 5 billion podcasts as one of the first examples, and I’m delighted to have chosen this option. Already, my pod site feels “complete” to look at, and more features are coming soon that will help with marketing, understanding listeners, and building a podcast brand.”
- Monthly User Base: Over 300 Thousand active users
- Supported OS: Dedicated apps for all major OS and web presence.
11. Overcast
Overcast is a dedicated podcast app for Apple devices, and what makes it a great podcast directory is that it offers unique features that attract many listeners.
On this platform, you’ll be allowed to display advertising slots, enabling listeners to subscribe to your podcast show within a few clicks. Plus, unlike many of its competitors, listeners have control over what podcast show is displayed in the featured podcast section. It is helpful as it lets listeners quickly discover every new episode you publish.
Overall, many incredible features make Overcast a good choice, and chances are your Podcast will get to real listeners when you publish them here.
- User Review of Overcast
**”**Nice alternative to Apple’s. I’ve been well pleased so far. It isn’t always the most intuitive, but I’ve eventually figured out how to achieve almost everything I’ve wanted to. The benefits of adding a show via RSS have become immediately clear.
Being a subscriber to a show and getting early access episodes and bonus material right in my podcast manager makes it easy to stay up with all my shows.”
- Monthly User Base: Over 70 Thousand active users.
- Supported OS: Dedicated app for iOS and web presence.
12. Pocket Casts
If you’re looking for a free podcast directory to publish your Podcast show, Pocket Casts is the ideal one for you. This podcast directory is packed with many rich features that podcasters will find very helpful. In addition, thanks to its beautifully designed website interface, you won’t find the platform difficult to use.
Besides, many listeners love Pocket Podcasts as it offers them incredible features—for example, improved discovery options, playback speed options, and lots more. In addition, they’ve enhanced how they find and listen to podcasts on the platform. You can’t go wrong publishing your show on a platform like this one.
- User Review of Pocket Casts
“Wonderful app, the most reliable one I’ve found. Even with accounts, most others lose all your progress data which hasn’t happened once with this, and I’ve switched phones 3 times. The progress tracker is so accurate you can pause on one device, open the same account and continue listening. Most apps can’t even keep things downloaded. Search does take a minute but finds stuff no other app does.”
- Monthly User Base: Over 1 Million active users.
- Supported OS: Dedicated apps for all major OS and web presence.
13. CastBox
CastBox is another unique podcast directory that podcasters trust to publish their show online. The platform boasts an optimized SEO and artificial intelligence that lets listeners find new podcast shows. Thanks to its massive user base of up to 20 Million users, your Podcast could reach a wide range of audiences quickly and easily.
Also, CastBox offers social media features that allow listeners to comment and share your podcast show on their social media page, thus helping you get your show to more listeners and potentially increase your fanbase.
- User Review of CastBox
“I’ve been a podcaster for years and an avid podcast listener for a while. So I searched high and low for the best podcast app and distribution service, Castbox. They have a great app and website, a huge content library, and a superb feature set. Also, their app allows offline listening, as I can download my favorite podcast show.”
- Monthly User Base: Over 1 million active users
- Supported OS: Dedicated apps for all major OS and web presence.
14. Stitcher
Last but not least podcast directory on our list is Stitcher. The platform boasts more than 14.5 Million active listeners, with an average listener having up to 25 hours of listening duration per month.
Stitcher helps you alleviate the stress of getting your show to the right audience, and thanks to the platform’s easy podcast submission requirements, you only need to have at least one podcast episode on your RSS Feed to get approved.
Also, Stitcher offers a unique analytic tool that allows you to track the performance of your show on the platform, and what more impressive is that it’s integrated into more than fifty car models. In addition, it works with any vehicle that supports Apple’s CarPlay and Android Auto, which makes it a great choice for podcasters who believe their audience loves to listen to their show while driving.
- User Review of Stitcher
“So glad I switched! I have my podcasts but didn’t listen to them much - partially because Apple Podcasts is so hard to use. I switched to Stitcher to listen to The Magnus Archives, and I love it!”
- Monthly User Base: Over 1.5 million active users.
- Supported OS: Dedicated apps for all major OS and web presence.
Part 3. More choices to submit your podcast shows
The above Podcast directories are great choices you can always count on any day. However, if you’re looking for more options, the following are reliable podcasting directories to choose from;
Part 4. How to submit a show to podcast directories?
Submitting a podcast show to podcast directories is pretty simple. Here, we used Spotify as an example to show you how you can easily submit your podcast show within a few clicks. The steps are as follows;
Step1 Create a Spotify account using the email attached to your podcast host.
Step2 Open Spotify for Podcasters in your browser and login into your account. Then, click Get Started on the new screen.
Step3 Provide your Podcast’s RSS Feed and click Next to proceed.
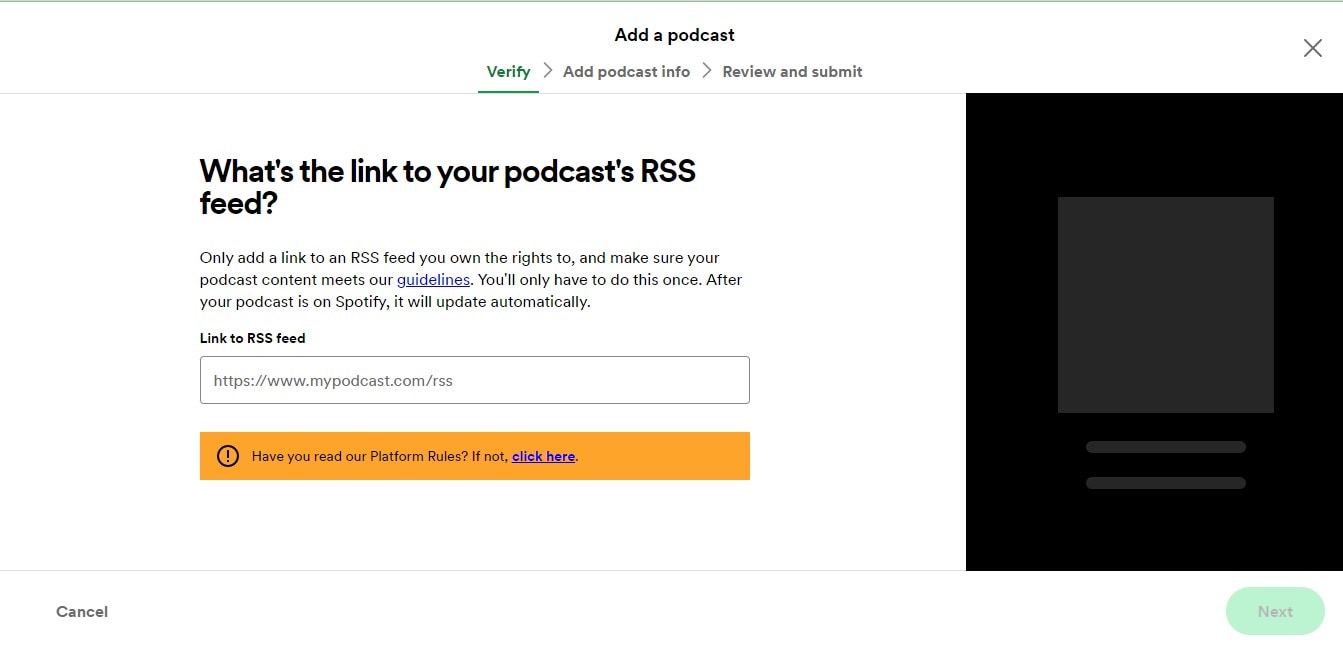
Step4 You’ll be asked to add information about your Podcast, from its description to the title, artwork, etc.
Step5 Verify the Podcast by submitting the code sent to your email.
Step6 Review the information you’ve provided so far and submit it to Spotify for review.
Once you complete the steps, keep an eye on the submitted Podcast, as Spotify won’t message you even if your Podcast has been published.
Hot FAQs on Podcast Directories
1. Are podcast directories free?
Almost all top podcast directories are entirely free for creators. All you have to do is sign up on the platforms. Then, check the platform’s requirements to submit your podcast episodes, like the format, cover photos, and description. Of course, the requirements vary depending on the platform.
2. Can any podcast be on a directory of podcasts?
Yes, you can choose from any podcast directory to publish your Podcast. There’s no limitation. When submitting, you must select the ideal category for your podcast show so it can be displayed to the right audience.
3. Does it cost to join a podcast directory?
Yes, and the cost of joining a podcast directory varies depending on your platform.
Conclusion
The podcast directories introduced above are reliable for submitting podcast shows. So, chances are there, no matter what your podcast show is about. It’ll help you connect with the right audience. However, one thing is vital you need to make sure you choose the podcast directory that suits you.
Part 1. What are podcast directories?
A podcast directory is a listening app. It’s the place where podcasts and their listeners meet. Podcast listeners search for, subscribe to, and listen to your Podcast using their podcast directory of choice. Popular podcast directories include Apple Podcasts, Spotify, and Google Podcasts.
Part 2. 15 Top podcast directories to focus on in 2024
Thankfully, research conducted by EdisonResearch shows the weekly audience reach of top podcast directories. So this list will help us locate the best podcasting directories. And it can multiply your audience size and quickly reach a more extensive user base.
According to Edison Research, the top 15 Podcast Networks are:
You must retain that Edison’s research only analyzes the US podcast services. Yet, our guide has compiled the best podcasting directories to connect with users worldwide.
Below you will find the list of top podcast directories and their reviews. But keep in mind that when it comes to podcast directories, there is no such thing as best or worse. Instead, it’s all about the user base and audience reach. So, it is best to submit your podcasts to multiple podcasting directories.
1. YouTube
With a monthly active user base of 2.5 billion, YouTube should be the top choice of any podcast creator. According to a recent survey by Statista, YouTube took over Spotify to become the largest platform for podcast consumption worldwide. Additionally, 47.7% of the US audience prefers YouTube over other platforms for listening to podcasts.
Not to forget, YouTube comes pre-installed on all smartphones and is also accessible via the Web to users worldwide. Another benefit of YouTube is that it is free for creators and users. Plus, once you grow your user base, it also allows you to get surplus revenue.
Of course, YouTube is a video-only platform. Still, you can use tools like Wondershare Filmora to create video-based podcasts seamlessly. You can simply convert the video podcasts into an audio format using Filmora itself and then reupload the same Podcast to even audio-based podcast directories.
Free Download For Win 7 or later(64-bit)
Free Download For macOS 10.14 or later
Tools like Fimora also allow you to directly publish the created Podcast on YouTube (so you do not have to worry about video requirements mandatory for YouTube).
- User Review of YouTube on G2: “YouTube is one of those sites that you can’t live without for a business. Everyone knows what YouTube is, and users (globally) use the platform daily.”
- Monthly User Base: Over 2.5 billion active users.
- Supported OS: All major OS and web browsers.
2. Spotify
Spotify has over 389 million listeners across 187 markets worldwide. Available on all major OS and its web presence makes it one of the best directories of podcasts on the internet.
Aside from its audience base, Spotify also provides real-time insights, like who your audience is, what they like, which episodes they prefer, and even what songs they want. All these insights will also help you plan your future content according to the audience.
Spotify’s personalized recommendations and algorithms are another pluses, given you can get discovered easily/ Like YouTube, Spotify allows you to upload even video podcasts. While you can also create and upload podcasts in audio format only.
- User Review of Spotify on G2: “I can find any song, artist, album, and even podcasts at any time and no commercials.”
- Monthly User Base: Over 360 million active users.
- Supported OS: All major OS and web browsers.
3. Apple Podcasts
Apple Podcast is another top directory for a podcast that creators cannot ignore. Given it is an exclusive-podcast platform, its 28.5 million active user base in more than 170 countries and regions is enough to tell its greatness.
It is essential to understand that YouTube and Spotify are not exclusive podcast platforms like Apple Podcasts. And while Spotify and YouTube are best for connecting novice podcast listeners, Apple Podcast is the way to go if you want to connect with a dedicated podcast community.
The best thing about the Apple Podcast directory is it allows you to create a podcast (via Apple Podcast Connect), but you must be an Apple user. However, you can submit your podcasts to Apple Podcast via RSS feed even if you are not an Apple user.
In all, given Apple Podcast is available for Apple users and is known by default on all Apple devices (the most prominent smartphone company in the world), Apple Podcast is a must-use podcast directory.
- User Review of Apple Podcast: “Apple once again nails with simplicity, millions of shows of my interest, and freemium service.”
- Monthly User Base: Over 28.5 million active users.
- Supported OS: All Apple devices.
4. Google Podcasts
Google Podcasts has over 100 million downloads on Play Store alone and is also available on the web, App Store, Blackberry, and ChromeOS users. A completely subscription-free and ad-free platform, Google Podcasts is one of the top podcasting directories among users.
However, unlike the Apple Podcast directory, it does not have a studio, so you can only submit your podcasts via RSS feeds. Still, its user base and the advanced algorithms are an opportunity to connect with users who like the subjects you discuss.
Like Spotify and Apple Podcast directories, Google Podcasts also show you real-time analytics and guide you about users so that you can plan your content accordingly. Given that it only requires a Google account to start, it is another top podcast directory you cannot ignore.
- User Review of Google Podcast
“Google Podcast includes everything that a podcast listener wants. It’s simple, free, and includes valuable options like Sleep Timer, Playback speed, and more.”
- Monthly User Base: Over 30 million active users.
- Supported OS: Dedicated apps for all major OS and web presence.
5. Pandora
Pandora has over 64 million monthly active users, with a listener spending up to 24 hours/monthly on the platform. It explains that users spend up to 45 minutes on the Pandora platform tuning in to their favorite podcasts. Again, its search-based algorithms allow you to get discovered by users that like subjects and topics on which you’re creating podcasts, meaning it is simple to connect with a large user base conveniently.
Pandora only accepts podcasts via RSS feed, which should be in MP3 format. But recent notifications have shown more audio formats will be added.
However, it is vital to retain that Pandora Podcast’s team critically analyzes all submissions manually. So, it might take up to 4-6 weeks for your first Podcast to appear on the platform.
- User Review of Pandora Podcast
“Pandora Podcasts recommendations are a blessing for me, who always finds it confusing to locate the right episode to spend my time on.”
- Monthly User Base: Over 64 million active users.
- Supported OS: Dedicated apps for all major OS and web presence.
6. Audible
Although popular among audiobook lovers, Audible has a considerable podcast following too. Its monthly active user base is around 41 million. The biggest benefit of registering your Podcast on the Audible directory of podcasts is that it connects with users who use Alexa to discover new podcasts.
Besides Audible, the Podcast will also be available for users of the Amazon Music app. That means you can connect with even more users via one submission only. Not to forget, Amazon Prime Video (a massive following) users get a free subscription to Amazon Music, so there’s a perfect chance that you will connect with users conveniently.
It is important to note that both Amazon Music and Audible offer podcasts for entirely free to users, so a more extensive user base prefers these platforms over paid platforms.
- User Review of Pandora Podcast
“You get to listen to any audiobook in the “included” library no matter which subscription you purchase..”
- Monthly User Base: Over 64 million active users.
- Supported OS: Android, iOS,
7. NPR One
With an average listener spending up to 145 minutes weekly, the NPR One podcast directory is one of the best podcast directories you can trust to submit your show online. The podcast directory has a userbase of over 500 thousand users globally, and
- User Review of NPR One Podcast
“I’ve been using this app for years now. It’s been my trusty companion to give me the news. I primarily use it with the sleep timer. I’m not a super picky consumer, especially when I don’t pay for the app!
But for many months now, the sleep timer will frequently think the time is up and shut off the player well before it should. The player will often shut off within 5 minutes of using the 30 min sleep timer. It’s annoying to open the player hit resume, and reset the sleep timer.”
- Monthly User Base: 500 thousand
- Supported OS: Android, iOS
8. Tune In
Technically, TuneIn is a radio. But lately, it has become prevalent amongst podcast listeners to find their favorite shows and also listen to music. The podcast directory has a global user base of over 75 million and a monthly visit of 7million+, which makes it a great spot for any podcaster to publish their show.
- User Review of Tune In Podcast
“I’ve been using the app for 4 years. I like it, but there are some annoying “features.”
the screen won’t time out when the app is active.
the developers must have recently made a change. I used to search through my list of “recent” (there were about 20) to look for new episodes of my favorite podcasts.
Now, the app only allows me to see the last four podcasts or stations I have listened to. So it is not helpful.’
- Monthly User Base: Over 7 million active users
- Supported OS: Dedicated apps for all major OS and web presence.
9. Podcast Addict
With over 10 million downloads on Google Playstore, Podcast Addict is one of Android’s most popular podcast apps. You can publish your podcast show, as it allows you to connect with the ideal audience quickly and easily.
Also, Podcast Addict is one of the few podcast directories available in various languages, including French and German. So it’s a perfect choice non-English podcasters.
- User Review of PodcastAddit
**”**Been using this for years. It does everything I could ever want when listening/ referencing/ re-listening to my favorite podcasts and a lot more.
I’ve suffered through having to use other podcast players (e.g., listening to something “exclusive”), but I couldn’t stand the inane simplicity of other players long enough to finish their content.
Also, it takes a bit to get used to (especially if you’re coming from other stripped-down players), but very worth the small effort for a powerful app.”
- Monthly User Base: Over 750 thousand active users.
- Supported OS: Dedicated Android App and web presence.
10. RadioPublic
Having been in the game for over 15 years, RadioPublic is another excellent podcast directory you can count on to submit your show. Although the platform does not have a massive user base compared to its competitors, it will help you grow your listeners and business by getting your podcast show to the right audience.
On RadioPublic, an average listener spends up to 72 minutes every day finding new podcast shows and listening to new episodes from their favorite podcasts. And given that the platform offers many robust features, listeners can enjoy a seamless listening experience on any device.
Overall, the RadioPublic podcast directory offers you a smart way to publish your show and grow your audience without going through stress.
- User Review of RadioPublic
“Glad I waited a while to find a podcast website provider. Starting from scratch in WordPress seemed too much hassle. Luckily the site came along while I was dithering about what to do.
The RadioPublic team onboarded the other 5 billion podcasts as one of the first examples, and I’m delighted to have chosen this option. Already, my pod site feels “complete” to look at, and more features are coming soon that will help with marketing, understanding listeners, and building a podcast brand.”
- Monthly User Base: Over 300 Thousand active users
- Supported OS: Dedicated apps for all major OS and web presence.
11. Overcast
Overcast is a dedicated podcast app for Apple devices, and what makes it a great podcast directory is that it offers unique features that attract many listeners.
On this platform, you’ll be allowed to display advertising slots, enabling listeners to subscribe to your podcast show within a few clicks. Plus, unlike many of its competitors, listeners have control over what podcast show is displayed in the featured podcast section. It is helpful as it lets listeners quickly discover every new episode you publish.
Overall, many incredible features make Overcast a good choice, and chances are your Podcast will get to real listeners when you publish them here.
- User Review of Overcast
**”**Nice alternative to Apple’s. I’ve been well pleased so far. It isn’t always the most intuitive, but I’ve eventually figured out how to achieve almost everything I’ve wanted to. The benefits of adding a show via RSS have become immediately clear.
Being a subscriber to a show and getting early access episodes and bonus material right in my podcast manager makes it easy to stay up with all my shows.”
- Monthly User Base: Over 70 Thousand active users.
- Supported OS: Dedicated app for iOS and web presence.
12. Pocket Casts
If you’re looking for a free podcast directory to publish your Podcast show, Pocket Casts is the ideal one for you. This podcast directory is packed with many rich features that podcasters will find very helpful. In addition, thanks to its beautifully designed website interface, you won’t find the platform difficult to use.
Besides, many listeners love Pocket Podcasts as it offers them incredible features—for example, improved discovery options, playback speed options, and lots more. In addition, they’ve enhanced how they find and listen to podcasts on the platform. You can’t go wrong publishing your show on a platform like this one.
- User Review of Pocket Casts
“Wonderful app, the most reliable one I’ve found. Even with accounts, most others lose all your progress data which hasn’t happened once with this, and I’ve switched phones 3 times. The progress tracker is so accurate you can pause on one device, open the same account and continue listening. Most apps can’t even keep things downloaded. Search does take a minute but finds stuff no other app does.”
- Monthly User Base: Over 1 Million active users.
- Supported OS: Dedicated apps for all major OS and web presence.
13. CastBox
CastBox is another unique podcast directory that podcasters trust to publish their show online. The platform boasts an optimized SEO and artificial intelligence that lets listeners find new podcast shows. Thanks to its massive user base of up to 20 Million users, your Podcast could reach a wide range of audiences quickly and easily.
Also, CastBox offers social media features that allow listeners to comment and share your podcast show on their social media page, thus helping you get your show to more listeners and potentially increase your fanbase.
- User Review of CastBox
“I’ve been a podcaster for years and an avid podcast listener for a while. So I searched high and low for the best podcast app and distribution service, Castbox. They have a great app and website, a huge content library, and a superb feature set. Also, their app allows offline listening, as I can download my favorite podcast show.”
- Monthly User Base: Over 1 million active users
- Supported OS: Dedicated apps for all major OS and web presence.
14. Stitcher
Last but not least podcast directory on our list is Stitcher. The platform boasts more than 14.5 Million active listeners, with an average listener having up to 25 hours of listening duration per month.
Stitcher helps you alleviate the stress of getting your show to the right audience, and thanks to the platform’s easy podcast submission requirements, you only need to have at least one podcast episode on your RSS Feed to get approved.
Also, Stitcher offers a unique analytic tool that allows you to track the performance of your show on the platform, and what more impressive is that it’s integrated into more than fifty car models. In addition, it works with any vehicle that supports Apple’s CarPlay and Android Auto, which makes it a great choice for podcasters who believe their audience loves to listen to their show while driving.
- User Review of Stitcher
“So glad I switched! I have my podcasts but didn’t listen to them much - partially because Apple Podcasts is so hard to use. I switched to Stitcher to listen to The Magnus Archives, and I love it!”
- Monthly User Base: Over 1.5 million active users.
- Supported OS: Dedicated apps for all major OS and web presence.
Part 3. More choices to submit your podcast shows
The above Podcast directories are great choices you can always count on any day. However, if you’re looking for more options, the following are reliable podcasting directories to choose from;
Part 4. How to submit a show to podcast directories?
Submitting a podcast show to podcast directories is pretty simple. Here, we used Spotify as an example to show you how you can easily submit your podcast show within a few clicks. The steps are as follows;
Step1 Create a Spotify account using the email attached to your podcast host.
Step2 Open Spotify for Podcasters in your browser and login into your account. Then, click Get Started on the new screen.
Step3 Provide your Podcast’s RSS Feed and click Next to proceed.
Step4 You’ll be asked to add information about your Podcast, from its description to the title, artwork, etc.
Step5 Verify the Podcast by submitting the code sent to your email.
Step6 Review the information you’ve provided so far and submit it to Spotify for review.
Once you complete the steps, keep an eye on the submitted Podcast, as Spotify won’t message you even if your Podcast has been published.
Hot FAQs on Podcast Directories
1. Are podcast directories free?
Almost all top podcast directories are entirely free for creators. All you have to do is sign up on the platforms. Then, check the platform’s requirements to submit your podcast episodes, like the format, cover photos, and description. Of course, the requirements vary depending on the platform.
2. Can any podcast be on a directory of podcasts?
Yes, you can choose from any podcast directory to publish your Podcast. There’s no limitation. When submitting, you must select the ideal category for your podcast show so it can be displayed to the right audience.
3. Does it cost to join a podcast directory?
Yes, and the cost of joining a podcast directory varies depending on your platform.
Conclusion
The podcast directories introduced above are reliable for submitting podcast shows. So, chances are there, no matter what your podcast show is about. It’ll help you connect with the right audience. However, one thing is vital you need to make sure you choose the podcast directory that suits you.
Also read:
- New Vocaroo Voice Recorder Tutorial and Alternatives for 2024
- New 3 Easy Ways to Booster/Increase Volume on Windows for Free for 2024
- Updated The Ultimate Guide 6 Premier Automatic Transcription Programs for 2024
- Updated Essential Voice Dampening Tech A List of the Top 10 Tools for 2024
- Updated The Beastly Symphony Capturing Giants in Audio Form for 2024
- New Perfect Purity of Sound Unveiling Techniques to Exclude Voices in Adobe Audition Projects for 2024
- New 2024 Approved Essential Audio Recording Tools for Personal Computers
- 2024 Approved Perfecting the Choreography Between Images and Acoustics
- New 2024 Approved Mastering Audio Removing Vocals From Video Like A Pro
- Expert Techniques for Isolating Singers From Visual Media for 2024
- Updated Voice Alteration Devices A Guide to Introductions, Assessments, and Substitutes for 2024
- Exploring the Sonic Qualities of Whistle Noises
- Dive Deep Into Vimeo Videos Understanding Aspect Ratios and Their Significance
- New In 2024, Top Budget-Friendly Mac Audio Converter Tool
- New Mastering the Art of De-Echoing Audio Simple, Proven Techniques
- Updated Melody Compendium The 15 Best Music Selections for Different Visual Media Types for 2024
- 2024 Approved Simplified Audio Voice Customization Methods Description, Standards, and Variants
- In 2024, Audible Artistry Providers 10 Online & Desktop Platforms to Revolutionize Your Work
- Updated The Sound Engineers Approach to Detaching Bass From Mixed Tracks for 2024
- New The Ultimate Compendium Selecting Your Best Software to Record Guitars for 2024
- 2024 Approved Navigating the Art of Selecting Top-Notch Sound Designers
- Updated 2024 Approved Virtual Sound Editor with Cut & Join Features
- New 2024 Approved Show Audio Waveform and Add Waveform Animation in Premiere ProTutorial
- New Audacity Mastery Modifying Vocal Characteristics to Suit Your Style for 2024
- Updated In 2024, Ultimate Web-Based MP3 Modifier App
- Cambridge Audio CXU Review for 2024
- 2024 Approved Quickened Cadence Control An In-Depth Look at Fast-Tracking Audio Speed Alteration
- New 2024 Approved Transformations at the Click of a Button Expert Reviews on Real-Time Voice Changers
- Updated Best Online MP3 Cutter And Joiner
- New 2024 Approved Step-by-Step Tutorial Integrating Songs Into Your iMovie Masterpiece
- 2024 Approved The Professionals Method for Removing Unwanted Sounds From Media Projects Using Premiere Pro
- New 2024 Approved Tapping Into Tempo Step-by-Step Approach to Isolate Musics Heartbeat
- New In 2024, News Beats and Melodies The Ultimate Background Playlist
- New Win & Mac Users Best Picks Top MP3 Recording Software and Hardware for 2024
- In 2024, Rhythm Cleanser App Design Tailored Accompaniment Sets
- Ways To Find Unlocking Codes For Vivo Y02T Phones
- [New] Vote-Ventures 5 Top Political Game Showdowns
- Updated The Most Popular 3D Video Production Tools You Cant Miss
- Methods to Change GPS Location On Nokia G42 5G | Dr.fone
- Updated No Cost, No Problem Top 10 Free WebM Video Editors for 2024
- [Updated] Adding Time-Bound Elements to Your OBS Productions for 2024
- In 2024, How to Remove Apple ID from Apple iPhone 12 Pro Max without Password?
- 2024 Approved Minimize Surround Loudness - Economical & Premium Solutions
- [New] Mastering the Art of Live Streams Merge OBS, Zoom
- In 2024, How Can Realme GT 5Mirror Share to PC? | Dr.fone
- In 2024, How to Lock Apps on Oppo Reno 11 Pro 5G to Protect Your Individual Information
- 2024 Approved Unmatched Fun Awaits in Our Top 12 PC Clicker Games List
- 2024 Approved The Ultimate List of Video Editing Essentials Incorporating Soundtracks From the Most Popular Platforms
- Seeking Spots Where Massive Celebratory Roars Occur
- Use Device Manager to identify some outdated drivers in Windows 11 & 10
- A Guide Xiaomi Redmi Note 12 4G Wireless and Wired Screen Mirroring | Dr.fone
- Web-Based Serenity Spots The Pinnacle Top 10 Sites to Chill Out and Recharge for 2024
- [Updated] 2024 Approved Streamlined Recording The Very Best Fullscreen Software
- Updated Virtualdub A Comprehensive Review and Comparison to Rivals
- In 2024, Game On The Ultimate Guide to Superior Offline iOS Fun
- [Updated] In 2024, Clear Audio in Videos Essential Tips and Tool Reviews
- [New] 2024 Approved Road Warriors Top Virtual Races Listed
- [New] 2024 Approved Ultimate Plan for Livestream & Document Sports Contests
- Title: In 2024, The Newbies Roadmap to Successful Podcast Editing
- Author: David
- Created at : 2024-06-10 05:53:10
- Updated at : 2024-06-11 05:53:10
- Link: https://sound-tweaking.techidaily.com/in-2024-the-newbies-roadmap-to-successful-podcast-editing/
- License: This work is licensed under CC BY-NC-SA 4.0.
