

In 2024, Audience-Friendly Approach to PC Audio Recording Using Audacity Gratis
Audience-Friendly Approach to PC Audio Recording Using Audacity Gratis
Natural audio recording software, such as Voice Memos for Macs or Sound Recorder for Windows PCs, is included with every machine. These applications enable users to record audio using either the desktop’s internal or an external microphone, and they generally have basic audio editing features.
However, when you’re looking for a higher-quality recording program, Audacity is the way to go. Audacity is a free audio editor with a lot of cutting-edge features. More significantly, recording using Audacity is as simple as clicking a button.
In this Audacity Record Computer Audio guide, we will show you all the methods of recording internal audio on your computer and Mac.
In this article
01 Record Audio On Audacity with a Microphone
02 Record Sounds Playing on Your Computer Using Audacity on Win
03 Record Sounds Playing on Your Computer Using Audacity on Mac
04 Set up Audacity to Record as Schedule
Part 1: How to Record Audio On Audacity with a Microphone On Windows and Mac Computers?
For both Windows and Mac, the procedures for recording audio from a microphone are the same if you’re utilizing your desktop’s built-in mic or an external microphone. Here’s your step-by-step guide to audacity record using a microphone:
Step 1: Launch Audacity and get to know the Device Toolbar, situated underneath the playback controls. You may modify the Audio Host and the Recording and Playback Devices—all of which are required for Audacity recording.

Step 2: To begin, select Tracks under the Add New tab, Stereo Track, or Mono Track to create a new track.

Step 3: Select Recording Device from the options list. Select your microphone from the dropdown menu and hit the Record option.

Step 4: A soundwave emerges along the track as you talk into the speaker. The Recording Level may be found at the top of the display. To pause or stop the recording, click Stop or Pause until you select Record anew.

Step 5: With the mouse over any recording area, click the Delete button to cut out any portion of it quickly. Click Ctrl + A, then Delete to erase whatever you’ve just saved. Alternatively, press the X button to delete the track completely.

Part 2: How to Record Sounds Playing on Your Computer Using Audacity On Windows?
Unlike Mac, Windows makes it simple to capture audio from a movie or media file running on your desktop. There seem to be two primary methods for accomplishing audacity record desktop audio in this way:
1. Use MME as the Audio Host
Step 1: To use MME as your audio host, go to Tracks in the Add New tab in Stereo Track and create a new file.

Step 2: Change the Audio Host (to the left of Recording Device) to MME—this is the standard setting, so you might not have to change anything.

Step 3: Choose desired option from the Recording Device dropdown menu. Based on your configuration, this might be referred to as Wave Out or Loopback. When you’re uncertain, try it out.

Step 4: To record your audio source, click Record, then play it back.
2. Use WASAPI as the Audio Host
WASAPI provides higher-resolution digital recordings. If capturing audio from an external monitor, it’s also a good idea to utilize it.
Step 1: Convert the Audio Host from MME to Windows WASAPI after creating a fresh Stereo Track.

Step 2: Switch the Recording Device to Speaker (loopback). To display the entire label, you might have to slide the toolbar’s knobs outwards. Begin recording by pressing the red dot and then listen to the audio source. Audacity will capture the audio even if your PC is muted.
Part 3: How to Record Sounds Playing on Your Computer Using Audacity on Mac?
Unfortunately, there’s no ready-made method to record computer audio using Audacity on a Mac. Some alternative ways to use Audacity to record from Mac including using a loopback cable, or download and using a third-party software. You can try some Audacity alternatives to record the computer audio on Mac.
For Win 7 or later (64-bit)
For macOS 10.12 or later
If you have installed Filmora already, you can use it to record the sound playing on your Mac with some tricks.
Step 1: Luanch Filmora, and then click the Record button and select Record PC Screen.

Step 2: Set up the recording settings based on the need. Since we’re going to record the playing audio from the Mac computer, select Microphone and System Audio On and click the Red button to start.

Step 3: Now you have a screen captured video with sound included. Since we need th audio only, we can attache the audio from the video first and then do some editing such as adding fade in and fade out effect, or remove unwanted audio clip.

Part 4: How to Set up Audacity to Record as Schedule?
A streaming video recorder or cassette can be used to arrange a recording. All of those are identical to Time Recordings in that they are used to schedule recording. The Timer record configuration dialog box may be used to set the beginning and finish of the recording. This is how you do it:
Step 1: By definition, the recording’s Start Date and Time are set to the present time. It will begin recording on the present day and hour by default when you don’t alter it. There is no default setting for the End Date and Time. You must either choose a date and time to determine the end time.

Step 2: There is a Checkbox to Save the work immediately. By Ticking the option, you may choose the path or Folder where the file will be saved when the recording is finished.

Conclusion
Well, there you have it – your complete Audacity Record Computer Audio guide. One thing is for certain that Audacity allows some great ways of recording audio from internal and external components of your Windows and Mac. However, if your Audacity is having issues, we would highly recommend opting for another software, such as Wondershare Filmora.
Wondershare Filmora is the finest thing that has come out in recent years for recording audio from a desktop. It is intended not just for pros but also for any enthusiast videographer who desires to create a high-quality movie for their family and friends. Download it today to make your movie a delightful journey with high-quality audio recording.
02 Record Sounds Playing on Your Computer Using Audacity on Win
03 Record Sounds Playing on Your Computer Using Audacity on Mac
04 Set up Audacity to Record as Schedule
Part 1: How to Record Audio On Audacity with a Microphone On Windows and Mac Computers?
For both Windows and Mac, the procedures for recording audio from a microphone are the same if you’re utilizing your desktop’s built-in mic or an external microphone. Here’s your step-by-step guide to audacity record using a microphone:
Step 1: Launch Audacity and get to know the Device Toolbar, situated underneath the playback controls. You may modify the Audio Host and the Recording and Playback Devices—all of which are required for Audacity recording.
Step 2: To begin, select Tracks under the Add New tab, Stereo Track, or Mono Track to create a new track.
Step 3: Select Recording Device from the options list. Select your microphone from the dropdown menu and hit the Record option.
Step 4: A soundwave emerges along the track as you talk into the speaker. The Recording Level may be found at the top of the display. To pause or stop the recording, click Stop or Pause until you select Record anew.
Step 5: With the mouse over any recording area, click the Delete button to cut out any portion of it quickly. Click Ctrl + A, then Delete to erase whatever you’ve just saved. Alternatively, press the X button to delete the track completely.
Part 2: How to Record Sounds Playing on Your Computer Using Audacity On Windows?
Unlike Mac, Windows makes it simple to capture audio from a movie or media file running on your desktop. There seem to be two primary methods for accomplishing audacity record desktop audio in this way:
1. Use MME as the Audio Host
Step 1: To use MME as your audio host, go to Tracks in the Add New tab in Stereo Track and create a new file.
Step 2: Change the Audio Host (to the left of Recording Device) to MME—this is the standard setting, so you might not have to change anything.
Step 3: Choose desired option from the Recording Device dropdown menu. Based on your configuration, this might be referred to as Wave Out or Loopback. When you’re uncertain, try it out.
Step 4: To record your audio source, click Record, then play it back.
2. Use WASAPI as the Audio Host
WASAPI provides higher-resolution digital recordings. If capturing audio from an external monitor, it’s also a good idea to utilize it.
Step 1: Convert the Audio Host from MME to Windows WASAPI after creating a fresh Stereo Track.
Step 2: Switch the Recording Device to Speaker (loopback). To display the entire label, you might have to slide the toolbar’s knobs outwards. Begin recording by pressing the red dot and then listen to the audio source. Audacity will capture the audio even if your PC is muted.
Part 3: How to Record Sounds Playing on Your Computer Using Audacity on Mac?
Unfortunately, there’s no ready-made method to record computer audio using Audacity on a Mac. Some alternative ways to use Audacity to record from Mac including using a loopback cable, or download and using a third-party software. You can try some Audacity alternatives to record the computer audio on Mac.
For Win 7 or later (64-bit)
For macOS 10.12 or later
If you have installed Filmora already, you can use it to record the sound playing on your Mac with some tricks.
Step 1: Luanch Filmora, and then click the Record button and select Record PC Screen.
Step 2: Set up the recording settings based on the need. Since we’re going to record the playing audio from the Mac computer, select Microphone and System Audio On and click the Red button to start.
Step 3: Now you have a screen captured video with sound included. Since we need th audio only, we can attache the audio from the video first and then do some editing such as adding fade in and fade out effect, or remove unwanted audio clip.
Part 4: How to Set up Audacity to Record as Schedule?
A streaming video recorder or cassette can be used to arrange a recording. All of those are identical to Time Recordings in that they are used to schedule recording. The Timer record configuration dialog box may be used to set the beginning and finish of the recording. This is how you do it:
Step 1: By definition, the recording’s Start Date and Time are set to the present time. It will begin recording on the present day and hour by default when you don’t alter it. There is no default setting for the End Date and Time. You must either choose a date and time to determine the end time.
Step 2: There is a Checkbox to Save the work immediately. By Ticking the option, you may choose the path or Folder where the file will be saved when the recording is finished.
Conclusion
Well, there you have it – your complete Audacity Record Computer Audio guide. One thing is for certain that Audacity allows some great ways of recording audio from internal and external components of your Windows and Mac. However, if your Audacity is having issues, we would highly recommend opting for another software, such as Wondershare Filmora.
Wondershare Filmora is the finest thing that has come out in recent years for recording audio from a desktop. It is intended not just for pros but also for any enthusiast videographer who desires to create a high-quality movie for their family and friends. Download it today to make your movie a delightful journey with high-quality audio recording.
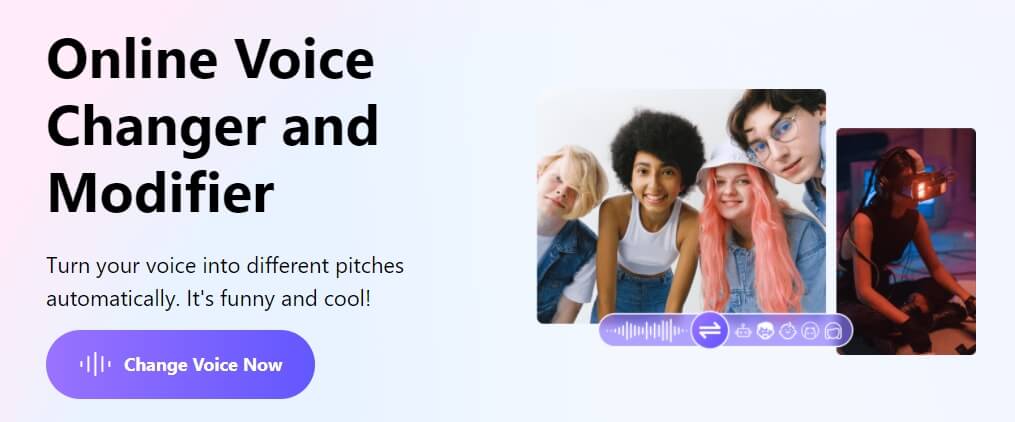
Innovative Top 10 Applications for Switching Masculine and Feminine Vocal Traits
If you’ve been searching for the best android and iOS voice-changing apps around the internet, you’re on the right spot. Voice-changing applications are always fun. They’re handy when you’re pulling a prank on a friend, or you want some amazing effects to test your voice. Thus, we provide you with all the best male to female voice changer apps in the list below.
Record & Edit Voice Fast before Changing Voice
Before changing your voice from male to female, I suggest you edit your voice first. Filmora is an easy-to-use yet powerful video editor helping you quickly edit voice no matter your voice or the audio extracted from videos. Explore Filmora’s audio editing features and get ready for changing voice!
For Win 7 or later (64-bit)
For macOS 10.12 or later


Part 1: Changing Voice Online for Free with Media.io
If you want to change voice without downloading and installing any app on your mobile phone, you can try some online solutions. Media.io is an all-in-one online video toolkit that allows you to edit, convert and compress video, audio and image files easily. The online voice changer from Media.io can transform your voice to a male voice, female voice, child voice, robot voice, and Donald Duck voice. If you wish to have voice filters, you won’t have any problems in the future with the Media.io voice changer.

This online voice changer works best on the Chrome browser, so you can utilize it whether using a Windows, Mac, Linux, or Chromebook device. As a result, you can deceive your family or friends by speaking in another people’s voice rather than your own. Doesn’t that sound like fun?
![]()
A cross-platform for making videos anywhere for all creators

Why your video editing isn’t good enough? How about some creative inspo?
- 100 Million+ Users
- 150+ Countries and Regions
- 4 Million+ Social Media Followers
- 5 Million+ Stock Media for Use
* Secure Download

Part 2: Best Male to Female Voice Changer Apps for iPhone and Android
- Girls Voice Changer
- Voice Changer Voice Recorder Editor & Effect
- VoiceFX
- Voice Changer
- Voice Changer - Audio effects
- Magic Call App
- Voice Changer and Sound Recorder
- Super Voice Editor
- Voice Changer with Effects
- Voice Changer - Girls Voice changer Male to Female
1. Girls Voice Changer
Available for: Android, iOS
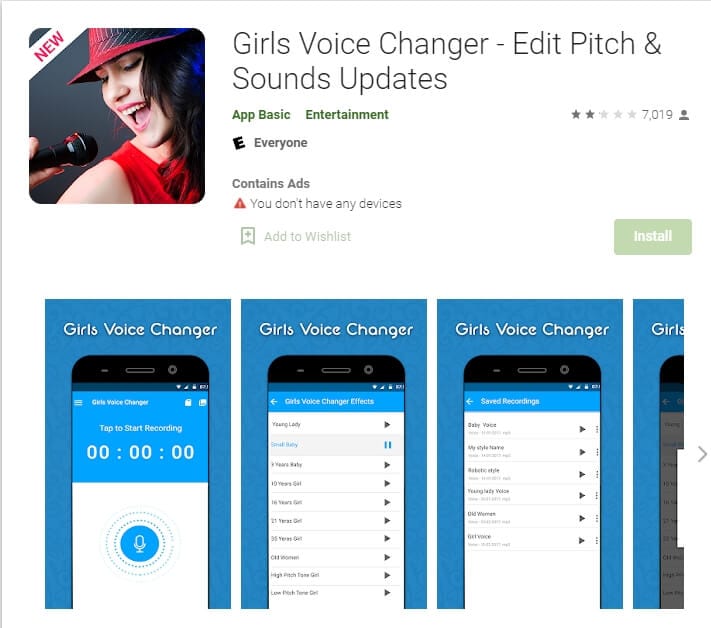
This girl voice changer app is highly portable and easy for any user to use comfortably. It is specifically more popular for changing male voice to female and for pitch adjustments. It’s completely free, so download on your android if you have a storage of about 8MB ready, and start using it!
This male-to-female voice changer app has several options in the library. Though the pitch adjustments are easy to make, some users have informed a lack of performance on very high-pitched settings. However, the smoothness of an android application also depends on how much space is readily available in the device. So next time you’re bored at a part, you have the perfect partner!
2. Voice Changer Voice Recorder Editor & Effect
Available for: Android
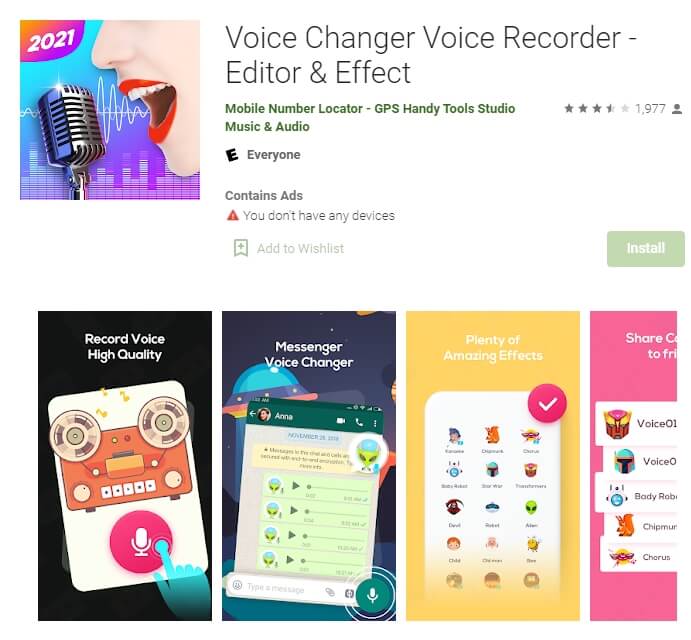
This voice changer application is for multi-purpose. Yes, you can use it as a girl voice changer smoothly and with ease. But apart from male to female voice changing, The “voice changer - voice editor application” can also be used to autotune your voice.
Now autotune is a big feature that every singer uses to make their voices tuned perfectly. With this app, you can also do the same to record your music or have fun while you are bored. The application is pretty to use and can be used as a girl voice changer not only for entertainment but also if you’re practicing. Many people who wish to seek a career in background voices might find this useful.
3. VoiceFX
Available for: Android

The VoiceFX application is filled with a lot of exciting options and features. If you are looking for an app that is more than just a male-to-female voice changer app, the voice fx is highly recommended.
You can also convert your voice into a robot or even an animal from male to female voice. Yes, you read it right. You can turn your manly voice into any of the fictional cartoons you want. This one’s a very easy and efficient way of filming a video with added effects or developing a mini-game with different voice characters. If you haven’t forgotten, there was a very big trend of converting famous music into chipmunk voices. With this app, you can convert your favorite songs into a chipmunk addition song without any problem.
4. Voice Changer
Available for: Android

The voice changer is a very famous male-to-female voice changer app. With over 10 million downloads on the google play store, the voice changer is highly recommended for users who have fun changing their voices from male to female. Compared to other voice changer applications, The Voice changer app has a very elegant and sleek design that makes it very easy to use.
Apart from the male to female voice change option, There are more than 50 other options that you can enjoy. Furthermore, you can share your creations with your friends through Bluetooth or other social media.
5. Voice Changer - Audio effects
Available for: Android

There are a lot of girl voice changer applications on the google play store. But not all of them are up to the mark. The Voice changer - audio effects is another highly recommended voice changer application.
The Voice Changer - Audio effects have a lot of other things to offer as well. Converting your voice from a male to a female has never been easier. Not only can you convert your voice into a girl, but you can also modify it. Furthermore, you can talk to your friends on the phone while you use the voice changer application. Moreover, the voices of animals and robots can also be an alternative to the female voice if you ever get bored of it.
6. Magic Call App
Available for: Android

The magic call is a real-time voice changer app that you can use for changing your voice during a call specifically. It is a really fun app which you can use with your friends to prank even your family!
This is a perfect option for people looking for a real-time girl voice changer app. The main purpose of this application is real-time calls. The magic call is ideal specifically for a male-to-female voice modification. And you can operate this application easily in call durations.
All you have to do is open the voice changer app and dial your call. Apart from Female voice, you can also convert your voice into a cartoon or an animal.
7. Voice Changer and Sound Recorder
Available for: iOS

If you are an iPhone user, then you must know that finding a voice changer on the apple store is like digging a diamond from the ground.
The Voice changer and sound recorder application is found exclusively on the apple store for people who love girl voice changer apps. It is a live call voice changer app, which means converting your voice from a male to a female in between the call. Furthermore, you can even add background voices such as traffic and echo to make your call even funnier. If you are looking for an excuse to get off from your call, then this application has got your back.
8. Super Voice Editor
Available for: Android
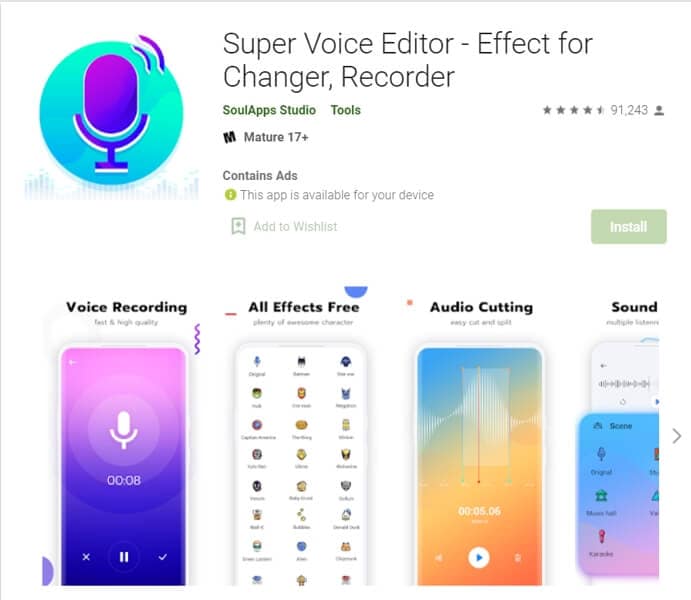
This one is a fun application for people searching for a voice changer app male to female. Not only can you record the audio that you edit, but also use it in real-time! Amazing right? Super voice editor enables you to add effects to your voice while you’re on a call as well. This feature means, next time you’re pulling a prank on the birthday boy, he won’t ever know! Sound like the wonder woman or dexter from his laboratory. The Super-Voice editor is perfect for kids playing in the house and even teenagers looking for something interesting. The SoulApps studio has made it easy for you to sound like your dream faces on the screen. With an MP3 cutter and Ringtone maker, this girl voice changer app is pure creativity.
9. Voice Changer with Effects
Available for: Android

Our list of girl voice changers, Voice changer with effects, is a very practical application that we highly recommend to our users.
With over 50 million downloads on google play, Voice changer with effects is highly suited for anyone looking for more than just a male-to-female voice changer. It has over 40 plus options such as helium, chipmunk, zombie, alien, and many more. With this application, you can even import a favorite audio clip of yours, and then you can easily convert it into a voice you like. If you want to modify your ringtone to an audio clip you just converted, then there is no better application than this one.
10. Voice Changer - Girls Voice changer Male to Female
Available for: Android

If you are looking for a girl voice changer app solely, this application perfectly fits you. The application is specifically designed only to change your voice from a male to a female. Although this application does provide options apart from female voice conversions, those features don’t function ideally. However, if you want a girl voice changer, you won’t have any trouble.
You can use this application while you are on a call. Hence, you can fool your family or friends by using a girl voice instead of your own. We recommend this as an average application that would fit your needs sufficiently.
In conclusion, you have now gone through the list of the perfect options for your android or iOS. Therefore, now you must be ready to choose the best girl voice changer app. So head on to your play store and search for your favorite app right now!
For Win 7 or later (64-bit)
For macOS 10.12 or later
Part 1: Changing Voice Online for Free with Media.io
If you want to change voice without downloading and installing any app on your mobile phone, you can try some online solutions. Media.io is an all-in-one online video toolkit that allows you to edit, convert and compress video, audio and image files easily. The online voice changer from Media.io can transform your voice to a male voice, female voice, child voice, robot voice, and Donald Duck voice. If you wish to have voice filters, you won’t have any problems in the future with the Media.io voice changer.
This online voice changer works best on the Chrome browser, so you can utilize it whether using a Windows, Mac, Linux, or Chromebook device. As a result, you can deceive your family or friends by speaking in another people’s voice rather than your own. Doesn’t that sound like fun?
![]()
A cross-platform for making videos anywhere for all creators
Why your video editing isn’t good enough? How about some creative inspo?
- 100 Million+ Users
- 150+ Countries and Regions
- 4 Million+ Social Media Followers
- 5 Million+ Stock Media for Use
* Secure Download
Part 2: Best Male to Female Voice Changer Apps for iPhone and Android
- Girls Voice Changer
- Voice Changer Voice Recorder Editor & Effect
- VoiceFX
- Voice Changer
- Voice Changer - Audio effects
- Magic Call App
- Voice Changer and Sound Recorder
- Super Voice Editor
- Voice Changer with Effects
- Voice Changer - Girls Voice changer Male to Female
1. Girls Voice Changer
Available for: Android, iOS
This girl voice changer app is highly portable and easy for any user to use comfortably. It is specifically more popular for changing male voice to female and for pitch adjustments. It’s completely free, so download on your android if you have a storage of about 8MB ready, and start using it!
This male-to-female voice changer app has several options in the library. Though the pitch adjustments are easy to make, some users have informed a lack of performance on very high-pitched settings. However, the smoothness of an android application also depends on how much space is readily available in the device. So next time you’re bored at a part, you have the perfect partner!
2. Voice Changer Voice Recorder Editor & Effect
Available for: Android
This voice changer application is for multi-purpose. Yes, you can use it as a girl voice changer smoothly and with ease. But apart from male to female voice changing, The “voice changer - voice editor application” can also be used to autotune your voice.
Now autotune is a big feature that every singer uses to make their voices tuned perfectly. With this app, you can also do the same to record your music or have fun while you are bored. The application is pretty to use and can be used as a girl voice changer not only for entertainment but also if you’re practicing. Many people who wish to seek a career in background voices might find this useful.
3. VoiceFX
Available for: Android
The VoiceFX application is filled with a lot of exciting options and features. If you are looking for an app that is more than just a male-to-female voice changer app, the voice fx is highly recommended.
You can also convert your voice into a robot or even an animal from male to female voice. Yes, you read it right. You can turn your manly voice into any of the fictional cartoons you want. This one’s a very easy and efficient way of filming a video with added effects or developing a mini-game with different voice characters. If you haven’t forgotten, there was a very big trend of converting famous music into chipmunk voices. With this app, you can convert your favorite songs into a chipmunk addition song without any problem.
4. Voice Changer
Available for: Android
The voice changer is a very famous male-to-female voice changer app. With over 10 million downloads on the google play store, the voice changer is highly recommended for users who have fun changing their voices from male to female. Compared to other voice changer applications, The Voice changer app has a very elegant and sleek design that makes it very easy to use.
Apart from the male to female voice change option, There are more than 50 other options that you can enjoy. Furthermore, you can share your creations with your friends through Bluetooth or other social media.
5. Voice Changer - Audio effects
Available for: Android
There are a lot of girl voice changer applications on the google play store. But not all of them are up to the mark. The Voice changer - audio effects is another highly recommended voice changer application.
The Voice Changer - Audio effects have a lot of other things to offer as well. Converting your voice from a male to a female has never been easier. Not only can you convert your voice into a girl, but you can also modify it. Furthermore, you can talk to your friends on the phone while you use the voice changer application. Moreover, the voices of animals and robots can also be an alternative to the female voice if you ever get bored of it.
6. Magic Call App
Available for: Android
The magic call is a real-time voice changer app that you can use for changing your voice during a call specifically. It is a really fun app which you can use with your friends to prank even your family!
This is a perfect option for people looking for a real-time girl voice changer app. The main purpose of this application is real-time calls. The magic call is ideal specifically for a male-to-female voice modification. And you can operate this application easily in call durations.
All you have to do is open the voice changer app and dial your call. Apart from Female voice, you can also convert your voice into a cartoon or an animal.
7. Voice Changer and Sound Recorder
Available for: iOS
If you are an iPhone user, then you must know that finding a voice changer on the apple store is like digging a diamond from the ground.
The Voice changer and sound recorder application is found exclusively on the apple store for people who love girl voice changer apps. It is a live call voice changer app, which means converting your voice from a male to a female in between the call. Furthermore, you can even add background voices such as traffic and echo to make your call even funnier. If you are looking for an excuse to get off from your call, then this application has got your back.
8. Super Voice Editor
Available for: Android
This one is a fun application for people searching for a voice changer app male to female. Not only can you record the audio that you edit, but also use it in real-time! Amazing right? Super voice editor enables you to add effects to your voice while you’re on a call as well. This feature means, next time you’re pulling a prank on the birthday boy, he won’t ever know! Sound like the wonder woman or dexter from his laboratory. The Super-Voice editor is perfect for kids playing in the house and even teenagers looking for something interesting. The SoulApps studio has made it easy for you to sound like your dream faces on the screen. With an MP3 cutter and Ringtone maker, this girl voice changer app is pure creativity.
9. Voice Changer with Effects
Available for: Android
Our list of girl voice changers, Voice changer with effects, is a very practical application that we highly recommend to our users.
With over 50 million downloads on google play, Voice changer with effects is highly suited for anyone looking for more than just a male-to-female voice changer. It has over 40 plus options such as helium, chipmunk, zombie, alien, and many more. With this application, you can even import a favorite audio clip of yours, and then you can easily convert it into a voice you like. If you want to modify your ringtone to an audio clip you just converted, then there is no better application than this one.
10. Voice Changer - Girls Voice changer Male to Female
Available for: Android
If you are looking for a girl voice changer app solely, this application perfectly fits you. The application is specifically designed only to change your voice from a male to a female. Although this application does provide options apart from female voice conversions, those features don’t function ideally. However, if you want a girl voice changer, you won’t have any trouble.
You can use this application while you are on a call. Hence, you can fool your family or friends by using a girl voice instead of your own. We recommend this as an average application that would fit your needs sufficiently.
In conclusion, you have now gone through the list of the perfect options for your android or iOS. Therefore, now you must be ready to choose the best girl voice changer app. So head on to your play store and search for your favorite app right now!
From Silence to Symphony: The Complete Process of Adding Music to KineMaster
Versatile Video Editor - Wondershare Filmora
An easy yet powerful editor
Numerous effects to choose from
Detailed tutorials provided by the official channel
Finding the right app to help you edit videos can be a bit of a chore. Finding a video editor that helps you seamlessly on the go can help immensely. If you’re looking for specific functions like how to add music on KineMaster.
The KineMaster app is ideally suited for beginners who have just taken an interest in learning video editing or professionals. It’s perfect if you’re just in it to create a celebratory video for special occasions like birthdays, weddings, anniversaries, or other special events.
It can also help you bring your A-game to the field if you’re a professional video editor looking to do serious work for clients. It’s easier to use than desktop video editing software.
In this article
01 [Basic introduction about KineMaster](#Part 1)
02 [How to add music to KineMaster](#Part 2)
03 [How to add Youtube/Spotify Music to KineMaster](#Part 3)
04 [Besides Adding Music, Here’s What You Can Do With KineMaster ](#Part 4)
Part 1 Basic introduction about KineMaster
KineMaster is a video editing app available for free download. It’s supported on both Android and iOS. It’s packed with many editing features, some commonplace and others advanced. This is why it’s the perfect app to learn how to add music in KineMaster.
You can download the app for free. It comes with a premium subscription that unlocks advanced features and tools. You can use KineMaster on your mobile to arrange scenes, transitions, and tools to cut, trim and edit videos as well as images. You can utilize layer support to create cinematic enhancements for your videos.

You can correct colors with color grading and create vibrant videos bursting with color and life. You can use blending modes, add effects and use graphics directly on the video with customized layers. One thing to note is that the free version of the videos comes with a watermark.
As for audio, it’s a simple matter to learn how to add music to video in KineMaster. Let’s look at how to add music in KineMaster iOS and Android. The Play Store version can help you with how to add music to KineMaster on Chromebook as well.
Part 2 How to add music to KineMaster
Follow these simple steps after downloading the app to your phone. After you enter KineMaster, you’ll be greeted by a home page that offers the chance to start a new project or continue to edit an existing one.
If you want to load an existing video on the app, then go to the media section. This means tapping on the ‘Audio’ icon option. It will allow you to browse your phone for images and videos you want to load on your phone. Tap the checkmark on the right-hand corner to add the video to the project. With the footage chosen, all that’s left is to add music to KineMaster.

Now let’s look at how to add music to a video in KineMaster. The first thing you need to do is decide if you want to choose a custom track or know how to add music to KineMaster without ‘my media.’

KineMaster’s premium edition comes with its library. In the meantime, we’ll have to use the tracks of our preference. So let’s get back to how to add music in KineMaster video.
When choosing a custom track, know what file you’re opting for. It’s simple to do when you know how to add music to video in KineMaster. It can support audio files in mp3, wav, m4v formats.

Once you’ve picked the appropriate file, you can choose the big red ‘Plus’ sign at the end of the file name. This will add audio to the video file. With this, you now know how to add music to a video on KineMaster.

Once you’re done with editing your video file, you can simply tap on the export symbol on the right-hand corner of the app.

Part 3 How to add Youtube/Spotify Music to KineMaster
How To Add Music To A KineMaster Video Using Youtube Audio Library
Now let’s tap into the knowledge for the YouTube edition of how to add music into KineMaster. You can source the free music from YouTube’s creator studio. It offers many options for copyright-free music. In all cases, you must credit the artist, and some artists may request you to contribute in exchange for their art.

YouTube allows users to download the audio file as an mp3. You can then use this mp3 file in KineMaster. To do so you. Once you’ve imported the video file, you can then choose how to add music to KineMaster.
Tap the ‘Media’ button to browse the audio file you want to include. Click on the big red plus encircled by a circle at the end of the file name.
How To Add Music To A KineMaster Video Using Spotify Audio
Unfortunately, all of Spotify’s tracks are exclusively licensed for usage only within the software. It cannot simply import Spotify audio into video editors like KineMaster for additional editing.

However, if you could export the relevant files to your mobile device. We can help you know how you can learn how to add music to KineMaster on iPad or any android device.
● Tap on ‘Media’
● Browse files until you locate the audio track
● Click on the encircled red plus sign.
● Edit track to fit your video
● Export video
That, dear readers, is how to add music to KineMaster.
Part 4 Besides Adding Music, Here’s What You Can Do With KineMaster
KineMaster is the best video editor app available for mobile devices. With extensive availability ranging from iPads to Chromebooks and everything in between. It’s easy to edit on the go.
It’s convenient when you’re editing while traveling or if you hate sitting still to work. It’s powerful to help you perform the tasks you need to while light enough to support on mobile.
Let’s look at some of the features available on KineMaster.
Trim/Split Video
You can customize a single clip from a longer video or trim the video for a highlights reel. Tap on the scissors option to open a window with four options.

The first is to trim to the ‘left of playhead’ (cuts before), trim to ‘right of playhead’ (cuts after), ‘split at playhead’ (splits the video into two). The final option is to ‘split and insert freeze frame.’ These options give you a lot of control over the video.
Video Transitions
You have many transitions ranging from 3D transitions to transitions for text or picture in picture options. Once you’ve selected the transition, tap on the tick mark at the top right corner to apply the effect.

Handwriting
This lets you handwrite messages, doodles, and more as a layer on top of your video. It can add a personal and creative flair to the video. When used in conjunction with the animation effects, you can expand the scope of use. You can enrich your videos with detailed and hand-drawn assists.

Animations
One of the better aspects of the KineMaster app is that you can animate individual elements in your video. Each animation has its layer. There are three types of animation.

For instance, ‘in animation’ guides how the animation enters. The ‘out animation’ can be used at the end of a clip or when characters exit. ‘Overall animations’ are sustained throughout the video. You have the option to customize animations.
Suppose you’re looking for a powerful video editor like KineMaster for your desktop/PC. Look no further thanWondershare Filmora. The software program is a powerful tool for video editing available for both Windows and macOS.
It’s the perfect blend of skill and automation that lets users showcase their talents. Both novices and industry professionals can use Filmora video editing with ease. It boasts a broader range of features and effects to draw on. With advanced video editing capabilities, you can never go wrong when using Wondershare Filmora.
Wondershare Filmora
Get started easily with Filmora’s powerful performance, intuitive interface, and countless effects!
Try It Free Try It Free Try It Free Learn More about Filmora>

Conclusion
KineMaster is among the greatest Android and iPhone video editing apps. This program allows users to edit films with a few basic tricks to look sophisticated. You can learn how to add music to KineMaster easily. With or without experience, everyone can spice up a video with its simple interface and robust capabilities.
Similarly, video editing from your smartphone is another one of the many methods to expand your creative horizons. Another is to use Wondershare Filmora video editing software.
Finding the right app to help you edit videos can be a bit of a chore. Finding a video editor that helps you seamlessly on the go can help immensely. If you’re looking for specific functions like how to add music on KineMaster.
The KineMaster app is ideally suited for beginners who have just taken an interest in learning video editing or professionals. It’s perfect if you’re just in it to create a celebratory video for special occasions like birthdays, weddings, anniversaries, or other special events.
It can also help you bring your A-game to the field if you’re a professional video editor looking to do serious work for clients. It’s easier to use than desktop video editing software.
In this article
01 [Basic introduction about KineMaster](#Part 1)
02 [How to add music to KineMaster](#Part 2)
03 [How to add Youtube/Spotify Music to KineMaster](#Part 3)
04 [Besides Adding Music, Here’s What You Can Do With KineMaster ](#Part 4)
Part 1 Basic introduction about KineMaster
KineMaster is a video editing app available for free download. It’s supported on both Android and iOS. It’s packed with many editing features, some commonplace and others advanced. This is why it’s the perfect app to learn how to add music in KineMaster.
You can download the app for free. It comes with a premium subscription that unlocks advanced features and tools. You can use KineMaster on your mobile to arrange scenes, transitions, and tools to cut, trim and edit videos as well as images. You can utilize layer support to create cinematic enhancements for your videos.
You can correct colors with color grading and create vibrant videos bursting with color and life. You can use blending modes, add effects and use graphics directly on the video with customized layers. One thing to note is that the free version of the videos comes with a watermark.
As for audio, it’s a simple matter to learn how to add music to video in KineMaster. Let’s look at how to add music in KineMaster iOS and Android. The Play Store version can help you with how to add music to KineMaster on Chromebook as well.
Part 2 How to add music to KineMaster
Follow these simple steps after downloading the app to your phone. After you enter KineMaster, you’ll be greeted by a home page that offers the chance to start a new project or continue to edit an existing one.
If you want to load an existing video on the app, then go to the media section. This means tapping on the ‘Audio’ icon option. It will allow you to browse your phone for images and videos you want to load on your phone. Tap the checkmark on the right-hand corner to add the video to the project. With the footage chosen, all that’s left is to add music to KineMaster.
Now let’s look at how to add music to a video in KineMaster. The first thing you need to do is decide if you want to choose a custom track or know how to add music to KineMaster without ‘my media.’
KineMaster’s premium edition comes with its library. In the meantime, we’ll have to use the tracks of our preference. So let’s get back to how to add music in KineMaster video.
When choosing a custom track, know what file you’re opting for. It’s simple to do when you know how to add music to video in KineMaster. It can support audio files in mp3, wav, m4v formats.
Once you’ve picked the appropriate file, you can choose the big red ‘Plus’ sign at the end of the file name. This will add audio to the video file. With this, you now know how to add music to a video on KineMaster.
Once you’re done with editing your video file, you can simply tap on the export symbol on the right-hand corner of the app.
Part 3 How to add Youtube/Spotify Music to KineMaster
How To Add Music To A KineMaster Video Using Youtube Audio Library
Now let’s tap into the knowledge for the YouTube edition of how to add music into KineMaster. You can source the free music from YouTube’s creator studio. It offers many options for copyright-free music. In all cases, you must credit the artist, and some artists may request you to contribute in exchange for their art.
YouTube allows users to download the audio file as an mp3. You can then use this mp3 file in KineMaster. To do so you. Once you’ve imported the video file, you can then choose how to add music to KineMaster.
Tap the ‘Media’ button to browse the audio file you want to include. Click on the big red plus encircled by a circle at the end of the file name.
How To Add Music To A KineMaster Video Using Spotify Audio
Unfortunately, all of Spotify’s tracks are exclusively licensed for usage only within the software. It cannot simply import Spotify audio into video editors like KineMaster for additional editing.
However, if you could export the relevant files to your mobile device. We can help you know how you can learn how to add music to KineMaster on iPad or any android device.
● Tap on ‘Media’
● Browse files until you locate the audio track
● Click on the encircled red plus sign.
● Edit track to fit your video
● Export video
That, dear readers, is how to add music to KineMaster.
Part 4 Besides Adding Music, Here’s What You Can Do With KineMaster
KineMaster is the best video editor app available for mobile devices. With extensive availability ranging from iPads to Chromebooks and everything in between. It’s easy to edit on the go.
It’s convenient when you’re editing while traveling or if you hate sitting still to work. It’s powerful to help you perform the tasks you need to while light enough to support on mobile.
Let’s look at some of the features available on KineMaster.
Trim/Split Video
You can customize a single clip from a longer video or trim the video for a highlights reel. Tap on the scissors option to open a window with four options.
The first is to trim to the ‘left of playhead’ (cuts before), trim to ‘right of playhead’ (cuts after), ‘split at playhead’ (splits the video into two). The final option is to ‘split and insert freeze frame.’ These options give you a lot of control over the video.
Video Transitions
You have many transitions ranging from 3D transitions to transitions for text or picture in picture options. Once you’ve selected the transition, tap on the tick mark at the top right corner to apply the effect.
Handwriting
This lets you handwrite messages, doodles, and more as a layer on top of your video. It can add a personal and creative flair to the video. When used in conjunction with the animation effects, you can expand the scope of use. You can enrich your videos with detailed and hand-drawn assists.
Animations
One of the better aspects of the KineMaster app is that you can animate individual elements in your video. Each animation has its layer. There are three types of animation.
For instance, ‘in animation’ guides how the animation enters. The ‘out animation’ can be used at the end of a clip or when characters exit. ‘Overall animations’ are sustained throughout the video. You have the option to customize animations.
Suppose you’re looking for a powerful video editor like KineMaster for your desktop/PC. Look no further thanWondershare Filmora. The software program is a powerful tool for video editing available for both Windows and macOS.
It’s the perfect blend of skill and automation that lets users showcase their talents. Both novices and industry professionals can use Filmora video editing with ease. It boasts a broader range of features and effects to draw on. With advanced video editing capabilities, you can never go wrong when using Wondershare Filmora.
Wondershare Filmora
Get started easily with Filmora’s powerful performance, intuitive interface, and countless effects!
Try It Free Try It Free Try It Free Learn More about Filmora>
Conclusion
KineMaster is among the greatest Android and iPhone video editing apps. This program allows users to edit films with a few basic tricks to look sophisticated. You can learn how to add music to KineMaster easily. With or without experience, everyone can spice up a video with its simple interface and robust capabilities.
Similarly, video editing from your smartphone is another one of the many methods to expand your creative horizons. Another is to use Wondershare Filmora video editing software.
Also read:
- 2024 Approved Mastering the Basics Essential Podcast Editing Tips for Novices
- Updated The Best in Class A Top 10 Roundup of Cutting-Edge Instant Voice Alteration Technologies
- Updated Navigating the Increase/Decrease Functionality in Audacity for Clearer Sounds for 2024
- Updated 2024 Approved The Quiet Revolution Cutting-Edge Approaches to Taming Sibilance in Audio Editing
- Precision Listening Top Audio Customization Techniques
- Audio Purity Unleashed Advanced Noise Reduction Techniques Using Wondershare Filmora for 2024
- Updated 2024 Approved Top 8 Audio Capture Tools for Live Broadcasts and Recordings
- 2024 Approved From Airwaves to Hard Drives A Comprehensive Manual for Computer-Based Podcast Archiving
- New Explore the Best 8 DAW Platforms for Seamless Recording, Mixing, and Mastering Experience for 2024
- New Sync Your Stories Essential Strategies for Incorporating Audio in Android Videography
- Updated Infusing Auditory Experience in Visual Storytelling for 2024
- Updated In 2024, Insightful Exploration Discovering the Finest Zero-Price Free Audio Design Platforms on Windows
- New In 2024, Unlock the Power of Seamless Movement with These 7 Trendy Transition Audio Files (No Cost)
- Soundless Videos The Quintessential Methods to Ditch Noise Online for 2024
- New In 2024, Breakdown of Job Functions in the World of Movie-Making
- New Navigating the Best Options for Mac MP3 Metadata Editors for 2024
- New In 2024, The Ultimate List of Easy-to-Find Websites Offering Free Ding Noise Sounds
- Full Screen Vimeo Video Details with Aspect Ratio Information for 2024
- New Is Auto-Gain Control Effective in Optimizing Speech Intelligibility, In 2024
- New Forge Your Path with Music Top 6 Budget-Friendly DAW Tools Recommended for Beginners
- How to Add Music/ Audio to a GIF on Mac, In 2024
- In 2024, HarmonyVoices Mastering Cross-Platform Audio Synchronization in Adobe Premiere Pro
- Win & Apple Users Favorites Top Picks for Audio Recording Technology (MP3)
- Basic Tongue Articulation Adjustments A Comprehensive Guide to Utilities, Policies, and Replacements
- Best Auto Music Mixer for Mac
- Updated How Does Dynamic Range Processing Improve Audio Quality?
- 2024 Approved Ultimate 11 Handy Apps for On-the-Go Music Mixing
- Updated Must-Have Strategies for Building a Comprehensive YouTube Auditory Collection
- Updated The Ultimate Guide Seamless MP4 Audio Extraction Techniques for 2024
- In 2024, Sonic Journey on the House Start Listening to Music for Nothing
- Updated 2024 Approved The Secret Weapon of Gamers Vocal Charisma Mastering Morphvox Techniques for In-Game Broadcasts
- Updated 2024 Approved Mastering Your Music Production The Best Windows and Mac DAWs of the Year 2023
- 2024 Approved Applications for Adding Audio to Video in Android
- Ultimate Windows Audio Cleanse Guide Efficacious Removal of Background Noise Techniques for 2024
- New Exploring Alternatives to Vocaroo A Roadmap for Audio Documentation for 2024
- Updated Essential Tips for Incorporating Music Seamlessly Into Video Productions Without Financial Barriers for 2024
- In 2024, Basic Tongue Articulation Adjustments A Comprehensive Guide to Utilities, Policies, and Replacements
- Updated Harmonizing Hands-On An In-Depth Look at Tools for Extracting the Essence of a Tune
- New 2024 Approved Discovering the Fury in Canine Vocalizations
- In 2024, Transcribing Speech to MP3 Audio Format for Diverse Platforms
- New 2024 Approved The Ultimate Adobe Premiere Plugin Collection Top 15 Tools (Free & Paid)
- In 2024, 3 Effective Methods to Fake GPS location on Android For your Itel A05s | Dr.fone
- Bypass Activation Lock On iPhone SE (2022) - 4 Easy Ways
- In 2024, Unova Stone Pokémon Go Evolution List and How Catch Them For Lava Storm 5G | Dr.fone
- Proven Ways to Fix There Was A Problem Parsing the Package on Xiaomi Redmi Note 13 Pro 5G | Dr.fone
- Updated WhatsApp Status Editor Apps Top Picks for 2024
- In 2024, Easy Guide How To Bypass Infinix Note 30 FRP Android 10/11/12/13
- In 2024, How to Mirror Apple iPhone 12 mini to Other iPhone? | Dr.fone
- Updated 2024 Approved The Best Speech to Text Apps on Mac You Might Miss Free & No Download
- In 2024, Hassle-Free Ways to Remove FRP Lock on Asus ROG Phone 8with/without a PC
- All Must-Knows to Use Fake GPS GO Location Spoofer On Samsung Galaxy A54 5G | Dr.fone
- In 2024, The Best Virtualdub Replacements for Video Editing
- How to Factory Reset iPhone 6s Plus and iPad Without Apple ID | Stellar
- What is Geo-Blocking and How to Bypass it On Infinix Zero 5G 2023 Turbo? | Dr.fone
- In 2024, Top IMEI Unlokers for iPhone 6 and Android Phones
- In 2024, How to Unlock SIM Card on Nokia online without jailbreak
- 5 Ways to Restart Oppo Reno 11 Pro 5G Without Power Button | Dr.fone
- Updated In 2024, Great Guide for Beginners on 2D Animation Making
- Android Video Editing Made Easy Top 10 iMovie Alternatives for 2024
- New 2024 Approved 7 Best MP4 Editors on Mac Edit MP4 in Mac
- Pokemon Go Error 12 Failed to Detect Location On HTC U23 Pro? | Dr.fone
- Unlocking the Power of Smart Lock A Beginners Guide for Xiaomi 13T Pro Users
- In 2024, 4 solution to get rid of pokemon fail to detect location On Apple iPhone 6s Plus | Dr.fone
- How to Simulate GPS Movement in AR games On Realme 10T 5G? | Dr.fone
- Updated In 2024, Filmora 13 Editor Download Free No Subscription Needed
- New Secret Shortcut to Adobe Animate Character Tutorial for 2024
- In 2024, Ultimate Guide to Catch the Regional-Located Pokemon For Poco X6 Pro | Dr.fone
- In 2024, How and Where to Find a Shiny Stone Pokémon For Oppo Reno 11 Pro 5G? | Dr.fone
- Updated 2024 Approved How to Comment on YouTube Live Chat
- New In 2024, Get Moving with Motion Blur A Beginners Guide to Final Cut Pro Effects
- In 2024, How To Stream Anything From Realme 12+ 5G to Apple TV | Dr.fone
- How to Fix Android App Not Installed Error on Tecno Pova 5 Quickly? | Dr.fone
- Edit and Send Fake Location on Telegram For your Oppo A18 in 3 Ways | Dr.fone
- Full Tutorial to Bypass Your Vivo S18e Face Lock?
- Title: In 2024, Audience-Friendly Approach to PC Audio Recording Using Audacity Gratis
- Author: David
- Created at : 2024-06-10 05:53:00
- Updated at : 2024-06-11 05:53:00
- Link: https://sound-tweaking.techidaily.com/in-2024-audience-friendly-approach-to-pc-audio-recording-using-audacity-gratis/
- License: This work is licensed under CC BY-NC-SA 4.0.
