
:max_bytes(150000):strip_icc():format(webp)/ps6-concept-trailer-64aac5b7323041ad93d7535eccf7df40.png)
In 2024, A Comprehensive Walkthrough to Modify Videos Speaker Output
A Comprehensive Walkthrough to Modify Video’s Speaker Output
Video editing is inclusive of editing the audio track. You may be working on background scores, original soundtracks, and different kinds of sound effects. These tasks would need you to edit or replace audio in the video. You may have to mix other audio tracks to have one score. From sound engineering to finely editing every track being mixed, it is an ever expanding and exciting technical niche that will depend largely on a plethora of tools, so in this article, we will let you how to replace audio in video with 2 methods by using Filmora and Windows Movie Maker.
In this article
01 How to replace audio in video with Filmora
02 How to change audio in video with Windows Movie Maker
Part 1: How to replace audio in video with Filmora
The first method, let us explore how you can replace audio in video with Wondershare Filmora.
To begin with, get a free trial copy of Wondershare Filmora .
For Win 7 or later (64-bit)
For macOS 10.12 or later
Step 1. Import file
Open the application and click ‘ Import once you have downloaded and installed Wondershare Filmora. Please search for the relevant video you wish to edit and load it from the hard disk or the specific folder. You can select multiple videos using ‘ctrl’ and clicking on the chosen files.

Step 2. Drag and drop to the video Timeline
The videos selected will be displayed as thumbnails. Choose a video, hit and click without releasing the click and drag the chosen video to the Video Timeline.

Step 3. Remove the original sound of the video
Right-click on it, and you would see the option of “Audio detach.” Click on it, and the audio file will detach from the video file and get added to Music Timeline.
Press “Delete” on your keyboard, and you will get rid of it. You can save this video without the audio, and you would only have the visuals, unimpaired and unaffected in any way, without the sound.

Step 4. Add a new audio track
You can add a new audio track to the video by choosing royalty sound or music from the Filmora library or importing any audio you like.

Part 2: How to change audio in video with Windows Movie Maker
The second method, Apart from replacing audio by Filmora, you can also make it by Windows Movie Maker. Though it is discontinued to develop a new version, you can still use it in Windows 7. Below are the steps to replace audio in Windows Movie Maker .
Step 1: Import video
First, download and run it. Click Add videos and photos to import video.

Step 2: Turn off the original sound
Click Edit tab > Video volume to turn off the sound by draging the slider to the left.

Step 3: Add audio to video
Click Add music to import the targeted music to Windows Movie Maker. You can select Add music or Add music at the current point.

Step 4: Save project
Click the file icon in the top left corner to save the video. Choose Save movie to export the targeted file.

Wondershare Filmora allows you to replace easily and edit the audio in the video
Unfortunately, no application by default on your desktop or laptop, phone, or tablet would get this done. To replace audio in the video, you would need the help of state of the art software. Fortunately, you have Wondershare Filmora at your disposal.
With Wondershare Filmora, you can replace audio in the video, mute audio, detach the audio, and add audio. You can eliminate background noise, organic noise, sound effects, address the sync problem in a video file, and edit the audio in a video without any extensive training or expertise.
- It has a user-friendly interface which makes things simple even for amateurs.
- It supports all common video and audio formats, including WMV, MOV, FLV, MTS, MP4, etc.
- You can move audio, replace it or add new audio to the video without worrying about general loss, which is loss of quality.
- You can export the edited video with the new or edited audio to various devices, including the cloud and social media sites.
- Compatible with Windows (including Windows 8) & Mac OS X (10.6 and above).
For Win 7 or later (64-bit)
For macOS 10.12 or later
02 How to change audio in video with Windows Movie Maker
Part 1: How to replace audio in video with Filmora
The first method, let us explore how you can replace audio in video with Wondershare Filmora.
To begin with, get a free trial copy of Wondershare Filmora .
For Win 7 or later (64-bit)
For macOS 10.12 or later
Step 1. Import file
Open the application and click ‘ Import once you have downloaded and installed Wondershare Filmora. Please search for the relevant video you wish to edit and load it from the hard disk or the specific folder. You can select multiple videos using ‘ctrl’ and clicking on the chosen files.
Step 2. Drag and drop to the video Timeline
The videos selected will be displayed as thumbnails. Choose a video, hit and click without releasing the click and drag the chosen video to the Video Timeline.
Step 3. Remove the original sound of the video
Right-click on it, and you would see the option of “Audio detach.” Click on it, and the audio file will detach from the video file and get added to Music Timeline.
Press “Delete” on your keyboard, and you will get rid of it. You can save this video without the audio, and you would only have the visuals, unimpaired and unaffected in any way, without the sound.
Step 4. Add a new audio track
You can add a new audio track to the video by choosing royalty sound or music from the Filmora library or importing any audio you like.
Part 2: How to change audio in video with Windows Movie Maker
The second method, Apart from replacing audio by Filmora, you can also make it by Windows Movie Maker. Though it is discontinued to develop a new version, you can still use it in Windows 7. Below are the steps to replace audio in Windows Movie Maker .
Step 1: Import video
First, download and run it. Click Add videos and photos to import video.
Step 2: Turn off the original sound
Click Edit tab > Video volume to turn off the sound by draging the slider to the left.
Step 3: Add audio to video
Click Add music to import the targeted music to Windows Movie Maker. You can select Add music or Add music at the current point.
Step 4: Save project
Click the file icon in the top left corner to save the video. Choose Save movie to export the targeted file.
Wondershare Filmora allows you to replace easily and edit the audio in the video
Unfortunately, no application by default on your desktop or laptop, phone, or tablet would get this done. To replace audio in the video, you would need the help of state of the art software. Fortunately, you have Wondershare Filmora at your disposal.
With Wondershare Filmora, you can replace audio in the video, mute audio, detach the audio, and add audio. You can eliminate background noise, organic noise, sound effects, address the sync problem in a video file, and edit the audio in a video without any extensive training or expertise.
- It has a user-friendly interface which makes things simple even for amateurs.
- It supports all common video and audio formats, including WMV, MOV, FLV, MTS, MP4, etc.
- You can move audio, replace it or add new audio to the video without worrying about general loss, which is loss of quality.
- You can export the edited video with the new or edited audio to various devices, including the cloud and social media sites.
- Compatible with Windows (including Windows 8) & Mac OS X (10.6 and above).
For Win 7 or later (64-bit)
For macOS 10.12 or later
Essential No-Cost Android Microphone Recorders Reviewed
10 Best Voice Recording Apps for Android Devices [Free Included]

Benjamin Arango
Mar 27, 2024• Proven solutions
Memorizing every bit of information you need to perform your daily or weekly tasks becomes increasingly difficult as your workload rises. Students, journalists, and professionals from a wide array of industries can benefit from making audio notes or even recording entire conversations with their Smartphones.
A simple Android voice recorder can make this task easy since you can just tap on the Record button and create an audio note in seconds. However, with so many voice recorder apps for Android devices out there, finding the one best suited for your needs can be more complicated than it seems. So, in this article, we are going to help you discover some best free voice recorder for an Android device you are currently using.
Want to record voiceover and audio on iPhone? Check 10 Best Voice Recorder Apps for iPhones >>
10 Best Free Voice Recording Apps for Android Devices
Recording audio is no longer a highly technical process since now you can create an audio note or record an interview with an Android phone and a voice recorder app. The question is which voice recording app should you install on your device. So, let’s take a look at some of the most potent Android voice recorders you can find at Google Play Store.
1. Easy Voice Recorder Pro
Price: $3.99
Supported OS: Varies with the device
Best for: Students, musicians, and businessmen
App in Google Play
As the app’s name suggests making recordings for a broad range of purposes is easy. All you need to do is launch the app and start a new audio recording session. Easy Voice Recorder Pro doesn’t limit the duration of your recordings, and it also allows you to compress the recorded audio . That is perfect if you need to record long lectures or conversations. Besides, you can connect an external microphone with the app in case you want to increase the quality of the sound you are recording. The app also lets you store your recordings on Dropbox or Google Drive, while it also offers the possibility to send recordings via email.
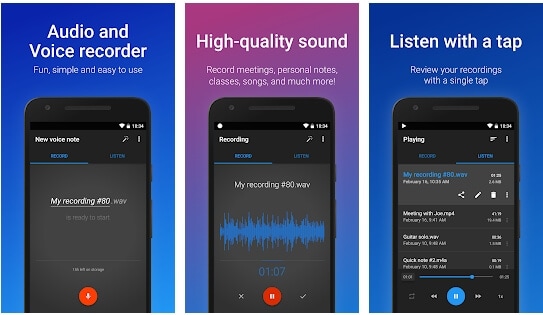
Easy Voice Recorder Pro Interface
Pros
- Allows users to manage and organize their recordings effortlessly
- Supports all standard output audio file formats
- Offers the option to record in stereo
- Recordings made with this app can be used as the ringtone
Cons
- Ads can be frustrating
- Limited basic audio editing tools
2. Smart Recorder – High-quality voice recorder
Price: Free, but contains ads and offers in-app purchases
Supported OS: Varies with the device
Best for: Students, musicians, and businessmen
App in Google Play
Capturing high-quality audio recordings effortlessly is the ultimate goal of all Android users who want to use voice recorders. As one of the best free voice recorders for Android, Smart Recorder app has a plethora of features that enable users to make high-quality audio recordings even in imperfect conditions. Options like Live Audio Spectrum Analyzer, microphone gain calibration or automatic and manual sensitivity control in Skip Silence mode are just a few reasons why this app has over 10 million installs. However, you should keep in mind that you cannot create audio files that are larger than 2 GB with this app.
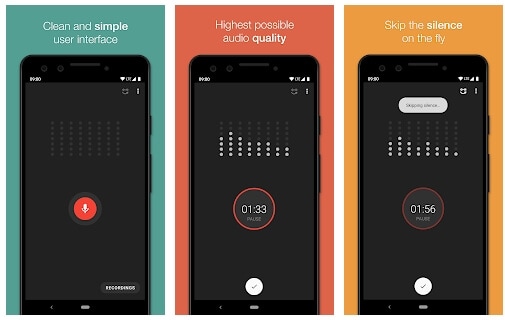
Smart Recorder – High-quality voice recorder Interface
Pros
- Provides full control over the audio recording process
- Equipped with the Wave Lock feature that prevents the device from going into the sleep mode
- Features a live audio spectrum analyzer
- Preserves battery life
Cons
- No phone call recording options
- Limited file-sharing capabilities
3. RecForge II Audio Recorder
Price: Free, but contains ads
Supported OS: Android 4.0 and up
Best for: Musicians
RecForge-audio-recorder App in Google Play
If you are looking for an Android voice recorder that allows you to customize bit rates, sample rates, choose codecs or record in mono or stereo mode, then you should consider installing RecForge II Audio Recorder on your device. The app allows you to schedule recordings, connect different types of external microphones or adjust the gain manually. In addition, you can also adjust the pitch , tempo and the playback rate of all audio files you record and edit with this app. RecForge II Audio Recorder continues working even while you are using other apps, and it keeps the battery consumption at the very minimum.
Pros
- Supports nearly all common audio file formats
- Offers a versatile set of audio editing tools
- Excellent file-sharing capabilities
- Allows users to increase the audio quality by disabling Automatic Gain Control
Cons
- The maximum duration of a recording is limited for some file formats
- Can be too complicated for inexperienced users
4. Hi-Q MP3 Voice Recorder
Price: Free
Supported OS: Varies with the device
Best for: Students, general use
Hi-Q MP3 Voice Recorder App in Google Play
You don’t need any previous audio recording experience to record long lectures, interviews and all other types of voice recordings with Hi-Q MP3 Voice Recorder. The free version of the app limits the maximum duration of a recording you can make to just 10 minutes. That is why you must upgrade to the Pro version of Hi-Q MP3 Voice Recorder if you want to capture hours of material directly from your phone. The best part is that all versions of the app automatically upload recordings to Google Drive or Dropbox which frees up space on your device.
Pros
- Intuitive and modernly designed interface
- Simple audio recording session setup
- Customizable audio quality
- Excellent file management capabilities
Cons
- Recording with external microphones is not an option
- The free version of the app limits the maximum duration of recordings
5. Voice Recorder
Price: Free, but contains ads
Supported OS: Android 4.1 and up
Best for: Students, musicians, and businessmen
Voice Recorder App in Google Play
If you are looking for an app you can use to record an interview, a business meeting or a lecture, then Voice Recorder may be one of your best options. You can record audio files without any restrictions and visualize the sounds with the Audio Spectrum Analyzer. The app continues recording from the background even while the phone’s screen is off which preserves battery life and enables you to perform other tasks while the recording session is in progress. Voice Recorder offers a broad range of file-sharing capabilities so that you can easily send your audio recordings via SMS, email and the Messenger app or share them on Facebook and WhatsApp.
Pros
- Available for free to all Android users
- Stopping, pausing or resuming a recording session is easy
- Allows users to adjust the sample rate
- Offers the microphone gain calibration tool
Cons
- Audio recordings can only be saved in two different file formats
- Doesn’t provide audio editing options
6. Music Maker JAM
Price: Free, but contains ads and offers in-app purchases
Supported OS: Varies with the device
Best for: Musicians
Music Maker JAM App in Google Play
With the selection of 300 mix packs, Music Maker JAM is one of the best android apps for aspiring musicians who want to compose their music even while they are on the go. You can choose from a variety of samples, audio loops and beats to create your next song or record live performances with the app’s 8-channel mixer. Music Maker JAM also enables you to record vocals, adjust the tempo of the audio files or apply effects to all recordings you edit with this app. Once your recording is ready, you can upload it to SoundCloud directly from the app or post it on Facebook and other social networks.
Pros
- Shake your Android phone to remix a song
- The app lets you choose from more than 300 mix packs
- Supports multi-channel recording
- Offers advanced audio editing options
Cons
- Music Maker JAM is not primarily a voice recorder
- No support for external microphones
7. LectureNotes
Price: Free
Supported OS: Android 3.0 and up
Best for: Students
LectureNotes App in Google Play
In case you take notes often, then this app can be an excellent choice for you as it allows you to use a stylus to create notes. However, the trial version limits the number of notebooks to just two, and neither of the notebooks can have more than eight pages. Moreover, if you would like to utilize the app’s voice recording features, you must install LectureRecordings plugin on your device. To capture videos, you must first install the LectureVideos plugin. Another disappointing thing is that you won’t be able to adjust the settings for your audio recording sessions or edit the recording you create with this app.
Pros
- An efficient tool for creating hand-written notes
- The app can be used while your Android phone is offline
- Allows users to export PDF files
- Compatible with OneNote and Evernote apps
Cons
- Underwhelming voice recording options
- You must install a plugin to record audio files
8. ASR Voice Recorder
Price: Free, but contains ads
Supported OS: Android 5.0 and up
Best for: Journalists, musicians, students

ASR Voice Recorder App in Google Play
A brief look at the list of features this app offers, you will find this is a well-rounded voice recorder because it offers all the tools you are going to need to create high-quality recordings. You can choose from a variety of file formats, add notes to recordings at recording or control the playback speed of all audio files you listen to in AVR Voice Recorder. You can also skip silences, connect a headset microphone to the app via Bluetooth or arrange your voice recordings in any way you want. The app lets you upload your audio files to Dropbox, Google Drive, and other file-hosting platforms.
Pros
- Provides excellent audio recording options for free
- Allows users to save recordings in different file formats
- Equipped with an audio playback controller
- Sharing multiple files is easy
Cons
- Offers only basic audio editing tools
- No audio transcription options
9. Call Recorder
Price: Free, but contains ads
Supported OS: Android 4.0 and up
Best for: Marketing professionals
Call Recorder App in Google Play
If you would like to record all incoming and outgoing calls on your device, the Call Recorder app is one of the best options you have at your disposal. Besides recording all calls from whitelisted numbers automatically, this app also allows you to choose from a variety of different recording modes. Furthermore, Call Recorder lets you blacklist numbers from which you don’t want to receive calls and enables you to organize your recordings efficiently. All files created with this app can be sent via Skype, SMS, Dropbox and other messaging services, which makes Call Recorder app a perfect choice for marketing professionals.
Pros
- No previous experience required to start using the app
- Records an unlimited number of phone calls
- Simple audio file management
- Offers several recording modes
Cons
- No voice recording options
- Doesn’t provide audio editing tools
10. Otter Voice Meeting Notes
Price: Free, but offers in-app purchases
Supported OS: Android 5.0 and up
Best for: Large teams of professionals
Otter Voice Meeting Notes App in Google Play
Besides being a powerful voice recorder, Otter Voice Meeting Notes is a collaborative tool that enables multiple team members to highlight and edit the transcripts this app generates in real-time. In addition to recording business meetings, you can also use Otter Voice Meeting Notes to record interviews, webinars or podcasts . Starting a new recording session takes only a second since you just have to tap on the Record button to capture the voices of all speakers in the room. What’s more, the app lets you add photos or slides to transcripts while the recording session is still in progress.
Pros
- Makes collaboration on a single transcript easier
- The app’s AI identifies different speakers automatically after the initial training
- Allows users to export MP3 audio files
- Compatible with the Call Recorder app
Cons
- In-app purchases are expensive
- Audio editing tools could be better
You may also like: 10 Best Free Discord Voice Changers
Conclusion
Creating an audio note or recording an entire interview with an Android device has never been easier. Each of the voice recorder apps we featured in this article enables you to create high-quality audio files you can share via email or store on the cloud.
Which of these Android voice recorders you are going to choose depends on a broad spectrum of factors, which range from the context in which you want to make the recording toaudio editing tools you want to use to process the audio files you created.
We’ve summarized the essential information in the table below. Hope that will help you to determine. What is your favorite Android voice recorder? Leave a comment and let us know.
| Voice recorder app | Price | Supported OS | User Rating | Best for |
|---|---|---|---|---|
| Easy Voice Recorder Pro | $3.99 | Varies with the device | 4.8 | Students, musicians, and businessmen |
| Smart Recorder – High-quality voice recorder | Free, but contains ads and offers in-app purchases | Varies with the device | 4.7 | Students, musicians, and businessmen |
| RecForge II Audio Recorder | Free, but contains ads | Android 4.0 and up | 4.0 | Musicians |
| Hi-Q MP3 Voice Recorder | Free | Varies with the device | 4.5 | Students |
| Voice Recorder | Free, but contains ads | Android 4.1 and up | 4.8 | Students, musicians, and businessmen |
| Music Maker JAM | Free, but contains ads and offers in-app purchases | Varies with the device | 4.6 | Musicians |
| LectureNotes | Free | Android 3.0 and up | 4.3 | Students |
| ASR Voice Recorder | Free, but contains ads | Android 5.0 and up | 4.4 | Journalists, musicians, students |
| Call Recorder | Free, but contains ads | Android 4.0 and up | 4.3 | Marketing professionals |
| Otter Voice Meeting Notes | Free, but offers in-app purchases | Android 5.0 and up | 4.5 | Large teams of professionals |
Benjamin Arango
Benjamin Arango is a writer and a lover of all things video.
Follow @Benjamin Arango
Benjamin Arango
Mar 27, 2024• Proven solutions
Memorizing every bit of information you need to perform your daily or weekly tasks becomes increasingly difficult as your workload rises. Students, journalists, and professionals from a wide array of industries can benefit from making audio notes or even recording entire conversations with their Smartphones.
A simple Android voice recorder can make this task easy since you can just tap on the Record button and create an audio note in seconds. However, with so many voice recorder apps for Android devices out there, finding the one best suited for your needs can be more complicated than it seems. So, in this article, we are going to help you discover some best free voice recorder for an Android device you are currently using.
Want to record voiceover and audio on iPhone? Check 10 Best Voice Recorder Apps for iPhones >>
10 Best Free Voice Recording Apps for Android Devices
Recording audio is no longer a highly technical process since now you can create an audio note or record an interview with an Android phone and a voice recorder app. The question is which voice recording app should you install on your device. So, let’s take a look at some of the most potent Android voice recorders you can find at Google Play Store.
1. Easy Voice Recorder Pro
Price: $3.99
Supported OS: Varies with the device
Best for: Students, musicians, and businessmen
App in Google Play
As the app’s name suggests making recordings for a broad range of purposes is easy. All you need to do is launch the app and start a new audio recording session. Easy Voice Recorder Pro doesn’t limit the duration of your recordings, and it also allows you to compress the recorded audio . That is perfect if you need to record long lectures or conversations. Besides, you can connect an external microphone with the app in case you want to increase the quality of the sound you are recording. The app also lets you store your recordings on Dropbox or Google Drive, while it also offers the possibility to send recordings via email.
Easy Voice Recorder Pro Interface
Pros
- Allows users to manage and organize their recordings effortlessly
- Supports all standard output audio file formats
- Offers the option to record in stereo
- Recordings made with this app can be used as the ringtone
Cons
- Ads can be frustrating
- Limited basic audio editing tools
2. Smart Recorder – High-quality voice recorder
Price: Free, but contains ads and offers in-app purchases
Supported OS: Varies with the device
Best for: Students, musicians, and businessmen
App in Google Play
Capturing high-quality audio recordings effortlessly is the ultimate goal of all Android users who want to use voice recorders. As one of the best free voice recorders for Android, Smart Recorder app has a plethora of features that enable users to make high-quality audio recordings even in imperfect conditions. Options like Live Audio Spectrum Analyzer, microphone gain calibration or automatic and manual sensitivity control in Skip Silence mode are just a few reasons why this app has over 10 million installs. However, you should keep in mind that you cannot create audio files that are larger than 2 GB with this app.
Smart Recorder – High-quality voice recorder Interface
Pros
- Provides full control over the audio recording process
- Equipped with the Wave Lock feature that prevents the device from going into the sleep mode
- Features a live audio spectrum analyzer
- Preserves battery life
Cons
- No phone call recording options
- Limited file-sharing capabilities
3. RecForge II Audio Recorder
Price: Free, but contains ads
Supported OS: Android 4.0 and up
Best for: Musicians
RecForge-audio-recorder App in Google Play
If you are looking for an Android voice recorder that allows you to customize bit rates, sample rates, choose codecs or record in mono or stereo mode, then you should consider installing RecForge II Audio Recorder on your device. The app allows you to schedule recordings, connect different types of external microphones or adjust the gain manually. In addition, you can also adjust the pitch , tempo and the playback rate of all audio files you record and edit with this app. RecForge II Audio Recorder continues working even while you are using other apps, and it keeps the battery consumption at the very minimum.
Pros
- Supports nearly all common audio file formats
- Offers a versatile set of audio editing tools
- Excellent file-sharing capabilities
- Allows users to increase the audio quality by disabling Automatic Gain Control
Cons
- The maximum duration of a recording is limited for some file formats
- Can be too complicated for inexperienced users
4. Hi-Q MP3 Voice Recorder
Price: Free
Supported OS: Varies with the device
Best for: Students, general use
Hi-Q MP3 Voice Recorder App in Google Play
You don’t need any previous audio recording experience to record long lectures, interviews and all other types of voice recordings with Hi-Q MP3 Voice Recorder. The free version of the app limits the maximum duration of a recording you can make to just 10 minutes. That is why you must upgrade to the Pro version of Hi-Q MP3 Voice Recorder if you want to capture hours of material directly from your phone. The best part is that all versions of the app automatically upload recordings to Google Drive or Dropbox which frees up space on your device.
Pros
- Intuitive and modernly designed interface
- Simple audio recording session setup
- Customizable audio quality
- Excellent file management capabilities
Cons
- Recording with external microphones is not an option
- The free version of the app limits the maximum duration of recordings
5. Voice Recorder
Price: Free, but contains ads
Supported OS: Android 4.1 and up
Best for: Students, musicians, and businessmen
Voice Recorder App in Google Play
If you are looking for an app you can use to record an interview, a business meeting or a lecture, then Voice Recorder may be one of your best options. You can record audio files without any restrictions and visualize the sounds with the Audio Spectrum Analyzer. The app continues recording from the background even while the phone’s screen is off which preserves battery life and enables you to perform other tasks while the recording session is in progress. Voice Recorder offers a broad range of file-sharing capabilities so that you can easily send your audio recordings via SMS, email and the Messenger app or share them on Facebook and WhatsApp.
Pros
- Available for free to all Android users
- Stopping, pausing or resuming a recording session is easy
- Allows users to adjust the sample rate
- Offers the microphone gain calibration tool
Cons
- Audio recordings can only be saved in two different file formats
- Doesn’t provide audio editing options
6. Music Maker JAM
Price: Free, but contains ads and offers in-app purchases
Supported OS: Varies with the device
Best for: Musicians
Music Maker JAM App in Google Play
With the selection of 300 mix packs, Music Maker JAM is one of the best android apps for aspiring musicians who want to compose their music even while they are on the go. You can choose from a variety of samples, audio loops and beats to create your next song or record live performances with the app’s 8-channel mixer. Music Maker JAM also enables you to record vocals, adjust the tempo of the audio files or apply effects to all recordings you edit with this app. Once your recording is ready, you can upload it to SoundCloud directly from the app or post it on Facebook and other social networks.
Pros
- Shake your Android phone to remix a song
- The app lets you choose from more than 300 mix packs
- Supports multi-channel recording
- Offers advanced audio editing options
Cons
- Music Maker JAM is not primarily a voice recorder
- No support for external microphones
7. LectureNotes
Price: Free
Supported OS: Android 3.0 and up
Best for: Students
LectureNotes App in Google Play
In case you take notes often, then this app can be an excellent choice for you as it allows you to use a stylus to create notes. However, the trial version limits the number of notebooks to just two, and neither of the notebooks can have more than eight pages. Moreover, if you would like to utilize the app’s voice recording features, you must install LectureRecordings plugin on your device. To capture videos, you must first install the LectureVideos plugin. Another disappointing thing is that you won’t be able to adjust the settings for your audio recording sessions or edit the recording you create with this app.
Pros
- An efficient tool for creating hand-written notes
- The app can be used while your Android phone is offline
- Allows users to export PDF files
- Compatible with OneNote and Evernote apps
Cons
- Underwhelming voice recording options
- You must install a plugin to record audio files
8. ASR Voice Recorder
Price: Free, but contains ads
Supported OS: Android 5.0 and up
Best for: Journalists, musicians, students
ASR Voice Recorder App in Google Play
A brief look at the list of features this app offers, you will find this is a well-rounded voice recorder because it offers all the tools you are going to need to create high-quality recordings. You can choose from a variety of file formats, add notes to recordings at recording or control the playback speed of all audio files you listen to in AVR Voice Recorder. You can also skip silences, connect a headset microphone to the app via Bluetooth or arrange your voice recordings in any way you want. The app lets you upload your audio files to Dropbox, Google Drive, and other file-hosting platforms.
Pros
- Provides excellent audio recording options for free
- Allows users to save recordings in different file formats
- Equipped with an audio playback controller
- Sharing multiple files is easy
Cons
- Offers only basic audio editing tools
- No audio transcription options
9. Call Recorder
Price: Free, but contains ads
Supported OS: Android 4.0 and up
Best for: Marketing professionals
Call Recorder App in Google Play
If you would like to record all incoming and outgoing calls on your device, the Call Recorder app is one of the best options you have at your disposal. Besides recording all calls from whitelisted numbers automatically, this app also allows you to choose from a variety of different recording modes. Furthermore, Call Recorder lets you blacklist numbers from which you don’t want to receive calls and enables you to organize your recordings efficiently. All files created with this app can be sent via Skype, SMS, Dropbox and other messaging services, which makes Call Recorder app a perfect choice for marketing professionals.
Pros
- No previous experience required to start using the app
- Records an unlimited number of phone calls
- Simple audio file management
- Offers several recording modes
Cons
- No voice recording options
- Doesn’t provide audio editing tools
10. Otter Voice Meeting Notes
Price: Free, but offers in-app purchases
Supported OS: Android 5.0 and up
Best for: Large teams of professionals
Otter Voice Meeting Notes App in Google Play
Besides being a powerful voice recorder, Otter Voice Meeting Notes is a collaborative tool that enables multiple team members to highlight and edit the transcripts this app generates in real-time. In addition to recording business meetings, you can also use Otter Voice Meeting Notes to record interviews, webinars or podcasts . Starting a new recording session takes only a second since you just have to tap on the Record button to capture the voices of all speakers in the room. What’s more, the app lets you add photos or slides to transcripts while the recording session is still in progress.
Pros
- Makes collaboration on a single transcript easier
- The app’s AI identifies different speakers automatically after the initial training
- Allows users to export MP3 audio files
- Compatible with the Call Recorder app
Cons
- In-app purchases are expensive
- Audio editing tools could be better
You may also like: 10 Best Free Discord Voice Changers
Conclusion
Creating an audio note or recording an entire interview with an Android device has never been easier. Each of the voice recorder apps we featured in this article enables you to create high-quality audio files you can share via email or store on the cloud.
Which of these Android voice recorders you are going to choose depends on a broad spectrum of factors, which range from the context in which you want to make the recording toaudio editing tools you want to use to process the audio files you created.
We’ve summarized the essential information in the table below. Hope that will help you to determine. What is your favorite Android voice recorder? Leave a comment and let us know.
| Voice recorder app | Price | Supported OS | User Rating | Best for |
|---|---|---|---|---|
| Easy Voice Recorder Pro | $3.99 | Varies with the device | 4.8 | Students, musicians, and businessmen |
| Smart Recorder – High-quality voice recorder | Free, but contains ads and offers in-app purchases | Varies with the device | 4.7 | Students, musicians, and businessmen |
| RecForge II Audio Recorder | Free, but contains ads | Android 4.0 and up | 4.0 | Musicians |
| Hi-Q MP3 Voice Recorder | Free | Varies with the device | 4.5 | Students |
| Voice Recorder | Free, but contains ads | Android 4.1 and up | 4.8 | Students, musicians, and businessmen |
| Music Maker JAM | Free, but contains ads and offers in-app purchases | Varies with the device | 4.6 | Musicians |
| LectureNotes | Free | Android 3.0 and up | 4.3 | Students |
| ASR Voice Recorder | Free, but contains ads | Android 5.0 and up | 4.4 | Journalists, musicians, students |
| Call Recorder | Free, but contains ads | Android 4.0 and up | 4.3 | Marketing professionals |
| Otter Voice Meeting Notes | Free, but offers in-app purchases | Android 5.0 and up | 4.5 | Large teams of professionals |
Benjamin Arango
Benjamin Arango is a writer and a lover of all things video.
Follow @Benjamin Arango
Superior Systems for Infusing Vocal Elements Into Instagram TV Content
People are putting lots of effort into creating videos and sharing them on IGTV to get fame. Due to it, they also want to figure out how to add music to IGTV to create impressive videos. For all these things, the interested ones have to consider some video editors. In this blog, you will get complete information about these factors.
In this article
01 [3 Ways To Add Music To IGTV On Android & iOS](#Part 1)
02 [2 Ways To Add Music To IGTV On Windows & Mac](#Part 2)
03 [How To Add Music To IGTV Without Copyright?](#Part 3)
04 [How To Post Your Video To IGTV?](#Part 4)
Part 1 3 Ways To Add Music To IGTV On Android & iOS
Most individuals are using mobile devices for Instagram and IGTV purposes. Similarly, they are looking for the best video editors by which they can edit videos and prepare impressive content for IGTV uploads. If you are one of these, the following are some major apps for Android and iOS.
Filmora

Videoshop

Videoshop is considered by numerous individuals. Mainly, this video editor is beneficial in adding audio to the video’s background. It can be used for both Android and iOS mobile devices. It is available with some basic editing features.
Prequel

In case you want to add music to IGTV, Prequel can be a good option as well. It also available for both types of devices Android and iOS. By using this particular application, you can add effects, text, do editing, and alter videos.
Part 2 2 Ways To Add Music To IGTV On Windows & Mac
Filmora
Filmora is one of the best video editors for Windows & Mac. It is almost similar to the mobile version (Filmora). In case you want to use it, you should follow below mentioned procedure.
Wondershare Filmora
Get started easily with Filmora’s powerful performance, intuitive interface, and countless effects!
Try It Free Try It Free Try It Free Learn More about Filmora>

Step1
Firstly, you should import video and audio files to the Filmora. For importing files, it should be available on the device.
Step2
Now, you need to add audio to the video. Filmora also has a big music library with lots of free files. You can pick sound effects from here to create an impressive video. By using audio keyframing features, you can also make changes to the files.
Step3
After all these things, you can proceed by saving the changes and exporting the available file.
Final Cut Pro

Final Cut Pro is a video editor that is mainly considered by professionals only. The biggest thing about this particular editor is, the tool is available for Mac devices only. It has a good and easy-to-understand interface with lots of features. But, you cannot ignore the fact that it is too expensive so everyone cannot consider its services.
Part 3 How To Add Music To IGTV Without Copyright?
In the case of the online system, copyright problems are taking place several times. It is the main reason why some publishers cannot post their content or get their videos removed by force. Due to all these things, many individuals are interested in figuring out the best ways that can be useful in avoiding copyright issues by uploading a music file with video.
Here, you can find out some basic things. Firstly, you should be careful with the copyright rules. If you want to add music to IGTV video, you should check out the music file and its all types of copyrights first. This inspection will help you figure out lots of things, such as – the current legal condition of the file. There are numerous free music files also available on the internet.
You can use these files in your videos as you want. While using these ones, you will never face any kind of copyright problem. For getting such kinds of audio files, you can get help from third-party sources on the internet. These websites are offering royalty-free music files. Another major way is contacting the copyright holder and getting his or her permission to use the file.
Part 4 How To Post Your Video To IGTV?
Everyone does not have expertise in using the IGTV. It is the main reason why they are looking for a proper guide in some major steps, such as -the best way to post a video on IGTV. Before that, you should get clarity that the process will be a little bit different for mobile and desktop. You should follow the procedure according to the device you are using. In the upcoming details, you can get a step-by-step guide for both types of devices.
For Mobile – Step-By-Step Guide
Step1
Firstly, you should proceed by accessing the mobile application of Instagram. After opening the application, you should pay attention to the top-right section of feeds. Here, you can see the IGTV symbol. In case you want direct access, you can also download the IGTV application separately.
Step2
After accessing the IGTV, you will get a different interface. Here, you can see the “+” button. When you click the button, it will open your video gallery. You can pick the video, you want to upload on the IGTV feeds.
Step3
When you successfully choose a video, you should be focused on choosing an image that will be used as the cover. When choosing an image or video scene for cover, you need to be smart and careful. Try to keep it interesting and eye-catching, so people would like to watch it.
Step4
The addition of cover images will complete media-related options. Now, you should proceed with the ‘NEXT’ button. It will take you to the title and description page. You should put an interesting title and description to showcase the right data about the video.
Step5
Now, you have to finalize everything. Before posting the video, you will get an option with a notification. If you click the ‘yes’ button, it will help you preview the video and figure out everything is perfect or not. In case you consider the ‘no’ button, it will eliminate the preview and proceed to publish the video. Within a few minutes, your video will be posted on IGTV and visible to the audience.
For Desktop – Step-By-Step Guide
Step1
Firstly, you need to proceed by opening Instagram on a desktop, no matter Windows or Mac. Here, you should log in to Instagram Web by using credentials. You should log in account by using the official sources only. Don’t fall for fake websites or scammers.
Step2
Now, you should access your account profile. Here, you can see multiple buttons in the interface. You should proceed by choosing the ‘IGTV’ button. You can see this button between the ‘post’ and ‘saved’ buttons.
Step3
In the IGTV interface, you can see the ‘upload’ button as well. Clicking this particular button will allow you to access the video upload interface and procedure.
Step4
The video that you want to upload on IGTV should be available on your device. By using the interface, you can access device storage and upload the desired video.
Step5
You can also upload the video by using drag and drop features. After adding the video, you should proceed with the addition of the title and description. In case you also want to target the Facebook audience, you can make it visible there as well. For such a task, you can see a specific button that will allow you to do that as well.
These are basic procedures to upload videos on IGTV. After completing the procedure, you need to wait for a few minutes only. Here, the video uploading procedure will take time as per your internet speed and connection quality.
Final Words
After all these things, you can easily figure out how to add music to IGTV video and the best methods to use IGTV. Along with it, you can understand what methods can help you get audio files by avoiding copyright problems. The most important thing is content. In case you don’t upload creative content, it will not please your audience. You should be using the best tools to create video content for sharing on IGTV. The best content will entertain your audience and provide better recognition as well. In case you are using mobile platforms, it will be good to consider Filmora and for desktops, Filmora works great. You should be smart and careful while making a final decision.
02 [2 Ways To Add Music To IGTV On Windows & Mac](#Part 2)
03 [How To Add Music To IGTV Without Copyright?](#Part 3)
04 [How To Post Your Video To IGTV?](#Part 4)
Part 1 3 Ways To Add Music To IGTV On Android & iOS
Most individuals are using mobile devices for Instagram and IGTV purposes. Similarly, they are looking for the best video editors by which they can edit videos and prepare impressive content for IGTV uploads. If you are one of these, the following are some major apps for Android and iOS.
Filmora
Videoshop
Videoshop is considered by numerous individuals. Mainly, this video editor is beneficial in adding audio to the video’s background. It can be used for both Android and iOS mobile devices. It is available with some basic editing features.
Prequel
In case you want to add music to IGTV, Prequel can be a good option as well. It also available for both types of devices Android and iOS. By using this particular application, you can add effects, text, do editing, and alter videos.
Part 2 2 Ways To Add Music To IGTV On Windows & Mac
Filmora
Filmora is one of the best video editors for Windows & Mac. It is almost similar to the mobile version (Filmora). In case you want to use it, you should follow below mentioned procedure.
Wondershare Filmora
Get started easily with Filmora’s powerful performance, intuitive interface, and countless effects!
Try It Free Try It Free Try It Free Learn More about Filmora>
Step1
Firstly, you should import video and audio files to the Filmora. For importing files, it should be available on the device.
Step2
Now, you need to add audio to the video. Filmora also has a big music library with lots of free files. You can pick sound effects from here to create an impressive video. By using audio keyframing features, you can also make changes to the files.
Step3
After all these things, you can proceed by saving the changes and exporting the available file.
Final Cut Pro
Final Cut Pro is a video editor that is mainly considered by professionals only. The biggest thing about this particular editor is, the tool is available for Mac devices only. It has a good and easy-to-understand interface with lots of features. But, you cannot ignore the fact that it is too expensive so everyone cannot consider its services.
Part 3 How To Add Music To IGTV Without Copyright?
In the case of the online system, copyright problems are taking place several times. It is the main reason why some publishers cannot post their content or get their videos removed by force. Due to all these things, many individuals are interested in figuring out the best ways that can be useful in avoiding copyright issues by uploading a music file with video.
Here, you can find out some basic things. Firstly, you should be careful with the copyright rules. If you want to add music to IGTV video, you should check out the music file and its all types of copyrights first. This inspection will help you figure out lots of things, such as – the current legal condition of the file. There are numerous free music files also available on the internet.
You can use these files in your videos as you want. While using these ones, you will never face any kind of copyright problem. For getting such kinds of audio files, you can get help from third-party sources on the internet. These websites are offering royalty-free music files. Another major way is contacting the copyright holder and getting his or her permission to use the file.
Part 4 How To Post Your Video To IGTV?
Everyone does not have expertise in using the IGTV. It is the main reason why they are looking for a proper guide in some major steps, such as -the best way to post a video on IGTV. Before that, you should get clarity that the process will be a little bit different for mobile and desktop. You should follow the procedure according to the device you are using. In the upcoming details, you can get a step-by-step guide for both types of devices.
For Mobile – Step-By-Step Guide
Step1
Firstly, you should proceed by accessing the mobile application of Instagram. After opening the application, you should pay attention to the top-right section of feeds. Here, you can see the IGTV symbol. In case you want direct access, you can also download the IGTV application separately.
Step2
After accessing the IGTV, you will get a different interface. Here, you can see the “+” button. When you click the button, it will open your video gallery. You can pick the video, you want to upload on the IGTV feeds.
Step3
When you successfully choose a video, you should be focused on choosing an image that will be used as the cover. When choosing an image or video scene for cover, you need to be smart and careful. Try to keep it interesting and eye-catching, so people would like to watch it.
Step4
The addition of cover images will complete media-related options. Now, you should proceed with the ‘NEXT’ button. It will take you to the title and description page. You should put an interesting title and description to showcase the right data about the video.
Step5
Now, you have to finalize everything. Before posting the video, you will get an option with a notification. If you click the ‘yes’ button, it will help you preview the video and figure out everything is perfect or not. In case you consider the ‘no’ button, it will eliminate the preview and proceed to publish the video. Within a few minutes, your video will be posted on IGTV and visible to the audience.
For Desktop – Step-By-Step Guide
Step1
Firstly, you need to proceed by opening Instagram on a desktop, no matter Windows or Mac. Here, you should log in to Instagram Web by using credentials. You should log in account by using the official sources only. Don’t fall for fake websites or scammers.
Step2
Now, you should access your account profile. Here, you can see multiple buttons in the interface. You should proceed by choosing the ‘IGTV’ button. You can see this button between the ‘post’ and ‘saved’ buttons.
Step3
In the IGTV interface, you can see the ‘upload’ button as well. Clicking this particular button will allow you to access the video upload interface and procedure.
Step4
The video that you want to upload on IGTV should be available on your device. By using the interface, you can access device storage and upload the desired video.
Step5
You can also upload the video by using drag and drop features. After adding the video, you should proceed with the addition of the title and description. In case you also want to target the Facebook audience, you can make it visible there as well. For such a task, you can see a specific button that will allow you to do that as well.
These are basic procedures to upload videos on IGTV. After completing the procedure, you need to wait for a few minutes only. Here, the video uploading procedure will take time as per your internet speed and connection quality.
Final Words
After all these things, you can easily figure out how to add music to IGTV video and the best methods to use IGTV. Along with it, you can understand what methods can help you get audio files by avoiding copyright problems. The most important thing is content. In case you don’t upload creative content, it will not please your audience. You should be using the best tools to create video content for sharing on IGTV. The best content will entertain your audience and provide better recognition as well. In case you are using mobile platforms, it will be good to consider Filmora and for desktops, Filmora works great. You should be smart and careful while making a final decision.
Also read:
- Updated Top 5 Digital Audio File Organizers for Seamless MP3 Management for 2024
- New Detailed Overview of the Wave Editor Key Functions, Ratings, and Step-by-Step Guides
- The Symphony of Applause Finding the Peak Sound Effects for 2024
- New 2024 Approved The Art of Initiating Audio Level Decrease with Ease
- In 2024, Pioneering Digital Maestros A Comprehensive List of AIs Finest Composers
- In 2024, How Does Gain Staging Impact the Overall Fidelity of Recorded Tracks?
- Updated The Definitive Guide to Song Collection Top Ten Gadgets for Easy Audio Archive
- Updated The Important Aspects of Leveraging YouTubes Sound Selection for 2024
- In 2024, Find Funny Sound Effects
- Refinement Through Removal Advanced Techniques for Enhancing Music Clarity in Adobe Audition
- 2024 Approved The Perfect Match Top 7 DAWs Tailored to Guitarists Recording and Playback Needs
- New Review of Sound Forge for 2024
- New Add Song to iMovie
- Abyss of Harmony Premium Selection of Free, Original Piano Compositions for Screen Projects for 2024
- Updated Leading Sites for Accessing True Nature Audio Archives for 2024
- New 2024 Approved The Ultimate Pathway for iPhone Speech Capture and Documentation
- New Whisper Through Winds Secrets for Neutralizing Wind Noise in Digital Soundscapes
- New 2024 Approved How to Use Audio Ducking in Adobe Premiere Pro on Win
- New The Cutest and Scariest Best Sites to Download Horrific Soundscapes for 2024
- Transforming Music Production in Logic Pro X with These Essential Plugin Tools (Free/Paid)
- Updated Discover the Best 8 DAW Options for Chrome OS Users in Music Production and Recording ( Edition)
- New 2024 Approved 10 Essential Sites for Downloading Montage Soundscapes
- Where Is the Best Place to Catch Dratini On Lava Blaze Pro 5G | Dr.fone
- New 2024 Approved Live Shopping Success Secrets Unveiling Strategies From Real Case Studies
- Top-Rated Free WMV Video Editing Software with Splitting Features for 2024
- Issues playing H.265 HEVC video on Xiaomi Civi 3 Disney 100th Anniversary Edition
- In 2024, Top 10 AirPlay Apps in Oppo Reno 8T for Streaming | Dr.fone
- How to Unlock Vivo Y77t Phone with Broken Screen
- How to Unlock Realme GT Neo 5 Phone Pattern Lock without Factory Reset
- How To Track IMEI Number Of Vivo Y36 Through Google Earth?
- Best Methods for Lava Yuva 2 Pro Wont Turn On | Dr.fone
- In 2024, List of Pokémon Go Joysticks On Samsung Galaxy A25 5G | Dr.fone
- How To Transfer Data From iPhone 11 Pro To Other iPhone 14 Pro devices? | Dr.fone
- Updated In 2024, Protect Your Videos with These Free Watermarking Tools
- In 2024, How can I get more stardust in pokemon go On Vivo S18? | Dr.fone
- New Maximize Yandex Translate in Video Translation and Beyond
- Complete guide for recovering music files on Realme 10T 5G
- In 2024, Top 9 Apple iPhone 12 mini Monitoring Apps for Parental Controls | Dr.fone
- Title: In 2024, A Comprehensive Walkthrough to Modify Videos Speaker Output
- Author: David
- Created at : 2024-05-20 05:45:19
- Updated at : 2024-05-21 05:45:19
- Link: https://sound-tweaking.techidaily.com/in-2024-a-comprehensive-walkthrough-to-modify-videos-speaker-output/
- License: This work is licensed under CC BY-NC-SA 4.0.
