
:max_bytes(150000):strip_icc():format(webp)/preaknessstakes-5c804f1b46e0fb00019b8ee0.jpg)
Harmonizing Visuals with Auditory Elements Effective Strategies for Music Integration in Final Cut Pro
Harmonizing Visuals with Auditory Elements: Effective Strategies for Music Integration in Final Cut Pro
Everyone does not have expertise in using the Final Cut Pro. Some are beginners and completely new to the tool. These are always looking for proper support and want to know how to add music to final cut pro. In case you are one of these individuals, you should be focused on proper procedure and follow it step-by-step. In the upcoming paragraphs, you will get complete information about it.

In this article
01 [Add Music To Final Cut Pro](#Part 1)
02 [Alternative For Final Cut Pro To Add Music To Video](#Part 2)
Part 1 Add Music To Final Cut Pro
Are you interested to figure out the best possible method to add music files to Final Cut Pro for video creation and other purposes? If you are looking for such an option, you should be focused on the following process.
Step1 Access Final Cut Pro
Firstly, you should focus on accessing the Final Cut Pro. You should check out the application on your desktop and open it.
Step2 Go To File

After accessing the Final Cut Pro, you can see multiple options and menus on the interface. Here, you should navigate to the ‘FILE’ option. You can find out this particular option on the top of the navigation bar.
Step3 Access File

Now, you should access the FILE button. It will lead to a fully-featured menu with multiple options. You should find out the IMPORT button and proceed.
Step4 Import Button
When you click on the IMPORT button, it will provide some choices. You should go with the option of MEDIA.
Step5 Locate File

After clicking the media button, it will present a complete file and storage interface in front of you. You should find out the audio file on your device by using such an interface. Here, you need to access the targeted folder only. You should select the audio file and hit the IMPORT button. It will bring your desired audio file to the Final Cut Pro easily for further usage.
Step6 Add Audio to Video

Once you get the audio file to the library of Final Cut Pro, after that, you should proceed by arranging it as per the video sequence and requirements. You should take the video timeline carefully and make all edits smartly. Here, you will find out drag and drop features are highly beneficial. It will help you synchronize the audio and video with ease.
It is the complete process by which you can easily add music to final cut pro. With it, you also have the option of accessing its built-in music library. By using this particular library, you can get multiple audio files with sound effects, songs, etc. You can access these files to add to the video as well. In case you don’t find something relevant to the content, you can consider the option of importing your own as per the procedure.
Part 2 Alternative For Final Cut Pro To Add Music To Video
No one can ignore the features and functionalities of Final Cut Pro. But, sometimes people don’t find it suitable or appropriate as per their video editing requirements. It is the main reason why they start looking for some alternatives that can help them in getting better results with top-notch edits.
Filmora
All individuals are not working as professional video editors or designers. Due to it, they lack technical knowledge and are also unaware of the tool’s interfaces and their usability. As a result, they start facing lots of problems with complicated tools. In case you want to access a video editor with a user-friendly interface that can be helpful in creating content easily, you can consider Filmora. It is the easiest video editor to use that can be useful in creating and editing videos with ease.
Both Windows and Mac users can access Filmora by downloading software on the system. On the other hand, Final Cut Pro is available only for the Mac.
Wondershare Filmora
Get started easily with Filmora’s powerful performance, intuitive interface, and countless effects!
Try It Free Try It Free Try It Free Learn More about Filmora>

Benefits
User-friendly interface
A big music library
Available for mobile platforms as well (Filmora)
Regular updates for features and functionalities
Drawbacks
Less audio editing features
By paying attention to these aspects, you can easily understand how important and useful Filmora is. It is also having some audio editing features. It will allow you to make changes in audio files as per the requirements and keep it perfect according to the video.
Premiere Pro

Premiere Pro is not new in the market. It is an old and famous editing tool. But, the main fact about this particular source is its usability. Everyone cannot consider the option of this particular video editor. There are multiple reasons behind it. Some people may find the tool difficult to use.
For some individuals, its charges are too high. Actually, Premiere Pro is paid source. Its plans are also too expensive. If you consider its option, you have two choices bill monthly or annually. In case you choose monthly billing, you will need to pay around $31.49 per month. Annual billing will help you save some money and it costs an average of $20.99 per month.
Benefits
Regular updates
Templates, plugins, and preset options available
Drawbacks
Too Expensive
Complicated
Premiere Pro is a complicated tool to use. It is mainly made for the professionals who master these types of skills and work on big projects. If a beginner tries to access it, they may find it irrelevant and hard to understand. It takes lots of time to process and complete some basic things as well.
CyberLink PowerDirector

It is also a paid option to consider. If you choose to use CyberLink PowerDirector for the first time, you can avail of its free trial services as well. It provides a free trial of 30 days that can help you access the tool’s capability and figure out it is worth buying or not. The following are some benefits and drawbacks of choosing this particular option.
Benefits
Regular updates
Multiple features
Drawbacks
Lack of color tools
CyberLink PowerDirector is a suitable option for video editing professionals with mid-level skills. Highly skilled individuals can consider its option but they may find it easy to use and don’t get some advanced feature as per their skill set.
Conclusion
By paying attention to all these details, you can easily figure out the best final cut pro add music method. It depends on your choice that you want to use some existing audio file or want to import your own. Along with it, you can also check out some alternatives that can help you figure out what kind of tools can be considered over Final Cut Pro for better results. Filmora holds the top-notch position with lots of features, functionalities, and complete accessibilities. You need to be smart while making a final decision regarding video editor selection for creating top-notch video content to entertain the audience perfectly.
02 [Alternative For Final Cut Pro To Add Music To Video](#Part 2)
Part 1 Add Music To Final Cut Pro
Are you interested to figure out the best possible method to add music files to Final Cut Pro for video creation and other purposes? If you are looking for such an option, you should be focused on the following process.
Step1 Access Final Cut Pro
Firstly, you should focus on accessing the Final Cut Pro. You should check out the application on your desktop and open it.
Step2 Go To File
After accessing the Final Cut Pro, you can see multiple options and menus on the interface. Here, you should navigate to the ‘FILE’ option. You can find out this particular option on the top of the navigation bar.
Step3 Access File
Now, you should access the FILE button. It will lead to a fully-featured menu with multiple options. You should find out the IMPORT button and proceed.
Step4 Import Button
When you click on the IMPORT button, it will provide some choices. You should go with the option of MEDIA.
Step5 Locate File
After clicking the media button, it will present a complete file and storage interface in front of you. You should find out the audio file on your device by using such an interface. Here, you need to access the targeted folder only. You should select the audio file and hit the IMPORT button. It will bring your desired audio file to the Final Cut Pro easily for further usage.
Step6 Add Audio to Video
Once you get the audio file to the library of Final Cut Pro, after that, you should proceed by arranging it as per the video sequence and requirements. You should take the video timeline carefully and make all edits smartly. Here, you will find out drag and drop features are highly beneficial. It will help you synchronize the audio and video with ease.
It is the complete process by which you can easily add music to final cut pro. With it, you also have the option of accessing its built-in music library. By using this particular library, you can get multiple audio files with sound effects, songs, etc. You can access these files to add to the video as well. In case you don’t find something relevant to the content, you can consider the option of importing your own as per the procedure.
Part 2 Alternative For Final Cut Pro To Add Music To Video
No one can ignore the features and functionalities of Final Cut Pro. But, sometimes people don’t find it suitable or appropriate as per their video editing requirements. It is the main reason why they start looking for some alternatives that can help them in getting better results with top-notch edits.
Filmora
All individuals are not working as professional video editors or designers. Due to it, they lack technical knowledge and are also unaware of the tool’s interfaces and their usability. As a result, they start facing lots of problems with complicated tools. In case you want to access a video editor with a user-friendly interface that can be helpful in creating content easily, you can consider Filmora. It is the easiest video editor to use that can be useful in creating and editing videos with ease.
Both Windows and Mac users can access Filmora by downloading software on the system. On the other hand, Final Cut Pro is available only for the Mac.
Wondershare Filmora
Get started easily with Filmora’s powerful performance, intuitive interface, and countless effects!
Try It Free Try It Free Try It Free Learn More about Filmora>
Benefits
User-friendly interface
A big music library
Available for mobile platforms as well (Filmora)
Regular updates for features and functionalities
Drawbacks
Less audio editing features
By paying attention to these aspects, you can easily understand how important and useful Filmora is. It is also having some audio editing features. It will allow you to make changes in audio files as per the requirements and keep it perfect according to the video.
Premiere Pro
Premiere Pro is not new in the market. It is an old and famous editing tool. But, the main fact about this particular source is its usability. Everyone cannot consider the option of this particular video editor. There are multiple reasons behind it. Some people may find the tool difficult to use.
For some individuals, its charges are too high. Actually, Premiere Pro is paid source. Its plans are also too expensive. If you consider its option, you have two choices bill monthly or annually. In case you choose monthly billing, you will need to pay around $31.49 per month. Annual billing will help you save some money and it costs an average of $20.99 per month.
Benefits
Regular updates
Templates, plugins, and preset options available
Drawbacks
Too Expensive
Complicated
Premiere Pro is a complicated tool to use. It is mainly made for the professionals who master these types of skills and work on big projects. If a beginner tries to access it, they may find it irrelevant and hard to understand. It takes lots of time to process and complete some basic things as well.
CyberLink PowerDirector
It is also a paid option to consider. If you choose to use CyberLink PowerDirector for the first time, you can avail of its free trial services as well. It provides a free trial of 30 days that can help you access the tool’s capability and figure out it is worth buying or not. The following are some benefits and drawbacks of choosing this particular option.
Benefits
Regular updates
Multiple features
Drawbacks
Lack of color tools
CyberLink PowerDirector is a suitable option for video editing professionals with mid-level skills. Highly skilled individuals can consider its option but they may find it easy to use and don’t get some advanced feature as per their skill set.
Conclusion
By paying attention to all these details, you can easily figure out the best final cut pro add music method. It depends on your choice that you want to use some existing audio file or want to import your own. Along with it, you can also check out some alternatives that can help you figure out what kind of tools can be considered over Final Cut Pro for better results. Filmora holds the top-notch position with lots of features, functionalities, and complete accessibilities. You need to be smart while making a final decision regarding video editor selection for creating top-notch video content to entertain the audience perfectly.
Essential Guide to Podcast Submission Portals
Submitting your podcast show on different platforms is essential to get the right audiences. As we all know, the more podcast directories you publish your show, the more listeners you get.
Yet, finding the ideal choices can take time and effort with many podcast directories available online. Worry less. We’ve compiled a list of the best podcast directories you can always count on to publish your podcast show anytime.
- YouTube
- Spotify
- Apple Podcasts
- Google Podcasts
- Pandora
- Audible
- NPR One
- Tune In
- Podcast Addict
- RadioPublic
- Overcast
- Pocket Casts
- CastBox
- Stitcher
- More choices to submit your podcast shows
- How to submit a show to podcast directories?
- Hot FAQs on Podcast Directories
Part 1. What are podcast directories?
A podcast directory is a listening app. It’s the place where podcasts and their listeners meet. Podcast listeners search for, subscribe to, and listen to your Podcast using their podcast directory of choice. Popular podcast directories include Apple Podcasts, Spotify, and Google Podcasts.
Part 2. 15 Top podcast directories to focus on in 2024
Thankfully, research conducted by EdisonResearch shows the weekly audience reach of top podcast directories. So this list will help us locate the best podcasting directories. And it can multiply your audience size and quickly reach a more extensive user base.
According to Edison Research, the top 15 Podcast Networks are:
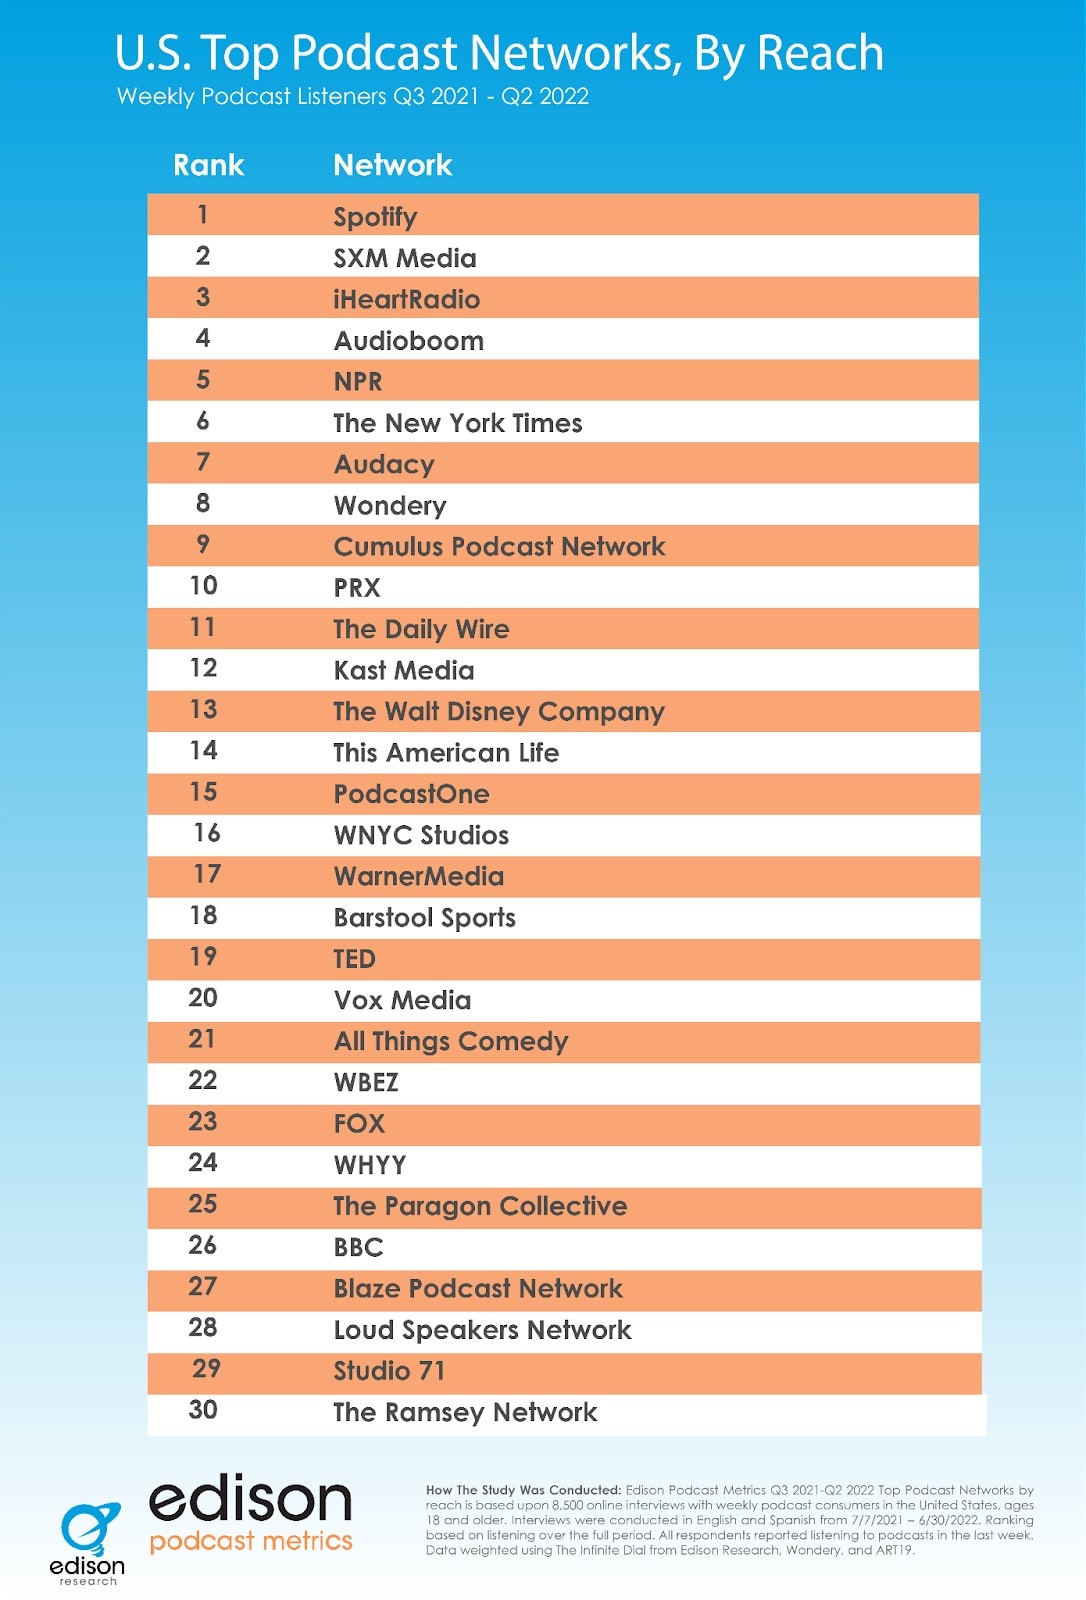
You must retain that Edison’s research only analyzes the US podcast services. Yet, our guide has compiled the best podcasting directories to connect with users worldwide.
Below you will find the list of top podcast directories and their reviews. But keep in mind that when it comes to podcast directories, there is no such thing as best or worse. Instead, it’s all about the user base and audience reach. So, it is best to submit your podcasts to multiple podcasting directories.
1. YouTube
With a monthly active user base of 2.5 billion, YouTube should be the top choice of any podcast creator. According to a recent survey by Statista, YouTube took over Spotify to become the largest platform for podcast consumption worldwide. Additionally, 47.7% of the US audience prefers YouTube over other platforms for listening to podcasts.
Not to forget, YouTube comes pre-installed on all smartphones and is also accessible via the Web to users worldwide. Another benefit of YouTube is that it is free for creators and users. Plus, once you grow your user base, it also allows you to get surplus revenue.

Of course, YouTube is a video-only platform. Still, you can use tools like Wondershare Filmora to create video-based podcasts seamlessly. You can simply convert the video podcasts into an audio format using Filmora itself and then reupload the same Podcast to even audio-based podcast directories.
Free Download For Win 7 or later(64-bit)
Free Download For macOS 10.14 or later
Tools like Fimora also allow you to directly publish the created Podcast on YouTube (so you do not have to worry about video requirements mandatory for YouTube).
- User Review of YouTube on G2: “YouTube is one of those sites that you can’t live without for a business. Everyone knows what YouTube is, and users (globally) use the platform daily.”
- Monthly User Base: Over 2.5 billion active users.
- Supported OS: All major OS and web browsers.
2. Spotify
Spotify has over 389 million listeners across 187 markets worldwide. Available on all major OS and its web presence makes it one of the best directories of podcasts on the internet.
Aside from its audience base, Spotify also provides real-time insights, like who your audience is, what they like, which episodes they prefer, and even what songs they want. All these insights will also help you plan your future content according to the audience.
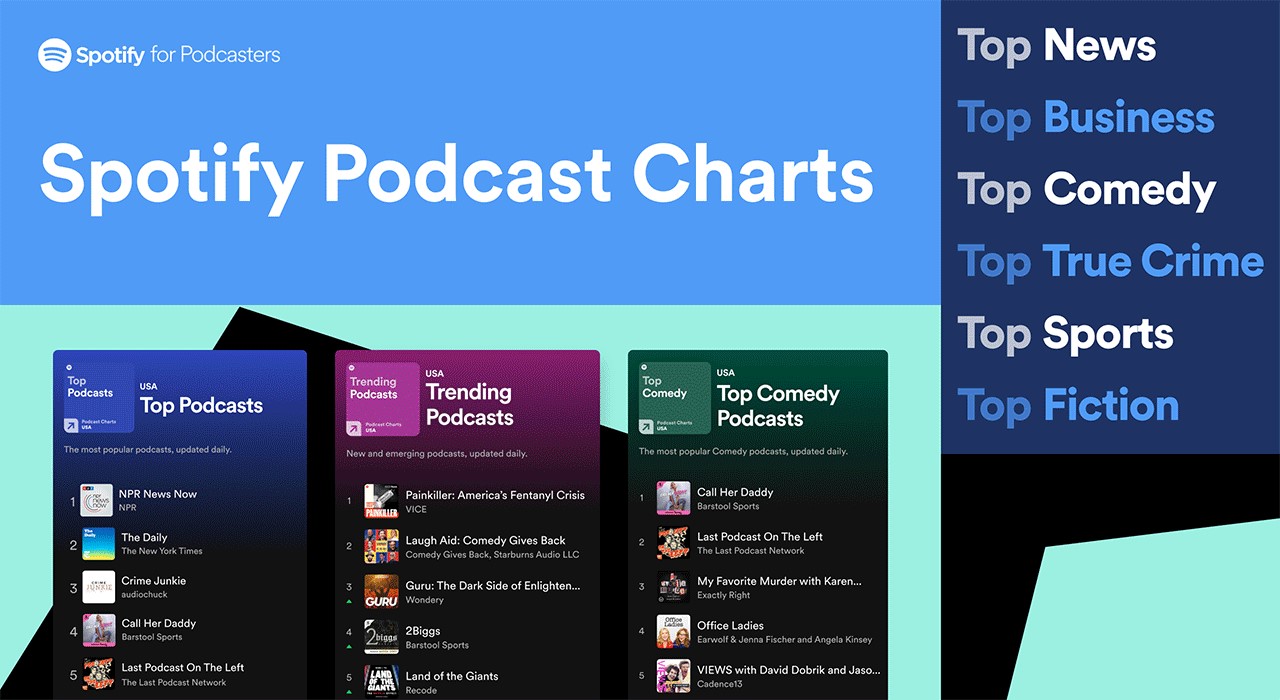
Spotify’s personalized recommendations and algorithms are another pluses, given you can get discovered easily/ Like YouTube, Spotify allows you to upload even video podcasts. While you can also create and upload podcasts in audio format only.
- User Review of Spotify on G2: “I can find any song, artist, album, and even podcasts at any time and no commercials.”
- Monthly User Base: Over 360 million active users.
- Supported OS: All major OS and web browsers.
3. Apple Podcasts
Apple Podcast is another top directory for a podcast that creators cannot ignore. Given it is an exclusive-podcast platform, its 28.5 million active user base in more than 170 countries and regions is enough to tell its greatness.
It is essential to understand that YouTube and Spotify are not exclusive podcast platforms like Apple Podcasts. And while Spotify and YouTube are best for connecting novice podcast listeners, Apple Podcast is the way to go if you want to connect with a dedicated podcast community.
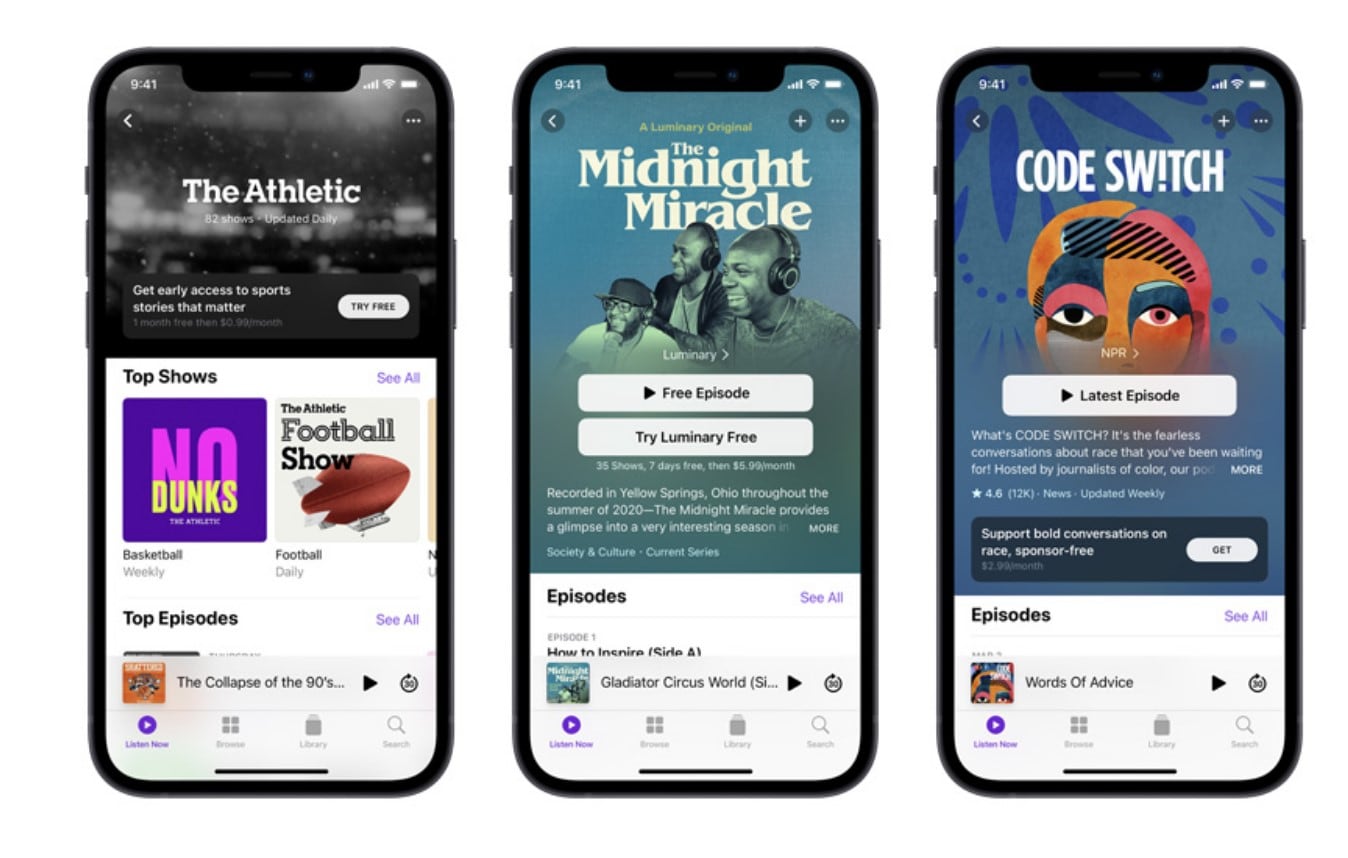
The best thing about the Apple Podcast directory is it allows you to create a podcast (via Apple Podcast Connect), but you must be an Apple user. However, you can submit your podcasts to Apple Podcast via RSS feed even if you are not an Apple user.
In all, given Apple Podcast is available for Apple users and is known by default on all Apple devices (the most prominent smartphone company in the world), Apple Podcast is a must-use podcast directory.
- User Review of Apple Podcast: “Apple once again nails with simplicity, millions of shows of my interest, and freemium service.”
- Monthly User Base: Over 28.5 million active users.
- Supported OS: All Apple devices.
4. Google Podcasts
Google Podcasts has over 100 million downloads on Play Store alone and is also available on the web, App Store, Blackberry, and ChromeOS users. A completely subscription-free and ad-free platform, Google Podcasts is one of the top podcasting directories among users.
However, unlike the Apple Podcast directory, it does not have a studio, so you can only submit your podcasts via RSS feeds. Still, its user base and the advanced algorithms are an opportunity to connect with users who like the subjects you discuss.
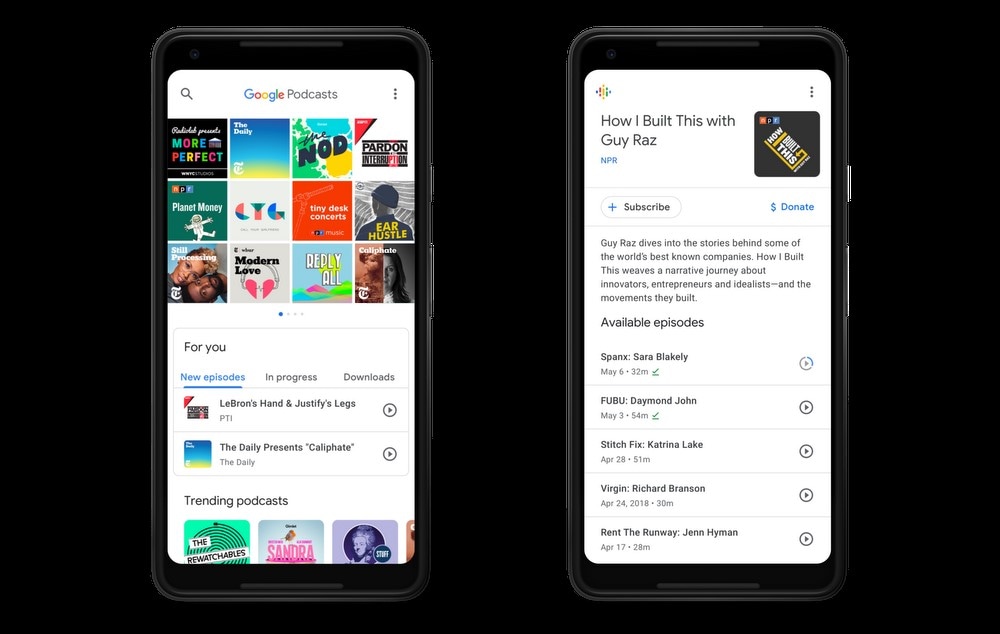
Like Spotify and Apple Podcast directories, Google Podcasts also show you real-time analytics and guide you about users so that you can plan your content accordingly. Given that it only requires a Google account to start, it is another top podcast directory you cannot ignore.
- User Review of Google Podcast
“Google Podcast includes everything that a podcast listener wants. It’s simple, free, and includes valuable options like Sleep Timer, Playback speed, and more.”
- Monthly User Base: Over 30 million active users.
- Supported OS: Dedicated apps for all major OS and web presence.
5. Pandora
Pandora has over 64 million monthly active users, with a listener spending up to 24 hours/monthly on the platform. It explains that users spend up to 45 minutes on the Pandora platform tuning in to their favorite podcasts. Again, its search-based algorithms allow you to get discovered by users that like subjects and topics on which you’re creating podcasts, meaning it is simple to connect with a large user base conveniently.
Pandora only accepts podcasts via RSS feed, which should be in MP3 format. But recent notifications have shown more audio formats will be added.
However, it is vital to retain that Pandora Podcast’s team critically analyzes all submissions manually. So, it might take up to 4-6 weeks for your first Podcast to appear on the platform.
- User Review of Pandora Podcast
“Pandora Podcasts recommendations are a blessing for me, who always finds it confusing to locate the right episode to spend my time on.”
- Monthly User Base: Over 64 million active users.
- Supported OS: Dedicated apps for all major OS and web presence.
6. Audible
Although popular among audiobook lovers, Audible has a considerable podcast following too. Its monthly active user base is around 41 million. The biggest benefit of registering your Podcast on the Audible directory of podcasts is that it connects with users who use Alexa to discover new podcasts.
Besides Audible, the Podcast will also be available for users of the Amazon Music app. That means you can connect with even more users via one submission only. Not to forget, Amazon Prime Video (a massive following) users get a free subscription to Amazon Music, so there’s a perfect chance that you will connect with users conveniently.
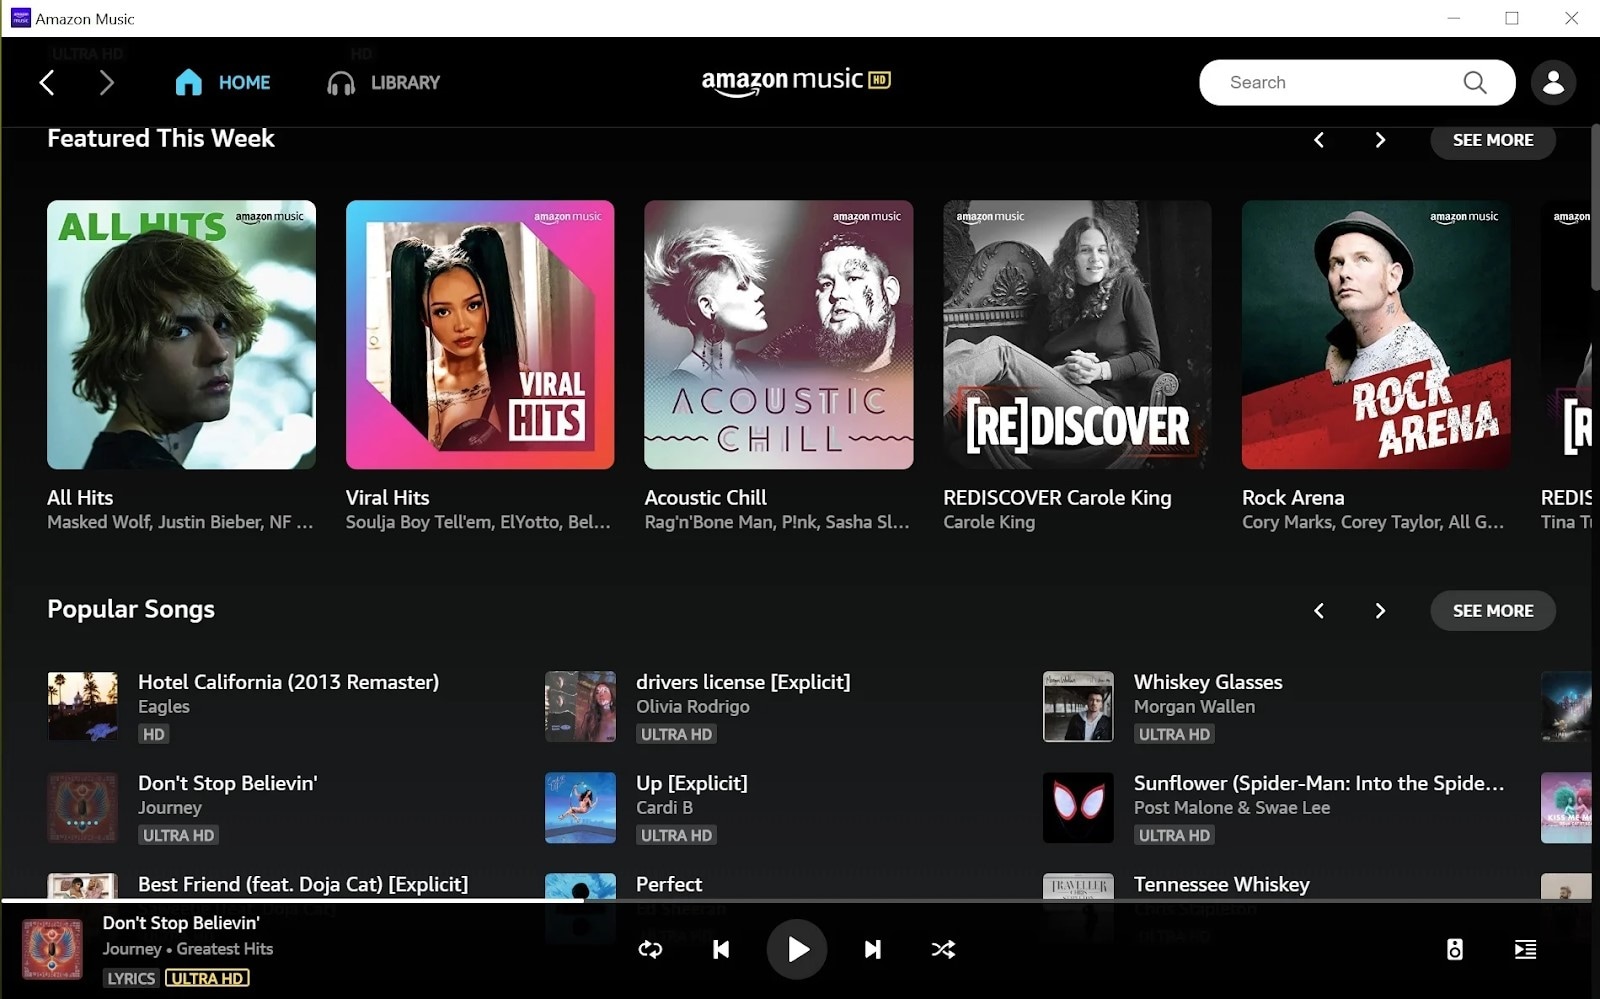
It is important to note that both Amazon Music and Audible offer podcasts for entirely free to users, so a more extensive user base prefers these platforms over paid platforms.
- User Review of Pandora Podcast
“You get to listen to any audiobook in the “included” library no matter which subscription you purchase..”
- Monthly User Base: Over 64 million active users.
- Supported OS: Android, iOS,
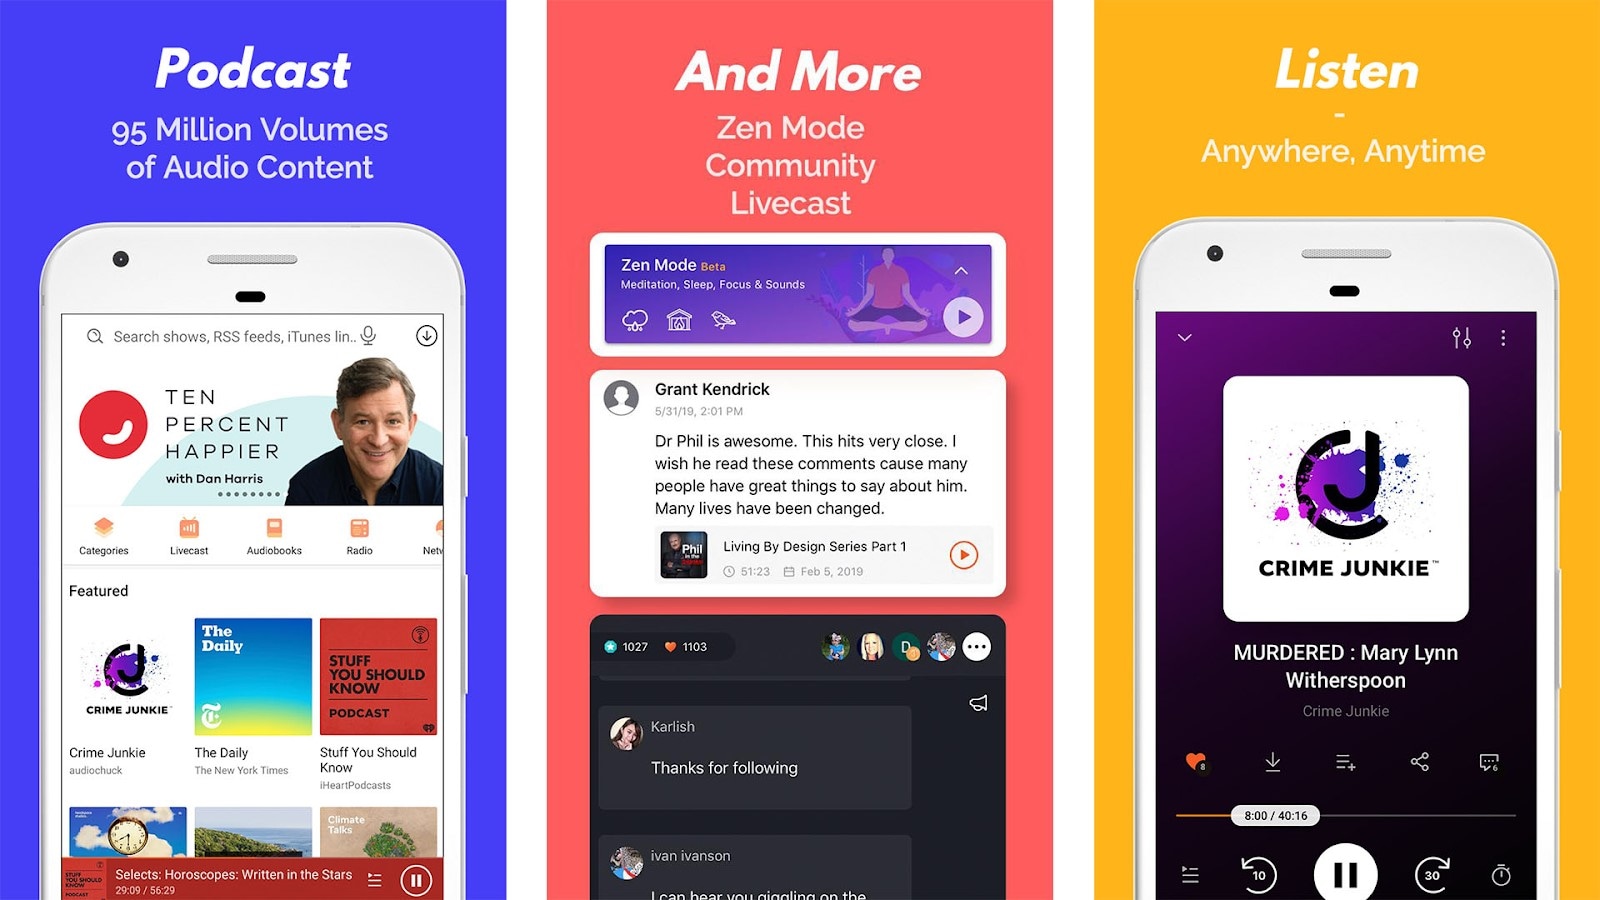
7. NPR One
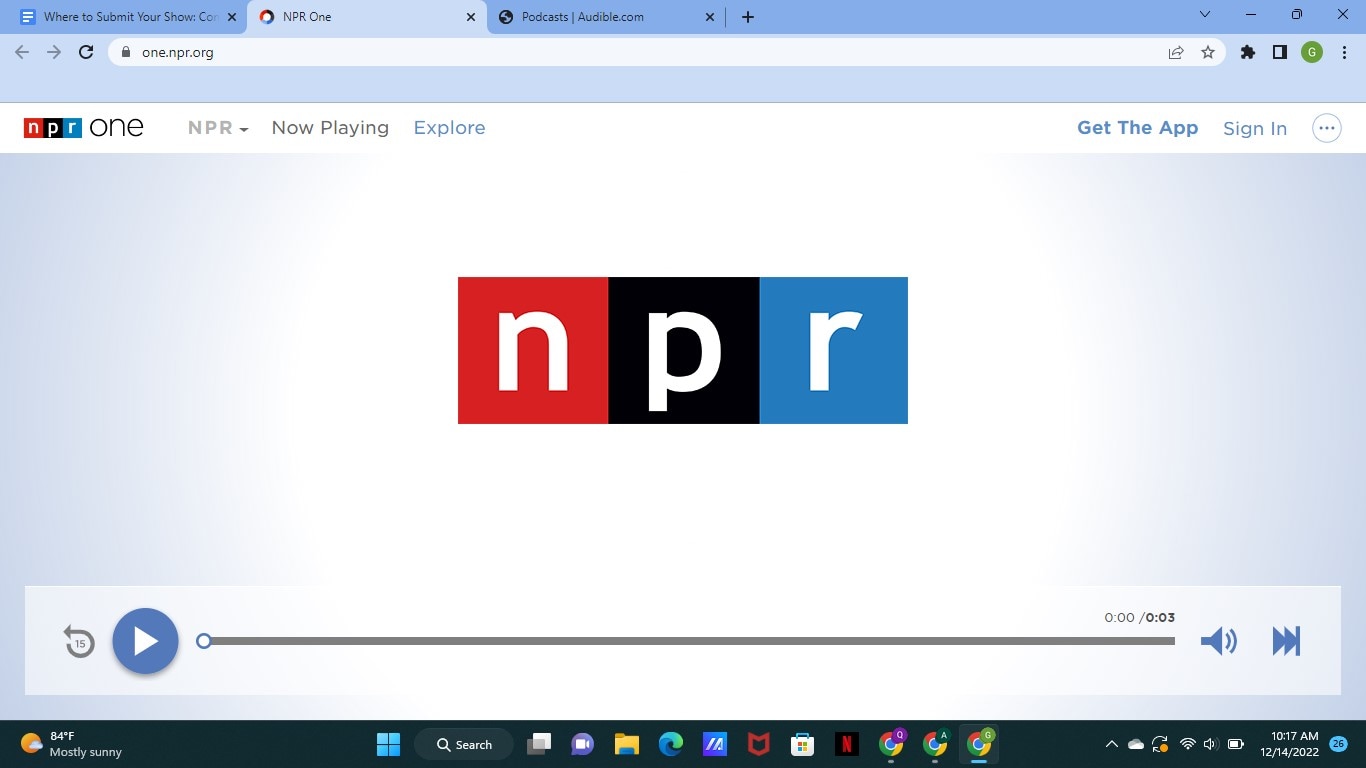
With an average listener spending up to 145 minutes weekly, the NPR One podcast directory is one of the best podcast directories you can trust to submit your show online. The podcast directory has a userbase of over 500 thousand users globally, and
- User Review of NPR One Podcast
“I’ve been using this app for years now. It’s been my trusty companion to give me the news. I primarily use it with the sleep timer. I’m not a super picky consumer, especially when I don’t pay for the app!
But for many months now, the sleep timer will frequently think the time is up and shut off the player well before it should. The player will often shut off within 5 minutes of using the 30 min sleep timer. It’s annoying to open the player hit resume, and reset the sleep timer.”
- Monthly User Base: 500 thousand
- Supported OS: Android, iOS
8. Tune In

Technically, TuneIn is a radio. But lately, it has become prevalent amongst podcast listeners to find their favorite shows and also listen to music. The podcast directory has a global user base of over 75 million and a monthly visit of 7million+, which makes it a great spot for any podcaster to publish their show.
- User Review of Tune In Podcast
“I’ve been using the app for 4 years. I like it, but there are some annoying “features.”
the screen won’t time out when the app is active.
the developers must have recently made a change. I used to search through my list of “recent” (there were about 20) to look for new episodes of my favorite podcasts.
Now, the app only allows me to see the last four podcasts or stations I have listened to. So it is not helpful.’
- Monthly User Base: Over 7 million active users
- Supported OS: Dedicated apps for all major OS and web presence.
9. Podcast Addict
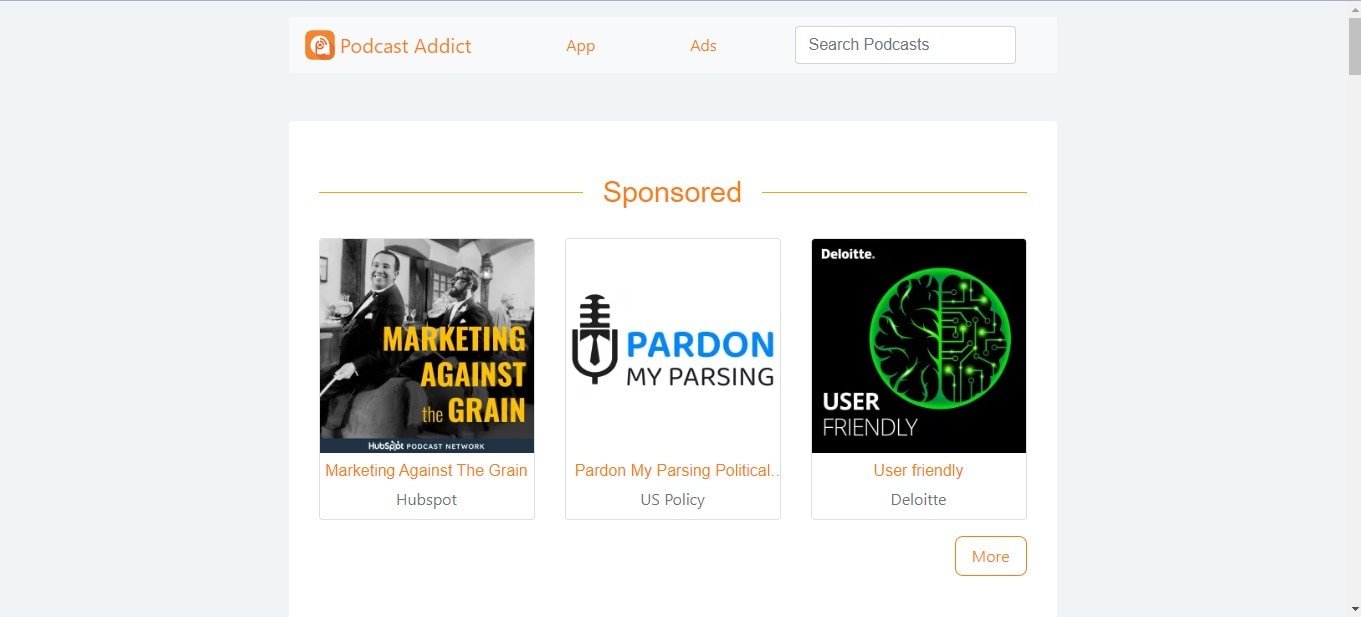
With over 10 million downloads on Google Playstore, Podcast Addict is one of Android’s most popular podcast apps. You can publish your podcast show, as it allows you to connect with the ideal audience quickly and easily.
Also, Podcast Addict is one of the few podcast directories available in various languages, including French and German. So it’s a perfect choice non-English podcasters.
- User Review of PodcastAddit
**”**Been using this for years. It does everything I could ever want when listening/ referencing/ re-listening to my favorite podcasts and a lot more.
I’ve suffered through having to use other podcast players (e.g., listening to something “exclusive”), but I couldn’t stand the inane simplicity of other players long enough to finish their content.
Also, it takes a bit to get used to (especially if you’re coming from other stripped-down players), but very worth the small effort for a powerful app.”
- Monthly User Base: Over 750 thousand active users.
- Supported OS: Dedicated Android App and web presence.
10. RadioPublic

Having been in the game for over 15 years, RadioPublic is another excellent podcast directory you can count on to submit your show. Although the platform does not have a massive user base compared to its competitors, it will help you grow your listeners and business by getting your podcast show to the right audience.
On RadioPublic, an average listener spends up to 72 minutes every day finding new podcast shows and listening to new episodes from their favorite podcasts. And given that the platform offers many robust features, listeners can enjoy a seamless listening experience on any device.
Overall, the RadioPublic podcast directory offers you a smart way to publish your show and grow your audience without going through stress.
- User Review of RadioPublic
“Glad I waited a while to find a podcast website provider. Starting from scratch in WordPress seemed too much hassle. Luckily the site came along while I was dithering about what to do.
The RadioPublic team onboarded the other 5 billion podcasts as one of the first examples, and I’m delighted to have chosen this option. Already, my pod site feels “complete” to look at, and more features are coming soon that will help with marketing, understanding listeners, and building a podcast brand.”
- Monthly User Base: Over 300 Thousand active users
- Supported OS: Dedicated apps for all major OS and web presence.
11. Overcast
Overcast is a dedicated podcast app for Apple devices, and what makes it a great podcast directory is that it offers unique features that attract many listeners.
On this platform, you’ll be allowed to display advertising slots, enabling listeners to subscribe to your podcast show within a few clicks. Plus, unlike many of its competitors, listeners have control over what podcast show is displayed in the featured podcast section. It is helpful as it lets listeners quickly discover every new episode you publish.
Overall, many incredible features make Overcast a good choice, and chances are your Podcast will get to real listeners when you publish them here.
- User Review of Overcast
**”**Nice alternative to Apple’s. I’ve been well pleased so far. It isn’t always the most intuitive, but I’ve eventually figured out how to achieve almost everything I’ve wanted to. The benefits of adding a show via RSS have become immediately clear.
Being a subscriber to a show and getting early access episodes and bonus material right in my podcast manager makes it easy to stay up with all my shows.”
- Monthly User Base: Over 70 Thousand active users.
- Supported OS: Dedicated app for iOS and web presence.
12. Pocket Casts
If you’re looking for a free podcast directory to publish your Podcast show, Pocket Casts is the ideal one for you. This podcast directory is packed with many rich features that podcasters will find very helpful. In addition, thanks to its beautifully designed website interface, you won’t find the platform difficult to use.
Besides, many listeners love Pocket Podcasts as it offers them incredible features—for example, improved discovery options, playback speed options, and lots more. In addition, they’ve enhanced how they find and listen to podcasts on the platform. You can’t go wrong publishing your show on a platform like this one.
- User Review of Pocket Casts
“Wonderful app, the most reliable one I’ve found. Even with accounts, most others lose all your progress data which hasn’t happened once with this, and I’ve switched phones 3 times. The progress tracker is so accurate you can pause on one device, open the same account and continue listening. Most apps can’t even keep things downloaded. Search does take a minute but finds stuff no other app does.”
- Monthly User Base: Over 1 Million active users.
- Supported OS: Dedicated apps for all major OS and web presence.
13. CastBox
CastBox is another unique podcast directory that podcasters trust to publish their show online. The platform boasts an optimized SEO and artificial intelligence that lets listeners find new podcast shows. Thanks to its massive user base of up to 20 Million users, your Podcast could reach a wide range of audiences quickly and easily.
Also, CastBox offers social media features that allow listeners to comment and share your podcast show on their social media page, thus helping you get your show to more listeners and potentially increase your fanbase.
- User Review of CastBox
“I’ve been a podcaster for years and an avid podcast listener for a while. So I searched high and low for the best podcast app and distribution service, Castbox. They have a great app and website, a huge content library, and a superb feature set. Also, their app allows offline listening, as I can download my favorite podcast show.”
- Monthly User Base: Over 1 million active users
- Supported OS: Dedicated apps for all major OS and web presence.
14. Stitcher
Last but not least podcast directory on our list is Stitcher. The platform boasts more than 14.5 Million active listeners, with an average listener having up to 25 hours of listening duration per month.
Stitcher helps you alleviate the stress of getting your show to the right audience, and thanks to the platform’s easy podcast submission requirements, you only need to have at least one podcast episode on your RSS Feed to get approved.
Also, Stitcher offers a unique analytic tool that allows you to track the performance of your show on the platform, and what more impressive is that it’s integrated into more than fifty car models. In addition, it works with any vehicle that supports Apple’s CarPlay and Android Auto, which makes it a great choice for podcasters who believe their audience loves to listen to their show while driving.
- User Review of Stitcher
“So glad I switched! I have my podcasts but didn’t listen to them much - partially because Apple Podcasts is so hard to use. I switched to Stitcher to listen to The Magnus Archives, and I love it!”
- Monthly User Base: Over 1.5 million active users.
- Supported OS: Dedicated apps for all major OS and web presence.
Part 3. More choices to submit your podcast shows
The above Podcast directories are great choices you can always count on any day. However, if you’re looking for more options, the following are reliable podcasting directories to choose from;
Part 4. How to submit a show to podcast directories?
Submitting a podcast show to podcast directories is pretty simple. Here, we used Spotify as an example to show you how you can easily submit your podcast show within a few clicks. The steps are as follows;
Step1 Create a Spotify account using the email attached to your podcast host.
Step2 Open Spotify for Podcasters in your browser and login into your account. Then, click Get Started on the new screen.
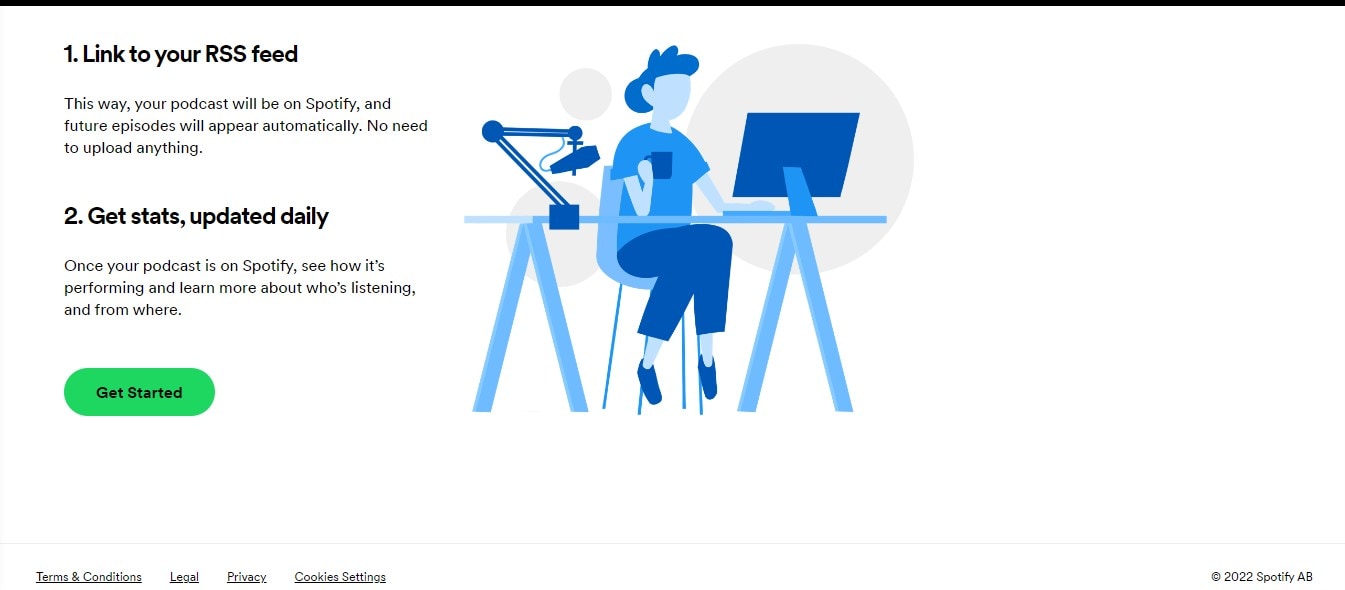
Step3 Provide your Podcast’s RSS Feed and click Next to proceed.
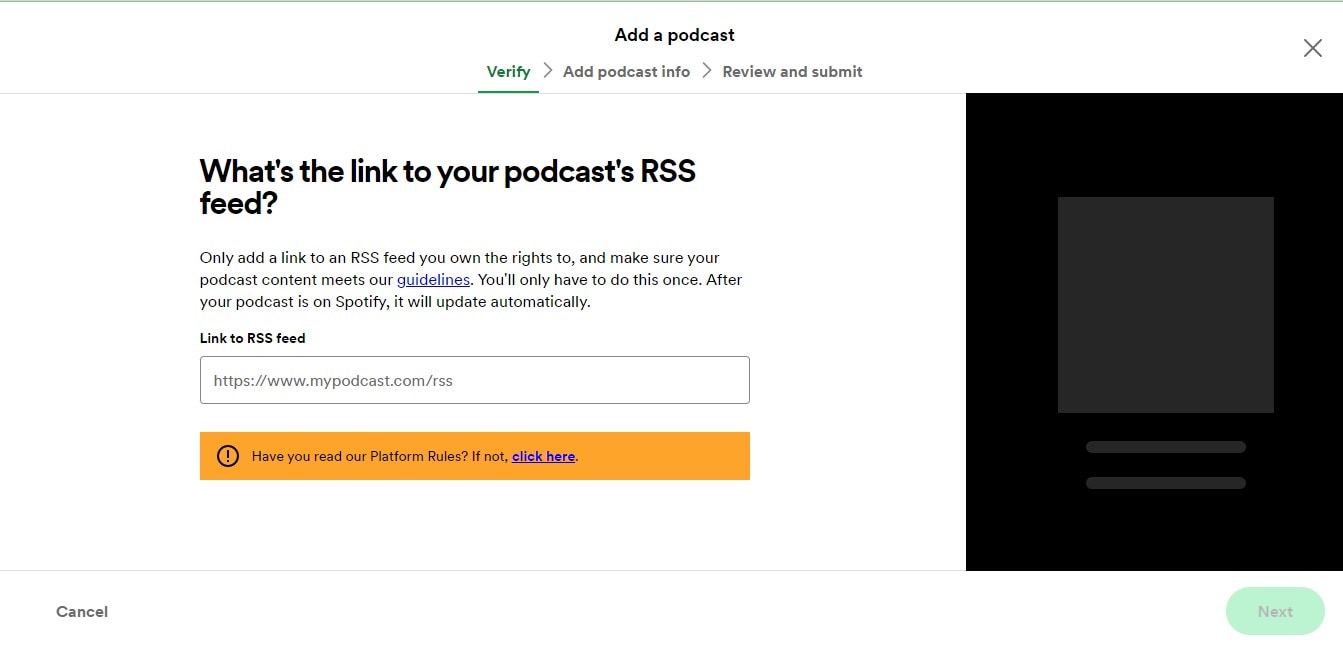
Step4 You’ll be asked to add information about your Podcast, from its description to the title, artwork, etc.
Step5 Verify the Podcast by submitting the code sent to your email.
Step6 Review the information you’ve provided so far and submit it to Spotify for review.
Once you complete the steps, keep an eye on the submitted Podcast, as Spotify won’t message you even if your Podcast has been published.
Hot FAQs on Podcast Directories
1. Are podcast directories free?
Almost all top podcast directories are entirely free for creators. All you have to do is sign up on the platforms. Then, check the platform’s requirements to submit your podcast episodes, like the format, cover photos, and description. Of course, the requirements vary depending on the platform.
2. Can any podcast be on a directory of podcasts?
Yes, you can choose from any podcast directory to publish your Podcast. There’s no limitation. When submitting, you must select the ideal category for your podcast show so it can be displayed to the right audience.
3. Does it cost to join a podcast directory?
Yes, and the cost of joining a podcast directory varies depending on your platform.
Conclusion
The podcast directories introduced above are reliable for submitting podcast shows. So, chances are there, no matter what your podcast show is about. It’ll help you connect with the right audience. However, one thing is vital you need to make sure you choose the podcast directory that suits you.
Part 1. What are podcast directories?
A podcast directory is a listening app. It’s the place where podcasts and their listeners meet. Podcast listeners search for, subscribe to, and listen to your Podcast using their podcast directory of choice. Popular podcast directories include Apple Podcasts, Spotify, and Google Podcasts.
Part 2. 15 Top podcast directories to focus on in 2024
Thankfully, research conducted by EdisonResearch shows the weekly audience reach of top podcast directories. So this list will help us locate the best podcasting directories. And it can multiply your audience size and quickly reach a more extensive user base.
According to Edison Research, the top 15 Podcast Networks are:
You must retain that Edison’s research only analyzes the US podcast services. Yet, our guide has compiled the best podcasting directories to connect with users worldwide.
Below you will find the list of top podcast directories and their reviews. But keep in mind that when it comes to podcast directories, there is no such thing as best or worse. Instead, it’s all about the user base and audience reach. So, it is best to submit your podcasts to multiple podcasting directories.
1. YouTube
With a monthly active user base of 2.5 billion, YouTube should be the top choice of any podcast creator. According to a recent survey by Statista, YouTube took over Spotify to become the largest platform for podcast consumption worldwide. Additionally, 47.7% of the US audience prefers YouTube over other platforms for listening to podcasts.
Not to forget, YouTube comes pre-installed on all smartphones and is also accessible via the Web to users worldwide. Another benefit of YouTube is that it is free for creators and users. Plus, once you grow your user base, it also allows you to get surplus revenue.
Of course, YouTube is a video-only platform. Still, you can use tools like Wondershare Filmora to create video-based podcasts seamlessly. You can simply convert the video podcasts into an audio format using Filmora itself and then reupload the same Podcast to even audio-based podcast directories.
Free Download For Win 7 or later(64-bit)
Free Download For macOS 10.14 or later
Tools like Fimora also allow you to directly publish the created Podcast on YouTube (so you do not have to worry about video requirements mandatory for YouTube).
- User Review of YouTube on G2: “YouTube is one of those sites that you can’t live without for a business. Everyone knows what YouTube is, and users (globally) use the platform daily.”
- Monthly User Base: Over 2.5 billion active users.
- Supported OS: All major OS and web browsers.
2. Spotify
Spotify has over 389 million listeners across 187 markets worldwide. Available on all major OS and its web presence makes it one of the best directories of podcasts on the internet.
Aside from its audience base, Spotify also provides real-time insights, like who your audience is, what they like, which episodes they prefer, and even what songs they want. All these insights will also help you plan your future content according to the audience.
Spotify’s personalized recommendations and algorithms are another pluses, given you can get discovered easily/ Like YouTube, Spotify allows you to upload even video podcasts. While you can also create and upload podcasts in audio format only.
- User Review of Spotify on G2: “I can find any song, artist, album, and even podcasts at any time and no commercials.”
- Monthly User Base: Over 360 million active users.
- Supported OS: All major OS and web browsers.
3. Apple Podcasts
Apple Podcast is another top directory for a podcast that creators cannot ignore. Given it is an exclusive-podcast platform, its 28.5 million active user base in more than 170 countries and regions is enough to tell its greatness.
It is essential to understand that YouTube and Spotify are not exclusive podcast platforms like Apple Podcasts. And while Spotify and YouTube are best for connecting novice podcast listeners, Apple Podcast is the way to go if you want to connect with a dedicated podcast community.
The best thing about the Apple Podcast directory is it allows you to create a podcast (via Apple Podcast Connect), but you must be an Apple user. However, you can submit your podcasts to Apple Podcast via RSS feed even if you are not an Apple user.
In all, given Apple Podcast is available for Apple users and is known by default on all Apple devices (the most prominent smartphone company in the world), Apple Podcast is a must-use podcast directory.
- User Review of Apple Podcast: “Apple once again nails with simplicity, millions of shows of my interest, and freemium service.”
- Monthly User Base: Over 28.5 million active users.
- Supported OS: All Apple devices.
4. Google Podcasts
Google Podcasts has over 100 million downloads on Play Store alone and is also available on the web, App Store, Blackberry, and ChromeOS users. A completely subscription-free and ad-free platform, Google Podcasts is one of the top podcasting directories among users.
However, unlike the Apple Podcast directory, it does not have a studio, so you can only submit your podcasts via RSS feeds. Still, its user base and the advanced algorithms are an opportunity to connect with users who like the subjects you discuss.
Like Spotify and Apple Podcast directories, Google Podcasts also show you real-time analytics and guide you about users so that you can plan your content accordingly. Given that it only requires a Google account to start, it is another top podcast directory you cannot ignore.
- User Review of Google Podcast
“Google Podcast includes everything that a podcast listener wants. It’s simple, free, and includes valuable options like Sleep Timer, Playback speed, and more.”
- Monthly User Base: Over 30 million active users.
- Supported OS: Dedicated apps for all major OS and web presence.
5. Pandora
Pandora has over 64 million monthly active users, with a listener spending up to 24 hours/monthly on the platform. It explains that users spend up to 45 minutes on the Pandora platform tuning in to their favorite podcasts. Again, its search-based algorithms allow you to get discovered by users that like subjects and topics on which you’re creating podcasts, meaning it is simple to connect with a large user base conveniently.
Pandora only accepts podcasts via RSS feed, which should be in MP3 format. But recent notifications have shown more audio formats will be added.
However, it is vital to retain that Pandora Podcast’s team critically analyzes all submissions manually. So, it might take up to 4-6 weeks for your first Podcast to appear on the platform.
- User Review of Pandora Podcast
“Pandora Podcasts recommendations are a blessing for me, who always finds it confusing to locate the right episode to spend my time on.”
- Monthly User Base: Over 64 million active users.
- Supported OS: Dedicated apps for all major OS and web presence.
6. Audible
Although popular among audiobook lovers, Audible has a considerable podcast following too. Its monthly active user base is around 41 million. The biggest benefit of registering your Podcast on the Audible directory of podcasts is that it connects with users who use Alexa to discover new podcasts.
Besides Audible, the Podcast will also be available for users of the Amazon Music app. That means you can connect with even more users via one submission only. Not to forget, Amazon Prime Video (a massive following) users get a free subscription to Amazon Music, so there’s a perfect chance that you will connect with users conveniently.
It is important to note that both Amazon Music and Audible offer podcasts for entirely free to users, so a more extensive user base prefers these platforms over paid platforms.
- User Review of Pandora Podcast
“You get to listen to any audiobook in the “included” library no matter which subscription you purchase..”
- Monthly User Base: Over 64 million active users.
- Supported OS: Android, iOS,
7. NPR One
With an average listener spending up to 145 minutes weekly, the NPR One podcast directory is one of the best podcast directories you can trust to submit your show online. The podcast directory has a userbase of over 500 thousand users globally, and
- User Review of NPR One Podcast
“I’ve been using this app for years now. It’s been my trusty companion to give me the news. I primarily use it with the sleep timer. I’m not a super picky consumer, especially when I don’t pay for the app!
But for many months now, the sleep timer will frequently think the time is up and shut off the player well before it should. The player will often shut off within 5 minutes of using the 30 min sleep timer. It’s annoying to open the player hit resume, and reset the sleep timer.”
- Monthly User Base: 500 thousand
- Supported OS: Android, iOS
8. Tune In
Technically, TuneIn is a radio. But lately, it has become prevalent amongst podcast listeners to find their favorite shows and also listen to music. The podcast directory has a global user base of over 75 million and a monthly visit of 7million+, which makes it a great spot for any podcaster to publish their show.
- User Review of Tune In Podcast
“I’ve been using the app for 4 years. I like it, but there are some annoying “features.”
the screen won’t time out when the app is active.
the developers must have recently made a change. I used to search through my list of “recent” (there were about 20) to look for new episodes of my favorite podcasts.
Now, the app only allows me to see the last four podcasts or stations I have listened to. So it is not helpful.’
- Monthly User Base: Over 7 million active users
- Supported OS: Dedicated apps for all major OS and web presence.
9. Podcast Addict
With over 10 million downloads on Google Playstore, Podcast Addict is one of Android’s most popular podcast apps. You can publish your podcast show, as it allows you to connect with the ideal audience quickly and easily.
Also, Podcast Addict is one of the few podcast directories available in various languages, including French and German. So it’s a perfect choice non-English podcasters.
- User Review of PodcastAddit
**”**Been using this for years. It does everything I could ever want when listening/ referencing/ re-listening to my favorite podcasts and a lot more.
I’ve suffered through having to use other podcast players (e.g., listening to something “exclusive”), but I couldn’t stand the inane simplicity of other players long enough to finish their content.
Also, it takes a bit to get used to (especially if you’re coming from other stripped-down players), but very worth the small effort for a powerful app.”
- Monthly User Base: Over 750 thousand active users.
- Supported OS: Dedicated Android App and web presence.
10. RadioPublic
Having been in the game for over 15 years, RadioPublic is another excellent podcast directory you can count on to submit your show. Although the platform does not have a massive user base compared to its competitors, it will help you grow your listeners and business by getting your podcast show to the right audience.
On RadioPublic, an average listener spends up to 72 minutes every day finding new podcast shows and listening to new episodes from their favorite podcasts. And given that the platform offers many robust features, listeners can enjoy a seamless listening experience on any device.
Overall, the RadioPublic podcast directory offers you a smart way to publish your show and grow your audience without going through stress.
- User Review of RadioPublic
“Glad I waited a while to find a podcast website provider. Starting from scratch in WordPress seemed too much hassle. Luckily the site came along while I was dithering about what to do.
The RadioPublic team onboarded the other 5 billion podcasts as one of the first examples, and I’m delighted to have chosen this option. Already, my pod site feels “complete” to look at, and more features are coming soon that will help with marketing, understanding listeners, and building a podcast brand.”
- Monthly User Base: Over 300 Thousand active users
- Supported OS: Dedicated apps for all major OS and web presence.
11. Overcast
Overcast is a dedicated podcast app for Apple devices, and what makes it a great podcast directory is that it offers unique features that attract many listeners.
On this platform, you’ll be allowed to display advertising slots, enabling listeners to subscribe to your podcast show within a few clicks. Plus, unlike many of its competitors, listeners have control over what podcast show is displayed in the featured podcast section. It is helpful as it lets listeners quickly discover every new episode you publish.
Overall, many incredible features make Overcast a good choice, and chances are your Podcast will get to real listeners when you publish them here.
- User Review of Overcast
**”**Nice alternative to Apple’s. I’ve been well pleased so far. It isn’t always the most intuitive, but I’ve eventually figured out how to achieve almost everything I’ve wanted to. The benefits of adding a show via RSS have become immediately clear.
Being a subscriber to a show and getting early access episodes and bonus material right in my podcast manager makes it easy to stay up with all my shows.”
- Monthly User Base: Over 70 Thousand active users.
- Supported OS: Dedicated app for iOS and web presence.
12. Pocket Casts
If you’re looking for a free podcast directory to publish your Podcast show, Pocket Casts is the ideal one for you. This podcast directory is packed with many rich features that podcasters will find very helpful. In addition, thanks to its beautifully designed website interface, you won’t find the platform difficult to use.
Besides, many listeners love Pocket Podcasts as it offers them incredible features—for example, improved discovery options, playback speed options, and lots more. In addition, they’ve enhanced how they find and listen to podcasts on the platform. You can’t go wrong publishing your show on a platform like this one.
- User Review of Pocket Casts
“Wonderful app, the most reliable one I’ve found. Even with accounts, most others lose all your progress data which hasn’t happened once with this, and I’ve switched phones 3 times. The progress tracker is so accurate you can pause on one device, open the same account and continue listening. Most apps can’t even keep things downloaded. Search does take a minute but finds stuff no other app does.”
- Monthly User Base: Over 1 Million active users.
- Supported OS: Dedicated apps for all major OS and web presence.
13. CastBox
CastBox is another unique podcast directory that podcasters trust to publish their show online. The platform boasts an optimized SEO and artificial intelligence that lets listeners find new podcast shows. Thanks to its massive user base of up to 20 Million users, your Podcast could reach a wide range of audiences quickly and easily.
Also, CastBox offers social media features that allow listeners to comment and share your podcast show on their social media page, thus helping you get your show to more listeners and potentially increase your fanbase.
- User Review of CastBox
“I’ve been a podcaster for years and an avid podcast listener for a while. So I searched high and low for the best podcast app and distribution service, Castbox. They have a great app and website, a huge content library, and a superb feature set. Also, their app allows offline listening, as I can download my favorite podcast show.”
- Monthly User Base: Over 1 million active users
- Supported OS: Dedicated apps for all major OS and web presence.
14. Stitcher
Last but not least podcast directory on our list is Stitcher. The platform boasts more than 14.5 Million active listeners, with an average listener having up to 25 hours of listening duration per month.
Stitcher helps you alleviate the stress of getting your show to the right audience, and thanks to the platform’s easy podcast submission requirements, you only need to have at least one podcast episode on your RSS Feed to get approved.
Also, Stitcher offers a unique analytic tool that allows you to track the performance of your show on the platform, and what more impressive is that it’s integrated into more than fifty car models. In addition, it works with any vehicle that supports Apple’s CarPlay and Android Auto, which makes it a great choice for podcasters who believe their audience loves to listen to their show while driving.
- User Review of Stitcher
“So glad I switched! I have my podcasts but didn’t listen to them much - partially because Apple Podcasts is so hard to use. I switched to Stitcher to listen to The Magnus Archives, and I love it!”
- Monthly User Base: Over 1.5 million active users.
- Supported OS: Dedicated apps for all major OS and web presence.
Part 3. More choices to submit your podcast shows
The above Podcast directories are great choices you can always count on any day. However, if you’re looking for more options, the following are reliable podcasting directories to choose from;
Part 4. How to submit a show to podcast directories?
Submitting a podcast show to podcast directories is pretty simple. Here, we used Spotify as an example to show you how you can easily submit your podcast show within a few clicks. The steps are as follows;
Step1 Create a Spotify account using the email attached to your podcast host.
Step2 Open Spotify for Podcasters in your browser and login into your account. Then, click Get Started on the new screen.
Step3 Provide your Podcast’s RSS Feed and click Next to proceed.
Step4 You’ll be asked to add information about your Podcast, from its description to the title, artwork, etc.
Step5 Verify the Podcast by submitting the code sent to your email.
Step6 Review the information you’ve provided so far and submit it to Spotify for review.
Once you complete the steps, keep an eye on the submitted Podcast, as Spotify won’t message you even if your Podcast has been published.
Hot FAQs on Podcast Directories
1. Are podcast directories free?
Almost all top podcast directories are entirely free for creators. All you have to do is sign up on the platforms. Then, check the platform’s requirements to submit your podcast episodes, like the format, cover photos, and description. Of course, the requirements vary depending on the platform.
2. Can any podcast be on a directory of podcasts?
Yes, you can choose from any podcast directory to publish your Podcast. There’s no limitation. When submitting, you must select the ideal category for your podcast show so it can be displayed to the right audience.
3. Does it cost to join a podcast directory?
Yes, and the cost of joining a podcast directory varies depending on your platform.
Conclusion
The podcast directories introduced above are reliable for submitting podcast shows. So, chances are there, no matter what your podcast show is about. It’ll help you connect with the right audience. However, one thing is vital you need to make sure you choose the podcast directory that suits you.
Adjusting Decibels: Fine-Tuning Sound on Audacity
Audacity is a free, open access, cross-platform sound editing and recording tool. It is compatible with Windows, Mac OS X, Linux, and various other operating systems. All of these aspects have contributed to Audacity’s worldwide popularity. Audacity features an amplified effect that alters the loudness of your chosen audio and other practical tools that can change the sound in different ways.
As a result, Audacity can not only assist you in modifying the level of an audio file, but it can also help you equalize, reduce, normalize, and so on.
Yes, you have heard it right, Audacity increase volume, but the primary question is how? But don’t worry, you will get the answer after reading the article. This article will explain how you can increase or decrease the volume of a whole and a specific segment of the audio file. Let’s get started.
In this article
01 How to Increase or Decrease Volume Without Distortion and Clipping in Audacity
02 How to Increase Volume of Multiple Files in Audacity?
03 How to Increase Volume in Certain Parts of Track?
04 What’s the Difference between Normalize and Amplify?
Part 1: How to Increase or Decrease Volume Without Distortion and Clipping in Audacity
Audio clipping occurs when the audio input becomes too loud for an amplifier to produce, and the surplus signal creates distortion. When editing, you cannot add additional volume to your audio clip forever because this would result in clipping. In this case, you can use the Audacity application to emphasize your material by turning the volume up or down without distortion and clipping on a track or recording.
Learn how Audacity increase volume without distortion by following the procedure described below:
Step 1: First, download and install the Audacity software on your computer.
Step 2: Select the File from the menu above and click Open to open the audio file.

Step 3: Choose the audio track, go to the Effect menu and pick the Amplify option from the drop-down menu.

Note: You can increase or decrease the volume by double-clicking the track and using the slider under the Gain title.
Step 4: Increase or decrease the volume by sliding the slider or typing the amplification value in the text box next to it in the Amplify window as needed.

Note: Ensure that the Allow Clipping checkbox remains unchecked to avoid clipping. Moreover, keep in mind that increasing the volume to a greater extent can result in distortion.
Related: How to Change Audio Volume in Filmora
Part 2: How to Increase Volume of Multiple Files in Audacity?
Audacity is an open-source audio editing tool. It is used for various purposes, like audio recording, music creation, and audio file editing. It also allows you to increase and decrease the volume of audio files.
You may also apply the modifications to multiple files at once, rather than one at a time. Check out the instructions below to learn how to change the volume of multiple audio files:
Step 1: Select the Import option from the File menu, and then pick the Audio option. Browse to your audio files, choose all of them, and then click the Open option.

Step 2: To select all the files, press Ctrl + A, click on the Effect option in the menu bar and pick Amplify.

Step 3: Now, either enter the value in the text box next to the Amplification Decibels tab or use the slider under it. To verify the operation of increasing the volume, check the allow clipping checkbox. When you’re through with the options, click the Ok button.

Step 4: Amplification will be applied to all the tracks. Go to the File option from the above menu to export the files and then select the Export option.

If you’re running Audacity on macOS computer, you can watch the video tutorial below to apply effects to multiple files.
Part 3: How to Increase Volume in Certain Parts of Track?
The audacity software also allows you to alter a specific section of an audio file. The selection tool can assist in locating a particular area of the track. After you’ve chosen a section of the audio file, you may utilize the amplification effect to increase its loudness. Check out the instructions below to learn how you can achieve it:
Step 1: Launch the Audacity software on the computer. To open the audio file, go to the File menu and select Open. You may also open the file by dragging it.
Step 2: Ensure that the Selection tool is active now. Click and hold the mouse left-click to move from one spot on the track to another.

Step 3: After picking the part, go to the Effect option from the menu and select Amplify.

Step 4: Now, for that specific region, modify the amplification and click OK. This will only change the volume for the area you have selected.

Part 4: What’s the Difference between Normalize and Amplify?
Amplify and Normalize are two essential features of the Audacity tool. Many people think they are the same thing, they are right up to some extent, but there exists a big difference between both the features. Before discussing the differences, you need to know what the terms Normalize and Amplify imply.
Amplify
It is the quickest approach to comprehend the effect’s name if you want to know precisely what impacts are. The frequency of the vibration is enhanced to increase the amplification effect. As previously said, it raises a tiny sound.
Furthermore, because this amplification is extended to all frequencies and amplitude, the noise increases. If you choose ten sources and magnify them by ten decibels, each source will be ten decibels louder than your present sound.

Normalize
The meaning of normalizing is standardized, which is also a feature of its name. Whenever you pick an audio input and use the normalize feature, the level is adjusted automatically according to the previously indicated average volume size in Oda City.
As a result, when one sound source is normalized, there is no discernible difference between it and the amplification mechanism. Still, the effect is evident when several sound sources are performed concurrently.
By pressing Ctrl + A and selecting all ten various audio sources, you may compute the required standard of every sound source, enhance the audio input that is smaller than the normal, and create the audio signal more significant than the standard. Shrink the size of each noise source, such as the name, and normalize the sound.

Related: Best Audio Normalizers for Windows
Differences
To differentiate the meaning and impact precisely, amplification means increasing or reducing the sound, whereas normalizing means equalizing the sound. Simply defined, if you magnify ten sources by ten decibels, each of the shorter and louder noises equals ten decibels in their actual loudness.
When the ten sources are normalized, the louder sounds grow louder, conforming to the standard sound source size. Because the amplifying is done regardless, the little noises are going insane during this procedure.
Conclusion
All in all, Audacity does an excellent job at audio editing. If you simply need to modify an audio file, Audacity is a great option. For increasing and decreasing the volume of single and multiple audio files, Audacity is still one of the best bets in the market. We hope that now know how Audacity increase volume of the audio files after reading this article.
02 How to Increase Volume of Multiple Files in Audacity?
03 How to Increase Volume in Certain Parts of Track?
04 What’s the Difference between Normalize and Amplify?
Part 1: How to Increase or Decrease Volume Without Distortion and Clipping in Audacity
Audio clipping occurs when the audio input becomes too loud for an amplifier to produce, and the surplus signal creates distortion. When editing, you cannot add additional volume to your audio clip forever because this would result in clipping. In this case, you can use the Audacity application to emphasize your material by turning the volume up or down without distortion and clipping on a track or recording.
Learn how Audacity increase volume without distortion by following the procedure described below:
Step 1: First, download and install the Audacity software on your computer.
Step 2: Select the File from the menu above and click Open to open the audio file.
Step 3: Choose the audio track, go to the Effect menu and pick the Amplify option from the drop-down menu.
Note: You can increase or decrease the volume by double-clicking the track and using the slider under the Gain title.
Step 4: Increase or decrease the volume by sliding the slider or typing the amplification value in the text box next to it in the Amplify window as needed.
Note: Ensure that the Allow Clipping checkbox remains unchecked to avoid clipping. Moreover, keep in mind that increasing the volume to a greater extent can result in distortion.
Related: How to Change Audio Volume in Filmora
Part 2: How to Increase Volume of Multiple Files in Audacity?
Audacity is an open-source audio editing tool. It is used for various purposes, like audio recording, music creation, and audio file editing. It also allows you to increase and decrease the volume of audio files.
You may also apply the modifications to multiple files at once, rather than one at a time. Check out the instructions below to learn how to change the volume of multiple audio files:
Step 1: Select the Import option from the File menu, and then pick the Audio option. Browse to your audio files, choose all of them, and then click the Open option.
Step 2: To select all the files, press Ctrl + A, click on the Effect option in the menu bar and pick Amplify.
Step 3: Now, either enter the value in the text box next to the Amplification Decibels tab or use the slider under it. To verify the operation of increasing the volume, check the allow clipping checkbox. When you’re through with the options, click the Ok button.
Step 4: Amplification will be applied to all the tracks. Go to the File option from the above menu to export the files and then select the Export option.
If you’re running Audacity on macOS computer, you can watch the video tutorial below to apply effects to multiple files.
Part 3: How to Increase Volume in Certain Parts of Track?
The audacity software also allows you to alter a specific section of an audio file. The selection tool can assist in locating a particular area of the track. After you’ve chosen a section of the audio file, you may utilize the amplification effect to increase its loudness. Check out the instructions below to learn how you can achieve it:
Step 1: Launch the Audacity software on the computer. To open the audio file, go to the File menu and select Open. You may also open the file by dragging it.
Step 2: Ensure that the Selection tool is active now. Click and hold the mouse left-click to move from one spot on the track to another.
Step 3: After picking the part, go to the Effect option from the menu and select Amplify.
Step 4: Now, for that specific region, modify the amplification and click OK. This will only change the volume for the area you have selected.
Part 4: What’s the Difference between Normalize and Amplify?
Amplify and Normalize are two essential features of the Audacity tool. Many people think they are the same thing, they are right up to some extent, but there exists a big difference between both the features. Before discussing the differences, you need to know what the terms Normalize and Amplify imply.
Amplify
It is the quickest approach to comprehend the effect’s name if you want to know precisely what impacts are. The frequency of the vibration is enhanced to increase the amplification effect. As previously said, it raises a tiny sound.
Furthermore, because this amplification is extended to all frequencies and amplitude, the noise increases. If you choose ten sources and magnify them by ten decibels, each source will be ten decibels louder than your present sound.
Normalize
The meaning of normalizing is standardized, which is also a feature of its name. Whenever you pick an audio input and use the normalize feature, the level is adjusted automatically according to the previously indicated average volume size in Oda City.
As a result, when one sound source is normalized, there is no discernible difference between it and the amplification mechanism. Still, the effect is evident when several sound sources are performed concurrently.
By pressing Ctrl + A and selecting all ten various audio sources, you may compute the required standard of every sound source, enhance the audio input that is smaller than the normal, and create the audio signal more significant than the standard. Shrink the size of each noise source, such as the name, and normalize the sound.
Related: Best Audio Normalizers for Windows
Differences
To differentiate the meaning and impact precisely, amplification means increasing or reducing the sound, whereas normalizing means equalizing the sound. Simply defined, if you magnify ten sources by ten decibels, each of the shorter and louder noises equals ten decibels in their actual loudness.
When the ten sources are normalized, the louder sounds grow louder, conforming to the standard sound source size. Because the amplifying is done regardless, the little noises are going insane during this procedure.
Conclusion
All in all, Audacity does an excellent job at audio editing. If you simply need to modify an audio file, Audacity is a great option. For increasing and decreasing the volume of single and multiple audio files, Audacity is still one of the best bets in the market. We hope that now know how Audacity increase volume of the audio files after reading this article.
Also read:
- Enhance Your Audio Remove Background Noise With Wondershare Filmora
- Updated In 2024, Upgrade Your Call Game with These Top 6 Android & iOS Voice-Changing Tools
- New In 2024, Digital Zen Spaces The Leading 10 Sites for Soothing the Soul
- Updated In 2024, Unlocking the Full Potential of Audacity A Comprehensive Installation and Removal Manual for Ubuntu Users
- New 2024 Approved Achieving Silent Movie Magic Non-Download Methods for Removing Sound From Windows 10 Footage
- Updated 2024 Approved Instant Silence Muting Zoom Sound From Your Computer or Smartphone
- Updated Show Audio Waveform and Add Waveform Animation in Final Cut ProTutorial
- Essential Methods Reprogramming Soundtracks Within Film and Video Material for 2024
- In 2024, The Ultimate Ranking Best Online & Physical MP3 Karaoke Tools
- New The Noise Negators Handbook Removing Unwanted Soundscapes From Audio Experience for 2024
- In 2024, Audacity Alternatives Unveiled The Best Free Nonaudacity Apps on Your Desktop
- New Top 6 Android & iOS Apps for Enhancing Call Conversation Volume for 2024
- Audio-Free Filming Tips for Cleaner iPhone Videos
- Cutting Through Chaos Effective Techniques to Silence Unwanted Sounds in Audacity and FilmoraPro for 2024
- 2024 Approved Effective Ways to Decelerate Audio Pieces without Impacting Tonal Integrity
- 2024 Approved Comprehensive Audit of Sound Forge Capabilities
- Updated 2024 Approved Crafting Seamless Sound Tracks with iMovies Volume Control
- Updated In 2024, Discover the Unbeatable Selection of Cost-Free Audio Editing Applications for Windows/Mac (Updated List, 2023)
- Updated In 2024, The Complete Guide to MP3 Customization From Editing Basics to Professional Touches
- In 2024, Exploring the Best A Ranked List of 6 Top Transcription Automation Tools
- Silent Elements Unveiled Techniques for Retrieving Sound From Videos for 2024
- New In 2024, Auditory Dog Effects Collection A Resource List
- New Digital Tunes on the House Mastering Free Audio Downloads Techniques
- Elevate Your Gameplay A Guide to Embedding Songs Into KineMaster
- Updated 2024 Approved The Ultimate Guide to Free Mobile Applications Transforming Audio Into Captivating Visuals for iOS & Android Users
- Updated 2024 Approved The Ultimate List of Free Haunting Noise Archives
- 2024 Approved 5 Essential Strategies for Capturing High-Quality Chromebook Sound
- New In 2024, Unveiling Pure Acoustics Strategies to Correct and Amplify Sound Quality in Video Production
- New Expert Audio Tidying Up Techniques and Applications to Purify Soundtracks for 2024
- New Balancing Act Techniques for Achieving Even Loudness in DaVinci Resolve
- New 2024 Approved Online Anomalies Sound Bank - Legal, Free Access
- New In 2024, The Ultimate Selection Newsroom Soundscapes for Inspiration
- New Innovations in Digital Vocal Alteration Top-Notch Applications for 2024
- New 2024 Approved Top Picks Compiling a Collection of Gratis Tracks for Filmmaking
- Updated Useful Tips How Can You Use Voxal Voice Changer on Discord, In 2024
- Updated The Modern Producers Guide to Applying Gradual Volume Decrease in Audio Production for 2024
- Voice Memos Made Simple Your Comprehensive Guide to High-Quality Audio Recordings on Windows 10 for 2024
- New 2024 Approved Uncovering Artistic Soundscapes Mimicking Brush Techniques
- Updated 2024 Approved Become an Expert at Uncomplicated Podcasting A Stepwise Manual to Success 2023 Guidebook
- Audio Engineering Simplified 6 Crucial Steps for Effective Vocal Isolation Using Adobe Audition for 2024
- Updated In 2024, Find Cricket Sound Effect
- Updated Audio Alchemy Revealed A Deep Dive Into Premier Sound Design Software for 2024
- Uncovering the Method to Remove iOS Ducking From Your Listening Habits
- In 2024, Audible Artistry Providers 10 Online & Desktop Platforms to Revolutionize Your Work
- How to Screen Mirroring Itel A70 to PC? | Dr.fone
- In 2024, How to Bypass FRP on Sony Xperia 1 V?
- Are You Looking for Trustworthy GIF Converters to Use GIF Images Across Various Platforms? Find Out About Reliable and Authentic GIF Converters that You Can Easily Use for WMV to GIF Conversion Anytime You Want
- 2024 Approved Best Free Video Cutting Tools for Divx Files (Updated 2023)
- How to Stop Google Chrome from Tracking Your Location On Motorola Moto G04? | Dr.fone
- New Crafting Compelling Lower Thirds Essential Tips for FCPX
- Updated 2024 Approved Create Kinetice Typography Text Effect in Filmora
- New 2024 Approved Best Video Editing Apps for Windows 10 PCs and Laptops
- Ultimate Guide from OnePlus 12 FRP Bypass
- How to Use Google Assistant on Your Lock Screen Of Samsung Galaxy A15 4G Phone
- New Top Video Editing Apps for Smartphone Creators for 2024
- In 2024, Understanding Aspect Ratios 5 Key Insights
- Ultimate Guide on Itel A70 FRP Bypass
- Updated Upgraded to the Latest Windows 11 and Looking for a Video Editor that Can Be Compatible with It? Here, I Have Picked up some of the Best Video Editors for Windows 11 Based on Its Features and Compatibility
- In 2024, Process of Screen Sharing Honor 80 Pro Straight Screen Edition to PC- Detailed Steps | Dr.fone
- How to Change/Add Location Filters on Snapchat For your Motorola Edge 40 Neo | Dr.fone
- Can I Remove the Apple Watch Activation Lock By iPhone X without the Previous Owner?
- Apple ID Locked for Security Reasons From iPhone 6 Plus? Find the Best Solution Here
- Updated The Top 5 Free M4A File Editors You Need for 2024
- Updated 2024 Approved How to Rotate a Video in Windows 10
- Fix Unfortunately Settings Has Stopped on Xiaomi Redmi Note 12 Pro+ 5G Quickly | Dr.fone
- How to Unlock X9b Phone Forgot Password
- 2024 Approved What Is an AI Editor?
- Updated In 2024, Converting Video to MP3 Tips and Tricks for Retaining Quality
- 4 Methods to Turn off Life 360 On Oppo A1 5G without Anyone Knowing | Dr.fone
- In 2024, How PGSharp Save You from Ban While Spoofing Pokemon Go On Vivo Y36? | Dr.fone
- How to Resolve Itel P55 5G Screen Not Working | Dr.fone
- New 2024 Approved Unlocking FCPX Potential A Deep Dive Into XML Files
- In 2024, How to Bypass Android Lock Screen Using Emergency Call On Xiaomi Redmi Note 12 Pro 4G?
- In 2024, No-Cost Video Editing Solutions The Ultimate List
- How to Change/Add Location Filters on Snapchat For your Lava Yuva 3 Pro | Dr.fone
- How to Stop Google Chrome from Tracking Your Location On Itel A05s? | Dr.fone
- How To Reset the Security Questions of Your Apple ID On Your iPhone XS Max
- Title: Harmonizing Visuals with Auditory Elements Effective Strategies for Music Integration in Final Cut Pro
- Author: David
- Created at : 2024-05-20 05:45:08
- Updated at : 2024-05-21 05:45:08
- Link: https://sound-tweaking.techidaily.com/harmonizing-visuals-with-auditory-elements-effective-strategies-for-music-integration-in-final-cut-pro/
- License: This work is licensed under CC BY-NC-SA 4.0.
