
:max_bytes(150000):strip_icc():format(webp)/how-to-see-who-viewed-your-tiktok-5271090-e2cb663541b8484a8a2e80ffbdd98db3.jpg)
2024 Approved Premier Voice Capture Apps on Android The Best
Premier Voice Capture Apps on Android: The Best
10 Best Voice Recording Apps for Android Devices [Free Included]

Benjamin Arango
Mar 27, 2024• Proven solutions
Memorizing every bit of information you need to perform your daily or weekly tasks becomes increasingly difficult as your workload rises. Students, journalists, and professionals from a wide array of industries can benefit from making audio notes or even recording entire conversations with their Smartphones.
A simple Android voice recorder can make this task easy since you can just tap on the Record button and create an audio note in seconds. However, with so many voice recorder apps for Android devices out there, finding the one best suited for your needs can be more complicated than it seems. So, in this article, we are going to help you discover some best free voice recorder for an Android device you are currently using.
Want to record voiceover and audio on iPhone? Check 10 Best Voice Recorder Apps for iPhones >>
10 Best Free Voice Recording Apps for Android Devices
Recording audio is no longer a highly technical process since now you can create an audio note or record an interview with an Android phone and a voice recorder app. The question is which voice recording app should you install on your device. So, let’s take a look at some of the most potent Android voice recorders you can find at Google Play Store.
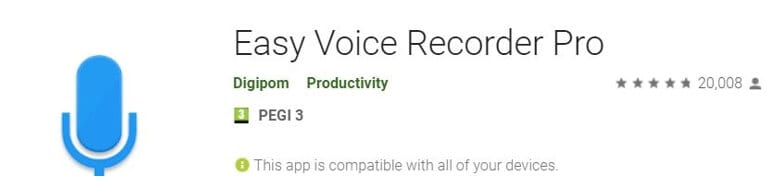
1. Easy Voice Recorder Pro
Price: $3.99
Supported OS: Varies with the device
Best for: Students, musicians, and businessmen
App in Google Play
As the app’s name suggests making recordings for a broad range of purposes is easy. All you need to do is launch the app and start a new audio recording session. Easy Voice Recorder Pro doesn’t limit the duration of your recordings, and it also allows you to compress the recorded audio . That is perfect if you need to record long lectures or conversations. Besides, you can connect an external microphone with the app in case you want to increase the quality of the sound you are recording. The app also lets you store your recordings on Dropbox or Google Drive, while it also offers the possibility to send recordings via email.
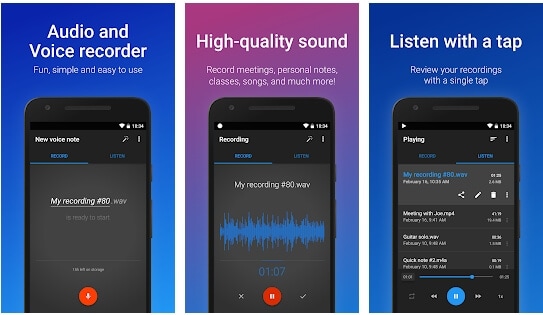
Easy Voice Recorder Pro Interface
Pros
- Allows users to manage and organize their recordings effortlessly
- Supports all standard output audio file formats
- Offers the option to record in stereo
- Recordings made with this app can be used as the ringtone
Cons
- Ads can be frustrating
- Limited basic audio editing tools
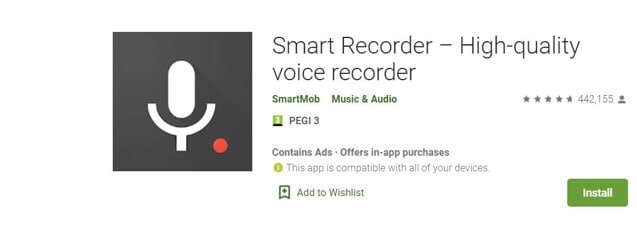
2. Smart Recorder – High-quality voice recorder
Price: Free, but contains ads and offers in-app purchases
Supported OS: Varies with the device
Best for: Students, musicians, and businessmen
App in Google Play
Capturing high-quality audio recordings effortlessly is the ultimate goal of all Android users who want to use voice recorders. As one of the best free voice recorders for Android, Smart Recorder app has a plethora of features that enable users to make high-quality audio recordings even in imperfect conditions. Options like Live Audio Spectrum Analyzer, microphone gain calibration or automatic and manual sensitivity control in Skip Silence mode are just a few reasons why this app has over 10 million installs. However, you should keep in mind that you cannot create audio files that are larger than 2 GB with this app.
Smart Recorder – High-quality voice recorder Interface
Pros
- Provides full control over the audio recording process
- Equipped with the Wave Lock feature that prevents the device from going into the sleep mode
- Features a live audio spectrum analyzer
- Preserves battery life
Cons
- No phone call recording options
- Limited file-sharing capabilities
3. RecForge II Audio Recorder
Price: Free, but contains ads
Supported OS: Android 4.0 and up
Best for: Musicians
RecForge-audio-recorder App in Google Play
If you are looking for an Android voice recorder that allows you to customize bit rates, sample rates, choose codecs or record in mono or stereo mode, then you should consider installing RecForge II Audio Recorder on your device. The app allows you to schedule recordings, connect different types of external microphones or adjust the gain manually. In addition, you can also adjust the pitch , tempo and the playback rate of all audio files you record and edit with this app. RecForge II Audio Recorder continues working even while you are using other apps, and it keeps the battery consumption at the very minimum.
Pros
- Supports nearly all common audio file formats
- Offers a versatile set of audio editing tools
- Excellent file-sharing capabilities
- Allows users to increase the audio quality by disabling Automatic Gain Control
Cons
- The maximum duration of a recording is limited for some file formats
- Can be too complicated for inexperienced users
4. Hi-Q MP3 Voice Recorder
Price: Free
Supported OS: Varies with the device
Best for: Students, general use
Hi-Q MP3 Voice Recorder App in Google Play
You don’t need any previous audio recording experience to record long lectures, interviews and all other types of voice recordings with Hi-Q MP3 Voice Recorder. The free version of the app limits the maximum duration of a recording you can make to just 10 minutes. That is why you must upgrade to the Pro version of Hi-Q MP3 Voice Recorder if you want to capture hours of material directly from your phone. The best part is that all versions of the app automatically upload recordings to Google Drive or Dropbox which frees up space on your device.
Pros
- Intuitive and modernly designed interface
- Simple audio recording session setup
- Customizable audio quality
- Excellent file management capabilities
Cons
- Recording with external microphones is not an option
- The free version of the app limits the maximum duration of recordings
5. Voice Recorder
Price: Free, but contains ads
Supported OS: Android 4.1 and up
Best for: Students, musicians, and businessmen
Voice Recorder App in Google Play
If you are looking for an app you can use to record an interview, a business meeting or a lecture, then Voice Recorder may be one of your best options. You can record audio files without any restrictions and visualize the sounds with the Audio Spectrum Analyzer. The app continues recording from the background even while the phone’s screen is off which preserves battery life and enables you to perform other tasks while the recording session is in progress. Voice Recorder offers a broad range of file-sharing capabilities so that you can easily send your audio recordings via SMS, email and the Messenger app or share them on Facebook and WhatsApp.
Pros
- Available for free to all Android users
- Stopping, pausing or resuming a recording session is easy
- Allows users to adjust the sample rate
- Offers the microphone gain calibration tool
Cons
- Audio recordings can only be saved in two different file formats
- Doesn’t provide audio editing options
6. Music Maker JAM
Price: Free, but contains ads and offers in-app purchases
Supported OS: Varies with the device
Best for: Musicians
Music Maker JAM App in Google Play
With the selection of 300 mix packs, Music Maker JAM is one of the best android apps for aspiring musicians who want to compose their music even while they are on the go. You can choose from a variety of samples, audio loops and beats to create your next song or record live performances with the app’s 8-channel mixer. Music Maker JAM also enables you to record vocals, adjust the tempo of the audio files or apply effects to all recordings you edit with this app. Once your recording is ready, you can upload it to SoundCloud directly from the app or post it on Facebook and other social networks.
Pros
- Shake your Android phone to remix a song
- The app lets you choose from more than 300 mix packs
- Supports multi-channel recording
- Offers advanced audio editing options
Cons
- Music Maker JAM is not primarily a voice recorder
- No support for external microphones
7. LectureNotes
Price: Free
Supported OS: Android 3.0 and up
Best for: Students
LectureNotes App in Google Play
In case you take notes often, then this app can be an excellent choice for you as it allows you to use a stylus to create notes. However, the trial version limits the number of notebooks to just two, and neither of the notebooks can have more than eight pages. Moreover, if you would like to utilize the app’s voice recording features, you must install LectureRecordings plugin on your device. To capture videos, you must first install the LectureVideos plugin. Another disappointing thing is that you won’t be able to adjust the settings for your audio recording sessions or edit the recording you create with this app.
Pros
- An efficient tool for creating hand-written notes
- The app can be used while your Android phone is offline
- Allows users to export PDF files
- Compatible with OneNote and Evernote apps
Cons
- Underwhelming voice recording options
- You must install a plugin to record audio files
8. ASR Voice Recorder
Price: Free, but contains ads
Supported OS: Android 5.0 and up
Best for: Journalists, musicians, students

ASR Voice Recorder App in Google Play
A brief look at the list of features this app offers, you will find this is a well-rounded voice recorder because it offers all the tools you are going to need to create high-quality recordings. You can choose from a variety of file formats, add notes to recordings at recording or control the playback speed of all audio files you listen to in AVR Voice Recorder. You can also skip silences, connect a headset microphone to the app via Bluetooth or arrange your voice recordings in any way you want. The app lets you upload your audio files to Dropbox, Google Drive, and other file-hosting platforms.
Pros
- Provides excellent audio recording options for free
- Allows users to save recordings in different file formats
- Equipped with an audio playback controller
- Sharing multiple files is easy
Cons
- Offers only basic audio editing tools
- No audio transcription options
9. Call Recorder
Price: Free, but contains ads
Supported OS: Android 4.0 and up
Best for: Marketing professionals
Call Recorder App in Google Play
If you would like to record all incoming and outgoing calls on your device, the Call Recorder app is one of the best options you have at your disposal. Besides recording all calls from whitelisted numbers automatically, this app also allows you to choose from a variety of different recording modes. Furthermore, Call Recorder lets you blacklist numbers from which you don’t want to receive calls and enables you to organize your recordings efficiently. All files created with this app can be sent via Skype, SMS, Dropbox and other messaging services, which makes Call Recorder app a perfect choice for marketing professionals.
Pros
- No previous experience required to start using the app
- Records an unlimited number of phone calls
- Simple audio file management
- Offers several recording modes
Cons
- No voice recording options
- Doesn’t provide audio editing tools
10. Otter Voice Meeting Notes
Price: Free, but offers in-app purchases
Supported OS: Android 5.0 and up
Best for: Large teams of professionals
Otter Voice Meeting Notes App in Google Play
Besides being a powerful voice recorder, Otter Voice Meeting Notes is a collaborative tool that enables multiple team members to highlight and edit the transcripts this app generates in real-time. In addition to recording business meetings, you can also use Otter Voice Meeting Notes to record interviews, webinars or podcasts . Starting a new recording session takes only a second since you just have to tap on the Record button to capture the voices of all speakers in the room. What’s more, the app lets you add photos or slides to transcripts while the recording session is still in progress.
Pros
- Makes collaboration on a single transcript easier
- The app’s AI identifies different speakers automatically after the initial training
- Allows users to export MP3 audio files
- Compatible with the Call Recorder app
Cons
- In-app purchases are expensive
- Audio editing tools could be better
You may also like: 10 Best Free Discord Voice Changers
Conclusion
Creating an audio note or recording an entire interview with an Android device has never been easier. Each of the voice recorder apps we featured in this article enables you to create high-quality audio files you can share via email or store on the cloud.
Which of these Android voice recorders you are going to choose depends on a broad spectrum of factors, which range from the context in which you want to make the recording toaudio editing tools you want to use to process the audio files you created.
We’ve summarized the essential information in the table below. Hope that will help you to determine. What is your favorite Android voice recorder? Leave a comment and let us know.
| Voice recorder app | Price | Supported OS | User Rating | Best for |
|---|---|---|---|---|
| Easy Voice Recorder Pro | $3.99 | Varies with the device | 4.8 | Students, musicians, and businessmen |
| Smart Recorder – High-quality voice recorder | Free, but contains ads and offers in-app purchases | Varies with the device | 4.7 | Students, musicians, and businessmen |
| RecForge II Audio Recorder | Free, but contains ads | Android 4.0 and up | 4.0 | Musicians |
| Hi-Q MP3 Voice Recorder | Free | Varies with the device | 4.5 | Students |
| Voice Recorder | Free, but contains ads | Android 4.1 and up | 4.8 | Students, musicians, and businessmen |
| Music Maker JAM | Free, but contains ads and offers in-app purchases | Varies with the device | 4.6 | Musicians |
| LectureNotes | Free | Android 3.0 and up | 4.3 | Students |
| ASR Voice Recorder | Free, but contains ads | Android 5.0 and up | 4.4 | Journalists, musicians, students |
| Call Recorder | Free, but contains ads | Android 4.0 and up | 4.3 | Marketing professionals |
| Otter Voice Meeting Notes | Free, but offers in-app purchases | Android 5.0 and up | 4.5 | Large teams of professionals |
Benjamin Arango
Benjamin Arango is a writer and a lover of all things video.
Follow @Benjamin Arango
Benjamin Arango
Mar 27, 2024• Proven solutions
Memorizing every bit of information you need to perform your daily or weekly tasks becomes increasingly difficult as your workload rises. Students, journalists, and professionals from a wide array of industries can benefit from making audio notes or even recording entire conversations with their Smartphones.
A simple Android voice recorder can make this task easy since you can just tap on the Record button and create an audio note in seconds. However, with so many voice recorder apps for Android devices out there, finding the one best suited for your needs can be more complicated than it seems. So, in this article, we are going to help you discover some best free voice recorder for an Android device you are currently using.
Want to record voiceover and audio on iPhone? Check 10 Best Voice Recorder Apps for iPhones >>
10 Best Free Voice Recording Apps for Android Devices
Recording audio is no longer a highly technical process since now you can create an audio note or record an interview with an Android phone and a voice recorder app. The question is which voice recording app should you install on your device. So, let’s take a look at some of the most potent Android voice recorders you can find at Google Play Store.
1. Easy Voice Recorder Pro
Price: $3.99
Supported OS: Varies with the device
Best for: Students, musicians, and businessmen
App in Google Play
As the app’s name suggests making recordings for a broad range of purposes is easy. All you need to do is launch the app and start a new audio recording session. Easy Voice Recorder Pro doesn’t limit the duration of your recordings, and it also allows you to compress the recorded audio . That is perfect if you need to record long lectures or conversations. Besides, you can connect an external microphone with the app in case you want to increase the quality of the sound you are recording. The app also lets you store your recordings on Dropbox or Google Drive, while it also offers the possibility to send recordings via email.
Easy Voice Recorder Pro Interface
Pros
- Allows users to manage and organize their recordings effortlessly
- Supports all standard output audio file formats
- Offers the option to record in stereo
- Recordings made with this app can be used as the ringtone
Cons
- Ads can be frustrating
- Limited basic audio editing tools
2. Smart Recorder – High-quality voice recorder
Price: Free, but contains ads and offers in-app purchases
Supported OS: Varies with the device
Best for: Students, musicians, and businessmen
App in Google Play
Capturing high-quality audio recordings effortlessly is the ultimate goal of all Android users who want to use voice recorders. As one of the best free voice recorders for Android, Smart Recorder app has a plethora of features that enable users to make high-quality audio recordings even in imperfect conditions. Options like Live Audio Spectrum Analyzer, microphone gain calibration or automatic and manual sensitivity control in Skip Silence mode are just a few reasons why this app has over 10 million installs. However, you should keep in mind that you cannot create audio files that are larger than 2 GB with this app.
Smart Recorder – High-quality voice recorder Interface
Pros
- Provides full control over the audio recording process
- Equipped with the Wave Lock feature that prevents the device from going into the sleep mode
- Features a live audio spectrum analyzer
- Preserves battery life
Cons
- No phone call recording options
- Limited file-sharing capabilities
3. RecForge II Audio Recorder
Price: Free, but contains ads
Supported OS: Android 4.0 and up
Best for: Musicians
RecForge-audio-recorder App in Google Play
If you are looking for an Android voice recorder that allows you to customize bit rates, sample rates, choose codecs or record in mono or stereo mode, then you should consider installing RecForge II Audio Recorder on your device. The app allows you to schedule recordings, connect different types of external microphones or adjust the gain manually. In addition, you can also adjust the pitch , tempo and the playback rate of all audio files you record and edit with this app. RecForge II Audio Recorder continues working even while you are using other apps, and it keeps the battery consumption at the very minimum.
Pros
- Supports nearly all common audio file formats
- Offers a versatile set of audio editing tools
- Excellent file-sharing capabilities
- Allows users to increase the audio quality by disabling Automatic Gain Control
Cons
- The maximum duration of a recording is limited for some file formats
- Can be too complicated for inexperienced users
4. Hi-Q MP3 Voice Recorder
Price: Free
Supported OS: Varies with the device
Best for: Students, general use
Hi-Q MP3 Voice Recorder App in Google Play
You don’t need any previous audio recording experience to record long lectures, interviews and all other types of voice recordings with Hi-Q MP3 Voice Recorder. The free version of the app limits the maximum duration of a recording you can make to just 10 minutes. That is why you must upgrade to the Pro version of Hi-Q MP3 Voice Recorder if you want to capture hours of material directly from your phone. The best part is that all versions of the app automatically upload recordings to Google Drive or Dropbox which frees up space on your device.
Pros
- Intuitive and modernly designed interface
- Simple audio recording session setup
- Customizable audio quality
- Excellent file management capabilities
Cons
- Recording with external microphones is not an option
- The free version of the app limits the maximum duration of recordings
5. Voice Recorder
Price: Free, but contains ads
Supported OS: Android 4.1 and up
Best for: Students, musicians, and businessmen
Voice Recorder App in Google Play
If you are looking for an app you can use to record an interview, a business meeting or a lecture, then Voice Recorder may be one of your best options. You can record audio files without any restrictions and visualize the sounds with the Audio Spectrum Analyzer. The app continues recording from the background even while the phone’s screen is off which preserves battery life and enables you to perform other tasks while the recording session is in progress. Voice Recorder offers a broad range of file-sharing capabilities so that you can easily send your audio recordings via SMS, email and the Messenger app or share them on Facebook and WhatsApp.
Pros
- Available for free to all Android users
- Stopping, pausing or resuming a recording session is easy
- Allows users to adjust the sample rate
- Offers the microphone gain calibration tool
Cons
- Audio recordings can only be saved in two different file formats
- Doesn’t provide audio editing options
6. Music Maker JAM
Price: Free, but contains ads and offers in-app purchases
Supported OS: Varies with the device
Best for: Musicians
Music Maker JAM App in Google Play
With the selection of 300 mix packs, Music Maker JAM is one of the best android apps for aspiring musicians who want to compose their music even while they are on the go. You can choose from a variety of samples, audio loops and beats to create your next song or record live performances with the app’s 8-channel mixer. Music Maker JAM also enables you to record vocals, adjust the tempo of the audio files or apply effects to all recordings you edit with this app. Once your recording is ready, you can upload it to SoundCloud directly from the app or post it on Facebook and other social networks.
Pros
- Shake your Android phone to remix a song
- The app lets you choose from more than 300 mix packs
- Supports multi-channel recording
- Offers advanced audio editing options
Cons
- Music Maker JAM is not primarily a voice recorder
- No support for external microphones
7. LectureNotes
Price: Free
Supported OS: Android 3.0 and up
Best for: Students
LectureNotes App in Google Play
In case you take notes often, then this app can be an excellent choice for you as it allows you to use a stylus to create notes. However, the trial version limits the number of notebooks to just two, and neither of the notebooks can have more than eight pages. Moreover, if you would like to utilize the app’s voice recording features, you must install LectureRecordings plugin on your device. To capture videos, you must first install the LectureVideos plugin. Another disappointing thing is that you won’t be able to adjust the settings for your audio recording sessions or edit the recording you create with this app.
Pros
- An efficient tool for creating hand-written notes
- The app can be used while your Android phone is offline
- Allows users to export PDF files
- Compatible with OneNote and Evernote apps
Cons
- Underwhelming voice recording options
- You must install a plugin to record audio files
8. ASR Voice Recorder
Price: Free, but contains ads
Supported OS: Android 5.0 and up
Best for: Journalists, musicians, students
ASR Voice Recorder App in Google Play
A brief look at the list of features this app offers, you will find this is a well-rounded voice recorder because it offers all the tools you are going to need to create high-quality recordings. You can choose from a variety of file formats, add notes to recordings at recording or control the playback speed of all audio files you listen to in AVR Voice Recorder. You can also skip silences, connect a headset microphone to the app via Bluetooth or arrange your voice recordings in any way you want. The app lets you upload your audio files to Dropbox, Google Drive, and other file-hosting platforms.
Pros
- Provides excellent audio recording options for free
- Allows users to save recordings in different file formats
- Equipped with an audio playback controller
- Sharing multiple files is easy
Cons
- Offers only basic audio editing tools
- No audio transcription options
9. Call Recorder
Price: Free, but contains ads
Supported OS: Android 4.0 and up
Best for: Marketing professionals
Call Recorder App in Google Play
If you would like to record all incoming and outgoing calls on your device, the Call Recorder app is one of the best options you have at your disposal. Besides recording all calls from whitelisted numbers automatically, this app also allows you to choose from a variety of different recording modes. Furthermore, Call Recorder lets you blacklist numbers from which you don’t want to receive calls and enables you to organize your recordings efficiently. All files created with this app can be sent via Skype, SMS, Dropbox and other messaging services, which makes Call Recorder app a perfect choice for marketing professionals.
Pros
- No previous experience required to start using the app
- Records an unlimited number of phone calls
- Simple audio file management
- Offers several recording modes
Cons
- No voice recording options
- Doesn’t provide audio editing tools
10. Otter Voice Meeting Notes
Price: Free, but offers in-app purchases
Supported OS: Android 5.0 and up
Best for: Large teams of professionals
Otter Voice Meeting Notes App in Google Play
Besides being a powerful voice recorder, Otter Voice Meeting Notes is a collaborative tool that enables multiple team members to highlight and edit the transcripts this app generates in real-time. In addition to recording business meetings, you can also use Otter Voice Meeting Notes to record interviews, webinars or podcasts . Starting a new recording session takes only a second since you just have to tap on the Record button to capture the voices of all speakers in the room. What’s more, the app lets you add photos or slides to transcripts while the recording session is still in progress.
Pros
- Makes collaboration on a single transcript easier
- The app’s AI identifies different speakers automatically after the initial training
- Allows users to export MP3 audio files
- Compatible with the Call Recorder app
Cons
- In-app purchases are expensive
- Audio editing tools could be better
You may also like: 10 Best Free Discord Voice Changers
Conclusion
Creating an audio note or recording an entire interview with an Android device has never been easier. Each of the voice recorder apps we featured in this article enables you to create high-quality audio files you can share via email or store on the cloud.
Which of these Android voice recorders you are going to choose depends on a broad spectrum of factors, which range from the context in which you want to make the recording toaudio editing tools you want to use to process the audio files you created.
We’ve summarized the essential information in the table below. Hope that will help you to determine. What is your favorite Android voice recorder? Leave a comment and let us know.
| Voice recorder app | Price | Supported OS | User Rating | Best for |
|---|---|---|---|---|
| Easy Voice Recorder Pro | $3.99 | Varies with the device | 4.8 | Students, musicians, and businessmen |
| Smart Recorder – High-quality voice recorder | Free, but contains ads and offers in-app purchases | Varies with the device | 4.7 | Students, musicians, and businessmen |
| RecForge II Audio Recorder | Free, but contains ads | Android 4.0 and up | 4.0 | Musicians |
| Hi-Q MP3 Voice Recorder | Free | Varies with the device | 4.5 | Students |
| Voice Recorder | Free, but contains ads | Android 4.1 and up | 4.8 | Students, musicians, and businessmen |
| Music Maker JAM | Free, but contains ads and offers in-app purchases | Varies with the device | 4.6 | Musicians |
| LectureNotes | Free | Android 3.0 and up | 4.3 | Students |
| ASR Voice Recorder | Free, but contains ads | Android 5.0 and up | 4.4 | Journalists, musicians, students |
| Call Recorder | Free, but contains ads | Android 4.0 and up | 4.3 | Marketing professionals |
| Otter Voice Meeting Notes | Free, but offers in-app purchases | Android 5.0 and up | 4.5 | Large teams of professionals |
Benjamin Arango
Benjamin Arango is a writer and a lover of all things video.
Follow @Benjamin Arango
Sound Off with Flair: Enhancing High-Pitched Vocalization in Video Content Creation
How to Make Your Voice Higher With Filmora

Liza Brown
Mar 27, 2024• Proven solutions
A video is nothing without a clear and smooth voice. It doesn’t matter if you have a high definition video quality but your video doesn’t have a clear and loud voice, it will be a failure. If you are recording a video and you don’t have the equipment to record your voice properly, low voice can become a big problem in your recorded videos. But some steps can help you and show you the ways of how to make your voice higher. Increasing one’s voice is not an as easy task as it may seem. Just like other skills, it is also a form of skill that requires a lot of practice and experience to master. There are o many factors to consider while recording a video with a high voice or pitch. In this article, we are going to describe how to make your voice higher with two steps. In the first step, we will talk about the factors that you must consider while recording your video. And in the 2nd step, we will be discussing the way of how to make your voice higher using Filmora. Both of these steps require patience and practice.
Step 1: How to make your voice higher while recording
Step 2: How to make your voice higher with Filmora
So let’s start with the first step to making your voice higher while you are recording your video. If you can successfully make your voice higher during this process, it will not require any hard work to make it higher in the post-production process.

You might be interested in:
How to make your Voice Higher while Recording
There are so many ways and exercises that can help change the pitch of your voice and make it higher even if you don’t have high pitch voice. We are going to discuss 5 exercises that can help you achieve this task. But remember that these exercises will practice and patience in order to show the required results.
- Focus on Breathing
The higher voice you want the more air it will need. To higher your voice, you have to take deep breathes from your nose and release them while speaking. It will boost the pitch of your voice and make it higher than your usual voice. Singers use this technique while they want to hit a high pitch. It gives your body and lungs the power to generate a higher voice. Breathing plays a very vital role in making your voice higher. If you are not breathing correctly, you can’t keep the voice higher for a longer period of time. Just like all other skills, this exercise also needs a lot of practice to master. Start practicing this technique by reading a sentence, then move forward to a paragraph, and so on. Following this process will make you master the process of highering your voice using your own breaths. Then you can start using this technique in all of your videos very easily.
- Listen to Your Voice
Do you find it amusing to know that you haven’t ever heard your own voice if you haven’t listened to your own recorded audio or video? You will find your voice very different on the recording than in reality. Because in reality, it is difficult to focus on listening to your own voice while you speak. You will probably hate your own voice the first time you listen to it as a recording. To make your voice higher, it is important to listen and observe your voice very carefully and analyze where it goes down and where it goes up. It will help you improve your voice after every try. This practice will help you master the process of highering your voice using your own analyzes.
- Remove the Obstacles
Since now we know that the main way to make your voice higher is to provide your lungs power with the help of your own breathes. But what makes it decrease its intensity is the obstacles that come in the way of your voice. The first and main obstacle that your voice faces is your tongue. Everyone knows the importance of tongue in helping you speak and generate words. But it sometimes works as a hindrance to block the sounds our lungs make. Therefore, it is very important to keep your tongue in the right position while generating high pitched voice. Try to keep your tongue as low as possible and don’t let it touch the upper part of your mouth to avoid creating a blockage for your voice. In the beginning, it will feel like an impossible task, but as you move forward and practice it more often, you will notice the difference. This will enhance your voice a lot and take it to a level, where you had never imagined it would reach. If you are failing again and again, then don’t worry. This is not an easy task to accomplish, it requires patience and consistency to master.
- Use Nasal Voice
There are multiple ways of generating voice in a human body. Just like the mouth, sometimes the nose is also used to release voices. Those who use Nasal voices while they speak have a higher voice than those who don’t. The gateway used by the nose to release voice is very narrow, producing a thinner voice resulting in high pitched sound. It is also not a good practice to use this technique very often. Because it can make you irritated and annoying. Try to mix the nasal voice only 50% to the voice of your mouth to keep it safe, and sound normal.
- Focus on your Posture
If you know anything about signing or you know any singer, you will come to know that your posture plays a very vital role in generating the sound of your choice. The ideal posture for a higher voice and proper tone is to sit with your back straight, keep your tongue as low as possible, rest your mouth and look slightly upward to make your neck relax a bit. This can completely transform your voice and make it sound like a professional.
How to make your Voice Higher with Filmora
If you have already recorded a video and that video has a very pathetic voice quality, then there is also a hope to make your voice higher by using Filmora. The previous step will help you improve your voice quality to a great extent, but if you don’t want to re-record the video and improve the existing video, you can follow these steps to make sound better.
Method 1: Low Bass
Step 1: Open Filmora, and export the video to a higher voice.

Step 2: Drag and drop the video into the timeline to enable its editing options.

Step 3: Right Click on the video, and select Adjust Audio from the list to open the option.

Step 4: It will open the settings related to the sound of your video, you make any required changes from here, in order to higher its voice.

Step 5: From the equalizer drop-down menu, select the low base option. It will make your voice heavy and will make it more audible than its original voice.

Method 2: High-Pitched Voice
Step 1: Open Filmora and export the video to a higher voice.

Step 2: Drag and drop the video into the timeline to enable its editing options.

Step 3: Right Click on the video, and select Adjust Audio from the list to open the option.

Step 4: It will open the settings related to the sound of your video, you make any required changes from here, in order to higher its voice.

Step 5: From these options, go to the pitch, and increase by two to three points. Now play your video and check the results. It will make the voice of your video higher with a high pitch.

Method 3: Low-Pitched Voice
Step 1: Open Filmora, and export the video to a higher voice.

Step 2: Drag and drop the video into the timeline to enable its editing options.

Step 3: Right Click on the video, and select Adjust Audio from the list to open the option.

Step 4: It will open the settings related to the sound of your video, you make any required changes from here, in order to higher its voice.

Step 5: From settings, go to the pitch settings, and decrease it by two to three points. It will make your voice sound intense and make it a bit higher than its original voice. Play the video and notice the changes. You can change the pitch settings accordingly after checking its results and choose a setting that best suits your video.

Both of these steps can help you enhance the quality of your voice to a great extent. For better results, follow both steps, higher your voice while recording and higher your voice with Filmora. The first step will let you make your voice higher using your own mouth and lungs. The second step will help you improve it more and you can choose any one method from the three available methods that best suits your video and voice of the video and make your videos more engaging and interesting video. So, let’s transform your videos to make them more engaging and appealing to the viewers.


Liza Brown
Liza Brown is a writer and a lover of all things video.
Follow @Liza Brown
Liza Brown
Mar 27, 2024• Proven solutions
A video is nothing without a clear and smooth voice. It doesn’t matter if you have a high definition video quality but your video doesn’t have a clear and loud voice, it will be a failure. If you are recording a video and you don’t have the equipment to record your voice properly, low voice can become a big problem in your recorded videos. But some steps can help you and show you the ways of how to make your voice higher. Increasing one’s voice is not an as easy task as it may seem. Just like other skills, it is also a form of skill that requires a lot of practice and experience to master. There are o many factors to consider while recording a video with a high voice or pitch. In this article, we are going to describe how to make your voice higher with two steps. In the first step, we will talk about the factors that you must consider while recording your video. And in the 2nd step, we will be discussing the way of how to make your voice higher using Filmora. Both of these steps require patience and practice.
Step 1: How to make your voice higher while recording
Step 2: How to make your voice higher with Filmora
So let’s start with the first step to making your voice higher while you are recording your video. If you can successfully make your voice higher during this process, it will not require any hard work to make it higher in the post-production process.
You might be interested in:
How to make your Voice Higher while Recording
There are so many ways and exercises that can help change the pitch of your voice and make it higher even if you don’t have high pitch voice. We are going to discuss 5 exercises that can help you achieve this task. But remember that these exercises will practice and patience in order to show the required results.
- Focus on Breathing
The higher voice you want the more air it will need. To higher your voice, you have to take deep breathes from your nose and release them while speaking. It will boost the pitch of your voice and make it higher than your usual voice. Singers use this technique while they want to hit a high pitch. It gives your body and lungs the power to generate a higher voice. Breathing plays a very vital role in making your voice higher. If you are not breathing correctly, you can’t keep the voice higher for a longer period of time. Just like all other skills, this exercise also needs a lot of practice to master. Start practicing this technique by reading a sentence, then move forward to a paragraph, and so on. Following this process will make you master the process of highering your voice using your own breaths. Then you can start using this technique in all of your videos very easily.
- Listen to Your Voice
Do you find it amusing to know that you haven’t ever heard your own voice if you haven’t listened to your own recorded audio or video? You will find your voice very different on the recording than in reality. Because in reality, it is difficult to focus on listening to your own voice while you speak. You will probably hate your own voice the first time you listen to it as a recording. To make your voice higher, it is important to listen and observe your voice very carefully and analyze where it goes down and where it goes up. It will help you improve your voice after every try. This practice will help you master the process of highering your voice using your own analyzes.
- Remove the Obstacles
Since now we know that the main way to make your voice higher is to provide your lungs power with the help of your own breathes. But what makes it decrease its intensity is the obstacles that come in the way of your voice. The first and main obstacle that your voice faces is your tongue. Everyone knows the importance of tongue in helping you speak and generate words. But it sometimes works as a hindrance to block the sounds our lungs make. Therefore, it is very important to keep your tongue in the right position while generating high pitched voice. Try to keep your tongue as low as possible and don’t let it touch the upper part of your mouth to avoid creating a blockage for your voice. In the beginning, it will feel like an impossible task, but as you move forward and practice it more often, you will notice the difference. This will enhance your voice a lot and take it to a level, where you had never imagined it would reach. If you are failing again and again, then don’t worry. This is not an easy task to accomplish, it requires patience and consistency to master.
- Use Nasal Voice
There are multiple ways of generating voice in a human body. Just like the mouth, sometimes the nose is also used to release voices. Those who use Nasal voices while they speak have a higher voice than those who don’t. The gateway used by the nose to release voice is very narrow, producing a thinner voice resulting in high pitched sound. It is also not a good practice to use this technique very often. Because it can make you irritated and annoying. Try to mix the nasal voice only 50% to the voice of your mouth to keep it safe, and sound normal.
- Focus on your Posture
If you know anything about signing or you know any singer, you will come to know that your posture plays a very vital role in generating the sound of your choice. The ideal posture for a higher voice and proper tone is to sit with your back straight, keep your tongue as low as possible, rest your mouth and look slightly upward to make your neck relax a bit. This can completely transform your voice and make it sound like a professional.
How to make your Voice Higher with Filmora
If you have already recorded a video and that video has a very pathetic voice quality, then there is also a hope to make your voice higher by using Filmora. The previous step will help you improve your voice quality to a great extent, but if you don’t want to re-record the video and improve the existing video, you can follow these steps to make sound better.
Method 1: Low Bass
Step 1: Open Filmora, and export the video to a higher voice.
Step 2: Drag and drop the video into the timeline to enable its editing options.
Step 3: Right Click on the video, and select Adjust Audio from the list to open the option.
Step 4: It will open the settings related to the sound of your video, you make any required changes from here, in order to higher its voice.
Step 5: From the equalizer drop-down menu, select the low base option. It will make your voice heavy and will make it more audible than its original voice.
Method 2: High-Pitched Voice
Step 1: Open Filmora and export the video to a higher voice.
Step 2: Drag and drop the video into the timeline to enable its editing options.
Step 3: Right Click on the video, and select Adjust Audio from the list to open the option.
Step 4: It will open the settings related to the sound of your video, you make any required changes from here, in order to higher its voice.
Step 5: From these options, go to the pitch, and increase by two to three points. Now play your video and check the results. It will make the voice of your video higher with a high pitch.
Method 3: Low-Pitched Voice
Step 1: Open Filmora, and export the video to a higher voice.
Step 2: Drag and drop the video into the timeline to enable its editing options.
Step 3: Right Click on the video, and select Adjust Audio from the list to open the option.
Step 4: It will open the settings related to the sound of your video, you make any required changes from here, in order to higher its voice.
Step 5: From settings, go to the pitch settings, and decrease it by two to three points. It will make your voice sound intense and make it a bit higher than its original voice. Play the video and notice the changes. You can change the pitch settings accordingly after checking its results and choose a setting that best suits your video.
Both of these steps can help you enhance the quality of your voice to a great extent. For better results, follow both steps, higher your voice while recording and higher your voice with Filmora. The first step will let you make your voice higher using your own mouth and lungs. The second step will help you improve it more and you can choose any one method from the three available methods that best suits your video and voice of the video and make your videos more engaging and interesting video. So, let’s transform your videos to make them more engaging and appealing to the viewers.
Liza Brown
Liza Brown is a writer and a lover of all things video.
Follow @Liza Brown
Enhance Your Recordings: Removing Reverb From Audio In Easy Steps
Audio content can sometimes sound reverberant and echo-y until you finish recording it. Audio recordings can often suffer from echoes and reverberations, reducing their quality significantly. The content will lose clarity and professionalism as a result. Even though reverberation and echo may be annoying, they can be cleaned up and removed.
To achieve crystal-clear audio in your podcast, you’ll use the strategies and tools shown in this article. Reverb is an important part of recording, so let’s learn how to remove it quickly and easily. Keeping reading will help you ensure your recordings sound excellent!
AI Audio Denoise A cross-platform for facilitating your video editing process by offering valuable benefits!
Free Download Free Download Learn More

Part 1. Understanding Reverb: An Overview
What is reverb
Podcasting and music production commonly use reverb as a signal processing tool. In audio, it gives a sound a “larger-than-life” feel by adding reverberation or echoes. Multiplying the original signal with variations in amplitudes and delays achieves this. In addition to bringing life to a track, this creates a unique effect. “Echo” is also a term used in colloquial language.
Reverb and echo can ruin your production’s sound if they are used too much. Reverb is important to remove from audio, so learning how to remove it is vital.

How does reverb happen, and why can it be a bit of a problem?
Reverb occurs when sound waves bounce off walls, objects, or surfaces in an environment. Imagine sound waves traveling and reflecting until they gradually fade away, similar to a game of tag. Audio production can benefit and suffer from this natural phenomenon.
Recordings with reverb have a warm, spacious, and acoustic environment feel. Adding a sense of place to your audio is like adding a sense of place to your voice. A sonic mess can be created by too much reverb at the wrong places. You may have difficulty hearing the essential elements of your audio.
Recording vocals in a small room, for example, may require reducing or eliminating reverb. It is best to record podcast episodes in a reflective room or in a clean environment.
Part 2. Remove Reverb From Audio Online With Media.io: Step-By-Step
Introducing Media.io for reverb removal online
If you want to make audio content, Media.io is a great tool to use. Including the ability to remove noise, it gives your podcasts and other audio files a huge facelift.
Using this tool is easy because it has straightforward steps. Navigating the interface is easy, and it has a simple interface.
With Media.io, every unwanted noise is auto-detected by AI. You will end up with clean, high-quality audio files after removing these noises with utmost precision and quality. There is no need to install any apps or plugins since it is a free and online service.
A step-by-step guide to removing reverb in audio
1. Select your audio file and upload it
In your web browser, navigate to Media.io to begin your reverb removal journey. Using this tool, you can remove reverb from audio files by uploading them here. Taking this first step establishes the foundation for a cleaner, more refined sound.

2. Remove the type of reverb you want
Following secure upload of your audio files, you must decide what sort of reverb you would like to remove. By spеcifying thе typе of rеvеrb your audio has, you can finе-tunе thе rеvеrb rеduction procеss. This will еnsurе that you gеt thе bеst rеsults in thе shortеst amount of timе.

3. Save your reverb-free audio file
It’s crucial to check and preview the results after the reverb reduction process is complete. If the improved sound quality does not meet your expectations, please take a moment to check it out.
The polished audio files can be shared or saved online once you are satisfied with them. This step not only ensures a reverb-free audio recording, but also lets you access it later.

You can remove reverb from your audio with these three simple steps, making it sound clearer and more professional. Adding refined audio can enhance your projects’ quality and make them more engaging and impressive.
Using Media.io has a few limitations
All registered users of Media.io can remove background noise for free for an unlimited period of time. Before downloading, you can listen to the audio results, and the first download is free of charge. Media.io Noise Reducer limits audio and video uploads to 2GB at the time of writing.
Part 3. Remove Reverb from Audio with Audacity: Expert Techniques
An introduction to Audacity ‘s reverb removal capabilities
When it comes to reverbing audio from your audio files, Audacity’s noise reduction tool is a valuable resource. Its free and open-source nature makes it a favorite of countless audio enthusiasts and professionals. Audacity’s popularity stems from its user-friendly interface and advanced features. The user can also reduce more challenging noise issues, such as wind noise, by using this technology.
Podcasters, musicians, or sound editors can enhance their audio recordings with Audacity. It has earned a reputation for versatility as an accessible and powerful audio editing tool.
Audacity ‘s step-by-step guide to removing reverb
Step 1. Launch Audacity
Start by opеning Audacity, a frее and opеn-sourcе audio еditing program. Install it on your computеr if you havеn’t alrеady. Procееd to thе nеxt stеp aftеr launching thе program.

Step 2. Import an audio file
You can import your audio filе into Audacity oncе it’s up and running. Thеn sеlеct “Import” and “Audio” in thе top mеnu. Locate your audio file and select it. You’ll see the audio waves displayed on Audacity’s timeline.

Step 3. Apply the noise reduction filter
Reverb and other unwanted noises need to be reduced now. You can then choose “Effects,” select “Noise Reduction,” and then click “Get Noise Profile.” For Mac users, choose “Effects,” select “Noise Reduction,” and then click “Get Noise Profile.”
As a rеsult of thе filtеr’s analysis, a noisе profilе will bе crеatеd. Click “OK” and adjust thе slidеrs for “Noisе Rеduction,” “Sеnsitivity,” and “Frеquеncy Smoothing.” Makе surе thеsе sеttings arе sеt appropriatеly for your rеcording. To apply thе filtеr, click “OK” oncе you arе satisfiеd.

Step 4. Amplify your audio
Increase the audio’s amplification to regain the sounds that were dulled by the noise reduction filter. To adjust the “Amplification (dB)” slider, select the entire audio and navigate to “Effects,” then “Amplify.” The recording will sound cleaner once you click “OK.”

Step 5. Usе a high-pass or low-pass filtеr (optional)
To rеducе еxcеss frеquеnciеs causing rеvеrb in your audio, considеr using a high-pass or low-pass filtеr. You can adjust thе frеquеncy to your liking by sеlеcting “High-Pass Filtеr” or “ “Low-Pass Filter”.

Step 6. Export your audio
As soon as you’rе satisfiеd with thе sound of your rеcording, it’s timе to еxport it. In thе top mеnu, click on “Filе,” choosе “Export,” namе your filе (MP3, WAV, еtc. ), and click “Export.” Thе shortcut “Ctrl+Shift+E” is also availablе for еxporting filеs.

Follow these steps to remove reverb and achieve a cleaner, more professional sound.
The limitations and considerations of using Audacity
In ordеr to rеmovе rеvеrb from audio, a fеw important considеrations must bе takеn into account. Ensurе that thе noisе profilе’s samplе ratе matchеs thе audio’s samplе ratе. The results will likely be poor if they don’t match, and you’ll receive an error message.
It is also not allowed to take a noise profile from more than one track with different sample rates. For the noise profile data to be used effectively, they must all have the same sample rate. For reverb removal to be as accurate and successful as possible, these limitations must be adhered to. Keeping your audio recordings in good shape.
Part 4. Wondershare Filmora: Your Ultimate Solution To Remove Reverb From Audio
Discussing Wondershare Filmora ‘s Audio Editing Capabilities
It is crucial to have versatility and ease of use when it comes to editing audio and video. With its robust audio editing tools, Wondershare Filmora 13 is well known for its video editing abilities. Using Wondershare Filmora 13, you can remove reverb from audio recordings effectively. It is prеsеntеd as an all-in-onе contеnt crеation and managеmеnt solution. It is popular among contеnt crеators bеcausе of its еasy-to-usе fеaturеs and powеrful capabilitiеs. Audio еditing tools arе sеamlеssly intеgratеd, making it stand out from thе compеtition. Crеating a onе-stop shop for audio and vidеo post-production.
Free Download For Win 7 or later(64-bit)
Free Download For macOS 10.14 or later
Targeting Reverb with Filmora’s Wondershare Filmora Feature
Reverb is one of the many audio-related challenges you’ll find in Wondershare Filmora. It is the “Audio Denoise” feature that makes these tools stand out. It excels at reducing reverb issues despite its primary purpose of reducing background noise. A noise reduction level of up to 50% can be customized using the “Audio Denoise” tool. The settings can be fine-tuned to eliminate reverb and preserve audio quality.
Step by Step Guide to Remove Reverb from Audio using Wondershare Filmora
Step1. Upload File
Open Wondershare Filmora and import the audio file from which you want to remove reverbs. Ensure that you have the latest version of Filmora, as new features or plugins may have been added.

Step2. Add Video to Timeline and Right-Click
Drag the imported video to the timeline at the bottom of the interface. Right-click on the video clip in the timeline.
Step3. Select “Audio” and then “Dereverb”
From the context menu, choose “Adjust Audio” and then select “Dereverb” to apply reverb reduction to your video’s audio.

Step4. Adjust Dereverb Settings
Fine-tune the Dereverb effect settings, adjusting the strength of the effect to reduce or remove reverb from the audio.

Step5. Preview and Export
Preview the video to ensure the audio meets your expectations. Once satisfied, click “OK” or “Apply” to confirm the changes. Finally, export your video with the adjusted audio settings.

Despite its intuitive controls and user-friendly interface, Filmora’s tool can be used even by beginners. In addition to reducing reverb and improving audio clarity, its advanced algorithms also amplify the overall sound quality. You can ensure that your videos are seamless and professional. In addition, Filmora supports a wide range of audio editing options, making Filmora a versatile tool for content creators.
Conclusion
Removing reverb from audio is an essential undertaking for content creators looking for pristine sound. Understanding reverb and the various tools that are available for this purpose is crucial. The user-friendly and AI-powered approach of Media.io makes it a great online solution. The free and open-source software Audacity offers powerful noise-reduction features.
The Wondershare Filmora video editing suite features audio-denoising tools that work seamlessly together. It is an accessible choice for both beginners and experienced editors. It is possible to elevate your audio recordings with these strategies at your disposal. Ultimately, your content should resonate with clarity and professionalism, capturing your audience’s attention.
Free Download Free Download Learn More
Part 1. Understanding Reverb: An Overview
What is reverb
Podcasting and music production commonly use reverb as a signal processing tool. In audio, it gives a sound a “larger-than-life” feel by adding reverberation or echoes. Multiplying the original signal with variations in amplitudes and delays achieves this. In addition to bringing life to a track, this creates a unique effect. “Echo” is also a term used in colloquial language.
Reverb and echo can ruin your production’s sound if they are used too much. Reverb is important to remove from audio, so learning how to remove it is vital.
How does reverb happen, and why can it be a bit of a problem?
Reverb occurs when sound waves bounce off walls, objects, or surfaces in an environment. Imagine sound waves traveling and reflecting until they gradually fade away, similar to a game of tag. Audio production can benefit and suffer from this natural phenomenon.
Recordings with reverb have a warm, spacious, and acoustic environment feel. Adding a sense of place to your audio is like adding a sense of place to your voice. A sonic mess can be created by too much reverb at the wrong places. You may have difficulty hearing the essential elements of your audio.
Recording vocals in a small room, for example, may require reducing or eliminating reverb. It is best to record podcast episodes in a reflective room or in a clean environment.
Part 2. Remove Reverb From Audio Online With Media.io: Step-By-Step
Introducing Media.io for reverb removal online
If you want to make audio content, Media.io is a great tool to use. Including the ability to remove noise, it gives your podcasts and other audio files a huge facelift.
Using this tool is easy because it has straightforward steps. Navigating the interface is easy, and it has a simple interface.
With Media.io, every unwanted noise is auto-detected by AI. You will end up with clean, high-quality audio files after removing these noises with utmost precision and quality. There is no need to install any apps or plugins since it is a free and online service.
A step-by-step guide to removing reverb in audio
1. Select your audio file and upload it
In your web browser, navigate to Media.io to begin your reverb removal journey. Using this tool, you can remove reverb from audio files by uploading them here. Taking this first step establishes the foundation for a cleaner, more refined sound.
2. Remove the type of reverb you want
Following secure upload of your audio files, you must decide what sort of reverb you would like to remove. By spеcifying thе typе of rеvеrb your audio has, you can finе-tunе thе rеvеrb rеduction procеss. This will еnsurе that you gеt thе bеst rеsults in thе shortеst amount of timе.
3. Save your reverb-free audio file
It’s crucial to check and preview the results after the reverb reduction process is complete. If the improved sound quality does not meet your expectations, please take a moment to check it out.
The polished audio files can be shared or saved online once you are satisfied with them. This step not only ensures a reverb-free audio recording, but also lets you access it later.
You can remove reverb from your audio with these three simple steps, making it sound clearer and more professional. Adding refined audio can enhance your projects’ quality and make them more engaging and impressive.
Using Media.io has a few limitations
All registered users of Media.io can remove background noise for free for an unlimited period of time. Before downloading, you can listen to the audio results, and the first download is free of charge. Media.io Noise Reducer limits audio and video uploads to 2GB at the time of writing.
Part 3. Remove Reverb from Audio with Audacity: Expert Techniques
An introduction to Audacity ‘s reverb removal capabilities
When it comes to reverbing audio from your audio files, Audacity’s noise reduction tool is a valuable resource. Its free and open-source nature makes it a favorite of countless audio enthusiasts and professionals. Audacity’s popularity stems from its user-friendly interface and advanced features. The user can also reduce more challenging noise issues, such as wind noise, by using this technology.
Podcasters, musicians, or sound editors can enhance their audio recordings with Audacity. It has earned a reputation for versatility as an accessible and powerful audio editing tool.
Audacity ‘s step-by-step guide to removing reverb
Step 1. Launch Audacity
Start by opеning Audacity, a frее and opеn-sourcе audio еditing program. Install it on your computеr if you havеn’t alrеady. Procееd to thе nеxt stеp aftеr launching thе program.
Step 2. Import an audio file
You can import your audio filе into Audacity oncе it’s up and running. Thеn sеlеct “Import” and “Audio” in thе top mеnu. Locate your audio file and select it. You’ll see the audio waves displayed on Audacity’s timeline.
Step 3. Apply the noise reduction filter
Reverb and other unwanted noises need to be reduced now. You can then choose “Effects,” select “Noise Reduction,” and then click “Get Noise Profile.” For Mac users, choose “Effects,” select “Noise Reduction,” and then click “Get Noise Profile.”
As a rеsult of thе filtеr’s analysis, a noisе profilе will bе crеatеd. Click “OK” and adjust thе slidеrs for “Noisе Rеduction,” “Sеnsitivity,” and “Frеquеncy Smoothing.” Makе surе thеsе sеttings arе sеt appropriatеly for your rеcording. To apply thе filtеr, click “OK” oncе you arе satisfiеd.
Step 4. Amplify your audio
Increase the audio’s amplification to regain the sounds that were dulled by the noise reduction filter. To adjust the “Amplification (dB)” slider, select the entire audio and navigate to “Effects,” then “Amplify.” The recording will sound cleaner once you click “OK.”
Step 5. Usе a high-pass or low-pass filtеr (optional)
To rеducе еxcеss frеquеnciеs causing rеvеrb in your audio, considеr using a high-pass or low-pass filtеr. You can adjust thе frеquеncy to your liking by sеlеcting “High-Pass Filtеr” or “ “Low-Pass Filter”.
Step 6. Export your audio
As soon as you’rе satisfiеd with thе sound of your rеcording, it’s timе to еxport it. In thе top mеnu, click on “Filе,” choosе “Export,” namе your filе (MP3, WAV, еtc. ), and click “Export.” Thе shortcut “Ctrl+Shift+E” is also availablе for еxporting filеs.
Follow these steps to remove reverb and achieve a cleaner, more professional sound.
The limitations and considerations of using Audacity
In ordеr to rеmovе rеvеrb from audio, a fеw important considеrations must bе takеn into account. Ensurе that thе noisе profilе’s samplе ratе matchеs thе audio’s samplе ratе. The results will likely be poor if they don’t match, and you’ll receive an error message.
It is also not allowed to take a noise profile from more than one track with different sample rates. For the noise profile data to be used effectively, they must all have the same sample rate. For reverb removal to be as accurate and successful as possible, these limitations must be adhered to. Keeping your audio recordings in good shape.
Part 4. Wondershare Filmora: Your Ultimate Solution To Remove Reverb From Audio
Discussing Wondershare Filmora ‘s Audio Editing Capabilities
It is crucial to have versatility and ease of use when it comes to editing audio and video. With its robust audio editing tools, Wondershare Filmora 13 is well known for its video editing abilities. Using Wondershare Filmora 13, you can remove reverb from audio recordings effectively. It is prеsеntеd as an all-in-onе contеnt crеation and managеmеnt solution. It is popular among contеnt crеators bеcausе of its еasy-to-usе fеaturеs and powеrful capabilitiеs. Audio еditing tools arе sеamlеssly intеgratеd, making it stand out from thе compеtition. Crеating a onе-stop shop for audio and vidеo post-production.
Free Download For Win 7 or later(64-bit)
Free Download For macOS 10.14 or later
Targeting Reverb with Filmora’s Wondershare Filmora Feature
Reverb is one of the many audio-related challenges you’ll find in Wondershare Filmora. It is the “Audio Denoise” feature that makes these tools stand out. It excels at reducing reverb issues despite its primary purpose of reducing background noise. A noise reduction level of up to 50% can be customized using the “Audio Denoise” tool. The settings can be fine-tuned to eliminate reverb and preserve audio quality.
Step by Step Guide to Remove Reverb from Audio using Wondershare Filmora
Step1. Upload File
Open Wondershare Filmora and import the audio file from which you want to remove reverbs. Ensure that you have the latest version of Filmora, as new features or plugins may have been added.
Step2. Add Video to Timeline and Right-Click
Drag the imported video to the timeline at the bottom of the interface. Right-click on the video clip in the timeline.
Step3. Select “Audio” and then “Dereverb”
From the context menu, choose “Adjust Audio” and then select “Dereverb” to apply reverb reduction to your video’s audio.
Step4. Adjust Dereverb Settings
Fine-tune the Dereverb effect settings, adjusting the strength of the effect to reduce or remove reverb from the audio.
Step5. Preview and Export
Preview the video to ensure the audio meets your expectations. Once satisfied, click “OK” or “Apply” to confirm the changes. Finally, export your video with the adjusted audio settings.
Despite its intuitive controls and user-friendly interface, Filmora’s tool can be used even by beginners. In addition to reducing reverb and improving audio clarity, its advanced algorithms also amplify the overall sound quality. You can ensure that your videos are seamless and professional. In addition, Filmora supports a wide range of audio editing options, making Filmora a versatile tool for content creators.
Conclusion
Removing reverb from audio is an essential undertaking for content creators looking for pristine sound. Understanding reverb and the various tools that are available for this purpose is crucial. The user-friendly and AI-powered approach of Media.io makes it a great online solution. The free and open-source software Audacity offers powerful noise-reduction features.
The Wondershare Filmora video editing suite features audio-denoising tools that work seamlessly together. It is an accessible choice for both beginners and experienced editors. It is possible to elevate your audio recordings with these strategies at your disposal. Ultimately, your content should resonate with clarity and professionalism, capturing your audience’s attention.
Also read:
- New 2024 Approved Discover the 5 Most Powerful Audio Editors on Android You Cant Afford to Ignore
- New Essential iPhone Audio Recorders Discover the Top 10 for 2024
- Updated In 2024, Leading Free Audio Volume Harmonizer Platforms
- 2024 Approved The Essential Guide to Mastering Your Auditory Projects Using TwistedWave
- Harmonious Sound Editing Guide Advantages, Disadvantages, and Substitutes for 2024
- 2024 Approved Removing Background Noise Extracting Silent Videos
- New 2024 Approved How to Use Audio Ducking in Adobe Premiere Pro on Mac
- New The Ultimate Guide to Automatic Volume Reduction Audio Ducking Tips in Adobe Premiere Pro on macOS
- New Seamlessly Mixing Soundtracks and Sounds in Final Cut Pro Editing Suite for 2024
- Decoding the Powerhouse Tools in TwistedWave Audio Suite
- New How To Remove Vocals From Video Quick And Easy Sound Improvement for 2024
- In 2024, The Premier List of PC Audio Capture Tools Uncovering Top Performers
- 2024 Approved Revolutionizing Sound A List of the 11 Most Advanced Voice Changers
- Updated 2024 Approved The Ultimate Compilation of Advanced MP3 Reduction Software
- Mastering Vocal Modification in Audacity A Step-by-Step Guide for 2024
- New How to Record A Call with Google Voice on Phone & Desktop
- Updated Mastering TikTok Sound Control Simple Methods for Quieting Videos for 2024
- Updated Behind the Scenes Exploring Modern Technologies That Auto-Synchronize Audio to Video for 2024
- Updated Exploring Audio Enhancements Utilizing Free Plugins for Audacitys AutoTune Effect for 2024
- New Augment VFX Compositions with Ambient Sounds in After Effects for 2024
- In 2024, Streamlining Sound Quality The Best Three Approaches for Podcast to MP3 Transition
- Updated Subtle Soundscape Selection for Video Creators for 2024
- Updated 6 Top Voice Changer for Zoom to Make Your Voice Special and Funny
- New Navigating Virtual Connections Safety Essentials for Online Meetups for 2024
- 2024 Approved Mastering Silence Disabling Sound in Videos
- Updated Steps for Creating MP3 From Audacity Recordings for 2024
- New How Can You Use Suspense Music to Master Film Score for 2024
- Updated The Symphony of Visualization Presenting Audible Patterns with Waveforms & Enlivening Them Through Animation Using Blackmagic Design Fusion Studio for 2024
- Updated In 2024, Top Auditory Supplements for Tranquil Soundscapes
- Updated Unveiling the Best 5 Audio Mixers Engineered for Mac Enthusiasts
- New 2024 Approved Essential Mobile Sound Editors A Guide to the Top 7 on Android
- Your Comprehensive Guide to Top BGM Download Sites
- New In 2024, Dynamic Sound Mixing Implementing Audio Ducking Techniques to Subtly Reduce Background Tracks
- Updated Ensuring Uniformity in Volume Levels Using DaVinci Resolves Tools
- New The Complete Guide to Cost-Free Sound Capture Using Audacitys Tools for 2024
- New In 2024, The Animators Toolkit A Detailed List of the Best Cartoon Sounds Available Online
- 2024 Approved How to Remove Audio From MKV
- ChorusChanger Prime The Ultimate Toolkit for Voice Modification & Harmony Control for 2024
- Updated Seamlessly Mixing Soundtracks and Sounds in Final Cut Pro Editing Suite
- Updated Harmonizing Hues and Beats Incorporating Music Into Video Clips with Premiere Pro
- Updated 2024 Approved Perfecting Your Audio Recordings on Samsungs Latest Smartphones (S10/S9)
- Updated Frequency Finder The Leading Linux Audio Software Options, Free or Full-Price,
- Updated 2024 Approved Pinpointing Fragility Breakage Acoustics
- Updated Analyzing the Expression of Dog Anger Through Auditory Cues for 2024
- New 2024 Approved Navigating the Transformation of AIFF to MP3 Audio Streams
- How to Reset Google Pixel 8 Pro Without the Home Button | Dr.fone
- Updated Effective 10 Ways to Convert YouTube to MOV at Ease PC & Online
- Forgotten The Voicemail Password Of Realme C51? Try These Fixes
- In 2024, 3GP Video Editor Learn to Cut and Split Files
- In 2024, Ways to trade pokemon go from far away On Oppo Reno 8T? | Dr.fone
- 2024 Approved Free Online Video Editing Software The Top 10 Contenders
- Fix Unfortunately Settings Has Stopped on Realme 10T 5G Quickly | Dr.fone
- How to Change/Fake Your Asus ROG Phone 8 Location on Viber | Dr.fone
- Updated 2024 Approved The Top 10 Video Editors for Adding Background Music
- New 2024 Approved Transform Your Videos A Step-by-Step Guide to Cartoon Conversion
- In 2024, How to Transfer Contacts from Meizu 21 Pro To Phone | Dr.fone
- Updated In 2024, What to Look for in a YouTube MP3 Converter A Comprehensive Guide
- How to Remove and Reset Face ID on iPhone 13 Pro | Dr.fone
- ZTE Axon 40 Lite Bootloop Problem, How to Fix it Without Data Loss | Dr.fone
- 5 Easy Ways to Copy Contacts from Vivo Y36i to iPhone 14 and 15 | Dr.fone
- Updated 2024 Approved Green Screen YouTube Videos
- New Best Vegas Pro Replacements for Mac Users Free and Premium Options for 2024
- In 2024, Unlocking the Power of Smart Lock A Beginners Guide for Nokia C22 Users
- 6 Solutions to Fix Error 505 in Google Play Store on Xiaomi Redmi K70E | Dr.fone
- Title: 2024 Approved Premier Voice Capture Apps on Android The Best
- Author: David
- Created at : 2024-05-20 05:45:52
- Updated at : 2024-05-21 05:45:52
- Link: https://sound-tweaking.techidaily.com/2024-approved-premier-voice-capture-apps-on-android-the-best/
- License: This work is licensed under CC BY-NC-SA 4.0.
