
:max_bytes(150000):strip_icc():format(webp)/man-measuring-tv-size-102761115-getty-5bf8513246e0fb008321de5f.jpg)
2024 Approved In-Depth Analysis of the Nero WaveShaper Toolkit
In-Depth Analysis of the Nero WaveShaper Toolkit
There are a lot of audio editors that you can use. The levels of expertise required for using different editing software are different; where, expertise level changes with experience and time. There are a lot of powerful audio editors, but they are difficult to use. With being difficult to use, they are not free and require the user to purchase them.
Have you ever used a simple yet powerful audio editor? Let us introduce you to Nero WaveEditor. It is the most useful free software that you might find. Start reading ahead for more useful information!
In this article
01 Introduction about Nero WaveEditor
02 Key Features of Nero WaveEditor
03 Pros and Cons of Nero WaveEditor
04 How to Use Nero WaveEditor?
05 Alternatives for Nero WaveEditor
Part 1. Introduction about Nero WaveEditor
Nero WaveEditor is a simple and powerful editor that anyone can use. It can edit pre-recorded audios along with recording new audios. Nero WaveEditor is capable of editing all major audio editing formats. You can use it to apply filters and optimize sounds. It can also apply effects and save the file. The on-set saving option makes it non-destructive and can be edited freely without making detrimental changes.

Nero WaveEditor is available for use in multiple languages, including German, Dutch, and French. It has a file size of 170MB. You get multiple audio editing options that provide full user control of the audio that is being edited.
Part 2. Key Features of Nero WaveEditor
For quick and easy editing and recording of audio files, Nero WaveEditor is a great option. This editor has simple yet very effective tools for manipulating audio files. It is free to use and works perfectly with different audio file formats. Some other key features of Nero WaveEditor are discussed below:
· View Options
No other audio editor offers this many view options as you get from Nero WaveEditor. From the top toolbar, you have to access the ‘View’ tab, where you will find different options. For instance, you’ll have access to the Wave display, Spectrogram display, and also Wavelet display.
· Tools
Do you have any idea about the different tools Nero WaveEditor offers? This editor has some very powerful editing tools, like Stereo Processor, Noise Gate, Equalizer, Pitch Tuning, and so much more. Access the ‘Tools’ tab to use these tools.
· Editing Options
Nero WaveEditor not only offers advanced editing tools but also provides some general editing options. For instance, you can Cut, Delete, Crop, Copy, etc. Options like Convert Sample Format, Reverse, and Insert Track Split are also offered.
· Enhancement Features
Is editing enough to enhance your audio? Try Enhancement features from Nero WaveEditor to completely transform your audio file. You get options like Noise Analysis, Noise Reduction, etc.
Part 3. Pros and Cons of Nero WaveEditor
Nero WaveEditor has some impressive features that instantly attract users. This editor is great for quick audio editing. To learn more about it, read the following section as we are about to share the benefits and drawbacks of Nero WaveEditor.
Benefits
- No matter where you belong, Nero WaveEditoris still usable as it supports different languages like Danish, Greek, Czech, Spanish, Russian, and others.
- A great thing about this wave editor is its support for plugins. For example, Nero supports VST and DirectX.
- Nero WaveEditor is not just an audio editor; it’s also an audio recorder. You can either import media files from your device or else record them on the spot.
- What else is great about Nero WaveEditor? This editor provides non-destructive editing. Nero offers full Preview and Undo features.
Drawbacks
- The main drawback of Nero WaveEditoris its interface. The offered interface is very outdated. The design and UI are not updated according to the latest Windows version.
Part 4. How to Use Nero WaveEditor?
Have you ever used Nero WaveEditor before? Or heard about it? If none is your case, this section will provide great help to you. We are about to share Nero WaveEditor’s step-by-step guideline with you for better working and understanding. Let’s begin!
Step 1: After installing the editor, launch it. Head to the ‘File’ tab and select the ‘Open’ option to import audio files from your respective device. Or else, you can also select the option to ‘Record’ from the toolbar.

Step 2: Start editing by firstly moving to the ‘Edit’ tab. There, you will find different editing options like; Cut, Crop, Copy, Delete, Reverse, and others.

Step 3: In case you are interested in using the Fade In and Fade Out features, head to the ‘Volume’ section. Not just this, you also get other options, for instance, Normalize, Volume change, and Mute.

Step 4: Who doesn’t add effects while editing? Try the amazing effects offered by Nero WaveEditor from the ‘Effects’ tab. You can select from the provided options like Distortion, Loudness, Reverb, Delay, and others.

Step 5: For enhancing your audio file, head to the ‘Enhancements’ section to use the offered options. For example, get your hands-on features like Noise Reduction, Noise Analysis, etc.

Step 6: Once everything is done, save the edited audio file to your device. For this, move to the ‘File’ tab and select the ‘Save As’ an option to save the file in your desired file format.

Part 5. Alternatives for Nero WaveEditor
People might not be able to use Nero WaveEditor as beginners. You can use other software to learn audio editing. We are suggesting two alternative editors to Nero WaveEditor so that you can use the following discussed alternatively for editing purposes.
Wave Editor
Wave Editor is a fast and easy-to-use editing software that is a great alternative for Nero WaveEditor download. This editor is powerful and best for those who are trying to learn audio editing. Wave Editor allows a maximum file size of 2GB. It has a simple user interface that boosts your speed and accuracy while using the editor.
What is its compatibility? Wave Editor is compatible with Windows. Moreover, it allows the user to use multiple audio formats, including MP3, WAV, and WMA, along with many more. Wave Editor can do basic editing along with amplifying audios to their maximum limit.

Audacity
Audacity is recording software along with audio editing software. It can do basic editing like cut, copy, paste, and delete, along with merging different audios. What else is great about Audacity? You can use the editor entirely through the keyboard with a large number of shortcuts. Audacity is widely used as exchange software against Nero WaveEditor.
Audacity supports plug-ins; you can either modify plug-ins or even write your own plug-ins. Audacity is free and open-source software with easy editing and multi-track audio editing. What about its compatibility? Audacity is compatible with Windows, Mac, and also Linux.

Final Thoughts
Nero WaveEditor is a free editor and very easy to use. For speedy editing, this is an ideal tool. This article talked about its features, advantages and we also shared a step-by-step guideline for your help. Moving on, are you interested in learning about another audio editor? We are talking about Wondershare Filmora Audio Editor , a platform with endless options.
This editing software is easily downloaded, and you don’t need any technical skills to use it. Its simple yet intuitive interface provides various tabs like Effects, Elements, etc. You can get different sound effects from Filmora. Furthermore, some of its advanced audio editing tools are Audio Equalizer, Audio Ducking, Add Voiceovers, Detach Audio from Video, and so many other options.
Wondershare Filmora
Get started easily with Filmora’s powerful performance, intuitive interface, and countless effects!
Try It Free Try It Free Try It Free Learn More >

02 Key Features of Nero WaveEditor
03 Pros and Cons of Nero WaveEditor
04 How to Use Nero WaveEditor?
05 Alternatives for Nero WaveEditor
Part 1. Introduction about Nero WaveEditor
Nero WaveEditor is a simple and powerful editor that anyone can use. It can edit pre-recorded audios along with recording new audios. Nero WaveEditor is capable of editing all major audio editing formats. You can use it to apply filters and optimize sounds. It can also apply effects and save the file. The on-set saving option makes it non-destructive and can be edited freely without making detrimental changes.
Nero WaveEditor is available for use in multiple languages, including German, Dutch, and French. It has a file size of 170MB. You get multiple audio editing options that provide full user control of the audio that is being edited.
Part 2. Key Features of Nero WaveEditor
For quick and easy editing and recording of audio files, Nero WaveEditor is a great option. This editor has simple yet very effective tools for manipulating audio files. It is free to use and works perfectly with different audio file formats. Some other key features of Nero WaveEditor are discussed below:
· View Options
No other audio editor offers this many view options as you get from Nero WaveEditor. From the top toolbar, you have to access the ‘View’ tab, where you will find different options. For instance, you’ll have access to the Wave display, Spectrogram display, and also Wavelet display.
· Tools
Do you have any idea about the different tools Nero WaveEditor offers? This editor has some very powerful editing tools, like Stereo Processor, Noise Gate, Equalizer, Pitch Tuning, and so much more. Access the ‘Tools’ tab to use these tools.
· Editing Options
Nero WaveEditor not only offers advanced editing tools but also provides some general editing options. For instance, you can Cut, Delete, Crop, Copy, etc. Options like Convert Sample Format, Reverse, and Insert Track Split are also offered.
· Enhancement Features
Is editing enough to enhance your audio? Try Enhancement features from Nero WaveEditor to completely transform your audio file. You get options like Noise Analysis, Noise Reduction, etc.
Part 3. Pros and Cons of Nero WaveEditor
Nero WaveEditor has some impressive features that instantly attract users. This editor is great for quick audio editing. To learn more about it, read the following section as we are about to share the benefits and drawbacks of Nero WaveEditor.
Benefits
- No matter where you belong, Nero WaveEditoris still usable as it supports different languages like Danish, Greek, Czech, Spanish, Russian, and others.
- A great thing about this wave editor is its support for plugins. For example, Nero supports VST and DirectX.
- Nero WaveEditor is not just an audio editor; it’s also an audio recorder. You can either import media files from your device or else record them on the spot.
- What else is great about Nero WaveEditor? This editor provides non-destructive editing. Nero offers full Preview and Undo features.
Drawbacks
- The main drawback of Nero WaveEditoris its interface. The offered interface is very outdated. The design and UI are not updated according to the latest Windows version.
Part 4. How to Use Nero WaveEditor?
Have you ever used Nero WaveEditor before? Or heard about it? If none is your case, this section will provide great help to you. We are about to share Nero WaveEditor’s step-by-step guideline with you for better working and understanding. Let’s begin!
Step 1: After installing the editor, launch it. Head to the ‘File’ tab and select the ‘Open’ option to import audio files from your respective device. Or else, you can also select the option to ‘Record’ from the toolbar.
Step 2: Start editing by firstly moving to the ‘Edit’ tab. There, you will find different editing options like; Cut, Crop, Copy, Delete, Reverse, and others.
Step 3: In case you are interested in using the Fade In and Fade Out features, head to the ‘Volume’ section. Not just this, you also get other options, for instance, Normalize, Volume change, and Mute.
Step 4: Who doesn’t add effects while editing? Try the amazing effects offered by Nero WaveEditor from the ‘Effects’ tab. You can select from the provided options like Distortion, Loudness, Reverb, Delay, and others.
Step 5: For enhancing your audio file, head to the ‘Enhancements’ section to use the offered options. For example, get your hands-on features like Noise Reduction, Noise Analysis, etc.
Step 6: Once everything is done, save the edited audio file to your device. For this, move to the ‘File’ tab and select the ‘Save As’ an option to save the file in your desired file format.
Part 5. Alternatives for Nero WaveEditor
People might not be able to use Nero WaveEditor as beginners. You can use other software to learn audio editing. We are suggesting two alternative editors to Nero WaveEditor so that you can use the following discussed alternatively for editing purposes.
Wave Editor
Wave Editor is a fast and easy-to-use editing software that is a great alternative for Nero WaveEditor download. This editor is powerful and best for those who are trying to learn audio editing. Wave Editor allows a maximum file size of 2GB. It has a simple user interface that boosts your speed and accuracy while using the editor.
What is its compatibility? Wave Editor is compatible with Windows. Moreover, it allows the user to use multiple audio formats, including MP3, WAV, and WMA, along with many more. Wave Editor can do basic editing along with amplifying audios to their maximum limit.
Audacity
Audacity is recording software along with audio editing software. It can do basic editing like cut, copy, paste, and delete, along with merging different audios. What else is great about Audacity? You can use the editor entirely through the keyboard with a large number of shortcuts. Audacity is widely used as exchange software against Nero WaveEditor.
Audacity supports plug-ins; you can either modify plug-ins or even write your own plug-ins. Audacity is free and open-source software with easy editing and multi-track audio editing. What about its compatibility? Audacity is compatible with Windows, Mac, and also Linux.
Final Thoughts
Nero WaveEditor is a free editor and very easy to use. For speedy editing, this is an ideal tool. This article talked about its features, advantages and we also shared a step-by-step guideline for your help. Moving on, are you interested in learning about another audio editor? We are talking about Wondershare Filmora Audio Editor , a platform with endless options.
This editing software is easily downloaded, and you don’t need any technical skills to use it. Its simple yet intuitive interface provides various tabs like Effects, Elements, etc. You can get different sound effects from Filmora. Furthermore, some of its advanced audio editing tools are Audio Equalizer, Audio Ducking, Add Voiceovers, Detach Audio from Video, and so many other options.
Wondershare Filmora
Get started easily with Filmora’s powerful performance, intuitive interface, and countless effects!
Try It Free Try It Free Try It Free Learn More >
“Harnessing Free Speech-to-Text Technology: A 2023 Roundup of Online Resources”
10+ Free Online Audio to Text Converters

Shanoon Cox
Mar 27, 2024• Proven solutions
An audio-to-text converter is a tool that can convert audio files to texts or even record any audio and produce the text of it simultaneously. Audio files are one of the most used methods of storing information. From online classes and long lectures to big business meetings and product information, audio is being shared a lot across the world.
But accessing information from a long audio file can be difficult and time-consuming, which is why there is a need to convert audio to text. Information in the form of text can easily be fully or partly accessed and edited whenever needed. And texts can also easily be shared with whomever you want.
So let’s have a look at some of the best audio-to-text converters that might be of use to you.


10+ Free Online Audio to Text Converters
There is number of audio text converters available in the online market that can help you while studying, researching, or even in your business. Some of these recorders can convert any audio file to texts while some others can record and convert to text at the same time. Here we will talk about the top 11 free applications that can be used to convert audio to text.
| 1 - Filmora | 2 - Audext | 3 - Sonix.ai |
|---|---|---|
| 4 - Virtualspeech.com | 5 - Speechnotes | 6 - SpeechTexter |
| 7 - Textfromtospeech.com | 8 - Dictation.io | 9 - Voice Note |
| 10 - Voice Notebook | 11 - NaturalReaders |
1. Wondershare Filmora
Filmora’s Speech To Text (STT) function allows you to transcript audio/voice to subtitles/text in one click. it can save your plenty of time on transcribing subtitles and boost your editing efficiency by applying speech-to-text.
What you need to do is download the software and subsribe for its plan.
Features
- Built-in function to transcribe subtitles and captions for your video
- High accuracy in generating text, allows you to edit text by yourself
- Supports up to 26 languages of transcription to engage more users all around the world
- Offers various tools for editing your videos and audio
2. Audext
Audext is a free online application that can help you to save a lot of time while transcribing any audio to text. The transcription to text is done with the use of an advanced AI and hence produces faster and more accurate results.
Audext is used by people from different sectors like education, marketing, media, consulting, healthcare, etc. for their work purposes.

Features
- An inbuilt editor for editing the text while transcribing
- Identifies the speaker easily
- Supports a variety of audio and video formats like MP3, WAV, MP4, etc.
- Offers an option of easy upload and export of files
Pricing
- Free
- Transcription costs for one hour are $12
- Or with the subscription $5
3. Sonix.ai
Sonix is a fast and accurate application that can be used to convert audio to text for any purpose. This application offers a 30-minute free transcription after which an affordable amount may be charged.
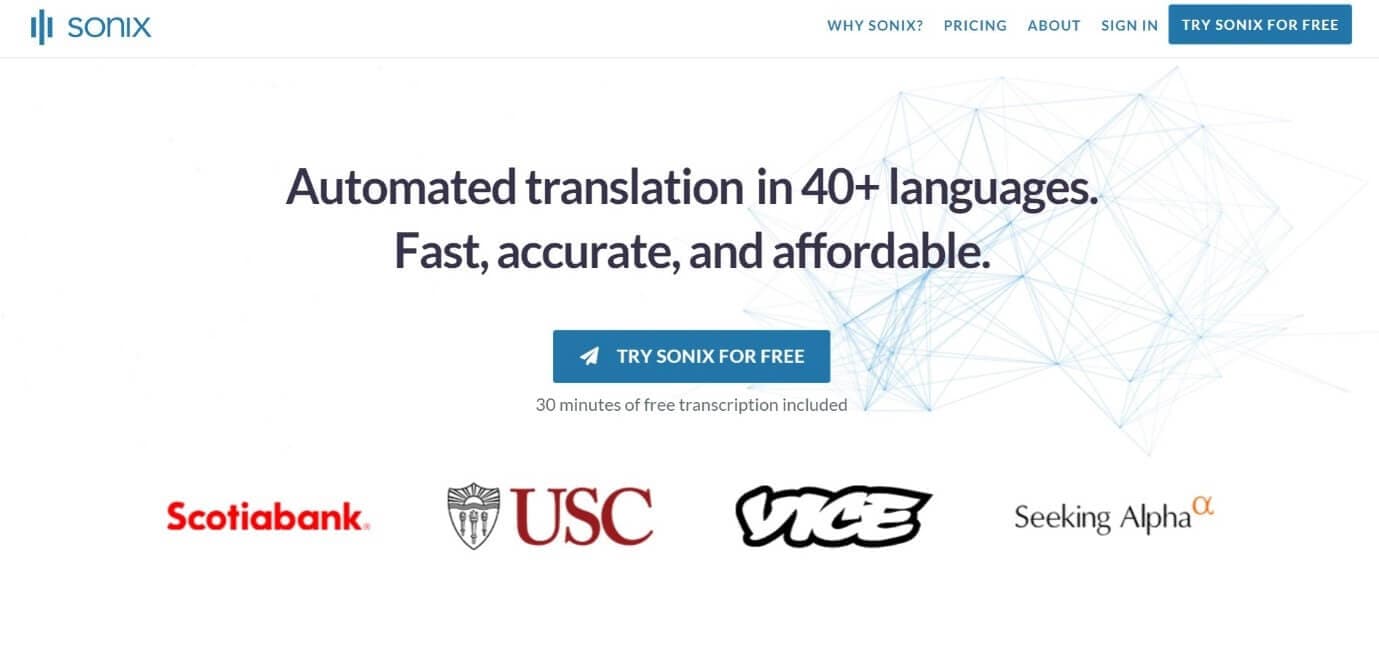
Features
- Automatic transcription of files and accessibility of these files from any device
- Advanced translation of these devices into 30 different languages
- Addition of subtitles into any video for easy understanding
- A Sonix media player that allows to share and publish files easily
Pricing
- Free
- Standard subscription - $10 per hour
- Premium subscription - $5 per hour, and an addition of $22 per month
4. Virtualspeech.com
Virtualspeech is an online tool that can transcribe audio to text free. It is a very simple application that allows fats conversion of audio files to texts. After conversion, the file will be emailed to the user from where it can be downloaded and saved.
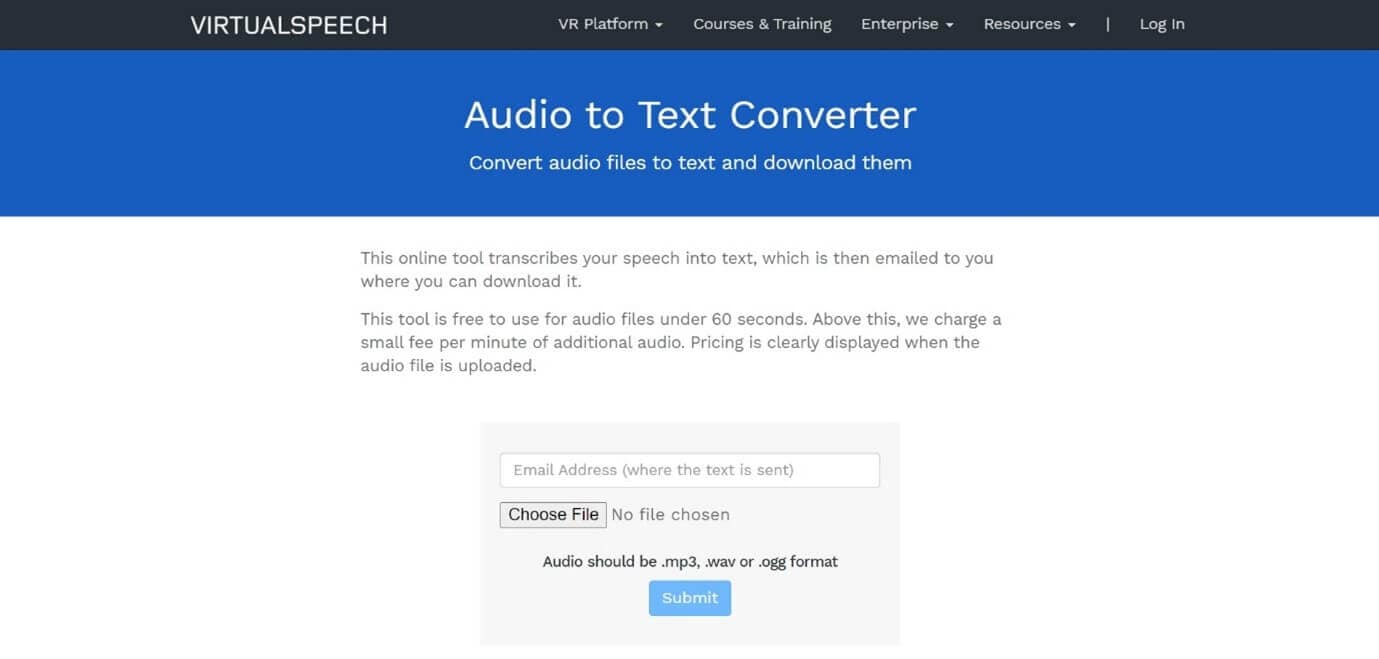
Features
- Free conversion of any audio files under 1 minute.
- Conversion of audio files of formats Mp3, Wav, or Ogg.
- Provides security as the no files are stored on the server and the site is secured with a b SSL
- Speech to text converter within the site
Pricing
- $0.50 per minute after the free minute
Filmora Audio to Text Converter
Filmora - Audio to Text Converter
• Enables you to convert video speech to text in one click
• Extremely accurate in video speech recognition
• Cross-platform supported - (Windows, Mac, iOS, Android)
Transcribe Audio to Text Free Transcribe Audio to Text Free Transcribe Audio to Text Free Learn More >
5. Speechnotes
Speechnotes is a powerful online notepad that can easily convert audio to text. This tool has implemented an efficient and clean design that makes conversion and editing very easy.
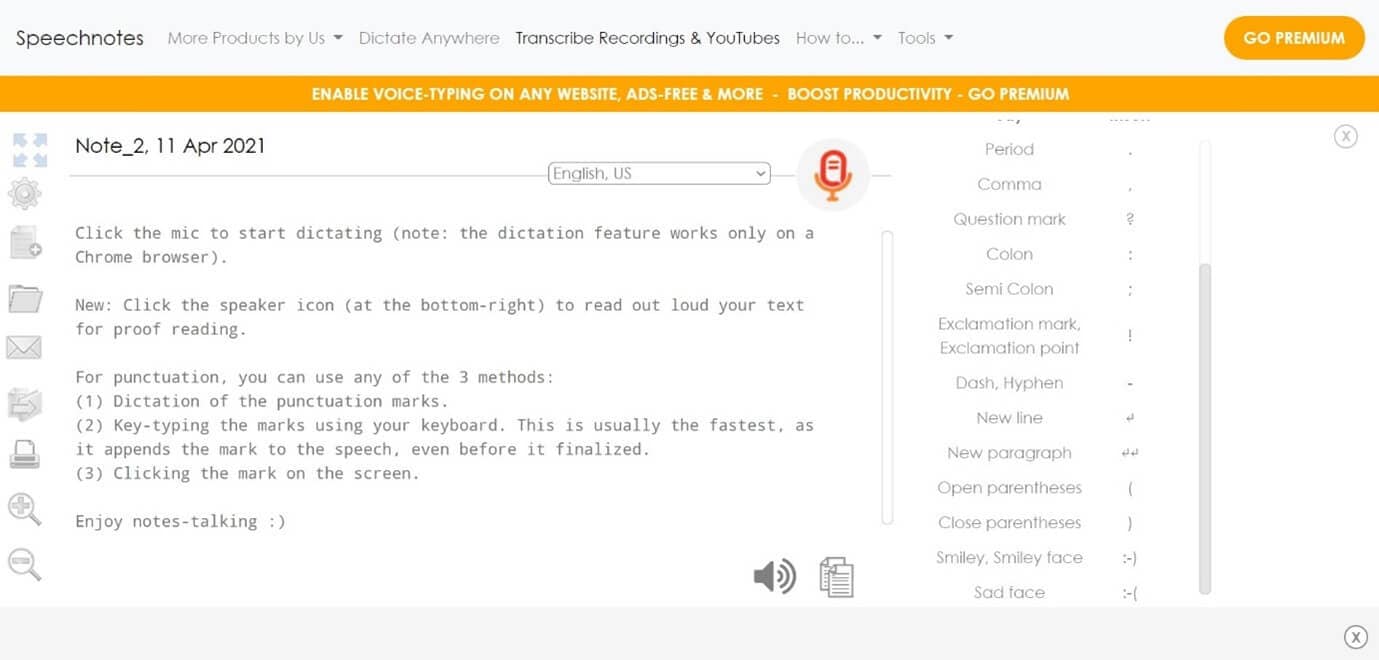
Features
- Best results with an advanced speech recognition technology
- Built-in tools that allow easy editing and correction of the converted text
- Fast working on any web browser and no installation apps required
- Autosave feature that ensures that your data is not lost
- Export to Google Drive option for easy accessibility from any device
Pricing
- Free
- Premium version with the addition of some extra features
6. SpeechTexter
SpeechTexter is a multilingual application that can help you transcribe any type of book, document, blog posts, etc. by using your audio. This tool has a custom dictionary that allows adding short commands for adding frequently used data like phone numbers, punctuation marks, addresses, etc.

Features
- Offers accuracy rate of 90 to 95% percent
- Can be used to increase your fluency in English
- Offers powerful real-time speech recognition
- Easy creation of emails, text notes, blog posts, etc.
- A custom dictionary that can be customized according to the individual use
- Supports more than 60 languages
- Available on both chrome browser and android
Pricing
- Free
7. Textfromtospeech.com
Textfromtospeech is a free online tool that allows you to easily convert audio to text without the need for registration downloading or installation. It has a very simple interface that can record and convert your speech into text with a single click.
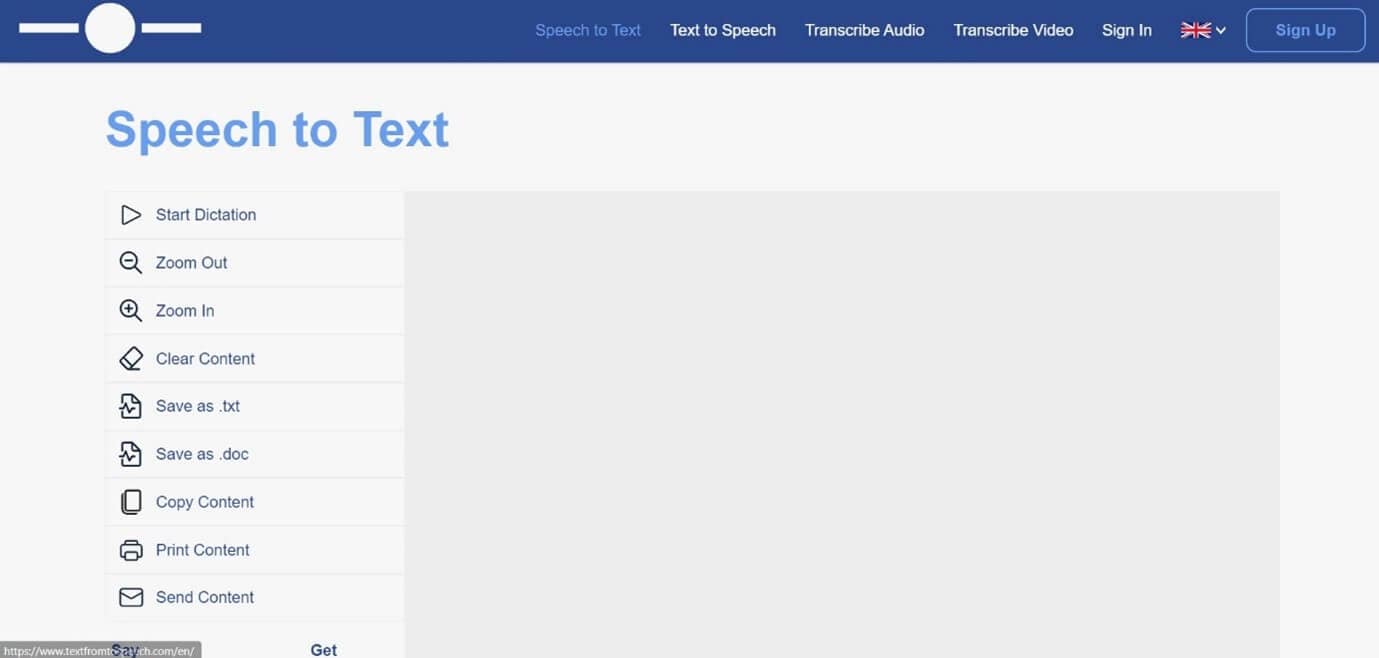
Features
- Free and online text recognition and transcription
- Supports many languages
- Pause and record option while converting large files
- Can use voice commands for insertion of symbols like “comma”, “full stop”, etc.
- Smart capitalization
- Easy saving, copying, and sharing of the dictated text
- Available on mobile devices, tablet, and computer
Pricing
- Free
![]()
A cross-platform for making videos anywhere for all creators

Why your video editing isn’t good enough? How about some creative inspo?
- 100 Million+ Users
- 150+ Countries and Regions
- 4 Million+ Social Media Followers
- 5 Million+ Stock Media for Use
* Secure Download

8. Dictation.io
Dictation is a free and simple tool that offers fast conversion of audio to text. Its interface is like that of a very simple notepad and allows the conversion of audio to text for a number of languages including English, Español, Français, Italiano, Português, and more.

Features
- Advanced speech recognition
- Easy editing within the notes
- Easy sharing to mail, tweets, etc.
- No storing of any data and hence offers the necessary security
Pricing
- Free
9. Voice Note
Voice Note is an online speech recognition tool that can automatically record and type anything including speech, interview, etc. This tool can convert any audio file into text format which can easily be opened in Microsoft Word.
Features
- No saving of data in any servers
- Customizable options for audio and text
- A number of languages to choose from while converting audio to text
- Easy copying and exporting options
- Direct Print option from the site
Price
- Free
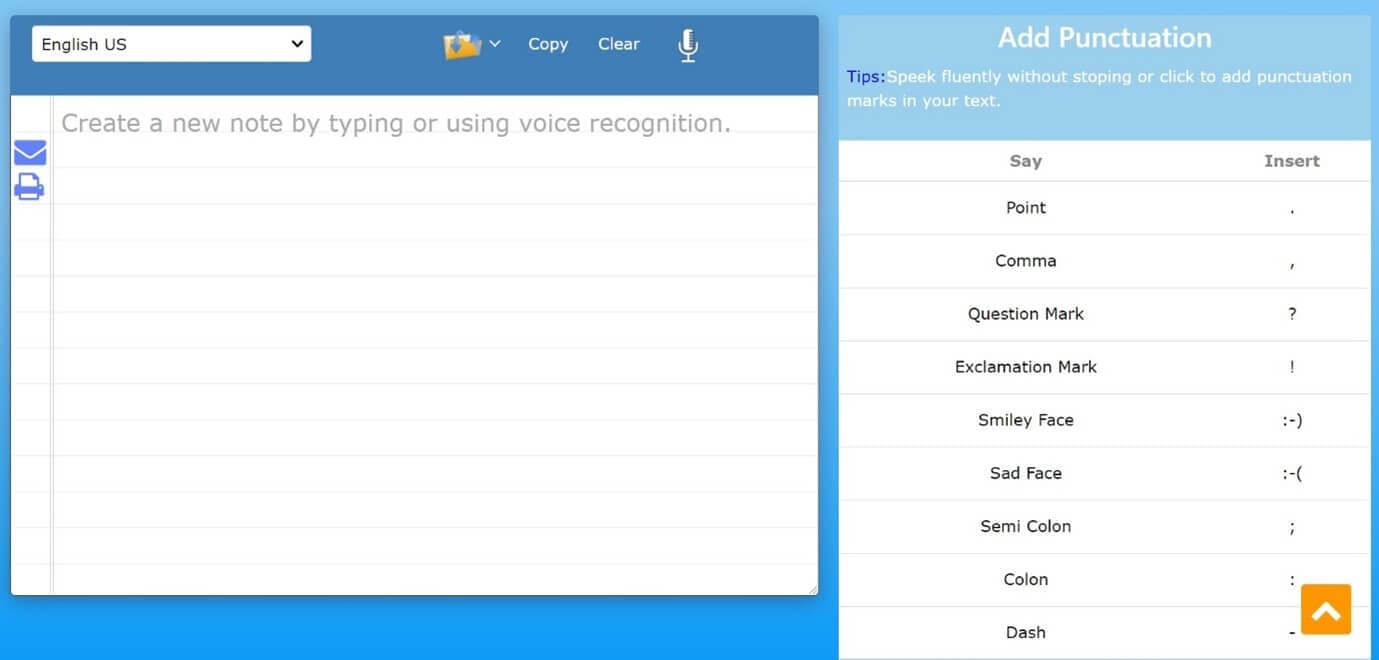
10. Voice Notebook
Voice Notebook is a speech recognition app that can also convert audio files to text. This application is compatible with a wide range of devices like Mac, Windows, Linux OS, Android, and iOS.
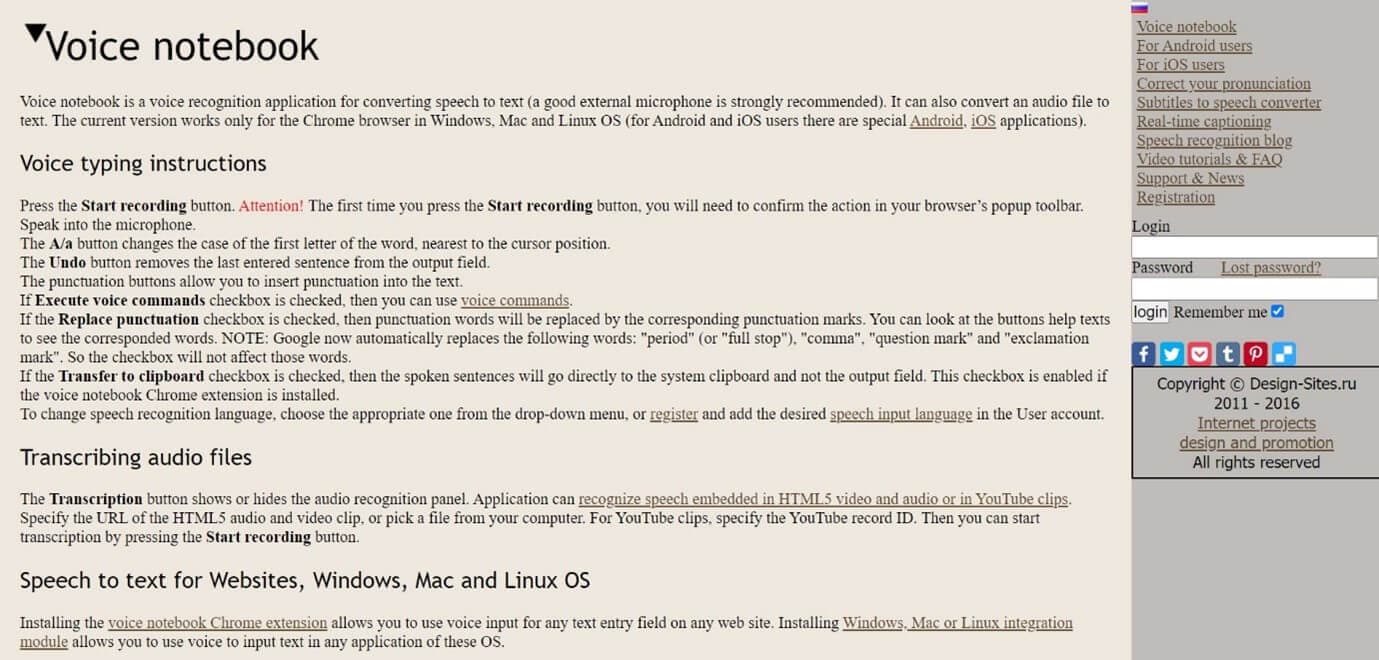
Features
- Voice commands are available when you transcribe audio to text
- Has the ability to recognize any speech embedded in YouTube clips or HTML5 audio or video
- Simple interface and easy editing of text
- An option to download into TXT format is available
Price
- Free
11. NaturalReaders
Natural Readers is a professional program that can convert any text into spoken words. This program offers a lot of features like adjusting the speed of audio, conversion into mp3, selection of voice, etc.
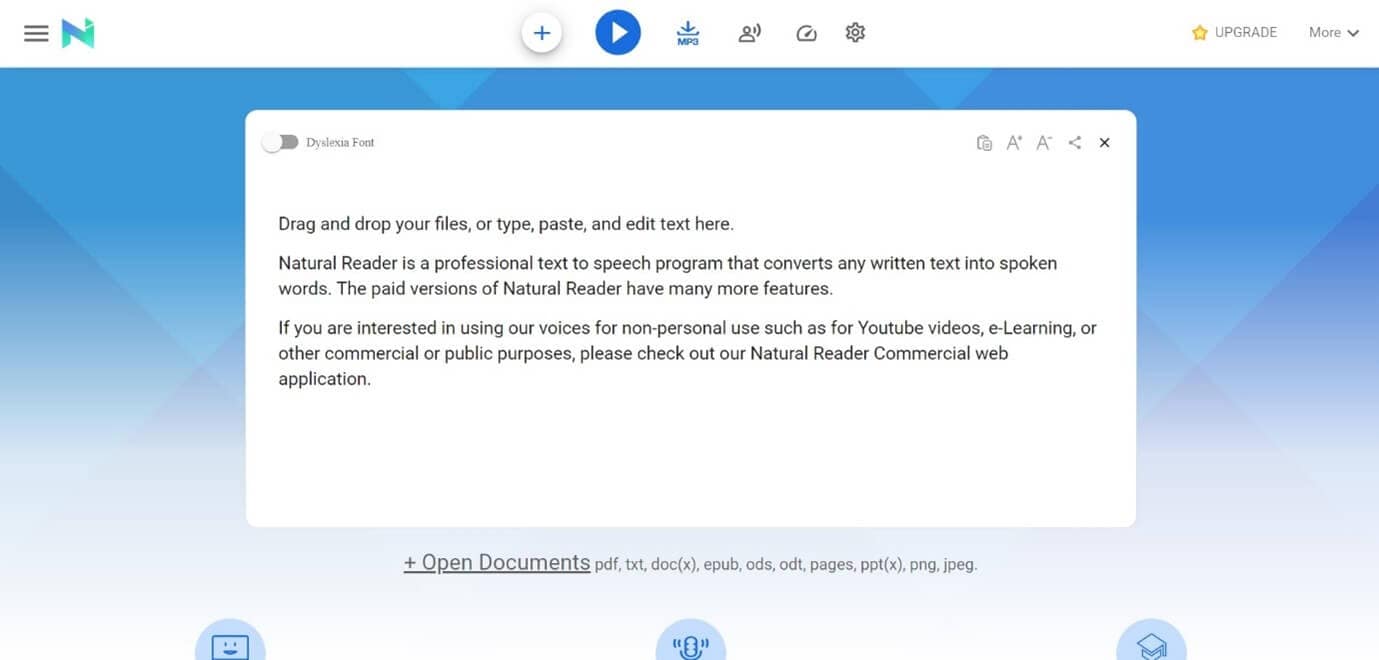
Features
- A font option available for dyslexic people
- Supports formats like pdf, txt, docs, epub, ods, ppt, png, jpeg
- App versions of this online tool are available both for android and apple devices
Pricing
- Free
- Premium plan - $9.99 per month, $59.88 per year
- Plus plan - $19.00 per month, $110.00 per year
Filmora Audio to Text Converter
Filmora - Audio to Text Converter
• Enables you to convert video speech to text in one click
• Extremely accurate in video speech recognition
• Cross-platform supported - (Windows, Mac, iOS, Android)
Transcribe Audio to Text Free Transcribe Audio to Text Free Transcribe Audio to Text Free Learn More >
Conclusion
We have listed above the top 11 tools that can be used to convert audio to text on any device using a browser. Converting audio to text allows you to easily access the required information, edit it, or even share it fully or partially with anyone you wish,
The applications we have listed are free and some of them might charge for the extra features they provide. So no matter what your profession is if you are looking for an app to convert audio to text or record and produce the text of the recordings, choose any one of the listed above applications.
We hope our suggestions help you reduce effort and save time. Please leave your valuable feedback in the comment box below, thank you.
Transform Long Videos into Short Ones Instantly
Turn long videos into viral clips. Effortlessly transform lengthy videos into engaging, shareable clips.

Shanoon Cox
Shanoon Cox is a writer and a lover of all things video.
Follow @Shanoon Cox
Shanoon Cox
Mar 27, 2024• Proven solutions
An audio-to-text converter is a tool that can convert audio files to texts or even record any audio and produce the text of it simultaneously. Audio files are one of the most used methods of storing information. From online classes and long lectures to big business meetings and product information, audio is being shared a lot across the world.
But accessing information from a long audio file can be difficult and time-consuming, which is why there is a need to convert audio to text. Information in the form of text can easily be fully or partly accessed and edited whenever needed. And texts can also easily be shared with whomever you want.
So let’s have a look at some of the best audio-to-text converters that might be of use to you.
10+ Free Online Audio to Text Converters
There is number of audio text converters available in the online market that can help you while studying, researching, or even in your business. Some of these recorders can convert any audio file to texts while some others can record and convert to text at the same time. Here we will talk about the top 11 free applications that can be used to convert audio to text.
| 1 - Filmora | 2 - Audext | 3 - Sonix.ai |
|---|---|---|
| 4 - Virtualspeech.com | 5 - Speechnotes | 6 - SpeechTexter |
| 7 - Textfromtospeech.com | 8 - Dictation.io | 9 - Voice Note |
| 10 - Voice Notebook | 11 - NaturalReaders |
1. Wondershare Filmora
Filmora’s Speech To Text (STT) function allows you to transcript audio/voice to subtitles/text in one click. it can save your plenty of time on transcribing subtitles and boost your editing efficiency by applying speech-to-text.
What you need to do is download the software and subsribe for its plan.
Features
- Built-in function to transcribe subtitles and captions for your video
- High accuracy in generating text, allows you to edit text by yourself
- Supports up to 26 languages of transcription to engage more users all around the world
- Offers various tools for editing your videos and audio
2. Audext
Audext is a free online application that can help you to save a lot of time while transcribing any audio to text. The transcription to text is done with the use of an advanced AI and hence produces faster and more accurate results.
Audext is used by people from different sectors like education, marketing, media, consulting, healthcare, etc. for their work purposes.
Features
- An inbuilt editor for editing the text while transcribing
- Identifies the speaker easily
- Supports a variety of audio and video formats like MP3, WAV, MP4, etc.
- Offers an option of easy upload and export of files
Pricing
- Free
- Transcription costs for one hour are $12
- Or with the subscription $5
3. Sonix.ai
Sonix is a fast and accurate application that can be used to convert audio to text for any purpose. This application offers a 30-minute free transcription after which an affordable amount may be charged.
Features
- Automatic transcription of files and accessibility of these files from any device
- Advanced translation of these devices into 30 different languages
- Addition of subtitles into any video for easy understanding
- A Sonix media player that allows to share and publish files easily
Pricing
- Free
- Standard subscription - $10 per hour
- Premium subscription - $5 per hour, and an addition of $22 per month
4. Virtualspeech.com
Virtualspeech is an online tool that can transcribe audio to text free. It is a very simple application that allows fats conversion of audio files to texts. After conversion, the file will be emailed to the user from where it can be downloaded and saved.
Features
- Free conversion of any audio files under 1 minute.
- Conversion of audio files of formats Mp3, Wav, or Ogg.
- Provides security as the no files are stored on the server and the site is secured with a b SSL
- Speech to text converter within the site
Pricing
- $0.50 per minute after the free minute
Filmora Audio to Text Converter
Filmora - Audio to Text Converter
• Enables you to convert video speech to text in one click
• Extremely accurate in video speech recognition
• Cross-platform supported - (Windows, Mac, iOS, Android)
Transcribe Audio to Text Free Transcribe Audio to Text Free Transcribe Audio to Text Free Learn More >
5. Speechnotes
Speechnotes is a powerful online notepad that can easily convert audio to text. This tool has implemented an efficient and clean design that makes conversion and editing very easy.
Features
- Best results with an advanced speech recognition technology
- Built-in tools that allow easy editing and correction of the converted text
- Fast working on any web browser and no installation apps required
- Autosave feature that ensures that your data is not lost
- Export to Google Drive option for easy accessibility from any device
Pricing
- Free
- Premium version with the addition of some extra features
6. SpeechTexter
SpeechTexter is a multilingual application that can help you transcribe any type of book, document, blog posts, etc. by using your audio. This tool has a custom dictionary that allows adding short commands for adding frequently used data like phone numbers, punctuation marks, addresses, etc.
Features
- Offers accuracy rate of 90 to 95% percent
- Can be used to increase your fluency in English
- Offers powerful real-time speech recognition
- Easy creation of emails, text notes, blog posts, etc.
- A custom dictionary that can be customized according to the individual use
- Supports more than 60 languages
- Available on both chrome browser and android
Pricing
- Free
7. Textfromtospeech.com
Textfromtospeech is a free online tool that allows you to easily convert audio to text without the need for registration downloading or installation. It has a very simple interface that can record and convert your speech into text with a single click.
Features
- Free and online text recognition and transcription
- Supports many languages
- Pause and record option while converting large files
- Can use voice commands for insertion of symbols like “comma”, “full stop”, etc.
- Smart capitalization
- Easy saving, copying, and sharing of the dictated text
- Available on mobile devices, tablet, and computer
Pricing
- Free
![]()
A cross-platform for making videos anywhere for all creators
Why your video editing isn’t good enough? How about some creative inspo?
- 100 Million+ Users
- 150+ Countries and Regions
- 4 Million+ Social Media Followers
- 5 Million+ Stock Media for Use
* Secure Download
8. Dictation.io
Dictation is a free and simple tool that offers fast conversion of audio to text. Its interface is like that of a very simple notepad and allows the conversion of audio to text for a number of languages including English, Español, Français, Italiano, Português, and more.
Features
- Advanced speech recognition
- Easy editing within the notes
- Easy sharing to mail, tweets, etc.
- No storing of any data and hence offers the necessary security
Pricing
- Free
9. Voice Note
Voice Note is an online speech recognition tool that can automatically record and type anything including speech, interview, etc. This tool can convert any audio file into text format which can easily be opened in Microsoft Word.
Features
- No saving of data in any servers
- Customizable options for audio and text
- A number of languages to choose from while converting audio to text
- Easy copying and exporting options
- Direct Print option from the site
Price
- Free
10. Voice Notebook
Voice Notebook is a speech recognition app that can also convert audio files to text. This application is compatible with a wide range of devices like Mac, Windows, Linux OS, Android, and iOS.
Features
- Voice commands are available when you transcribe audio to text
- Has the ability to recognize any speech embedded in YouTube clips or HTML5 audio or video
- Simple interface and easy editing of text
- An option to download into TXT format is available
Price
- Free
11. NaturalReaders
Natural Readers is a professional program that can convert any text into spoken words. This program offers a lot of features like adjusting the speed of audio, conversion into mp3, selection of voice, etc.
Features
- A font option available for dyslexic people
- Supports formats like pdf, txt, docs, epub, ods, ppt, png, jpeg
- App versions of this online tool are available both for android and apple devices
Pricing
- Free
- Premium plan - $9.99 per month, $59.88 per year
- Plus plan - $19.00 per month, $110.00 per year
Filmora Audio to Text Converter
Filmora - Audio to Text Converter
• Enables you to convert video speech to text in one click
• Extremely accurate in video speech recognition
• Cross-platform supported - (Windows, Mac, iOS, Android)
Transcribe Audio to Text Free Transcribe Audio to Text Free Transcribe Audio to Text Free Learn More >
Conclusion
We have listed above the top 11 tools that can be used to convert audio to text on any device using a browser. Converting audio to text allows you to easily access the required information, edit it, or even share it fully or partially with anyone you wish,
The applications we have listed are free and some of them might charge for the extra features they provide. So no matter what your profession is if you are looking for an app to convert audio to text or record and produce the text of the recordings, choose any one of the listed above applications.
We hope our suggestions help you reduce effort and save time. Please leave your valuable feedback in the comment box below, thank you.
Transform Long Videos into Short Ones Instantly
Turn long videos into viral clips. Effortlessly transform lengthy videos into engaging, shareable clips.
Shanoon Cox
Shanoon Cox is a writer and a lover of all things video.
Follow @Shanoon Cox
Instant Silence: Muting Zoom Sound From Your Computer or Smartphone
Zoom Meeting is a beneficial application, and video conferencing is on another level because of this app. Zoom offers high-quality audio and video. With this conferencing app, cross-platform messaging is also possible, and you can also schedule your meeting calendar with Zoom.
Many offices conduct formal meetings through Zoom. During the pandemic era, online classes were taken through Zoom. Sometimes, you wish to mute the mic and sit back. What bothers you is that you don’t know how to mute audio in zoom. If this is your case, then stay with us. We are about to discuss how you can mute zoom audio.
In this article
01 How to Mute Zoom Audio on Windows and Mac
02 How to Mute Zoom Audio on iPhone and Android
03 Tips To Optimize Zoom Audio Settings for Better Performance
04 Frequently Asked Questions about Zoom
Part 1. How to Mute Zoom Audio on Windows and Mac
Imagine you are having a meeting on Zoom, and there are a lot of people in the meeting. You are trying to do some office work, but their voices disturb you. You cannot even leave the meeting. What are you going to do now? Are you going to submit average quality work?
One thing that you can do is to mute audio on Zoom. The question is, do you know how to mute the microphone on zoom? Let us share the steps that will help you to mute Zoom audio on your Windows or Mac.
Step 1: First of all, open the desktop Zoom app and start a call. Then, for the options to appear on the screen, you need to move the cursor.
Step 2: To mute any participant, bring the cursor over their name. The options will appear. You can click on the blue ‘Mute’ button to mute them. Or else, you can open a pop-up menu by right-clicking on the participants’ names. There, select the option of ‘Mute Audio.’ You can unmute them in the same way.

Step 3: If you are the meeting host, you can manage all participants at once. For that, look at the bottom toolbar hit the ‘Manage Participants’ tab. Zoom meeting will display the total count of the participants in a sidebar on the screen. Along with the participants’ names, a microphone and video icon will also appear.

Step 5: If you are the meeting host, then you can mute individual participants. You have to bring the cursor over the microphone icon. A ‘Mute’ and ‘Unmute’ buttons will show up.

Step 6: Being the host, you can ‘Mute All’ and ‘Unmute All’ participants at once by clicking on these buttons at the bottom. A pop-up will appear on the screen, don’t forget to check the box. With this, the participants can unmute themselves.
Step 7: Also, the participants receive a message if the host is muting or unmuting everyone. To complete the process and apply the changes, hit the ‘Continue’ button.

Part 2. How to Mute Zoom Audio on iPhone and Android
Zoom meeting is compatible with Windows, Mac, Android, and also iPhone. You don’t need to always join zoom meetings with your computer. Sometimes, you join zoom with your mobile. In any case, you might need to mute zoom audio. Sadly, you don’t know how to mute Zoom audio. Let us share an easy step-by-step guideline to do this on both Android and iPhone.
Step 1: If you want to mute the sound of your mobile device, then in the top left corner, tap on the volume button. You will see ‘X’ appears over the speaker icon. You can tap on it again to play the sound.

Step 2: Being the host, you can manage participants. For that, look at the bottom and click on the ‘Participants’ tab. A pop-up will appear on your screen, and you can individually mute participants. For this, you need to hit the microphone icon visible next to the participants’ names. You can easily reverse this and unmute it by tapping on the microphone icon again. You can also manage the settings by clicking on the participant’s name.

Step 3: The host has the authority to Mute all participants at once. For this, the host needs to tap on the ‘Mute All’ button from the bottom. The host needs to check the box. This will allow the participants to unmute themselves.

Step 4: Lastly, once you are done and satisfied with everything, hit the ‘Close’ option. This will close the participants’ window.
Part 3. Tips To Optimize Zoom Audio Settings for Better Performance
Although Zoom meeting is itself an amazing app with so many different features, among those features, one is that Zoom has high-quality video and audio. Besides everything, you can still improve Zoom Audio’s performance by following the tips that are shared below.
· Reduce Background Noise
Your audio performance is instantly improved if you reduce background noise. Any disturbing noise in the background falls under this category. It can be the fan, air conditioning, ticking clocks, etc. You should move away from the noise.
· Use High-Quality Microphone
For better audio performance, use a high-quality microphone for your Zoom meetings. This factor is the most important factor when it comes to improving audio. Investing in a decent and good external microphone is never a bad option.
· Stable Internet Connection
With a weak internet connection, your voice breaks. If you want to have improved Zoom audio performance, then make sure that you have a stable internet connection. Distortion and disturbance cause problems while communicating.
· Distance from Microphone
You must sit at an average distance from your microphone. Sitting too close will sound like you are shouting. Whereas sitting too far, your voice is quieter, and background noise sounds loud. So, measure the appropriate distance from the microphone.
Part 4. Frequently Asked Questions about Zoom
1. Can you mute Zoom audio without muting the computer?
Yes, you can mute zoom without muting your computer. For Windows, look at the bottom right corner. Right-click on the speaker/volume icon. A pop-up menu will appear; from there, select ‘Open Volume Mixer.’ When Volume Mixer appears on the screen, turn down and mute the volume for Zoom Meetings.
In case you are a Mac user, then let us tell you what to do. During the Zoom call, click on the Zoom Meetings Control for Audio. Then select the option of ‘Audio Settings.’ From the audio setting panel, you can turn down the volume for the ‘Speaker.’ This lowers the volume for Zoom meetings and can even mute it.
2. How can I improve my zoom video quality?
Various ways could be adopted to improve the video quality for Zoom meetings. For instance, you can use the ‘Touch up my Appearance’ feature. Or else, you can enable HD, apply Studio Effects, enable Zoom’s Low Light Adjustment setting, etc.
3. How do I change the resolution of a video Zoom?
For changing the resolution of Zoom video, firstly open Zoom on either your mobile or computer. Then, head over to the ‘Settings’ section. There, you need to select ‘Video Quality’ settings. Lastly, check the box with HD. This will enable the HD option, and your device will stream high-quality videos.
4. How do you set a virtual background on Zoom without a green screen?
For setting a virtual background on Zoom, you firstly need to sign in to your account. After that, you should open the ‘Settings’ by clicking on your profile picture. From settings, select ‘Virtual Background.’ Now, you can add the image that you want as your virtual background. You can even upload any image and video by hitting the ‘+’ sign.
5. Where do you get zoom backgrounds?
Zoom website offers a variety of cool virtual backgrounds. You can easily download them and use them. In comparison, there is another site that offers free backgrounds. You can also download virtual background images from Unsplash and use them easily.
Final Thoughts
Now are days, Zoom Meeting is being widely used. This article will surely increase your knowledge regarding Zoom Audio. We have shared the steps for both computer and mobile for Zoom mute microphone. We also shared tips that will help you improve the Zoom audio performance.
02 How to Mute Zoom Audio on iPhone and Android
03 Tips To Optimize Zoom Audio Settings for Better Performance
04 Frequently Asked Questions about Zoom
Part 1. How to Mute Zoom Audio on Windows and Mac
Imagine you are having a meeting on Zoom, and there are a lot of people in the meeting. You are trying to do some office work, but their voices disturb you. You cannot even leave the meeting. What are you going to do now? Are you going to submit average quality work?
One thing that you can do is to mute audio on Zoom. The question is, do you know how to mute the microphone on zoom? Let us share the steps that will help you to mute Zoom audio on your Windows or Mac.
Step 1: First of all, open the desktop Zoom app and start a call. Then, for the options to appear on the screen, you need to move the cursor.
Step 2: To mute any participant, bring the cursor over their name. The options will appear. You can click on the blue ‘Mute’ button to mute them. Or else, you can open a pop-up menu by right-clicking on the participants’ names. There, select the option of ‘Mute Audio.’ You can unmute them in the same way.
Step 3: If you are the meeting host, you can manage all participants at once. For that, look at the bottom toolbar hit the ‘Manage Participants’ tab. Zoom meeting will display the total count of the participants in a sidebar on the screen. Along with the participants’ names, a microphone and video icon will also appear.
Step 5: If you are the meeting host, then you can mute individual participants. You have to bring the cursor over the microphone icon. A ‘Mute’ and ‘Unmute’ buttons will show up.
Step 6: Being the host, you can ‘Mute All’ and ‘Unmute All’ participants at once by clicking on these buttons at the bottom. A pop-up will appear on the screen, don’t forget to check the box. With this, the participants can unmute themselves.
Step 7: Also, the participants receive a message if the host is muting or unmuting everyone. To complete the process and apply the changes, hit the ‘Continue’ button.
Part 2. How to Mute Zoom Audio on iPhone and Android
Zoom meeting is compatible with Windows, Mac, Android, and also iPhone. You don’t need to always join zoom meetings with your computer. Sometimes, you join zoom with your mobile. In any case, you might need to mute zoom audio. Sadly, you don’t know how to mute Zoom audio. Let us share an easy step-by-step guideline to do this on both Android and iPhone.
Step 1: If you want to mute the sound of your mobile device, then in the top left corner, tap on the volume button. You will see ‘X’ appears over the speaker icon. You can tap on it again to play the sound.
Step 2: Being the host, you can manage participants. For that, look at the bottom and click on the ‘Participants’ tab. A pop-up will appear on your screen, and you can individually mute participants. For this, you need to hit the microphone icon visible next to the participants’ names. You can easily reverse this and unmute it by tapping on the microphone icon again. You can also manage the settings by clicking on the participant’s name.
Step 3: The host has the authority to Mute all participants at once. For this, the host needs to tap on the ‘Mute All’ button from the bottom. The host needs to check the box. This will allow the participants to unmute themselves.
Step 4: Lastly, once you are done and satisfied with everything, hit the ‘Close’ option. This will close the participants’ window.
Part 3. Tips To Optimize Zoom Audio Settings for Better Performance
Although Zoom meeting is itself an amazing app with so many different features, among those features, one is that Zoom has high-quality video and audio. Besides everything, you can still improve Zoom Audio’s performance by following the tips that are shared below.
· Reduce Background Noise
Your audio performance is instantly improved if you reduce background noise. Any disturbing noise in the background falls under this category. It can be the fan, air conditioning, ticking clocks, etc. You should move away from the noise.
· Use High-Quality Microphone
For better audio performance, use a high-quality microphone for your Zoom meetings. This factor is the most important factor when it comes to improving audio. Investing in a decent and good external microphone is never a bad option.
· Stable Internet Connection
With a weak internet connection, your voice breaks. If you want to have improved Zoom audio performance, then make sure that you have a stable internet connection. Distortion and disturbance cause problems while communicating.
· Distance from Microphone
You must sit at an average distance from your microphone. Sitting too close will sound like you are shouting. Whereas sitting too far, your voice is quieter, and background noise sounds loud. So, measure the appropriate distance from the microphone.
Part 4. Frequently Asked Questions about Zoom
1. Can you mute Zoom audio without muting the computer?
Yes, you can mute zoom without muting your computer. For Windows, look at the bottom right corner. Right-click on the speaker/volume icon. A pop-up menu will appear; from there, select ‘Open Volume Mixer.’ When Volume Mixer appears on the screen, turn down and mute the volume for Zoom Meetings.
In case you are a Mac user, then let us tell you what to do. During the Zoom call, click on the Zoom Meetings Control for Audio. Then select the option of ‘Audio Settings.’ From the audio setting panel, you can turn down the volume for the ‘Speaker.’ This lowers the volume for Zoom meetings and can even mute it.
2. How can I improve my zoom video quality?
Various ways could be adopted to improve the video quality for Zoom meetings. For instance, you can use the ‘Touch up my Appearance’ feature. Or else, you can enable HD, apply Studio Effects, enable Zoom’s Low Light Adjustment setting, etc.
3. How do I change the resolution of a video Zoom?
For changing the resolution of Zoom video, firstly open Zoom on either your mobile or computer. Then, head over to the ‘Settings’ section. There, you need to select ‘Video Quality’ settings. Lastly, check the box with HD. This will enable the HD option, and your device will stream high-quality videos.
4. How do you set a virtual background on Zoom without a green screen?
For setting a virtual background on Zoom, you firstly need to sign in to your account. After that, you should open the ‘Settings’ by clicking on your profile picture. From settings, select ‘Virtual Background.’ Now, you can add the image that you want as your virtual background. You can even upload any image and video by hitting the ‘+’ sign.
5. Where do you get zoom backgrounds?
Zoom website offers a variety of cool virtual backgrounds. You can easily download them and use them. In comparison, there is another site that offers free backgrounds. You can also download virtual background images from Unsplash and use them easily.
Final Thoughts
Now are days, Zoom Meeting is being widely used. This article will surely increase your knowledge regarding Zoom Audio. We have shared the steps for both computer and mobile for Zoom mute microphone. We also shared tips that will help you improve the Zoom audio performance.
Also read:
- Updated Achieving Smooth Transitions in Sound The Guide to Audio Fading for 2024
- New 2024 Approved A Symphony for the Ears Ranking the Top 8 Filmmaking Sonic Experiences
- Top Picks for High-Quality Outdoor Audio Archives
- Updated How to Use Morphvox Voice Changer for Online Games?
- Audio Recording Made Easy Exploring Options and Tutorials Outside of Apowersofts Offerings
- New Guide to Accessing Impactful Percussive Audio Elements
- Updated Combining Sounds & Visuals A Guide to Blending Video and Audio
- New In 2024, Bugged Upbeat Sounds Pack – FREE 2023 Digital Audio Library
- New In 2024, The Ultimate Guide to Quieting Down Films and Videos
- New Unveiling the Most Reliable Websites for Precision MP3 Tagging and Organizing
- Updated MP4 to Audiophile Revolutionary Audio Extraction Techniques of 2 Written by a Software Engineer for 2024
- Behind-the-Scenes Sound Management Expert Insights Into Using Ducking Effects for 2024
- New These Titles Are Designed to Convey a Similar Message About Using Autotune Plugins Within Audacity, Targeting Users Interested in Vocal Processing and Sound Editing Enhancements for 2024
- In 2024, Decoding Canine Emotional Outbursts Recognizing Irritation in Barks
- Updated 2024 Approved The Journey From Sonic Surroundings to Serene Soundscape
- Updated In 2024, Eleven Strategies of Online Bliss A Listicle for a Tranquil State of Mind
- Updated In 2024, The Ultimate Methods for Crafting Lifelike AI Speech Patterns
- Updated Achieving High-Quality Frequency Modulation in Audacity for 2024
- Updated 2024 Approved Audio Mastery on ChromeOS Easier Than You Think!
- In 2024, Aesthetic Background Tunes for YouTube Originals
- New 2024 Approved Best Voice-Over Generators That You Should Try Online & Desktop
- New The Quintessential List 8 Iconic Sound Effects From Todays Blockbusters for 2024
- How to Fade in and Fade Out Audio in iMovie for 2024
- Understanding Enhanced Functionality in Nero WaveEdito As
- 2024 Approved Expert Guide to Displaying Audio Waves and Adding Motion Graphics in Premiere Pro
- New Audacity Installation Protocols for Linux Users (Ubuntu Edition)
- Updated 2024 Approved Masterful Oratory Makers The Ultimate List of Voice Over Tools (Online + Desktop)
- New In 2024, Methods for Detaching Musical Elements From a Video Clip
- New In 2024, Best Background Music Remover to Help You Remove Background Music
- In 2024, Mastering Sound Capture with Apowersoft Step-by-Step Tutorial and Top 4 Alternatives
- 2024 Approved Soundwave Shift Step-by-Step MP3 to MP4 Audio File Transformation
- Updated 2024 Approved Identifying the Ideal Game Voice Overhaul Software
- The Definitive Guide to Choosing Best Pop Sounds for Video Backdrops (2024S Catalogue)
- New In 2024, Symphony of Screens The Best Music Pairings for Every Type of Video Content
- Updated Utilizing Automatic Pitch Correction AutoTune & Audacity Techniques for 2024
- 2024 Approved Harmonize Your Music with the Best 5 macOS-Friendly MP3 Amalgamators
- Updated Mastering Sound with These Top 10 Audio Editors Compatible with Windows and Mac
- Unleashing Clear Communication A Curated List of the 6 Best Voice Changers for Smartphones
- In 2024, Fake Android Location without Rooting For Your Motorola Moto G34 5G | Dr.fone
- In 2024, How To Check if Your Oppo Is Unlocked
- New In 2024, Smooth Operator Top Video Stabilizer Apps
- New In 2024, From Still to Stunning How to Add the Ken Burns Effect to Your Videos
- How to Downgrade iPhone 13 mini without Data Loss? | Dr.fone
- How do I reset my Infinix Note 30i Phone without technical knowledge? | Dr.fone
- Play Store Not Working On Xiaomi Redmi Note 12 Pro+ 5G? 8 Solutions Inside | Dr.fone
- How to Fix Android.Process.Media Has Stopped on Vivo V29 | Dr.fone
- New Top 6 Darth Vader AI Generators for All Platforms
- How to Fake GPS on Android without Mock Location For your Xiaomi Redmi A2 | Dr.fone
- New 2024 Approved Distort, Degrade, and Disrupt The Best Free Online Glitch Tools
- Identify missing or malfunctioning drivers with Windows Device Manager in Windows 11 & 10
- In 2024, How to Unlock Apple iPhone SE, Apples New iPhone | Dr.fone
- In 2024, Latest way to get Shiny Meltan Box in Pokémon Go Mystery Box On Apple iPhone 14 | Dr.fone
- In 2024, 2 Ways to Transfer Text Messages from Vivo Y27s to iPhone 15/14/13/12/11/X/8/ | Dr.fone
- 2024 Approved FCPX Tutorial Roundup The Most Popular Resources
- How to recover deleted photos from Samsung Galaxy XCover 6 Pro Tactical Edition.
- In 2024, How to Bypass Google FRP Lock on Vivo T2 5G Devices
- In 2024, How to Unlock Apple ID On your Apple iPhone 15 Pro without Security Questions?
- Title: 2024 Approved In-Depth Analysis of the Nero WaveShaper Toolkit
- Author: David
- Created at : 2024-05-20 05:45:43
- Updated at : 2024-05-21 05:45:43
- Link: https://sound-tweaking.techidaily.com/2024-approved-in-depth-analysis-of-the-nero-waveshaper-toolkit/
- License: This work is licensed under CC BY-NC-SA 4.0.
