
:max_bytes(150000):strip_icc():format(webp)/SetaLiveWallpaperinWindows11-b8ca3913592d4a5790808131bf8f34e1.jpg)
2024 Approved Audio Assets Almanac Unveiling the Best Online Sources for Video Clip Melodies
“Audio Assets Almanac: Unveiling the Best Online Sources for Video Clip Melodies”
FREE Top 10 Best Websites to Download Sound Clips for Videos

Liza Brown
Mar 27, 2024• Proven solutions


Are you working on animation , video, game, music, or maybe some other media file? Sound is a vital factor for all. It is the effect of the sound that can make or break a project.
But it can be difficult to find perfect and quality free sound clips. There are thousands of software for creating excellent videos, adding sounds , titles, overlays, tracks, and more. But what if you don’t wish to create a piece for just jazzing up your already existing video?
Free sound clips are great resources to download for videos if you don’t want to create sound effects.
Many people want to know the source of high-quality free audio for videos. These free sound samples are easy to find on the Internet.
In this article, you will get to know the 10 best websites to download free sound clips.
10 Best Free Sound Samples to Use
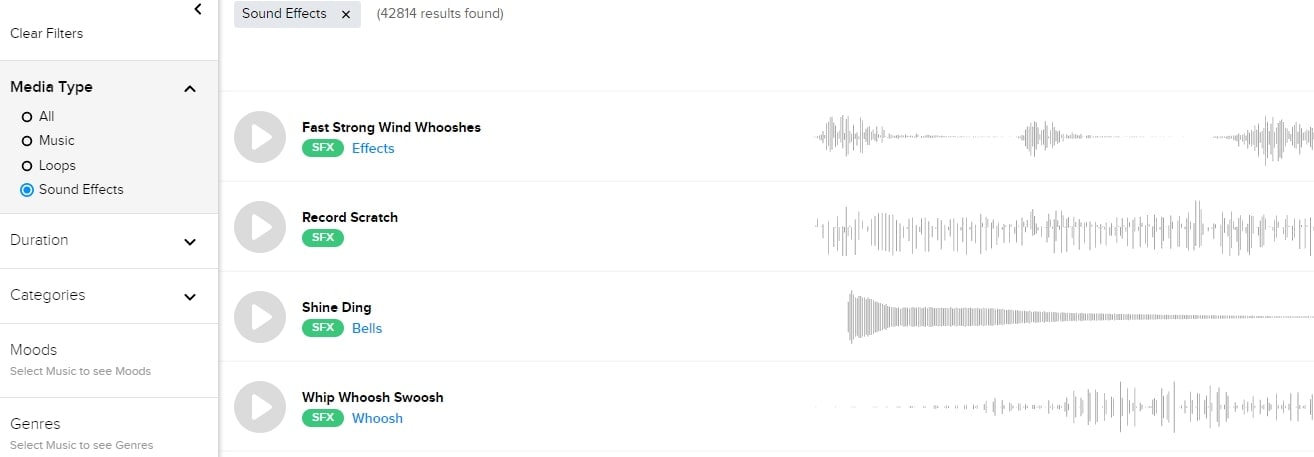
1. Freesound
Licensed under the Creative Commons License , the Freesound comprises of a large sound database. You can choose from the huge collection of sounds and decide which one is free and which sound needs attribution.
You can ensure if the sound can be used in commercial products or not. If you are not a professional and just need free sound samples for personal use, you may use free sound download from any site. The features of Freesound include-
- You can search for sounds or browse by tags or geotags
- The pack feature helps you to find a bunch of similar sounds very easily
- Preview the sound without logging in
- For downloading the sound, you need to log in
- Add your audio samples to contribute to the database
- You get 5 free sound clips download
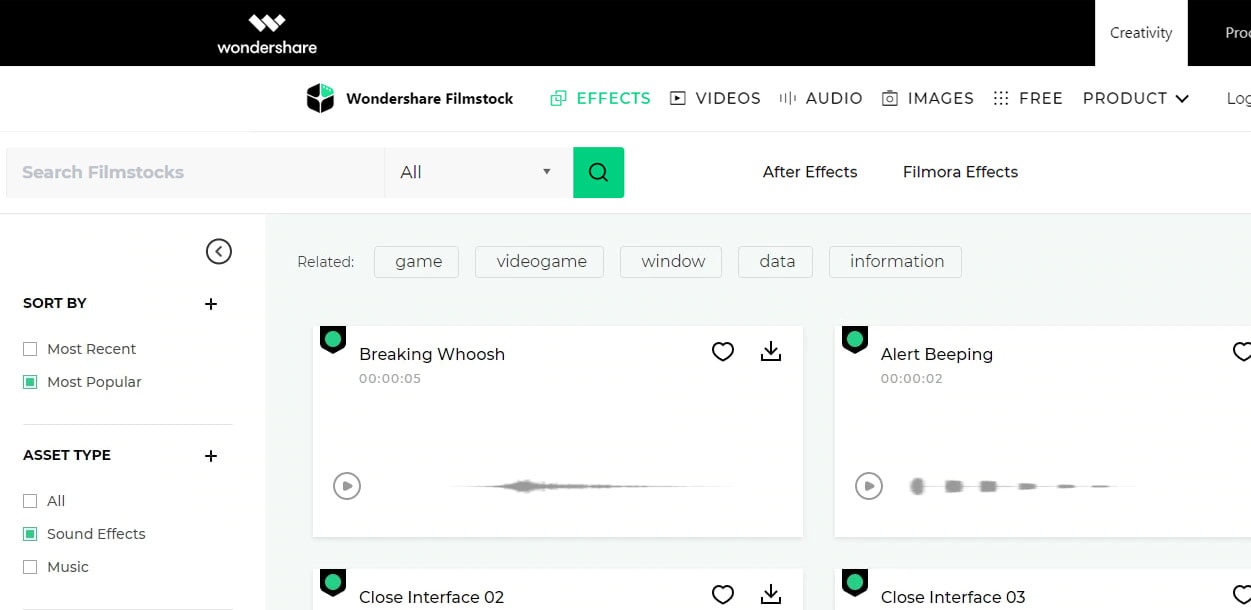
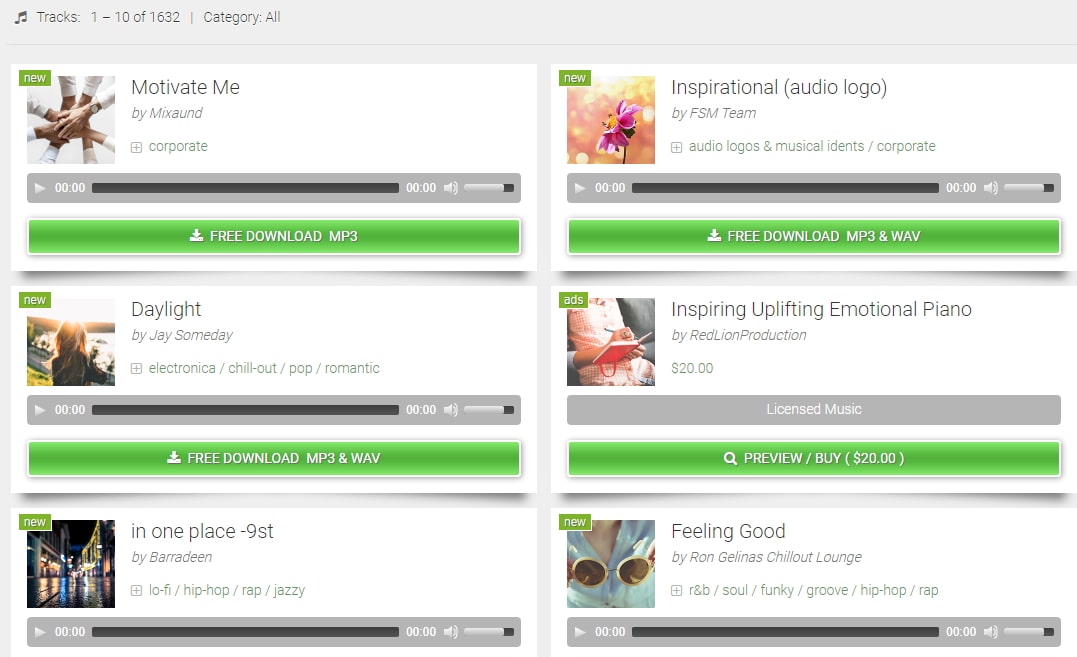
2. Filmstock
Filmstock from the house of Wondershare is one of the greatest libraries for free sound clips.
Any budget filmmaker would love to have this invaluable resource not just for free audio clips for videos but also for royalty-free sound clips.
You can bring your cinematic video to life from the Filmstock free-stuff one-stop-shop. The features of Filmstock include-
- Royalty-free video effects, audio, and stock media
- There are genres like science fiction, sci-fi, ufo, technology games
- Huge selection of curated quality stock images
- Filmstock library is continuously updated
- No attribution required for any project on Filmstock
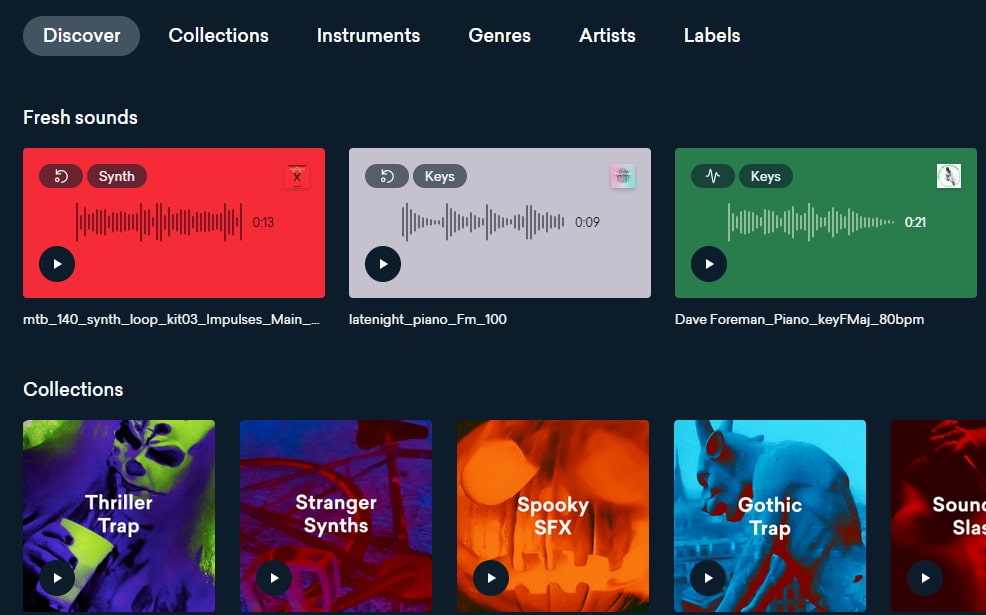
3. Landr
With a simple interface, Landr offers the best loops, packs, and samples to you. Make use of powerful Artificial Intelligence (AI) and you can spend lesser time searching and browsing. The features of Landr includes-
- You can browse free sound clips from the various collection of instruments
- Quickly find the right sound from the millions of free sound samples
- Get access to Selector tool powered by AI to make your browsing session faster
- Nourish your ideas with the curated collection and smart browsing
- The filter sounds by instrument, mood, BPM or key
- Go pro with your sampling
- Royalty-free sounds from today’s best artists, producers, and labels
4. Audio Micro
Audio Micro is one of the best tools for downloading horror-based free sound clips. Once you register with Audio Micro, you can easily download free audio clips for videos.
For downloading sound for commercial uses like TV or mass reproduction, you must be a paid subscriber. The features of Audio Micro are-
- Get access to the collection of royalty-free music and 2000 free good quality sound effects
- High-quality audio content for commercial use, available at competitive prices without any hidden cost
- Research, locate, purchase, and download stock audio
- Easy and fast search option with free sound collection visible from the navigation bar on the homepage
5. Audio Blocks
It is an intuitive platform to download loops, sound effects, and music. It has a low-cost subscription model and the content is constantly updated based on the search results. The features of Audio Blocks are-
- Unlimited royalty-free audio
- Loop, sound effects, and music download
- Low-cost subscription offers more content at a nominal price
- There are flexible plans for every budget
- Use content multiple times for commercial and personal projects
6. Free Stock Music
Whether YouTube project or your personal Vlog, Free Stock Music offers royalty-free music for a range of media platforms.
For any non-copyrighted sound clips free download, always feel free to reach Free Stock Music. The features are-
- Free access to non-copyrighted music
- Just put the attribution in credits to use the sound clips
- Unlimited royalty-free music in all moods, lengths, tempos, and categories
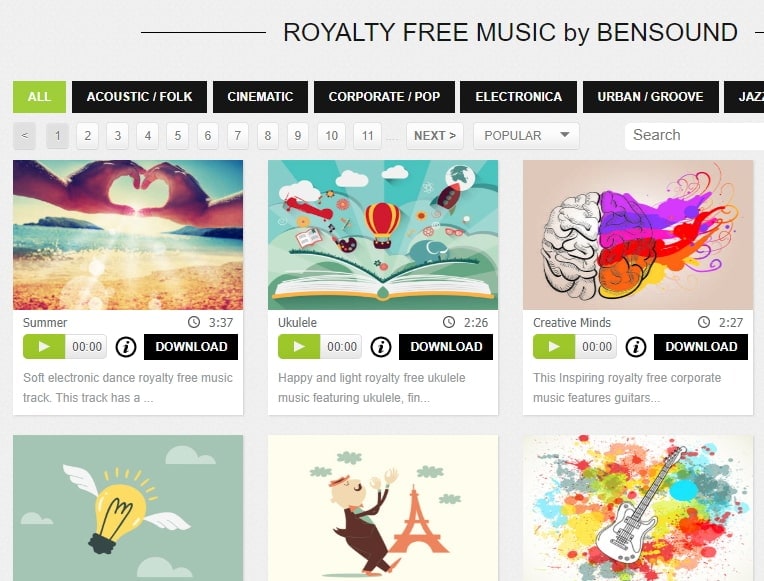
7. Bensound
Available under the Creative Common License, Bensound is used for multimedia projects like web applications or videos.
You can use the free tracks available with Bensound stock music in the various website background score, animations, web adverts, slideshows, etc. The features of Bensound include-
- Royalty-free stock music in various genres like electronica, urban, cinematic, jazz, rock, etc.
- Download free sound clips from the huge collection and add attributions in credits
- If you don’t wish to give credits and use the high-quality premium tracks, get the Bensound Pro License
8. Sounds Crate
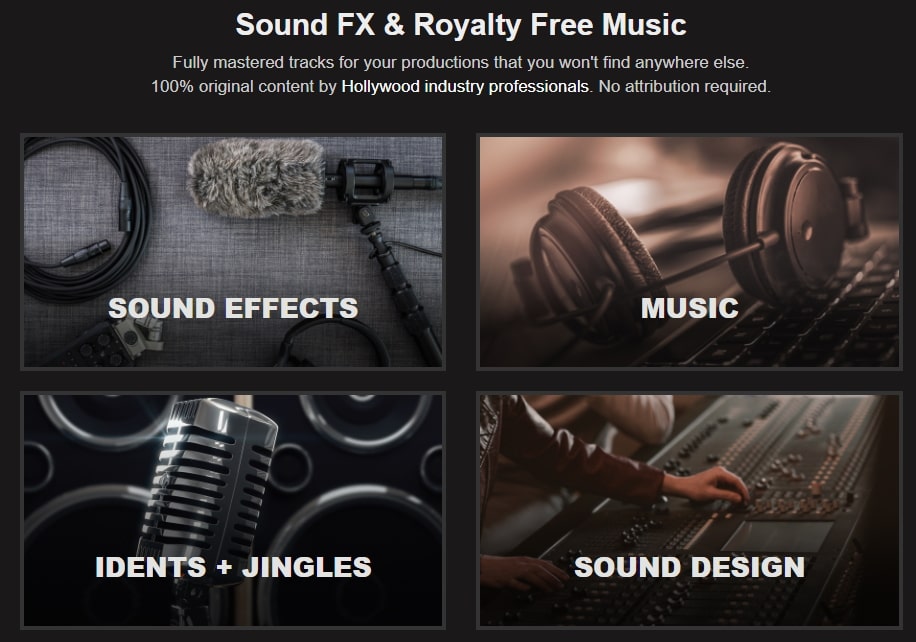
Are you looking for the best soundtrack for your video? Sounds Crate offers some of the best royalty-free music and sound FX.
With the tracks completely mastered for your production, Sound Crate offers 100% quality content created by industry professionals from Hollywood. The Sound Crate features include-
- Sound FX for electricity, gun, explosion, weapons, sci-fi, vehicles, movements, etc.
- Royalty-free music in diverse genres
- You can also use idents for corporate, news jingles, holiday idents, etc.
- Download and use the royalty-free sound clips easily
- Over 10000 plus HD assets
- No attribution required
- Browse from unlimited music, sound effects, etc.
9. ZapSlat
Do your audio and video editing projects need some cool soundtracks to jazz it up? Look no further. ZapSlat is one of the best free sound download sites to make your project successful. The features of ZapSlat are-
- Comprises over 54,000 professional free sound effects and royalty-free music files
- Variety of free sound effect packs
- Download royalty-free music from a variety of genres
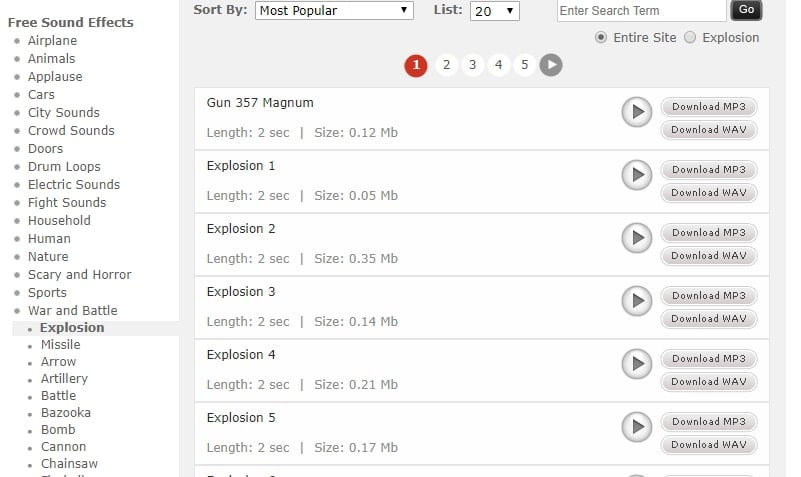
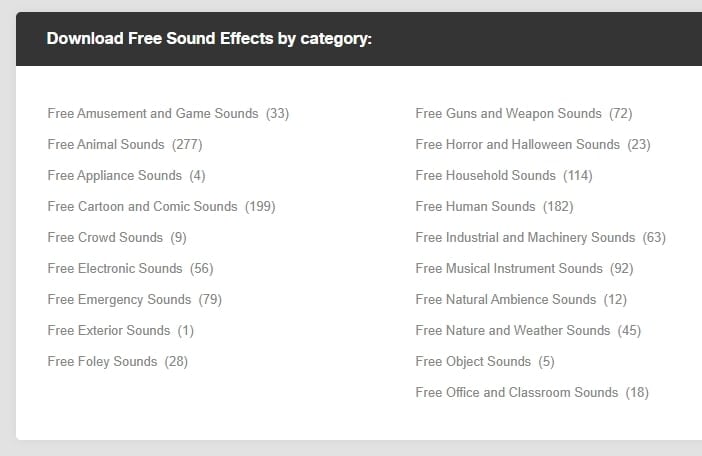
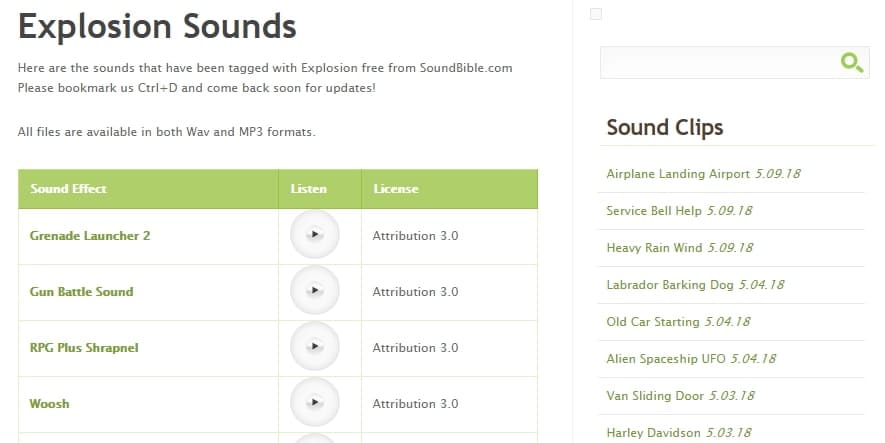
10. Sound Bible
Choose the best from 2000 free sound clips licensed under Creative Commons. To use the sound effect for commercial video, you can select from the royalty-free sounds. The features of SoundBible are-
- Download free sound clips without logging in or creating an account
- 2000 free sounds
- Copyright-free sound resources are weekly updated
Conclusion
Now that you know the best 10 free sound clip download sites, make use of it in your videos. Without worrying about the expense, you can use these sites to download free sound clips.
Liza Brown
Liza Brown is a writer and a lover of all things video.
Follow @Liza Brown
Liza Brown
Mar 27, 2024• Proven solutions
Are you working on animation , video, game, music, or maybe some other media file? Sound is a vital factor for all. It is the effect of the sound that can make or break a project.
But it can be difficult to find perfect and quality free sound clips. There are thousands of software for creating excellent videos, adding sounds , titles, overlays, tracks, and more. But what if you don’t wish to create a piece for just jazzing up your already existing video?
Free sound clips are great resources to download for videos if you don’t want to create sound effects.
Many people want to know the source of high-quality free audio for videos. These free sound samples are easy to find on the Internet.
In this article, you will get to know the 10 best websites to download free sound clips.
10 Best Free Sound Samples to Use
1. Freesound
Licensed under the Creative Commons License , the Freesound comprises of a large sound database. You can choose from the huge collection of sounds and decide which one is free and which sound needs attribution.
You can ensure if the sound can be used in commercial products or not. If you are not a professional and just need free sound samples for personal use, you may use free sound download from any site. The features of Freesound include-
- You can search for sounds or browse by tags or geotags
- The pack feature helps you to find a bunch of similar sounds very easily
- Preview the sound without logging in
- For downloading the sound, you need to log in
- Add your audio samples to contribute to the database
- You get 5 free sound clips download
2. Filmstock
Filmstock from the house of Wondershare is one of the greatest libraries for free sound clips.
Any budget filmmaker would love to have this invaluable resource not just for free audio clips for videos but also for royalty-free sound clips.
You can bring your cinematic video to life from the Filmstock free-stuff one-stop-shop. The features of Filmstock include-
- Royalty-free video effects, audio, and stock media
- There are genres like science fiction, sci-fi, ufo, technology games
- Huge selection of curated quality stock images
- Filmstock library is continuously updated
- No attribution required for any project on Filmstock
3. Landr
With a simple interface, Landr offers the best loops, packs, and samples to you. Make use of powerful Artificial Intelligence (AI) and you can spend lesser time searching and browsing. The features of Landr includes-
- You can browse free sound clips from the various collection of instruments
- Quickly find the right sound from the millions of free sound samples
- Get access to Selector tool powered by AI to make your browsing session faster
- Nourish your ideas with the curated collection and smart browsing
- The filter sounds by instrument, mood, BPM or key
- Go pro with your sampling
- Royalty-free sounds from today’s best artists, producers, and labels
4. Audio Micro
Audio Micro is one of the best tools for downloading horror-based free sound clips. Once you register with Audio Micro, you can easily download free audio clips for videos.
For downloading sound for commercial uses like TV or mass reproduction, you must be a paid subscriber. The features of Audio Micro are-
- Get access to the collection of royalty-free music and 2000 free good quality sound effects
- High-quality audio content for commercial use, available at competitive prices without any hidden cost
- Research, locate, purchase, and download stock audio
- Easy and fast search option with free sound collection visible from the navigation bar on the homepage
5. Audio Blocks
It is an intuitive platform to download loops, sound effects, and music. It has a low-cost subscription model and the content is constantly updated based on the search results. The features of Audio Blocks are-
- Unlimited royalty-free audio
- Loop, sound effects, and music download
- Low-cost subscription offers more content at a nominal price
- There are flexible plans for every budget
- Use content multiple times for commercial and personal projects
6. Free Stock Music
Whether YouTube project or your personal Vlog, Free Stock Music offers royalty-free music for a range of media platforms.
For any non-copyrighted sound clips free download, always feel free to reach Free Stock Music. The features are-
- Free access to non-copyrighted music
- Just put the attribution in credits to use the sound clips
- Unlimited royalty-free music in all moods, lengths, tempos, and categories
7. Bensound
Available under the Creative Common License, Bensound is used for multimedia projects like web applications or videos.
You can use the free tracks available with Bensound stock music in the various website background score, animations, web adverts, slideshows, etc. The features of Bensound include-
- Royalty-free stock music in various genres like electronica, urban, cinematic, jazz, rock, etc.
- Download free sound clips from the huge collection and add attributions in credits
- If you don’t wish to give credits and use the high-quality premium tracks, get the Bensound Pro License
8. Sounds Crate
Are you looking for the best soundtrack for your video? Sounds Crate offers some of the best royalty-free music and sound FX.
With the tracks completely mastered for your production, Sound Crate offers 100% quality content created by industry professionals from Hollywood. The Sound Crate features include-
- Sound FX for electricity, gun, explosion, weapons, sci-fi, vehicles, movements, etc.
- Royalty-free music in diverse genres
- You can also use idents for corporate, news jingles, holiday idents, etc.
- Download and use the royalty-free sound clips easily
- Over 10000 plus HD assets
- No attribution required
- Browse from unlimited music, sound effects, etc.
9. ZapSlat
Do your audio and video editing projects need some cool soundtracks to jazz it up? Look no further. ZapSlat is one of the best free sound download sites to make your project successful. The features of ZapSlat are-
- Comprises over 54,000 professional free sound effects and royalty-free music files
- Variety of free sound effect packs
- Download royalty-free music from a variety of genres
10. Sound Bible
Choose the best from 2000 free sound clips licensed under Creative Commons. To use the sound effect for commercial video, you can select from the royalty-free sounds. The features of SoundBible are-
- Download free sound clips without logging in or creating an account
- 2000 free sounds
- Copyright-free sound resources are weekly updated
Conclusion
Now that you know the best 10 free sound clip download sites, make use of it in your videos. Without worrying about the expense, you can use these sites to download free sound clips.
Liza Brown
Liza Brown is a writer and a lover of all things video.
Follow @Liza Brown
Breaking Down Silence: Extracting Video Content’s Hidden Aural Elements
Audio Extractor: How to Extract Audio from Video

Shanoon Cox
Mar 27, 2024• Proven solutions
You have a video that includes a great soundtrack that you’d like to extract it so that you can listen to it using the media player - a portable MP3 player, for instance. That can be a very easy job if you use the professional video editing software- Wondershare Filmora . Just follow this guide to extract audio from video with ease.
If you didn’t have Filmora yet, click the download button below to get started.
Download Mac Version ](https://tools.techidaily.com/wondershare/filmora/download/ )
1. Import video files
Install and run this Wondershare Filmora. Then click the “Import” button to locate and add your target video. You can also directly drag and drop the video to the program. The loaded video will be listed in the media library as the following picture shows.

2. Start extracting audio from video

After importing video to Wondershare Filmora, drag the video from the media library to the video Timeline. You can then right-click the video clip and choose “Audio Detach” to extract audio from the video. After a while, video and audio will be displayed on different tracks. If you don’t want to keep the video file, right-click it and choose “Delete” to remove it from the video timeline.
3. Edit the extracted audio if you like
Double click the extracted file in the audio track and then you will see the audio editing panel.
You can add fade-in and fade-out effects, change the sound volume , adjust the pitch to change the voice , etc. as you like.

If you find some unnecessary sounds in the extracted audio file, and you want to delete them, just put the cursor to the place where you would like the deletion to start and press the “Split” button to split. The end of the deletion area can be marked similarly – play the audio and select the final point of the area to be excluded from the output audio, and then press the “Split” button again.

Click the split part in the audio track, press the Delete button on the keyboard, or click the Delete icon on the toolbar to remove the unwanted audio clip.
4. Save the edited audio file
After that, click the “Export” button to export the extracted audio track. Here different options are provided. For example, you can save the audio in regular formats such as MP3, MP4, WMV, AVI, and so on in the “Device” tab.

To customize the audio Encoder, Sample Rate, Bit Rate or Channel settings, click the SETTINGS button to start.
Besides that, you can export the audio file for playback on portable devices, burn it to DVD or share it to YouTube directly.
Select a desirable output method and then click the “Export” button to save the audio track.
Tips: Filmora supports a wide range of audio and video formats. You can easily extract mp3 from mp4 video, or extract the audio from video and then save it in .wav format.
Shanoon Cox
Shanoon Cox is a writer and a lover of all things video.
Follow @Shanoon Cox
Shanoon Cox
Mar 27, 2024• Proven solutions
You have a video that includes a great soundtrack that you’d like to extract it so that you can listen to it using the media player - a portable MP3 player, for instance. That can be a very easy job if you use the professional video editing software- Wondershare Filmora . Just follow this guide to extract audio from video with ease.
If you didn’t have Filmora yet, click the download button below to get started.
Download Mac Version ](https://tools.techidaily.com/wondershare/filmora/download/ )
1. Import video files
Install and run this Wondershare Filmora. Then click the “Import” button to locate and add your target video. You can also directly drag and drop the video to the program. The loaded video will be listed in the media library as the following picture shows.
2. Start extracting audio from video
After importing video to Wondershare Filmora, drag the video from the media library to the video Timeline. You can then right-click the video clip and choose “Audio Detach” to extract audio from the video. After a while, video and audio will be displayed on different tracks. If you don’t want to keep the video file, right-click it and choose “Delete” to remove it from the video timeline.
3. Edit the extracted audio if you like
Double click the extracted file in the audio track and then you will see the audio editing panel.
You can add fade-in and fade-out effects, change the sound volume , adjust the pitch to change the voice , etc. as you like.
If you find some unnecessary sounds in the extracted audio file, and you want to delete them, just put the cursor to the place where you would like the deletion to start and press the “Split” button to split. The end of the deletion area can be marked similarly – play the audio and select the final point of the area to be excluded from the output audio, and then press the “Split” button again.
Click the split part in the audio track, press the Delete button on the keyboard, or click the Delete icon on the toolbar to remove the unwanted audio clip.
4. Save the edited audio file
After that, click the “Export” button to export the extracted audio track. Here different options are provided. For example, you can save the audio in regular formats such as MP3, MP4, WMV, AVI, and so on in the “Device” tab.
To customize the audio Encoder, Sample Rate, Bit Rate or Channel settings, click the SETTINGS button to start.
Besides that, you can export the audio file for playback on portable devices, burn it to DVD or share it to YouTube directly.
Select a desirable output method and then click the “Export” button to save the audio track.
Tips: Filmora supports a wide range of audio and video formats. You can easily extract mp3 from mp4 video, or extract the audio from video and then save it in .wav format.
Shanoon Cox
Shanoon Cox is a writer and a lover of all things video.
Follow @Shanoon Cox
“Navigating the World of Audio Production: A Beginner’s Guide to REAPER”
DAW stands for Digital Audio Workstation. It is where you can record, edit, mix or even master your music. You always need good DAW software to help you with the job to produce music or live recording musicians.
A good DAW software must have a multi-track audio recording , virtual instruments, MIDI sequencer, excellent mixing capabilities, and plug-in processor hosting. The software is found for all major operating systems such as Linux , Windows, and Mac. If you want to learn more about DAW, then stay with us. The article will discuss in detail REAPER Recording Software.
In this article
01 What Is REAPER Recording Software?
02 How to Download and Install REAPER Software?
03 Tutorial for Using REAPER Recording Software
Part 1. What Is REAPER Recording Software?
Recording software like REAPER records computer audio is used to produce music, edit it, transform, and customize your music. With REAPER Recording Software , you can record multi-layer audio and MIDI in various formats. REAPER has the easiest interface that allows you to drag and drop to import, split, move and do many other tasks.

This is just one feature of REAPER that sounds very interesting. In this section, we will talk about more of its features.
1. Record and Edit
You can easily record the audio and (MIDI) Musical Instrumental Digital Interface with REAPER recording software. It lets you edit and customize everything. You can record and edit things limitlessly. When it comes to recording, it’s not at all difficult for REAPER software to record various instruments or vocals.
2. Mixing
Initially, the mixer might seem inflexible, but in reality, REAPER has a lot to offer you. It has great automated capabilities for instrument and effect parameters. It doesn’t matter if you are working because you can still bounce or freeze tracks while working.
The mixer is very flexible. With REAPERs mixer, you just have to drag and drop your recordings so that you can create tracks, and also, you can customize the arrangements by moving the portions.
3. Interface
While looking at the interface, you might question yourself about how to use its interface. Some people love to learn about new things, such as the REAPER Recording Software. Whereas, some people seem least interested because the half-empty interface is not intuitive to them.
Whereas, the best thing about its interface is that you can customize it. REAPER allows you to add different wallpapers and layouts to your software interface.
4. Strong Stability
REAPER Recording Software has very strong stability. This is one of its strongest features as compared to other competitors. The RAM is rarely affected by the load time and the used resources. Moreover, the software offers a wide range of languages. You can select your desired language to run the software.
Part 2. How to Download and Install REAPER Software?
REAPER is a Digital Audio Workstation. The perfect platform where you can manipulate and transform your audio. With REAPER Record Computer audio, you can work efficiently in a resource-friendly studio with saving your time. Stay tuned if you plan to learn more about its pricing and requirements.

Pricing of REAPER Software
A reaper is a brilliant software. It has a 60-day trial period. REAPER costs $60 in total to register. It has complete MIDI sequencing. You can also get a discounted license if REAPER is the best private option for you or has commercial usage. You can set the equal license key on every computer for someone with multiple computers.
System Requirements
The recording software has uncountable features. REAPER software facilitates its users at every level by giving the best audio manipulating platform. The best thing about REAPER Recording Software is its compatibility with different operating systems. Let us add more to your knowledge on this.
Windows
REAPER software is available for Windows 7, 8, 10, XP, and Vista. The version of REAPER for Windows is 6.42. This is for Windows 64-bit whereas, a download package is also available for Windows 32-bit.
macOS
For macOS 64-bit, REAPER has a 6.42 version. This version is compatible with macOS 10.5 – 10.14. Whereas, for macOS 10.15+, the available version of REAPER is 6.42 with a 15MB file size.
Linux
REAPER Recording Software is also compatible with Linux x86_64. The REAPER version is 6.42 with an 11 MB file size. This version can also work on AMD64 64-bit.
Downloading and Installing REAPER
Now that REAPER Record Computer Audio has impressed you a lot. You must be thinking about how to download it. If this is on your mind, then we got you. Allow us to share its steps that will guide you to download the software easily.
Step 1: To install REAPER software, first of all, visit its official website. Then locate and head over to its download section.
Step 2: Click on ‘Download REAPER from the download section.’ For Windows users, they can download the Windows installation package. At the same time, Linux and macOS users can select their installation packages.
Step 3: Lastly, after you have downloaded your systems compatible installation package, you simply have to run it and then install it according to your respective operating system.
Part 3. Tutorial for Using REAPER Recording Software
After its attractive features and detailed downloading procedure, it is finally the time to talk about its works. This section of the article will explain to you more about REAPER Recording Software as we are now going to present a tutorial on how to use the software.
Understand the Layout
Understanding and knowing the layout of your software before you start working on it is essential. The crucial components of REAPER software include the Timeline, Arrangement Window, Track Panel, Toolbar, and lastly, Transport.

The Arrangement window holds all the added items. The items are played from left to right order, similar to their timeline arrangement. You can also zoom in and out. Then comes the transport toolbar, which holds the functions to stop, rewind, play, fast forward, adjust the timeline speed, etc. The toolbar holds all the toggle buttons. You can also customize your toolbar.
New Track Creation
For creating a new track on REAPER, go to the Track menu and hit Insert New Track. A track is like another layer to your audio. Multiple layers and tracks make your work complex yet interesting as you can play all the different tracks at the same time. By double-clicking in the Track Control Panel, you can set a name for the added track.

Audio Hardware Settings for Audio Recording
It is best suggested always to check your audio hardware settings before you start to record, edit or mix with REAPER Recording Software. Your primary focus should be on the recording device’s devices should be set as Input Device, whereas the listening device should be set as the Output Device.
For this, you have to select Preferences from the Options menu. A window will appear in front of you, the REAPER Preference window. You have to select the correct Input and Output devices from the dropdown menu from this window.

Arm your Track
Arming your track is very important. For this, head over to the Track Control Panel, and next to your track name, hit the red circle. If you have various tracks, you should solo this track and mute the other tracks.
As soon as the track is armed, a Gain Meter will activate on the side. From this, you can check if you have properly set the microphone or not. This could be tested by tapping on the microphone.

Record
After all, the hardware settings are done, and your track is armed, it’s time to start the recording. For that, just tap on the Record button in the Transport toolbar. A yellow line in the timeline will indicate the end of the recording.

To end the recording, tap on the Stop button from the Transport Toolbar. Lastly, REAPER Recording Software will ask you to save the file. In case you don’t want it, you can also delete it.
Create and Manipulate Clips
Things like manipulation get a lot easier if you split the clips in REAPER. From the items menu, you have to select the option of Split Item on Cursor. This divides your clip into two clips on each side of the cursor. You can also remove the clips by going to the Items Menu. From there, you just have to hit the Remove Item option, or else, simply press the Delete key on your keyboard.

Removing clips will create a gap in the arrangement window that can be filled by dragging forward the remaining clip.
Volume Adjustments – Normalize
By double-clicking on the item or by selecting ‘Item Properties’ from a right-click, you can normalize the item. A new window will appear as Media Item Properties, from where you have to locate the Volume Settings and then select the option of Normalize.
If your item is already loud, then nothing will happen, but if it is not, then the slider will change from 0.00 dB showing an increase in the volume. Lastly, hit the ‘Apply’ or ‘OK’ button to imply the changes.
Fade in/out
With the Media Properties, you can also adjust a Fade in and a Fade out. For this, you simply have to set an end time for the Fade in, whereas a start time is entered for Fade out. Hit the ‘Ok’ or ‘Apply’ button to apply the changes.
From the Arrangement window, fades can be adjusted. For adjusting the fades, hover with your mouse over the red line. You will see a newly shaped cursor. Just drag on the timeline to play and adjust the Fade with this new cursor.

Automate Changes
With REAPER, you can also automate changes in track parameters. We will guide about automation from Track Envelopes. From Track Control Panel, hit the Trim option. A new Envelopes window will open at this point from where you have to check the Volume box.
A new Volume Track will open up. Here, you have to set new Envelope points. That could be done by holding the shift key, right-clicking on the point, and then selecting Create New Point. A green circle will indicate the new point.
By dragging the Envelope point, you can also adjust the volume. Dragging it towards the top will increase the volume, whereas dragging it towards the bottom will eventually decrease.

Finalize the Audio – Render
After all the above steps have been completed to set the order and adjust your desired volume, the last step comes to render your project file. For that, move to the File menu and select the ‘Render’ option. A window will be opened as ‘Render to File.’ Now, from the dropdown menu, select your desired Output Format.
Lastly, hit the Render 1 File button, and then REAPER will export your project. You can immediately listen to it by selecting the ‘Launch File’ option.

Concluding Thoughts
This article is everything you need to learn about REAPER Recording Software. The article that started from an introduction on DAW took you on a roller coaster ride. Everything about REAPER software has been shared.
We hope that this article helps you in all possible ways. The attractive features impress you, and its pricing and system specifications increase your knowledge. Along with that, the shared tutorial will guide you thoroughly on how to use it.
02 How to Download and Install REAPER Software?
03 Tutorial for Using REAPER Recording Software
Part 1. What Is REAPER Recording Software?
Recording software like REAPER records computer audio is used to produce music, edit it, transform, and customize your music. With REAPER Recording Software , you can record multi-layer audio and MIDI in various formats. REAPER has the easiest interface that allows you to drag and drop to import, split, move and do many other tasks.
This is just one feature of REAPER that sounds very interesting. In this section, we will talk about more of its features.
1. Record and Edit
You can easily record the audio and (MIDI) Musical Instrumental Digital Interface with REAPER recording software. It lets you edit and customize everything. You can record and edit things limitlessly. When it comes to recording, it’s not at all difficult for REAPER software to record various instruments or vocals.
2. Mixing
Initially, the mixer might seem inflexible, but in reality, REAPER has a lot to offer you. It has great automated capabilities for instrument and effect parameters. It doesn’t matter if you are working because you can still bounce or freeze tracks while working.
The mixer is very flexible. With REAPERs mixer, you just have to drag and drop your recordings so that you can create tracks, and also, you can customize the arrangements by moving the portions.
3. Interface
While looking at the interface, you might question yourself about how to use its interface. Some people love to learn about new things, such as the REAPER Recording Software. Whereas, some people seem least interested because the half-empty interface is not intuitive to them.
Whereas, the best thing about its interface is that you can customize it. REAPER allows you to add different wallpapers and layouts to your software interface.
4. Strong Stability
REAPER Recording Software has very strong stability. This is one of its strongest features as compared to other competitors. The RAM is rarely affected by the load time and the used resources. Moreover, the software offers a wide range of languages. You can select your desired language to run the software.
Part 2. How to Download and Install REAPER Software?
REAPER is a Digital Audio Workstation. The perfect platform where you can manipulate and transform your audio. With REAPER Record Computer audio, you can work efficiently in a resource-friendly studio with saving your time. Stay tuned if you plan to learn more about its pricing and requirements.
Pricing of REAPER Software
A reaper is a brilliant software. It has a 60-day trial period. REAPER costs $60 in total to register. It has complete MIDI sequencing. You can also get a discounted license if REAPER is the best private option for you or has commercial usage. You can set the equal license key on every computer for someone with multiple computers.
System Requirements
The recording software has uncountable features. REAPER software facilitates its users at every level by giving the best audio manipulating platform. The best thing about REAPER Recording Software is its compatibility with different operating systems. Let us add more to your knowledge on this.
Windows
REAPER software is available for Windows 7, 8, 10, XP, and Vista. The version of REAPER for Windows is 6.42. This is for Windows 64-bit whereas, a download package is also available for Windows 32-bit.
macOS
For macOS 64-bit, REAPER has a 6.42 version. This version is compatible with macOS 10.5 – 10.14. Whereas, for macOS 10.15+, the available version of REAPER is 6.42 with a 15MB file size.
Linux
REAPER Recording Software is also compatible with Linux x86_64. The REAPER version is 6.42 with an 11 MB file size. This version can also work on AMD64 64-bit.
Downloading and Installing REAPER
Now that REAPER Record Computer Audio has impressed you a lot. You must be thinking about how to download it. If this is on your mind, then we got you. Allow us to share its steps that will guide you to download the software easily.
Step 1: To install REAPER software, first of all, visit its official website. Then locate and head over to its download section.
Step 2: Click on ‘Download REAPER from the download section.’ For Windows users, they can download the Windows installation package. At the same time, Linux and macOS users can select their installation packages.
Step 3: Lastly, after you have downloaded your systems compatible installation package, you simply have to run it and then install it according to your respective operating system.
Part 3. Tutorial for Using REAPER Recording Software
After its attractive features and detailed downloading procedure, it is finally the time to talk about its works. This section of the article will explain to you more about REAPER Recording Software as we are now going to present a tutorial on how to use the software.
Understand the Layout
Understanding and knowing the layout of your software before you start working on it is essential. The crucial components of REAPER software include the Timeline, Arrangement Window, Track Panel, Toolbar, and lastly, Transport.
The Arrangement window holds all the added items. The items are played from left to right order, similar to their timeline arrangement. You can also zoom in and out. Then comes the transport toolbar, which holds the functions to stop, rewind, play, fast forward, adjust the timeline speed, etc. The toolbar holds all the toggle buttons. You can also customize your toolbar.
New Track Creation
For creating a new track on REAPER, go to the Track menu and hit Insert New Track. A track is like another layer to your audio. Multiple layers and tracks make your work complex yet interesting as you can play all the different tracks at the same time. By double-clicking in the Track Control Panel, you can set a name for the added track.
Audio Hardware Settings for Audio Recording
It is best suggested always to check your audio hardware settings before you start to record, edit or mix with REAPER Recording Software. Your primary focus should be on the recording device’s devices should be set as Input Device, whereas the listening device should be set as the Output Device.
For this, you have to select Preferences from the Options menu. A window will appear in front of you, the REAPER Preference window. You have to select the correct Input and Output devices from the dropdown menu from this window.
Arm your Track
Arming your track is very important. For this, head over to the Track Control Panel, and next to your track name, hit the red circle. If you have various tracks, you should solo this track and mute the other tracks.
As soon as the track is armed, a Gain Meter will activate on the side. From this, you can check if you have properly set the microphone or not. This could be tested by tapping on the microphone.
Record
After all, the hardware settings are done, and your track is armed, it’s time to start the recording. For that, just tap on the Record button in the Transport toolbar. A yellow line in the timeline will indicate the end of the recording.
To end the recording, tap on the Stop button from the Transport Toolbar. Lastly, REAPER Recording Software will ask you to save the file. In case you don’t want it, you can also delete it.
Create and Manipulate Clips
Things like manipulation get a lot easier if you split the clips in REAPER. From the items menu, you have to select the option of Split Item on Cursor. This divides your clip into two clips on each side of the cursor. You can also remove the clips by going to the Items Menu. From there, you just have to hit the Remove Item option, or else, simply press the Delete key on your keyboard.
Removing clips will create a gap in the arrangement window that can be filled by dragging forward the remaining clip.
Volume Adjustments – Normalize
By double-clicking on the item or by selecting ‘Item Properties’ from a right-click, you can normalize the item. A new window will appear as Media Item Properties, from where you have to locate the Volume Settings and then select the option of Normalize.
If your item is already loud, then nothing will happen, but if it is not, then the slider will change from 0.00 dB showing an increase in the volume. Lastly, hit the ‘Apply’ or ‘OK’ button to imply the changes.
Fade in/out
With the Media Properties, you can also adjust a Fade in and a Fade out. For this, you simply have to set an end time for the Fade in, whereas a start time is entered for Fade out. Hit the ‘Ok’ or ‘Apply’ button to apply the changes.
From the Arrangement window, fades can be adjusted. For adjusting the fades, hover with your mouse over the red line. You will see a newly shaped cursor. Just drag on the timeline to play and adjust the Fade with this new cursor.
Automate Changes
With REAPER, you can also automate changes in track parameters. We will guide about automation from Track Envelopes. From Track Control Panel, hit the Trim option. A new Envelopes window will open at this point from where you have to check the Volume box.
A new Volume Track will open up. Here, you have to set new Envelope points. That could be done by holding the shift key, right-clicking on the point, and then selecting Create New Point. A green circle will indicate the new point.
By dragging the Envelope point, you can also adjust the volume. Dragging it towards the top will increase the volume, whereas dragging it towards the bottom will eventually decrease.
Finalize the Audio – Render
After all the above steps have been completed to set the order and adjust your desired volume, the last step comes to render your project file. For that, move to the File menu and select the ‘Render’ option. A window will be opened as ‘Render to File.’ Now, from the dropdown menu, select your desired Output Format.
Lastly, hit the Render 1 File button, and then REAPER will export your project. You can immediately listen to it by selecting the ‘Launch File’ option.
Concluding Thoughts
This article is everything you need to learn about REAPER Recording Software. The article that started from an introduction on DAW took you on a roller coaster ride. Everything about REAPER software has been shared.
We hope that this article helps you in all possible ways. The attractive features impress you, and its pricing and system specifications increase your knowledge. Along with that, the shared tutorial will guide you thoroughly on how to use it.
Also read:
- New In 2024, Transform Your Tone Top Applications Changing Masculine Vocal Traits to Feminine Sounds
- 2024 Approved 2023 Compilation of Top Free Music Software Produce, Edit & Record with Zero Cost Windows and macOS
- Updated Perfect Pitch with Autotune Installation Tutorial for Audacity Enthusiasts
- Three Methods for Transforming Your Podcast Into MP3 Format
- The Essential Guide to Online Audio Recording Platforms, with a Spotlight on Vocaroo
- Updated Auditory Sculpture in Motion Constructing Vibrant Audio-Visual Compositions with Premiere Pro for 2024
- Updated From Podcast to MP3 Unveiling the Top Three Conversion Strategies for 2024
- New Underwater Communication Secrets Optimizing Your Online Presence with Clownfish Vocal Alterations on Discord/Fortnite/Skype for 2024
- Updated In 2024, Three Easy, Cost-Free Strategies to Improve Audio Quality in Your Digital Projects
- New In 2024, Preserving Audio Integrity Techniques for Altering Pitch in Audacity
- Updated In 2024, Behind the Screens The Leading BGM Audio Selections
- Updated Enhancing Voice Resonance with Filmoras Latest Features for 2024
- New In 2024, Echoes of Creativity Where to Access Premium Audio for Episodic Storytelling
- In 2024, Top 6 Introduction-Level Digital Audio Workstation Applications
- New 2024 Approved Identify Applause Acoustic Marker
- New 2024 Approved Expert Tips on Selecting and Merging Songs with Your iMovie Content
- Explore the Top 6 Platforms for Accessing Premium Whoosh Audio Files
- In 2024, Enhancing Audio Production Integrating and Leveraging Audacitys Autotune Feature
- In 2024, Premium Pop Harmony Selections The Best Sounds for Video Scenes
- New 2024 Approved The Quintessential Compilation 3 A+ Online Services for Elevated Sound in Media
- How to Soft Reset Realme C67 5G phone? | Dr.fone
- 2024 Approved How to Denoise in After Effects – Audio and Video Noise Removal
- How To Erase Private Data From iPhone X | Dr.fone
- Updated In 2024, Unlock Seamless Audio A Step-by-Step Guide to L-Cuts and J-Cuts in FCPX
- How to Infinix Note 30 VIP Racing Edition Get Deleted Pictures Back with Ease and Safety?
- Updated Amazon Prime Video Aspect Ratio for 2024
- 3 Best Tools to Hard Reset Xiaomi Redmi Note 12R | Dr.fone
- In 2024, How to Change/Add Location Filters on Snapchat For your Samsung Galaxy S23 | Dr.fone
- Complete Guide to Hard Reset Your Lava Blaze 2 5G | Dr.fone
- How to recover deleted photos on Storm 5G
- Title: 2024 Approved Audio Assets Almanac Unveiling the Best Online Sources for Video Clip Melodies
- Author: David
- Created at : 2024-05-05 10:23:53
- Updated at : 2024-05-06 10:23:53
- Link: https://sound-tweaking.techidaily.com/2024-approved-audio-assets-almanac-unveiling-the-best-online-sources-for-video-clip-melodies/
- License: This work is licensed under CC BY-NC-SA 4.0.
